
After a chapter filled with intense firefights and epic chases, Chapter 6 takes you to the WEBB Gala at the Art Museum. Your objective is to track down the assassin who tried to kill you and find out who they are working for.
The Art Museum
Starting off, head to the reception table in the middle of the room and collect all the battery and chemical supplies to refill your resources.

You need an invitation to get into the Gala. To get one, use your Dart Phone on the guy standing right beside the reception table. When he walks away, snatch the invitation from him.
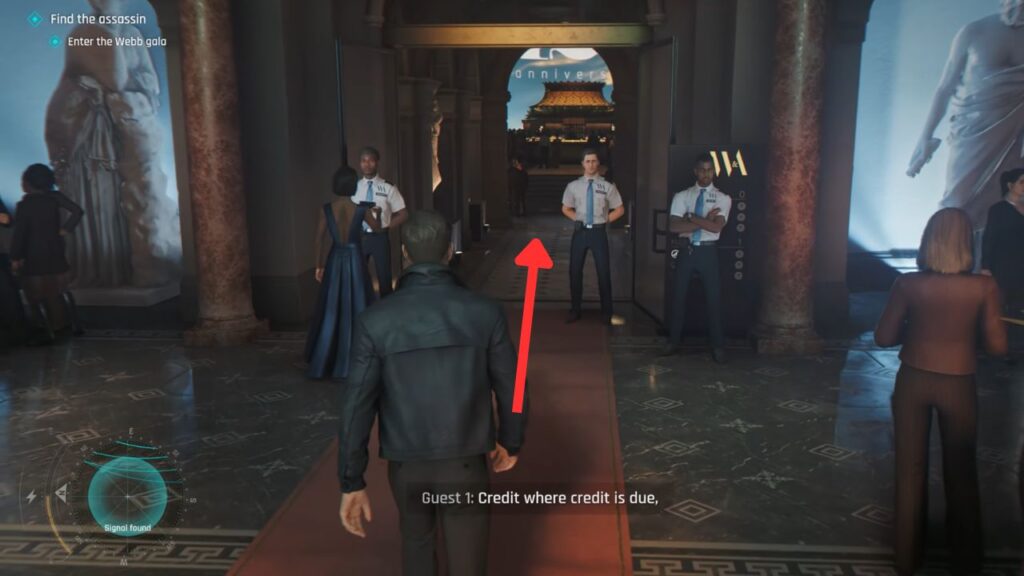
Now that you have the invitation, simply walk through the hallway with the security guards in front of it, right behind the reception table. The music starts, the cinematic camera pans, and suddenly you feel like you’re really in a Bond movie. Neat.
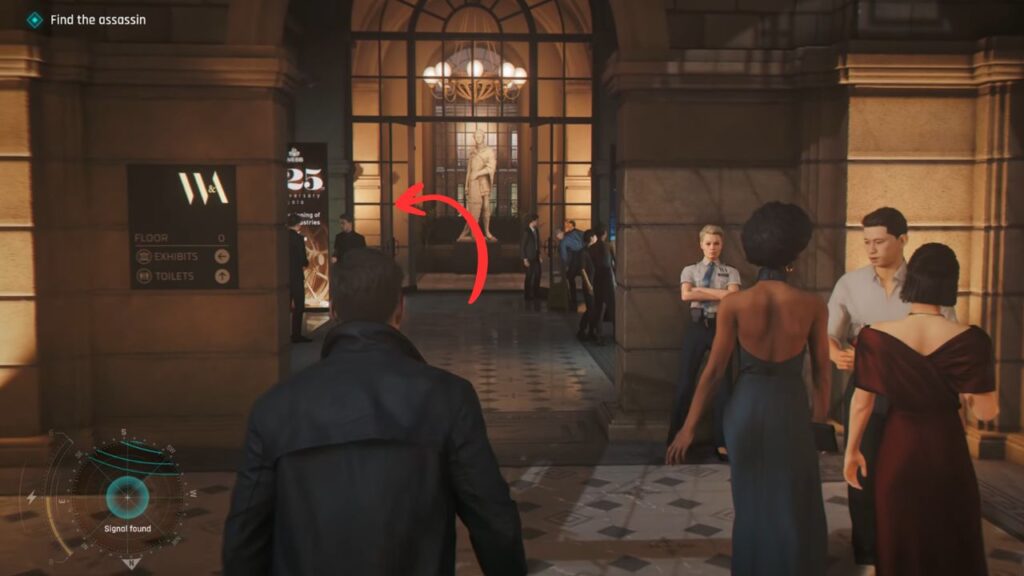
Your job is to find the assassin, so let’s do everything we can to track him down. The signal on your minimap pings the assassin’s last known location, so follow it. Head over to the right side of the room and enter the door.
Turn left at the end of the hallway and enter the washroom. You’ll discover that the pinged phone is actually inside a trash bin. Luckily, there is a CCTV camera right in front of the washroom, so you need to help Moneypenny hack into the CCTV network terminal. The security room is located on the first floor in the east wing.
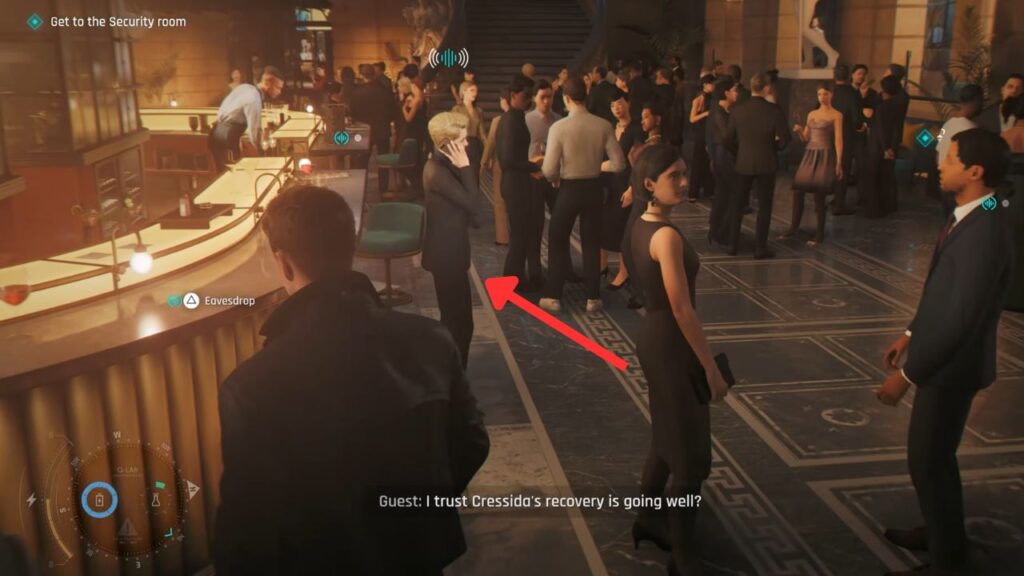
The problem is figuring out how to get there. We need a distraction or some help. Head back to the main hall area. Behind the bar across from you, you can eavesdrop on a PR lady who is talking on the phone.
After eavesdropping, talk to her. She then tells you to see Linda in the press room to get a pass so you can get past security and reach the upper floor.
Getting to the Upper Floor
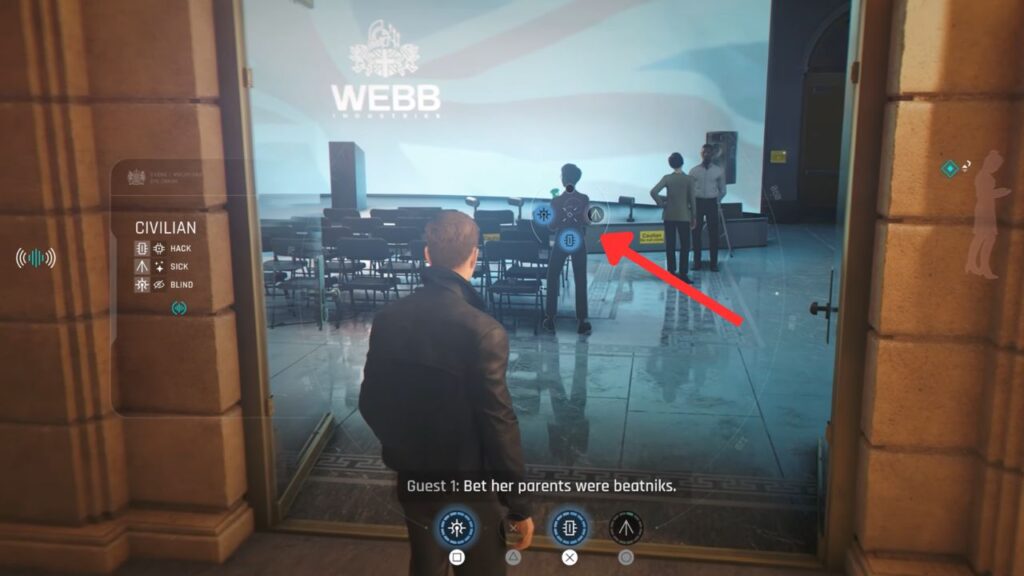
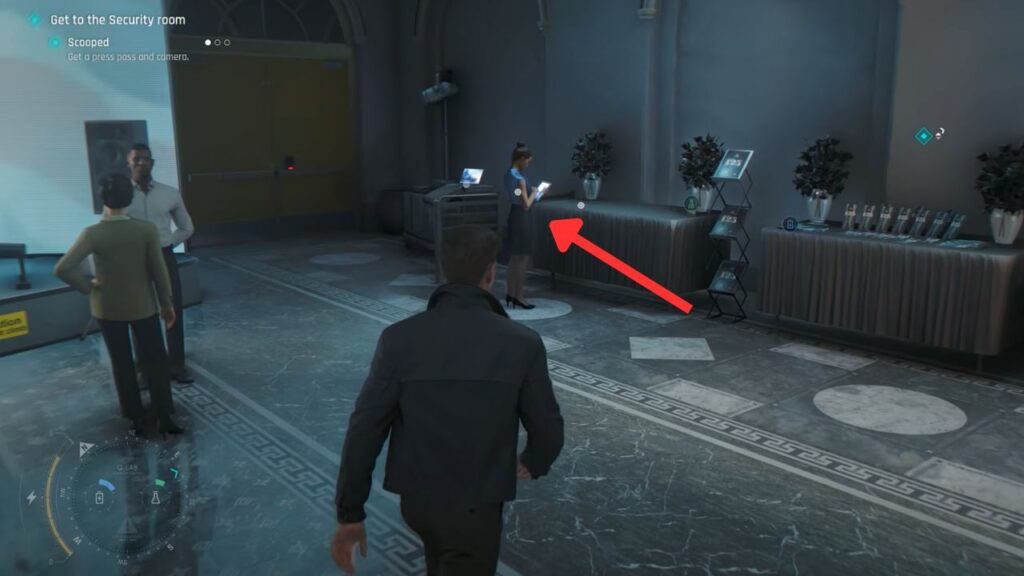
To get to the press room, head over to the circular stairs and turn right. You’ll see a room filled with chairs and a stage. That’s the room you’re looking for. Head inside and immediately laser the camera held by the lady in red to avoid trouble later.
Once inside, talk to Linda, who is wearing a blue dress and standing in front of the tables on the right. She will tell you that Mike, the person you are impersonating, has already checked in.
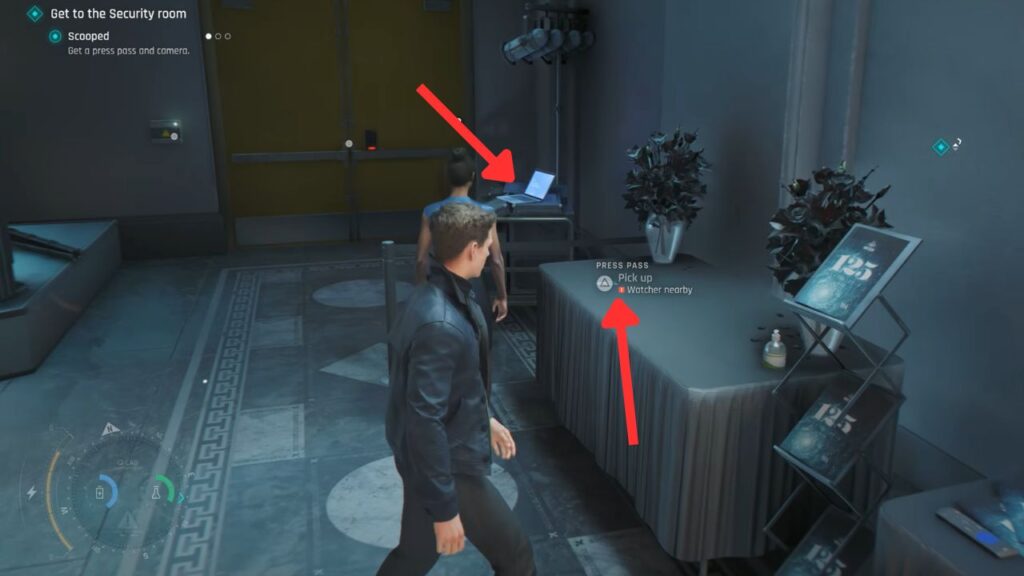
Walk over to the laptop beside her and hack it. She will then walk over to investigate, giving you an opportunity to snatch the press pass she was guarding. Now all you need is a camera.
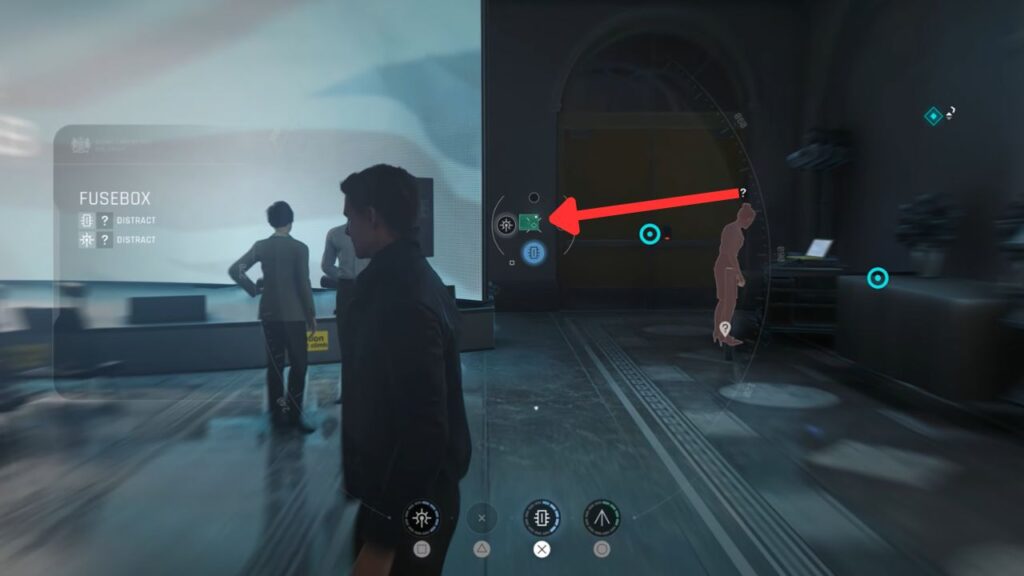
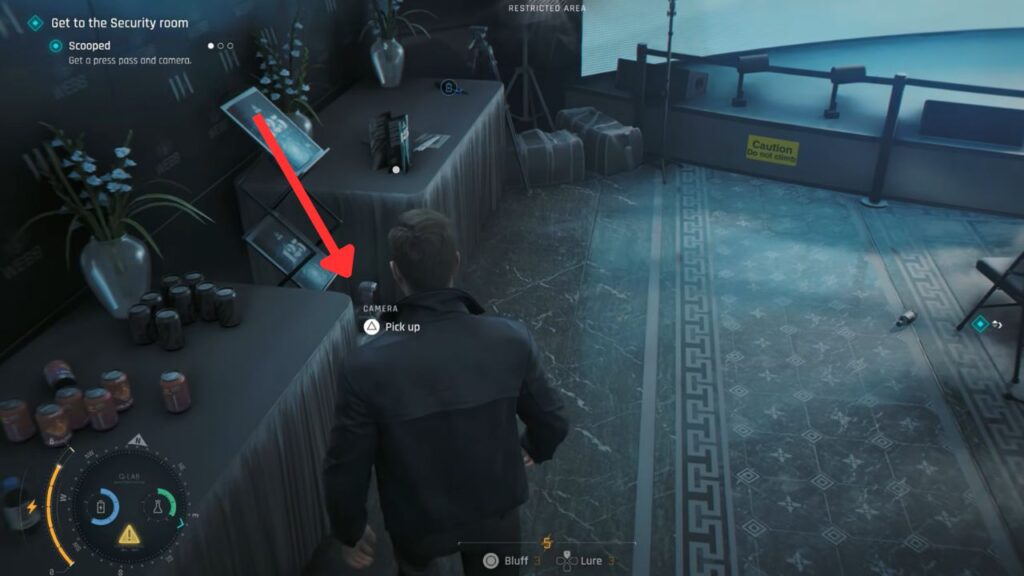
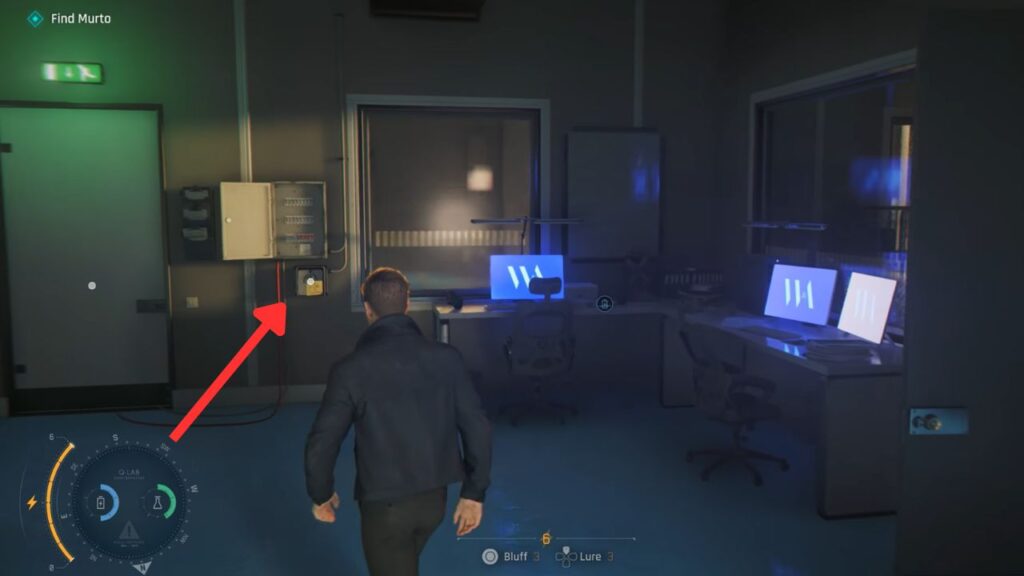
You’ll need to get past the guard in the same room. To distract him, hack the electrical panel beside the huge screen. When he walks away, sneak through and then dart the other guard. Once he is out of the way, take the camera from between the two tables. After having the pass and camera, head back outside and turn left.
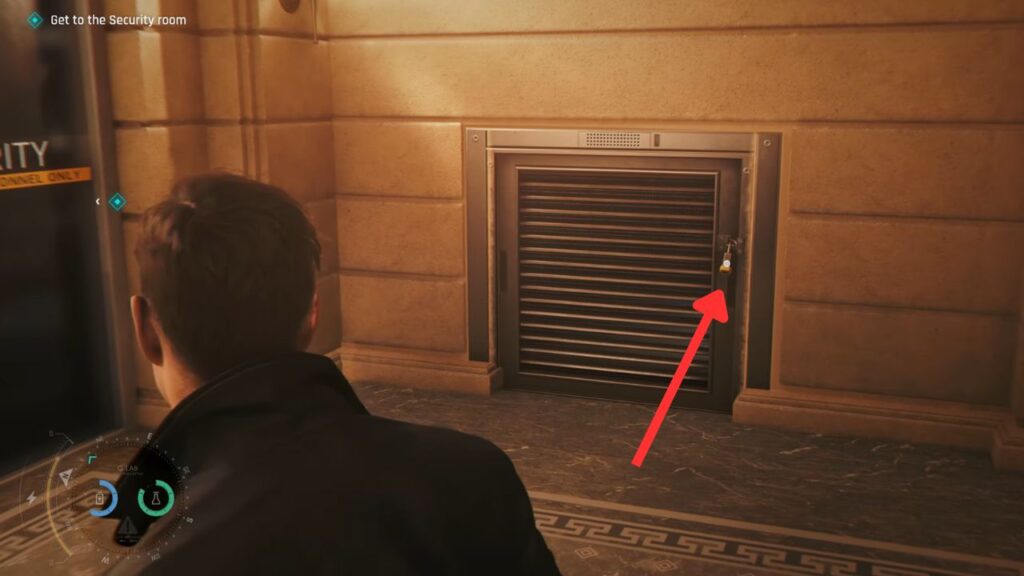
Show the press pass to the security guards stationed at the main stairs. Head upstairs and turn right toward the security wing. When you try to enter the security room, the guard there will not let you in. Instead of going through the door, destroy the padlock on the vent to the right and crawl inside.
After exiting the vent, you’ll already be inside the security room. Keep in mind that you are trespassing now, so stay alert.
Security Room
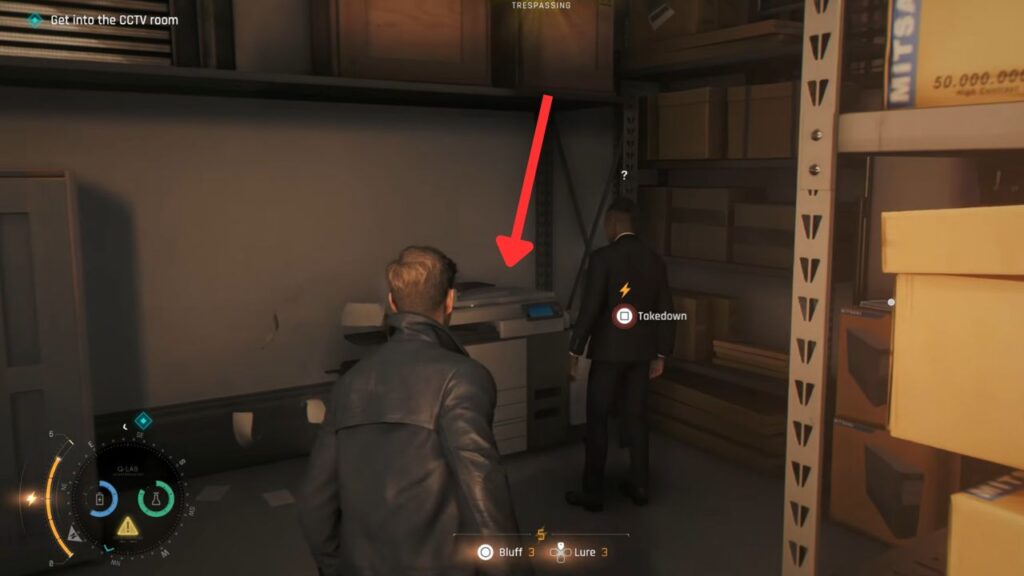
Once down the vent, collect all the battery resources you can find, you’ll need them. Activate the printer to lure a guard in, then take him down. Leave the storage room and turn right, then hack the CCTV camera beside the elevator.
There are two guards on the left, but you can bypass them by sneaking behind the bookshelves. Make your way across and open the door on the right side. You do not need to sneak here since you’ll be bluffing as security. Collect all the batteries in the area and read the hint on the table.
Next, open the door on the left and cross the room, then get ready to sneak again. Wait for the guards to walk away and head up the stairs on the right. Before going upstairs, read the note on the table mentioning a pipe leak, it might come in handy later.
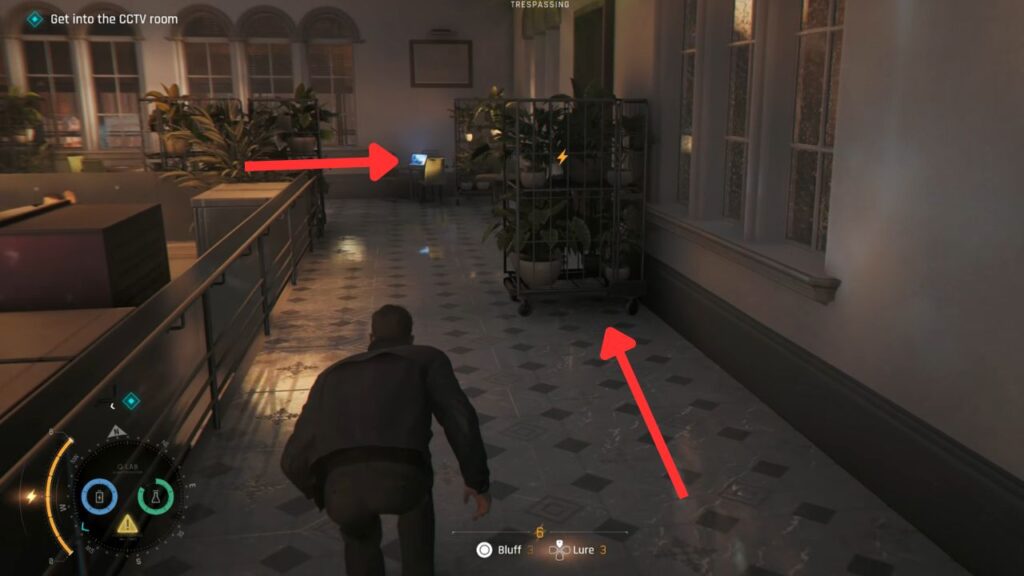
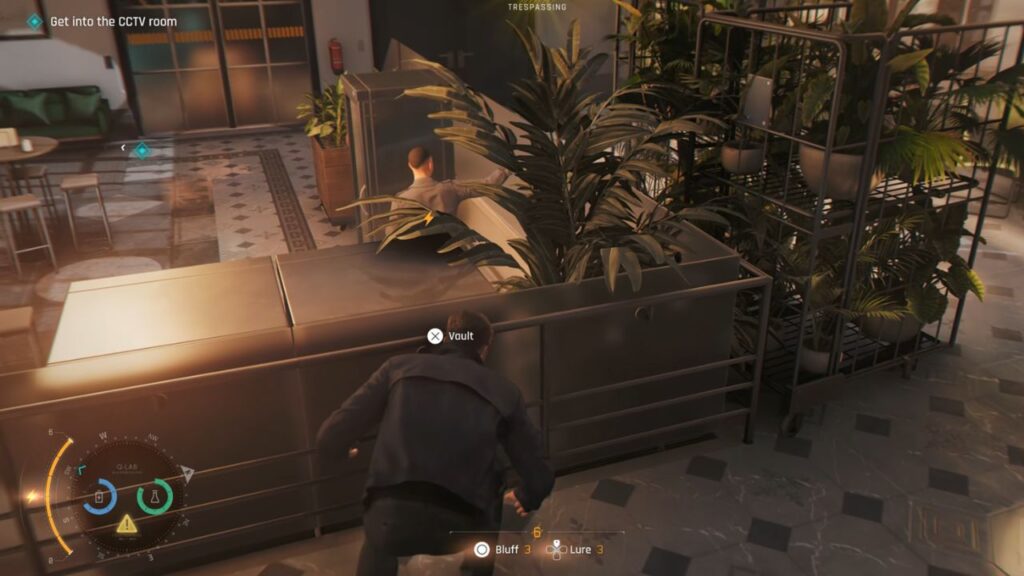
On the upper platform, hack the laptop in front of you and hide behind the plant shelf. Once the guard is lured over, take him down. After that, vault down behind the guy on the lower floor and quickly take him down as well.
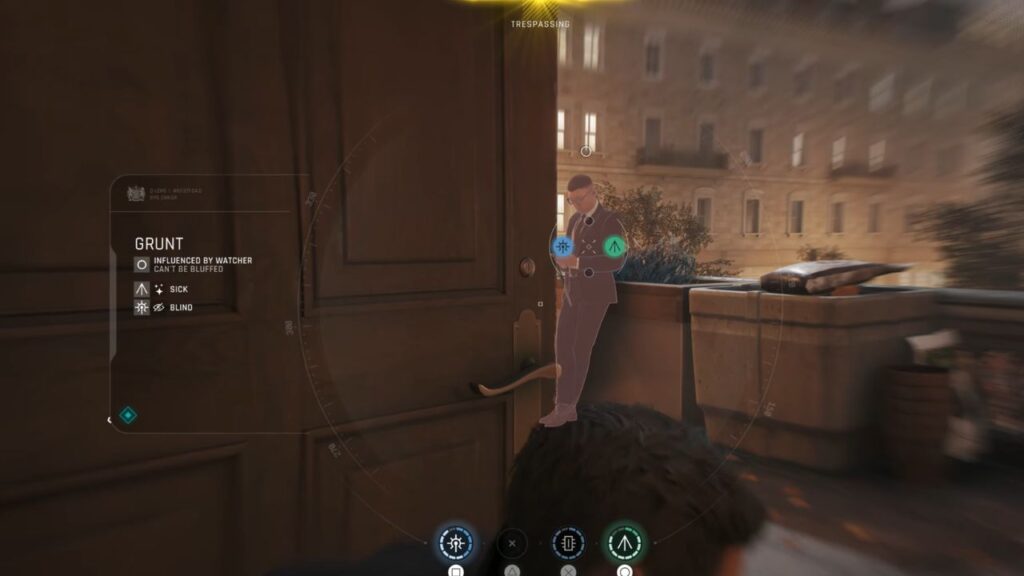
Wait for the guards on the balcony to separate. One of them will stand in front of the door. Open the door and dart the guard facing you first. Without hesitation, quickly take down the guard in front of you, then finish off the guard you darted. Taking him down rewards you with the CCTV keycard.
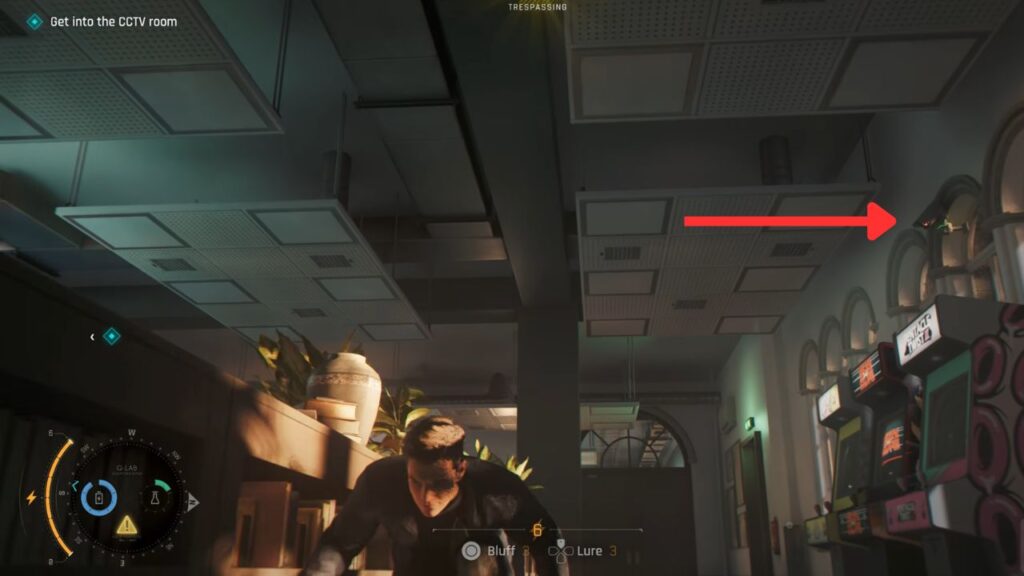
Head back into the room and open the other door, not the one you came through. Sneak behind the shelves and, before crossing, laser the CCTV camera on the right side above the arcade machines. Swapping between covers will not get you detected. Keep sneaking until you reach the door on the other side to the left.
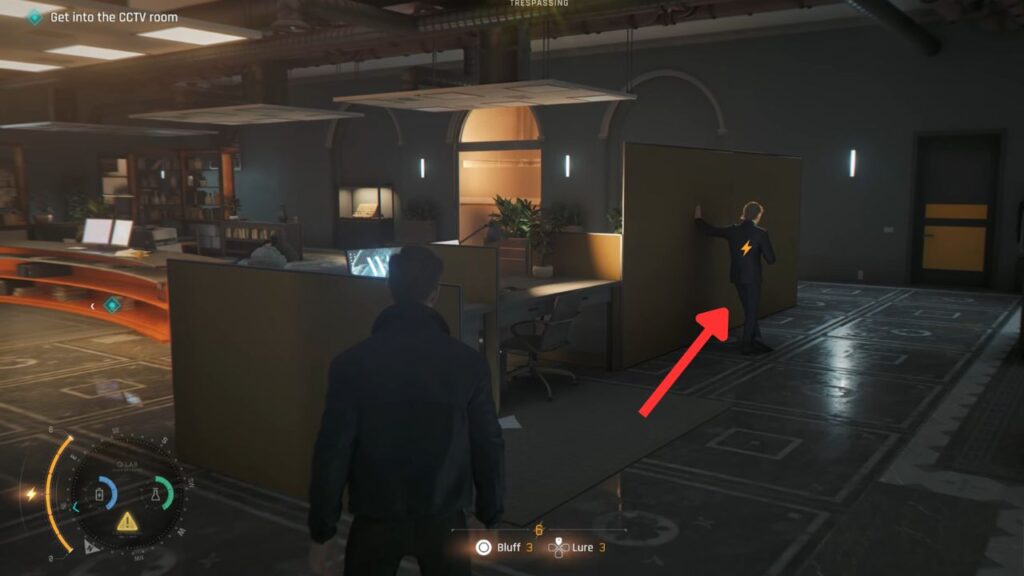
Open the door and casually walk past the people there, they are not guards. Open the door on the right, quickly turn left, and go left again. Immediately take down the guard talking on the phone.
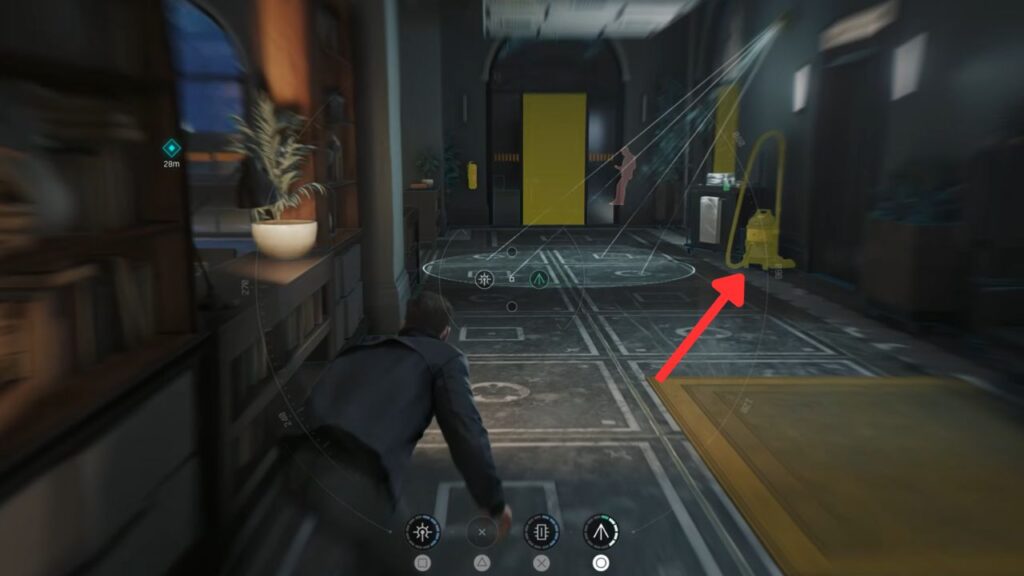
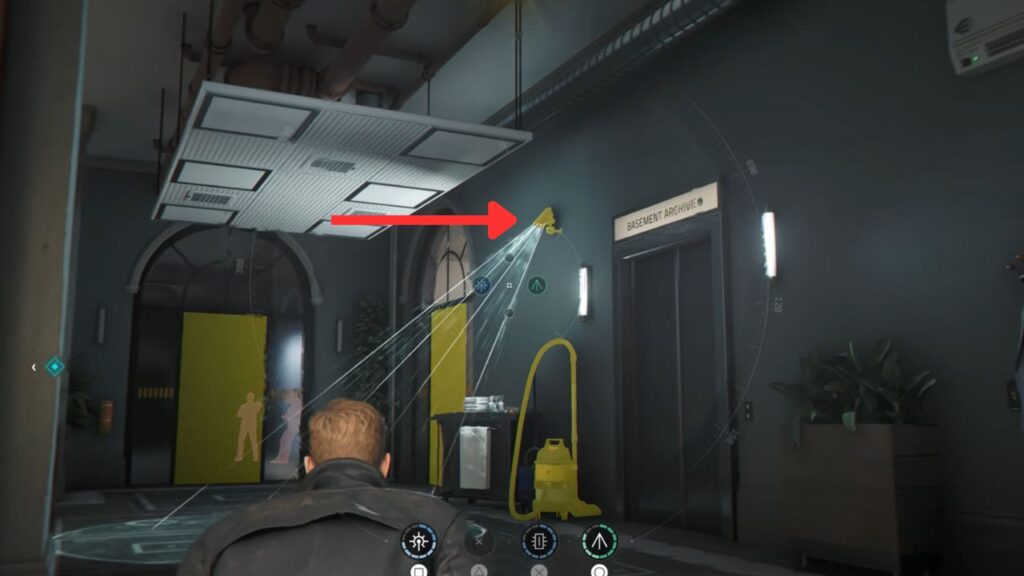
The room you need to enter is directly behind the middle counter guarded by two guards. Lure one of them away by turning on the vacuum cleaner beside the elevator.
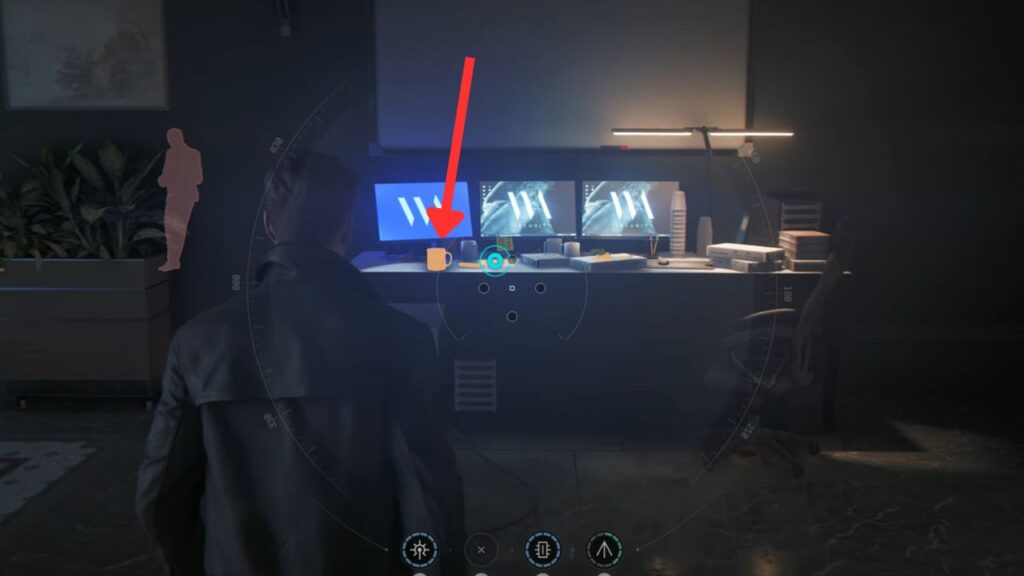
After taking down both guards, refill your battery and enter the CCTV room. You’ll need a password to access the main terminal, which can be found written underneath the coffee mug on the desk to the right of the door you entered through. After hacking the terminal, you’ll discover that the assassin you’re looking for is in the basement archives.
Basement Archive
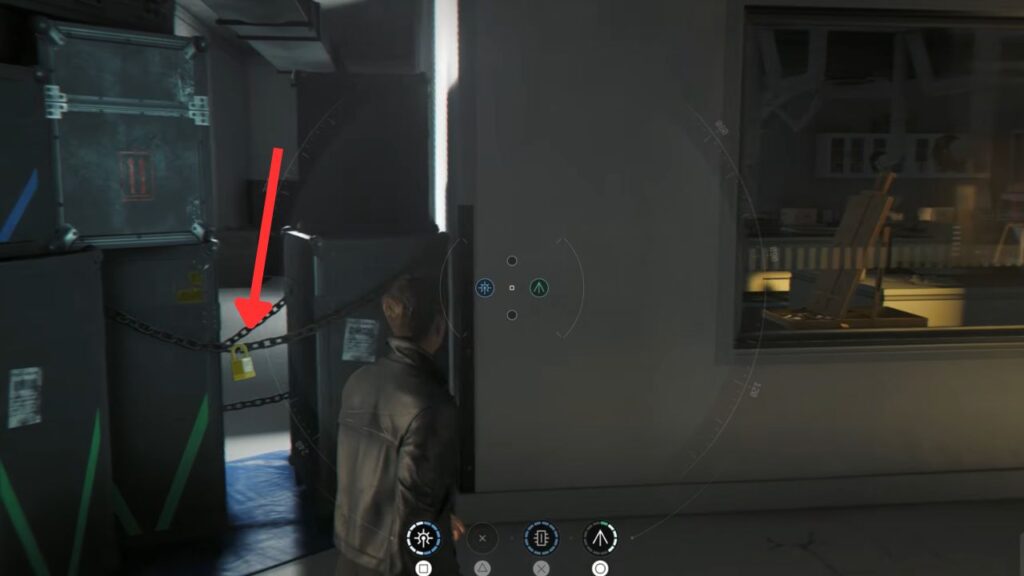
Head out and take the elevator on the left to the basement. Follow the pathway and look for a stack of crates on the left with a padlock. Break it and squeeze through. Enter the lab on the right side and kick open the door across the room.
Head over to the control panel beside the computer and turn it on to open the caged door outside. Refill your batteries before going through the caged door. Once you pass through, the door closes behind you. It seems Murto is expecting you.
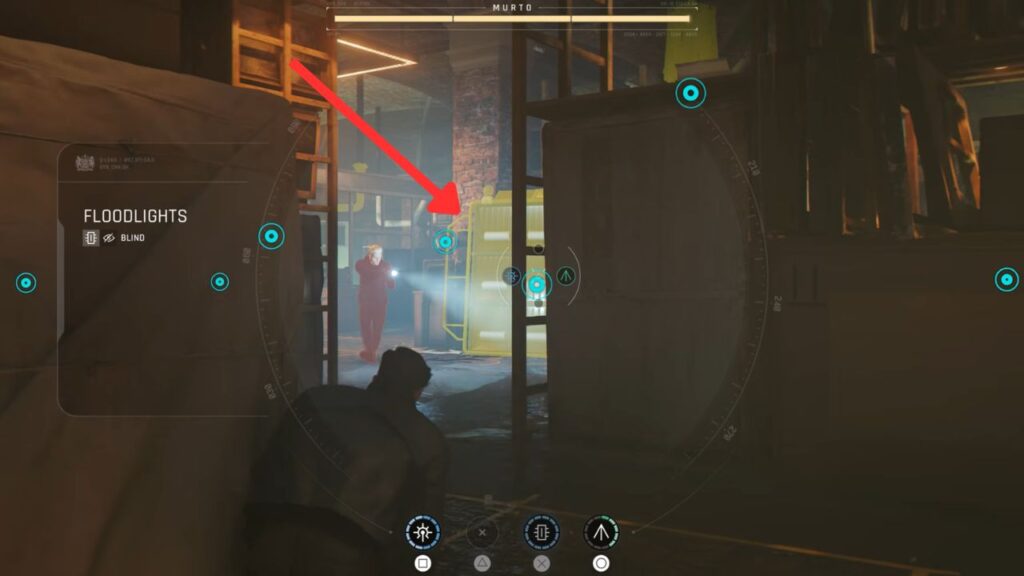
Head over to the box covered with a white cloth on the right and wait until Murto walks past the floodlights across, then turn them on to hurt him.
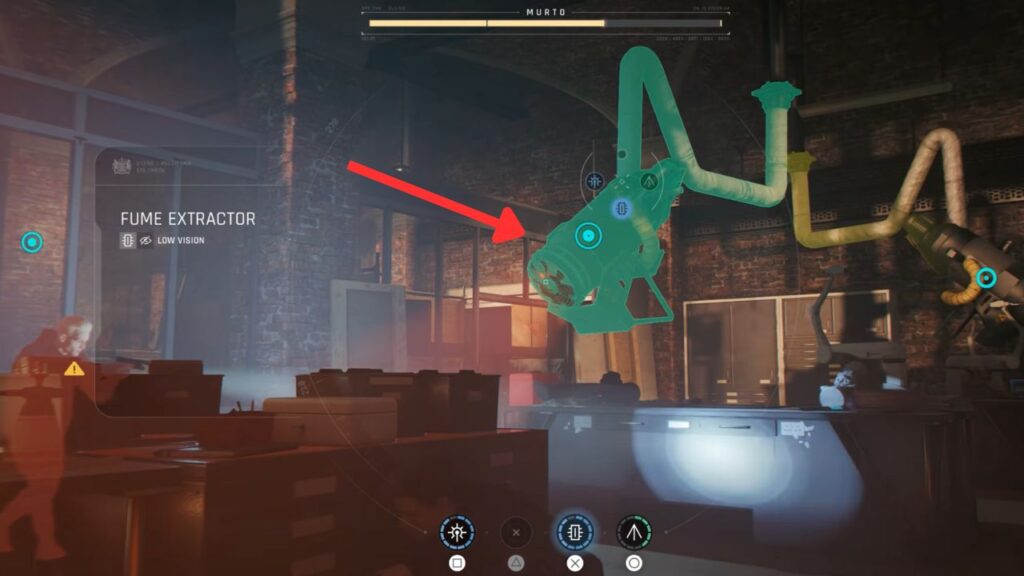
Next, move into the room with the fans. Grab some batteries and wait for him to arrive. Hide behind the desk away from Murto, and when he enters the room, hack the fume extractor on the right side to hurt him again.

Leave the room and turn right. Refill your battery charge and hide behind the middle desk. When he enters the room and steps onto the electrical panel, turn it on to electrocute him. After this sabotage, he will be knocked down.
Head over to him and finish him off. He still has some fight left in him, so enjoy the fight cutscene here. Finally, justice for Monroe.
Leave the storage room, walk across the hallway, and turn right at the end. Squeeze through the gap and destroy the vent padlock to get to the other side. Follow the pathway and climb up the ladder. Move over to the elevator and head back to the Gala Hall.
Escape With Isola

Once out, kick open the door on the right. Leave the room and turn right, where you’ll encounter a mysterious woman who turns out to be Isola. A cutscene then plays.
Get closer to the stage to begin hacking Webb’s phone. However, you start to feel hazy and dizzy.
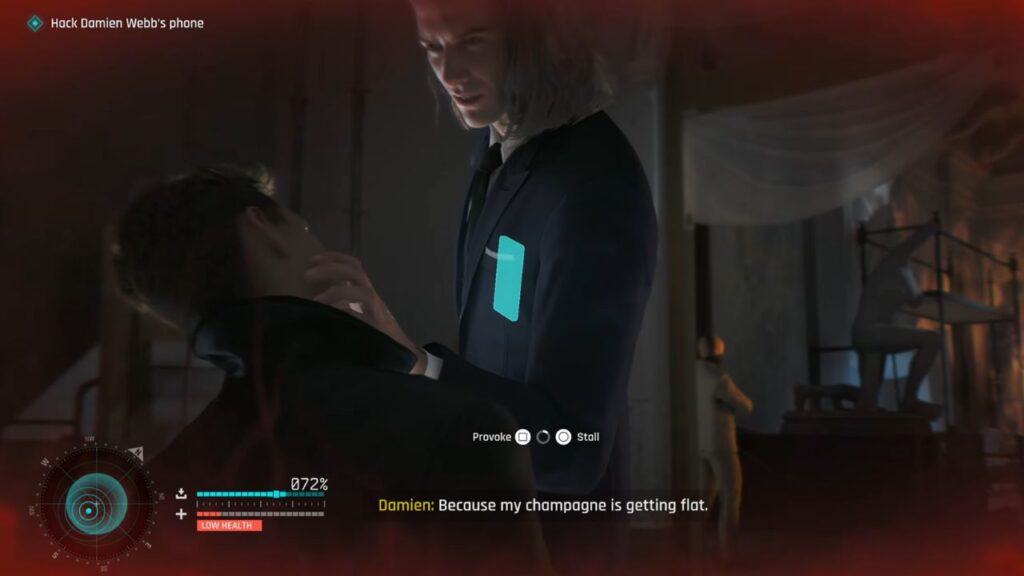
Coming out of the cutscene, you are tied up and being held captive. You need to hack Damien’s phone, so stay close to him for as long as possible. Provoke him twice, then stall. When he walks away, provoke him once again.
After a brief cutscene, you and Isola are freed and need to escape. Check all the doors, and you’ll discover that the window is the only way out.
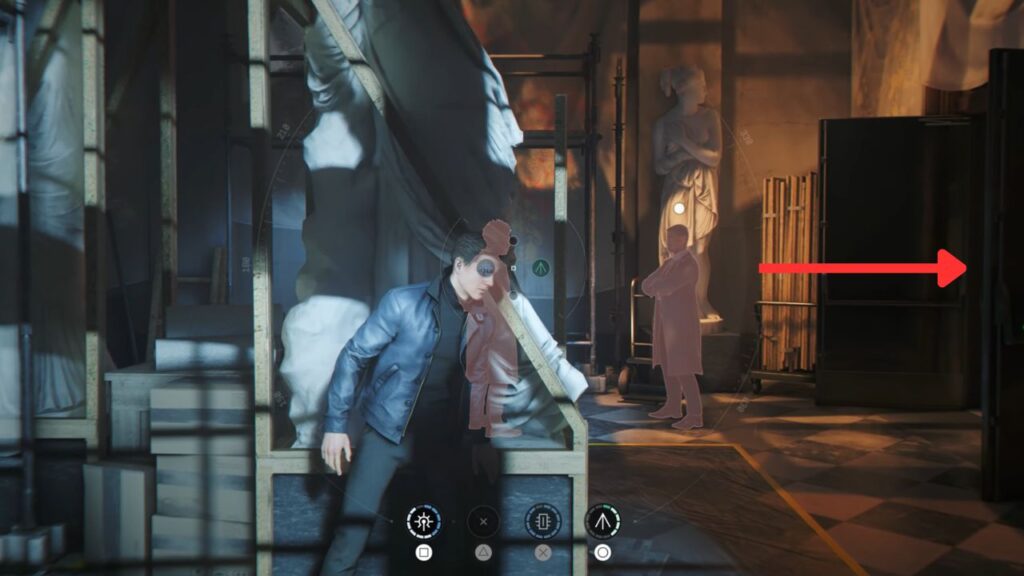
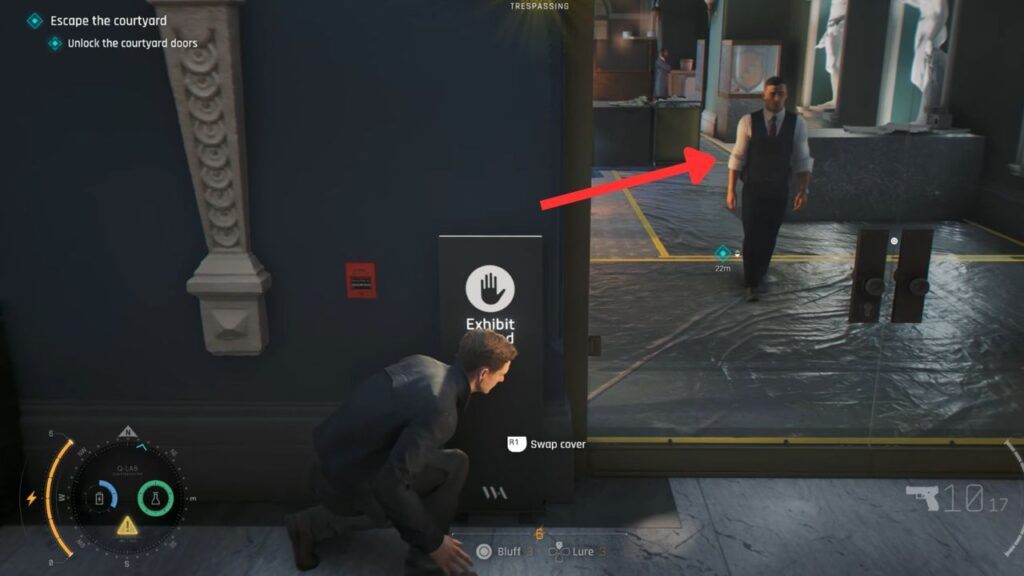
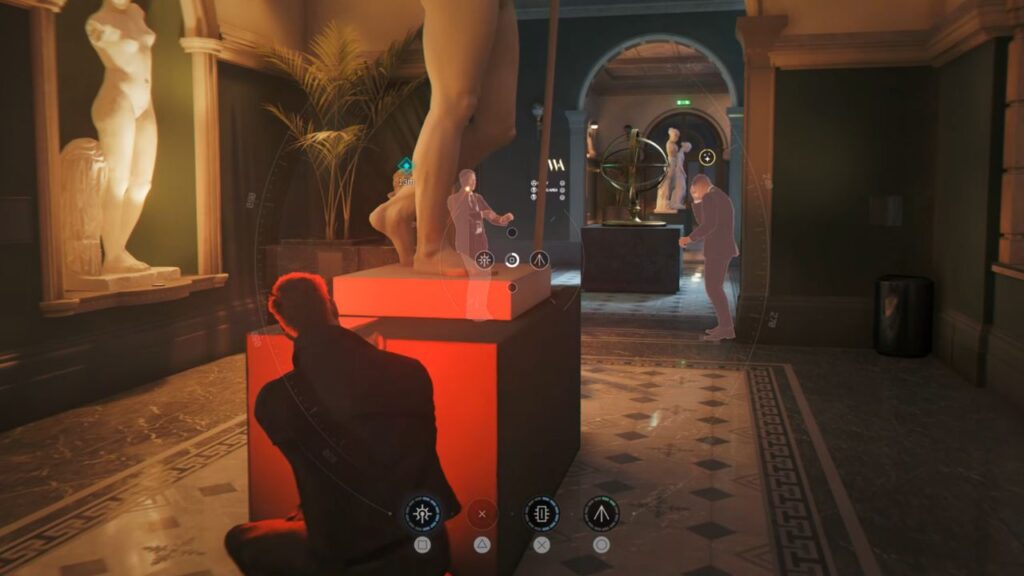
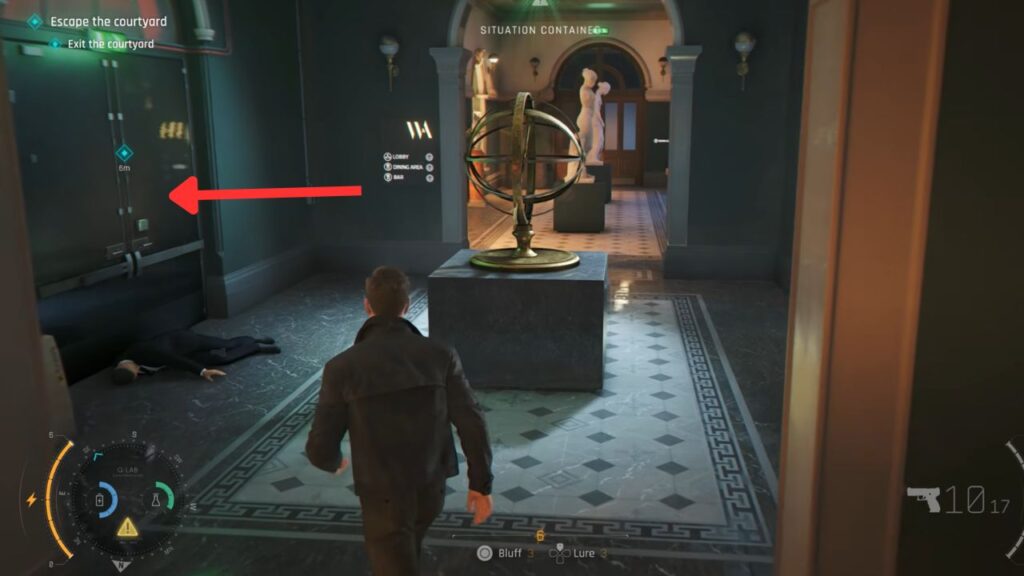
After boosting Isola up, guards enter the room. Hide behind the statue and wait for them to move in. Once they start moving, slip out through the open door. Move forward and resupply your resources before going through the door on the right.
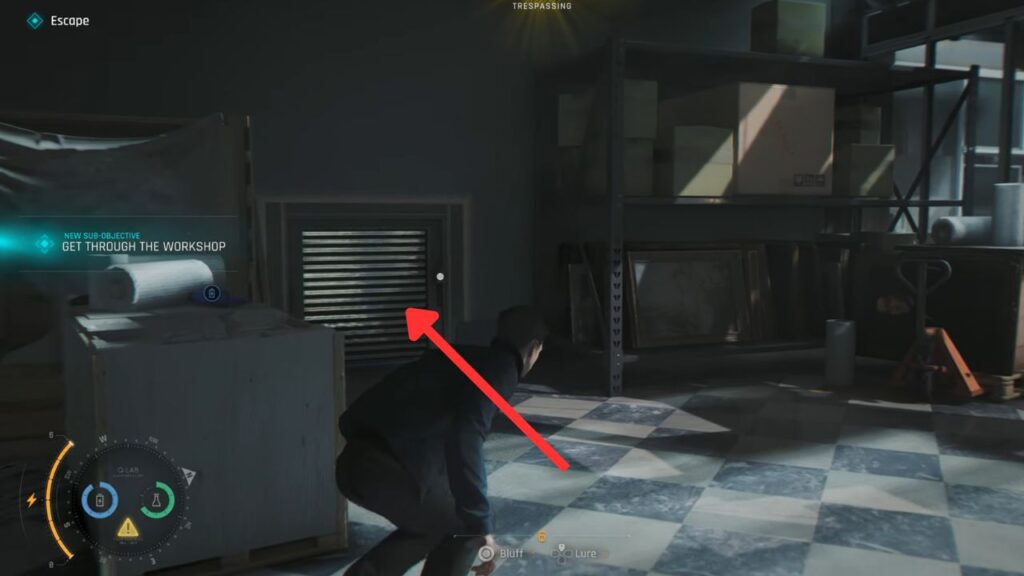
After kicking open the door, turn left and unlock the vent. Crawl inside and climb up to the top platform. At this point, it’s a license-to-kill situation, so get ready for some combat.
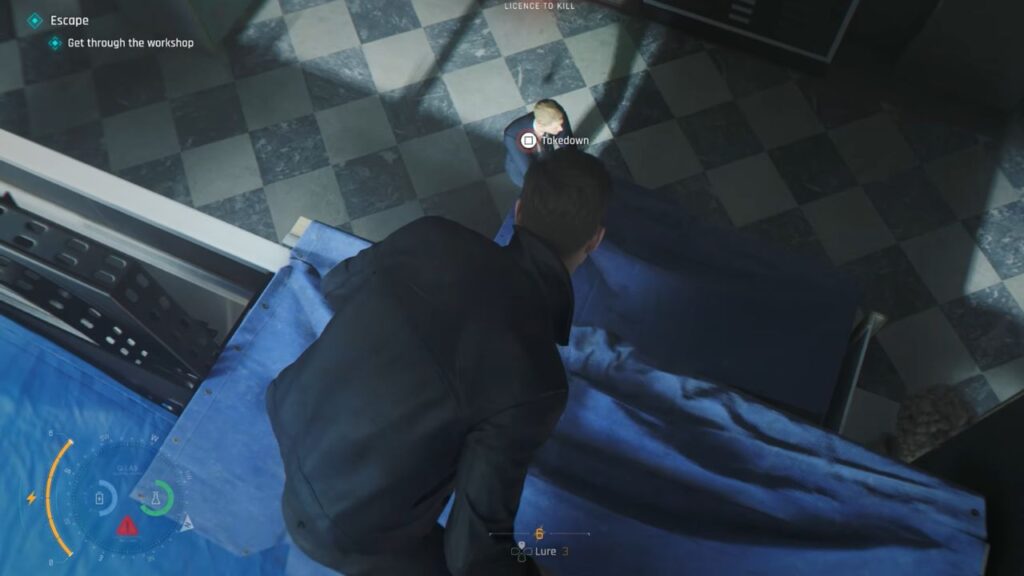
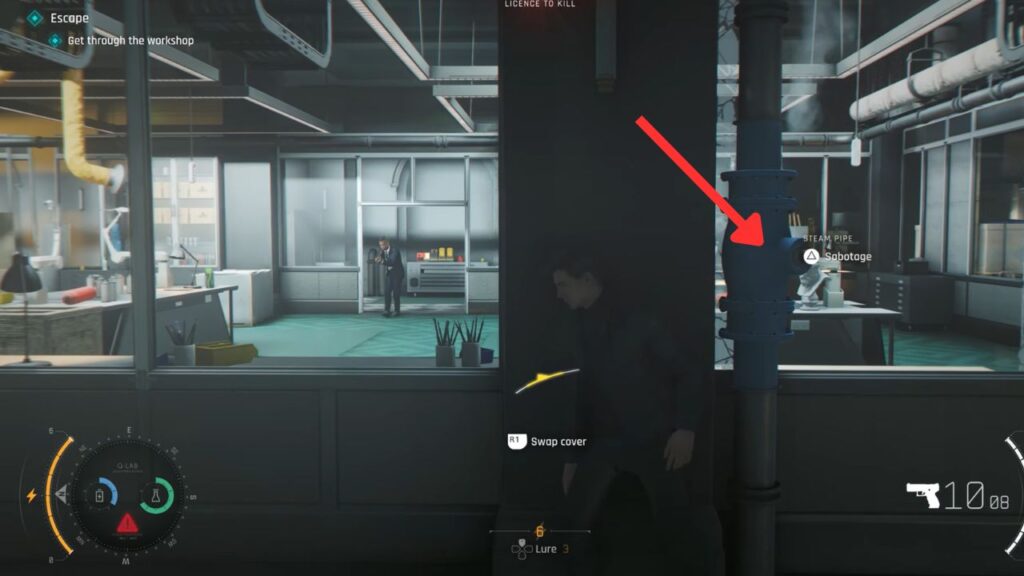
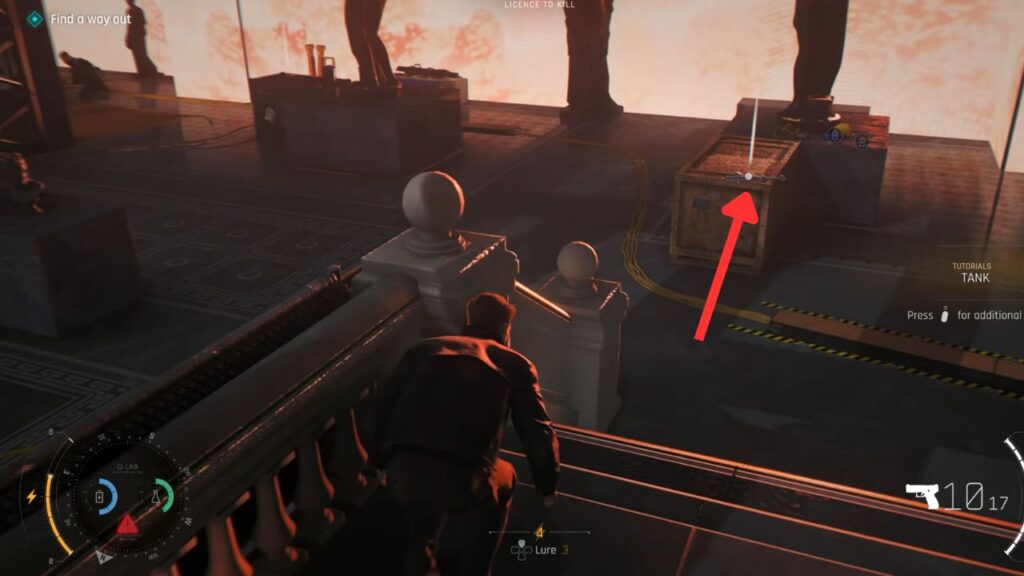
Follow the guard on the left until there is an opening to jump him. After taking him down, take his pistol, just in case things go south. Use the pillar as cover and sabotage the steam pipe to create concealment. Grab everything on the table to the right, then sneak back toward where you entered.
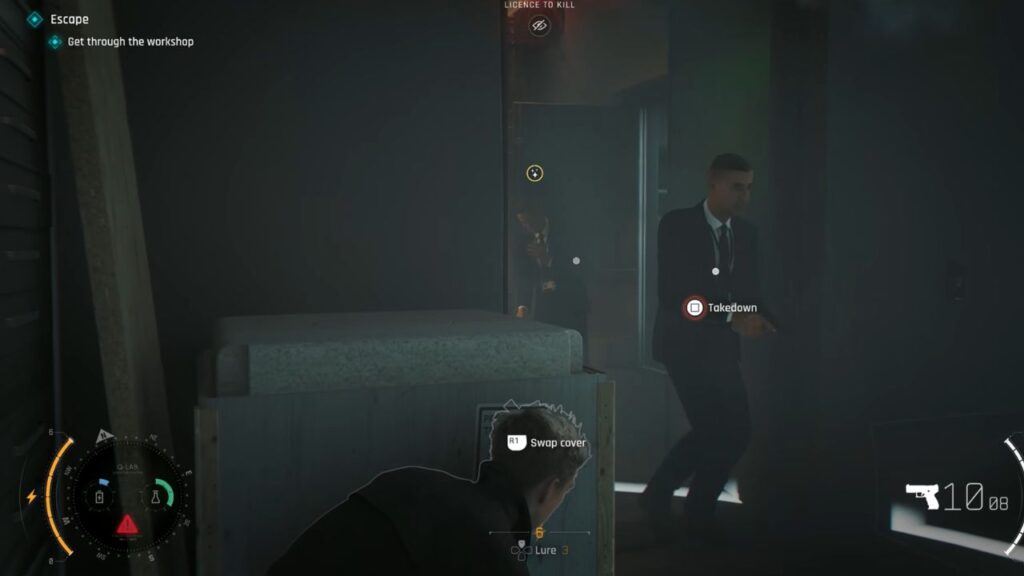
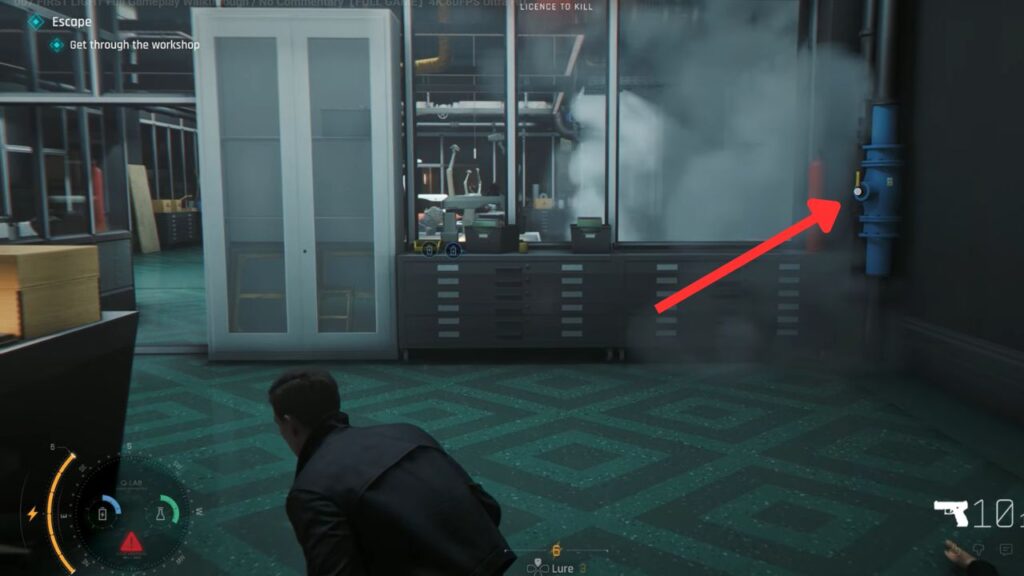
Open the door here, but do not go inside immediately. Instead, hide behind a nearby box. When the guards approach, dart one guard and take down the other. In the next room, sabotage the steam pipe again.
Turn on the printer to lure a guard into the steam and take him down when he gets close. Move forward and pick up the chemicals on the desk to the right. There are three more guards to deal with, so start with the one who is alone and furthest away.

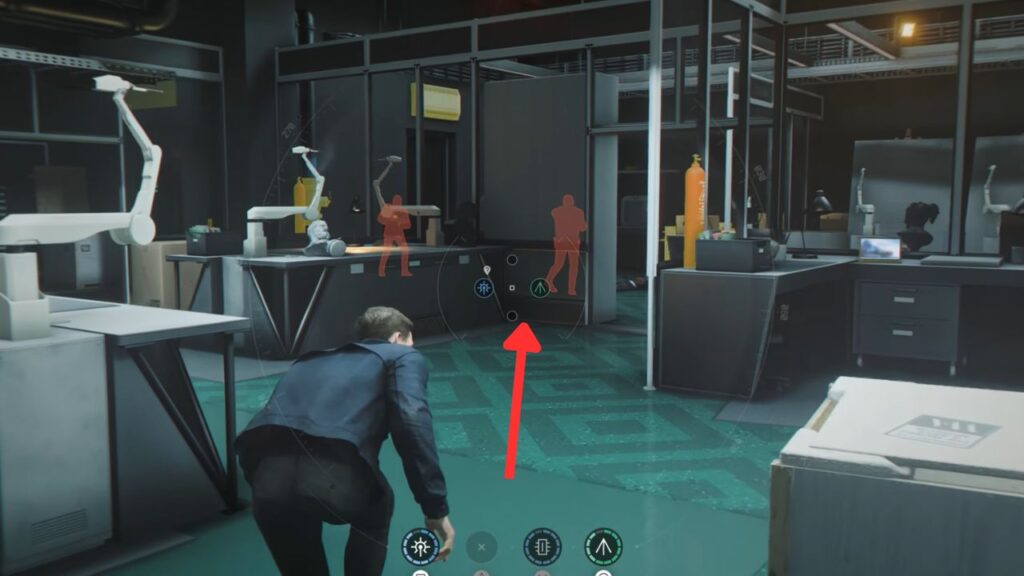
Quickly vault over the box and perform a vault attack to disarm him, then finish him off. Next, move to the central area and wait for one of the remaining guards to approach. Take him down, then simply follow the last guard stealthily and eliminate him as well.
After the situation is contained, head out through the exit door. Vault over the fence onto the lighting rig. Jump across to the next lighting rig and move forward to the blue exit door.
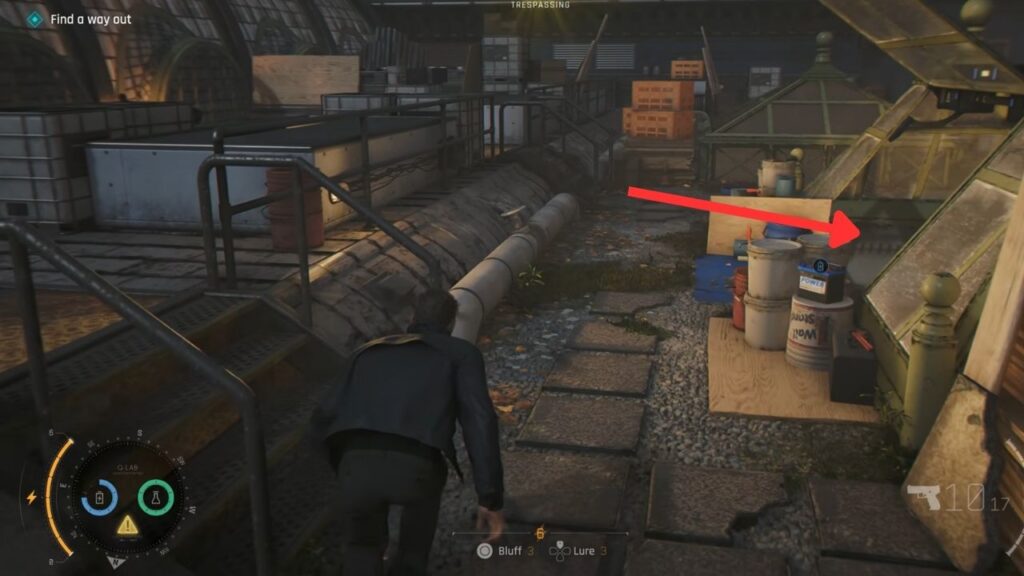
Outside, follow the only path forward. Open the door and look for an opening in the glass rooftop to jump through. Quickly take down the guard after he finishes talking.
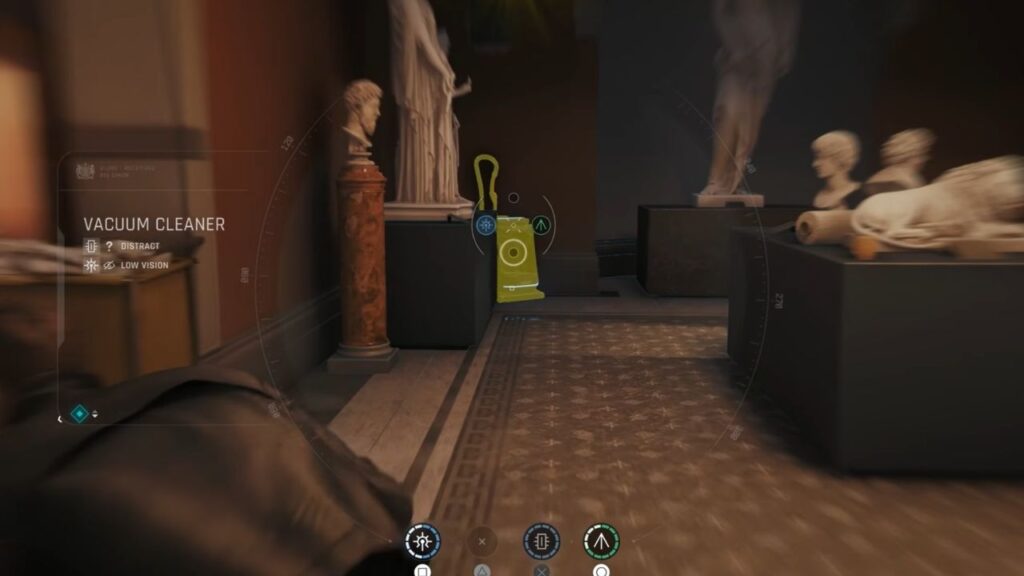
Enter the room filled with statues and activate the vacuum cleaner in the corner to lure one of the guards. Take him down once he passes through the door. Hack the CCTV camera and take down the other guard.
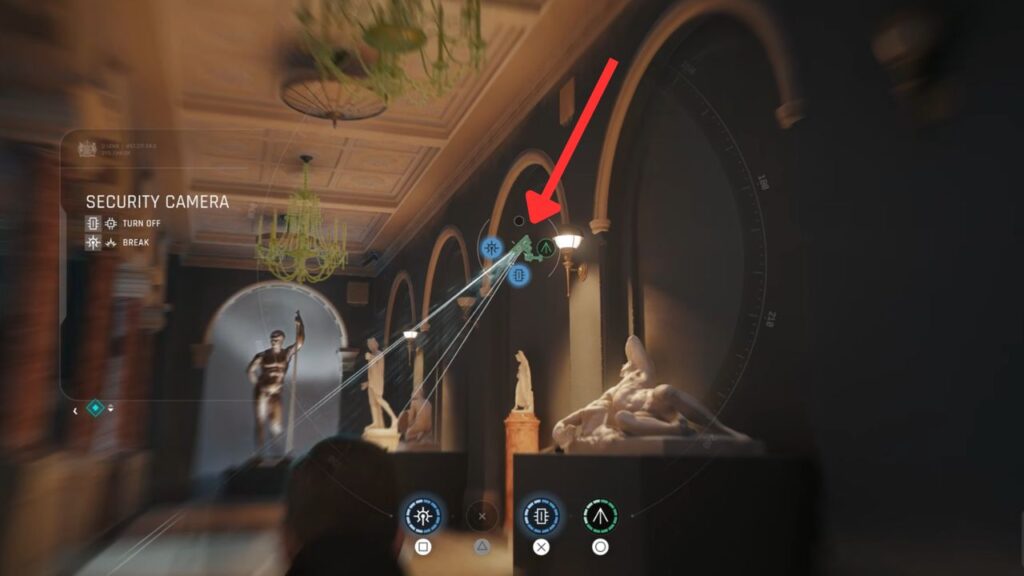

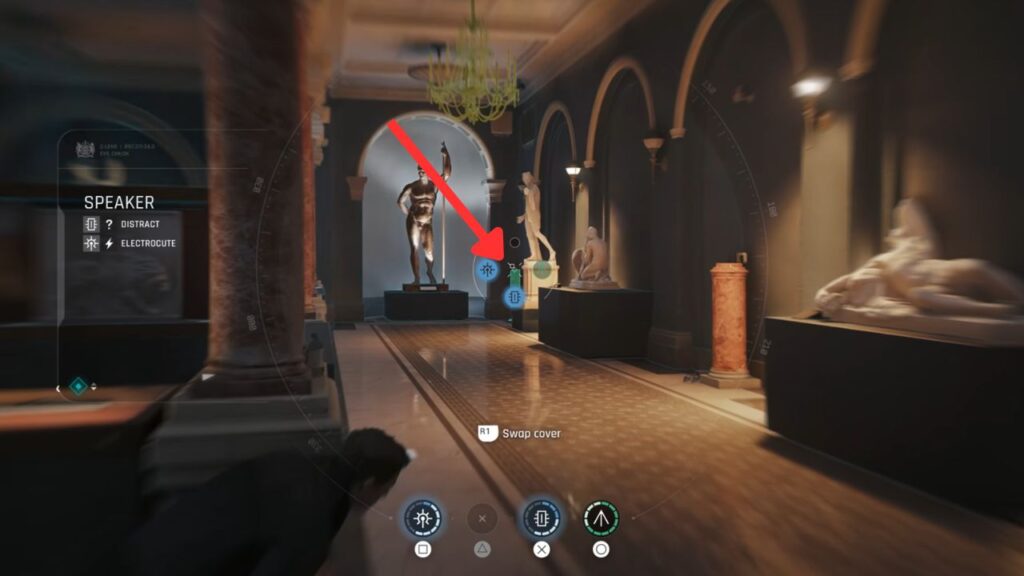
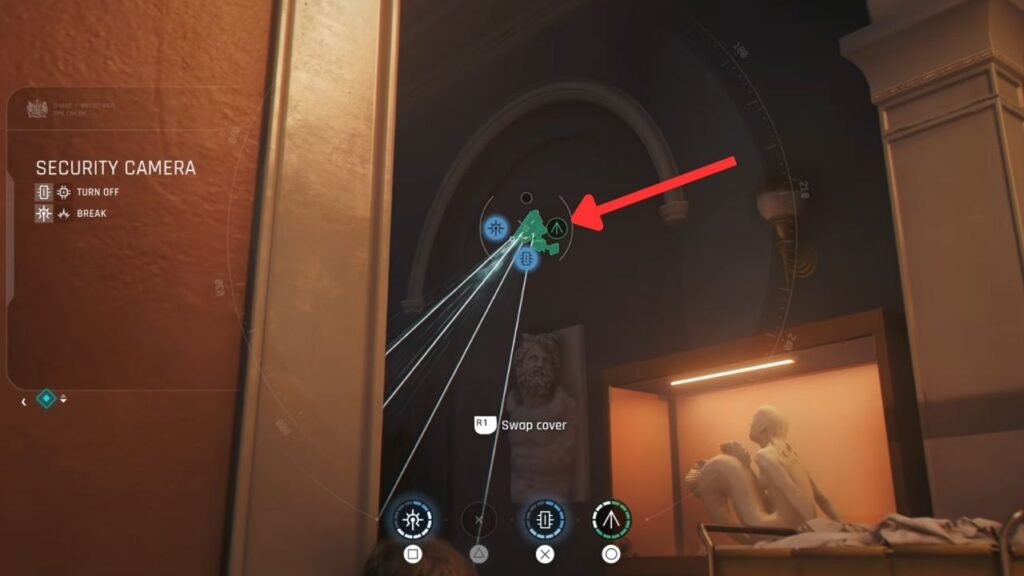
In the next room, destroy the CCTV camera on the right wall. Sneak over and take down the guard by the window first. Then hack the speaker in the right corner of the room to lure another guard away. Once he walks off, take down the guard behind him, then immediately take down the guard in front.
Quickly hide beside the glass door and wait for another guard to come over. Take him down once he enters the room.
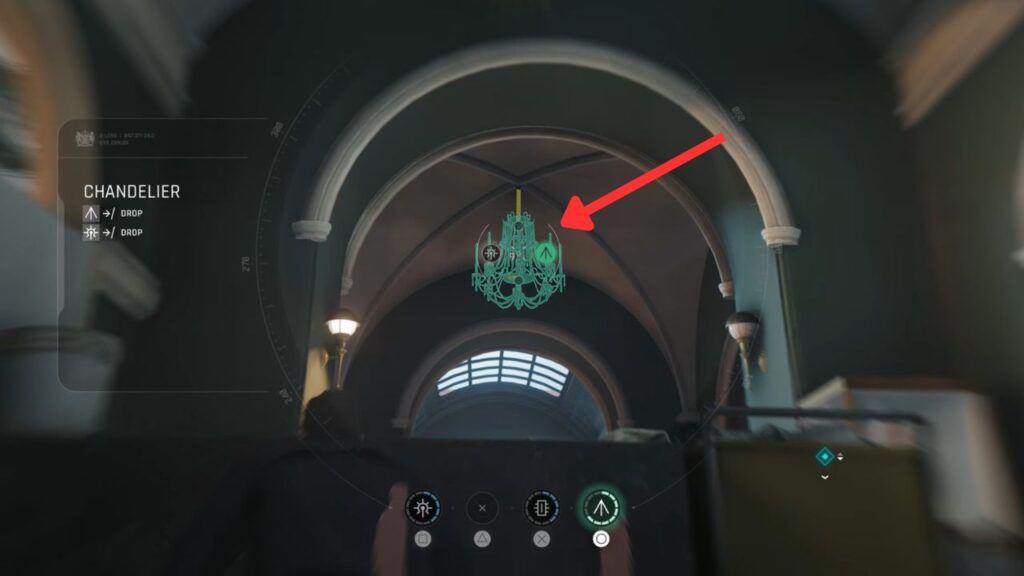
In the next room, see the chandelier on the ceiling? Shoot a dart at the floor beneath it to lure the guards underneath, then quickly destroy the chandelier to take both guards down.
Squeeze through the cabinet, turn left to jump down the platforms. On the lowest platform, turn right into the statue hall.
There will be two guards here. You can dart one and laser the other, then quickly take them both down. Exit through the door they are guarding.
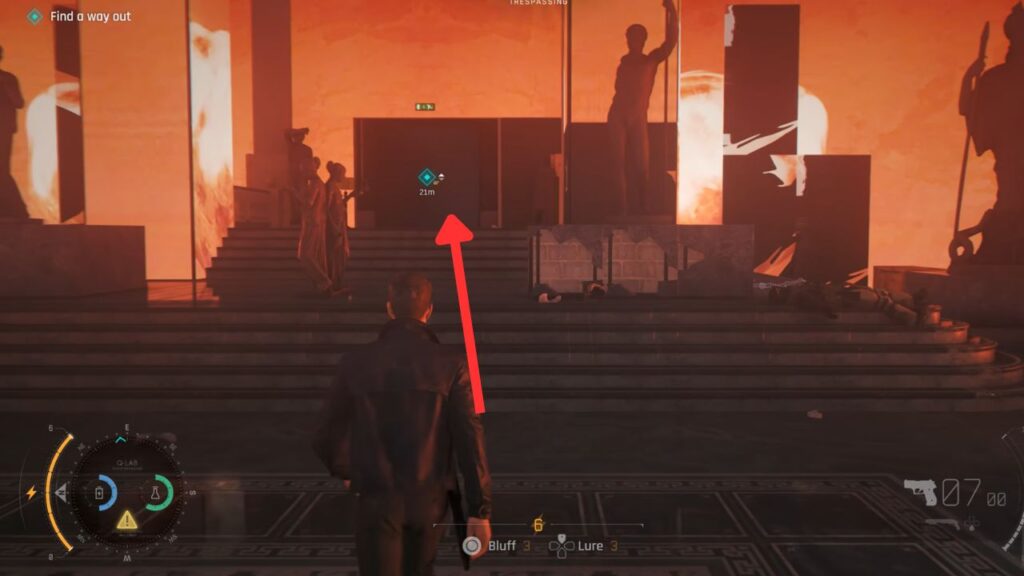
Finding a Way Out
Go straight through the somewhat creepy hallway. In the next room, you’ll encounter a large number of guards who are out to kill you, putting you in a license-to-kill situation once again. Head down the stairs on the right and grab the SMG along with some batteries.
You can either approach this section stealthily or go for an all-out shootout, it’s entirely up to you. There are plenty of objects to sabotage throughout the area, making either strategy viable. I personally went with the all-out combat approach, which was both fun and intense.
Try to land headshots on the armored guards to shoot off their helmets, making them much easier to eliminate.
Once everyone is down, head over to the exit door marked with the blue objective marker. Follow the next blue marker provided by Moneypenny to the exit door, for real this time. However, you’re met with a surprise ambush.
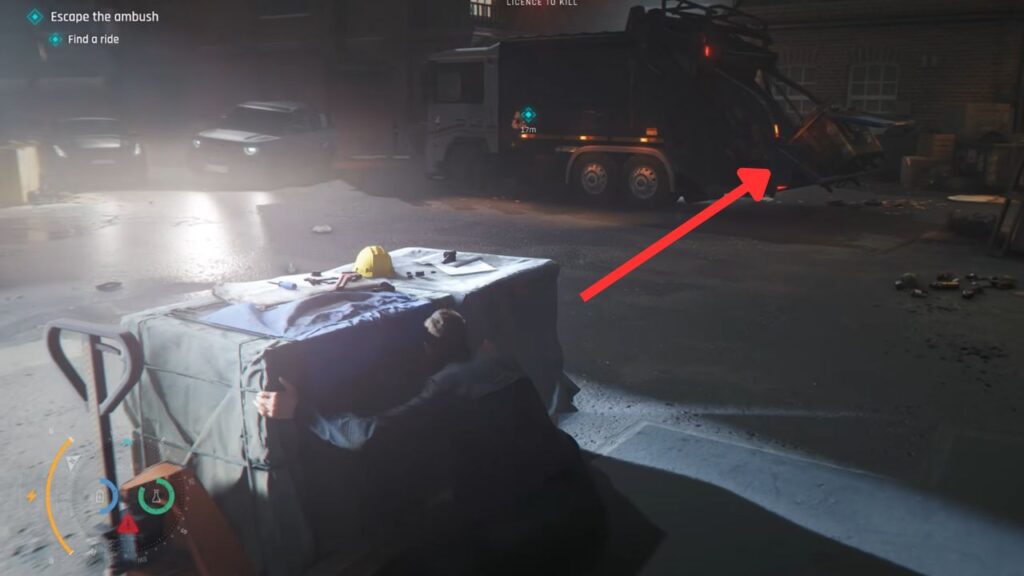
You need to quickly move between covers and make your way to the truck on the right side. Keep crouching behind cover and use the moving crate to help you reach the truck safely.
Drive and ram through the obstacles during this thrilling car chase. After crashing through a mall, a cutscene plays, taking you to Chapter 7: Knightfall.