Chapter 2 ended with M briefing the recruits on Rhys Beckett, a former 009 who spent a decade in hiding and has now resurfaced. He claims to have evidence of a conspiracy against the state but will only hand it over in a meeting with John Greenway.
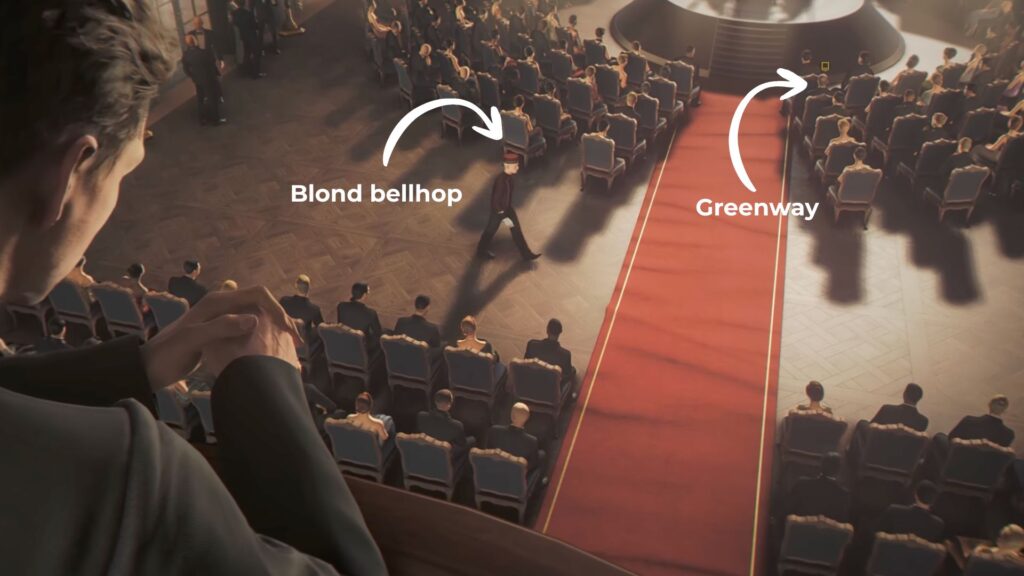
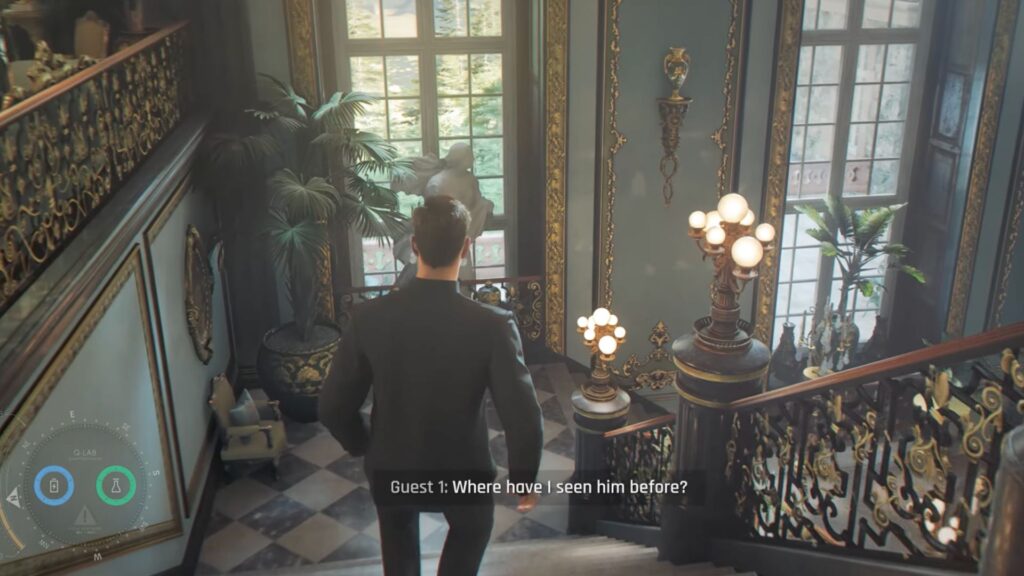
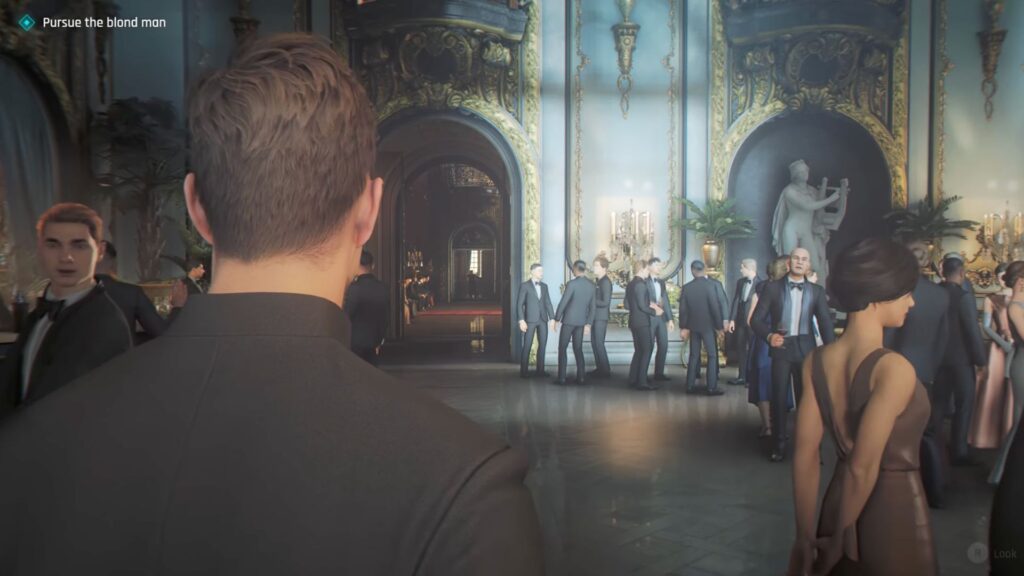
Moneypenny sends the recruits undercover to The Grand Carpathian Hotel in the High Tatra Mountains of Slovakia, where the World Chess Championship is being hosted. Bond’s cover is a chauffeur. After dropping off Cressida and Monroe, you spot a blond man throwing luggage from a balcony and follow him inside. Chapter 3 begins here.
007 First Light Chapter 3: All the Time in the World Walkthrough
The Hotel
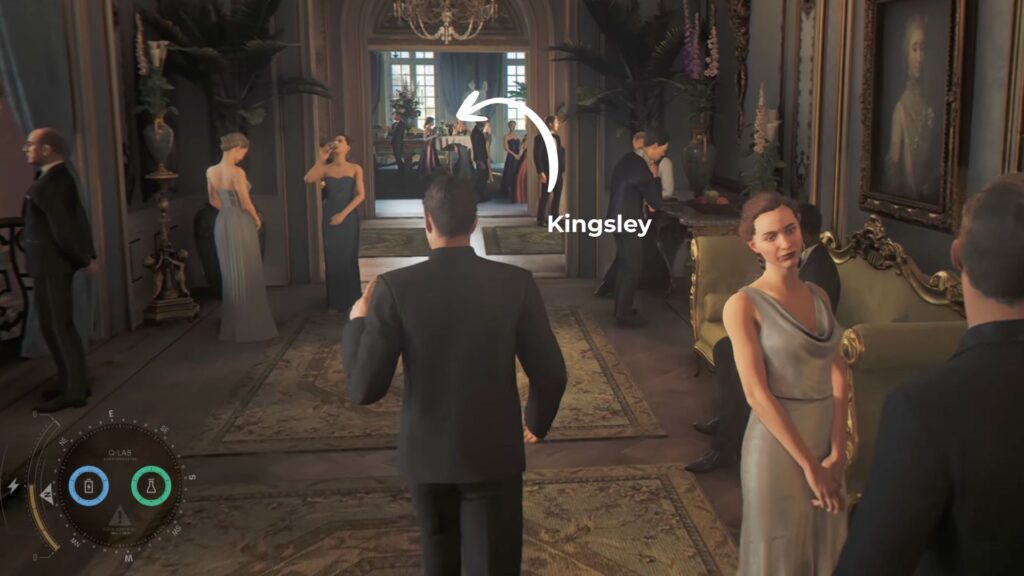
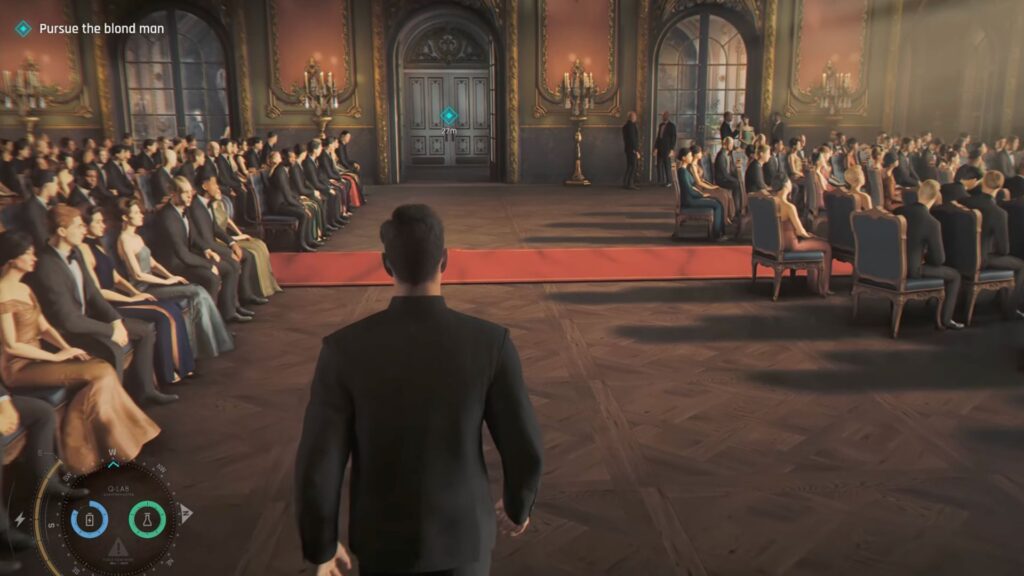
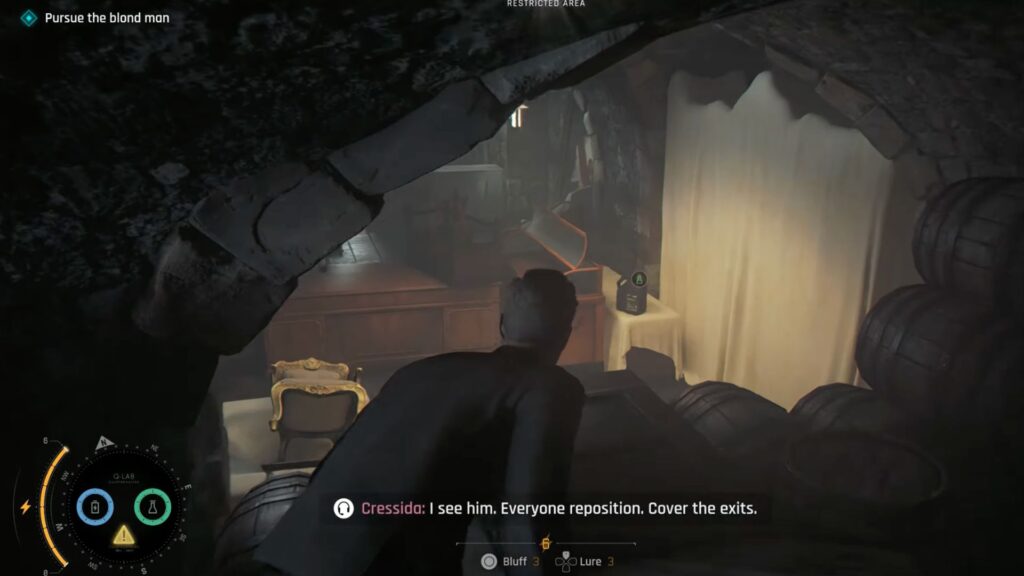
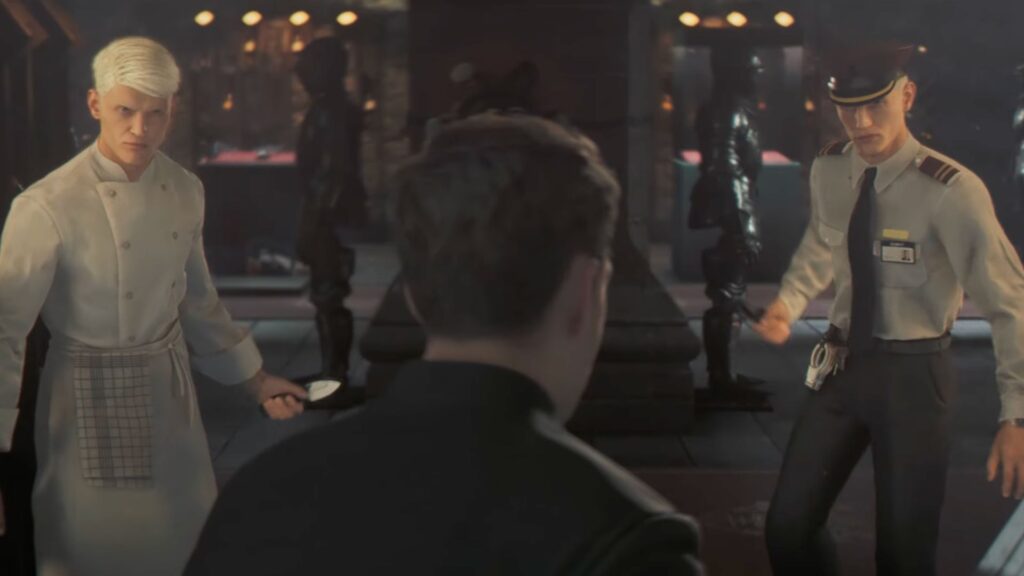
From the upper level you can see Greenway below in the chess championship hall sitting among the other guests. The blond man is also moving through the same space. Take the right path and walk through the aisle until a cutscene triggers with Kingsley, who is drinking in the dining area.
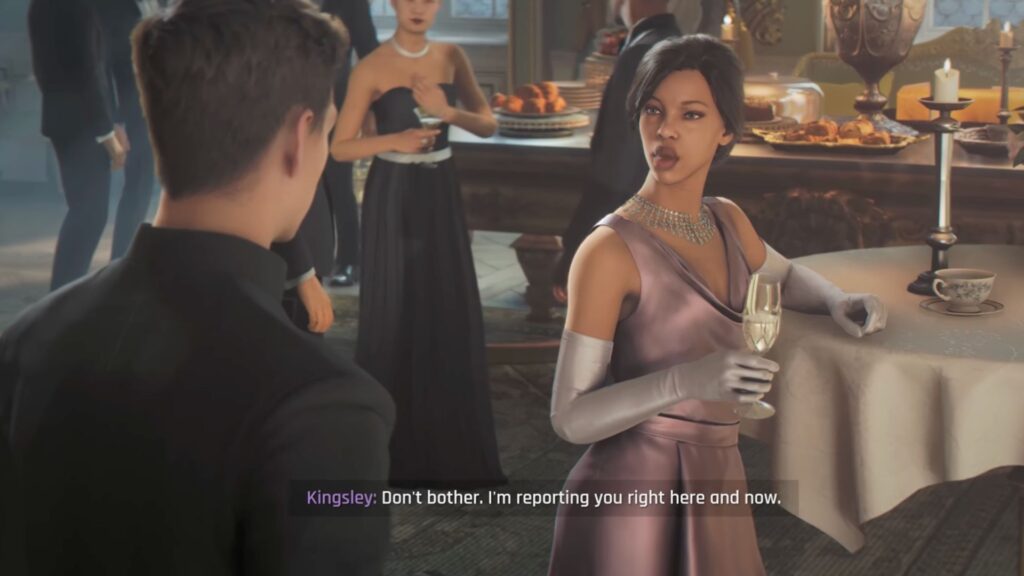
Bluff your way through by telling he Greenway gave you a . Head back to the aisle, take another right path, and keep going straight until you see a staircase going down on the right leading to the bar lounge.
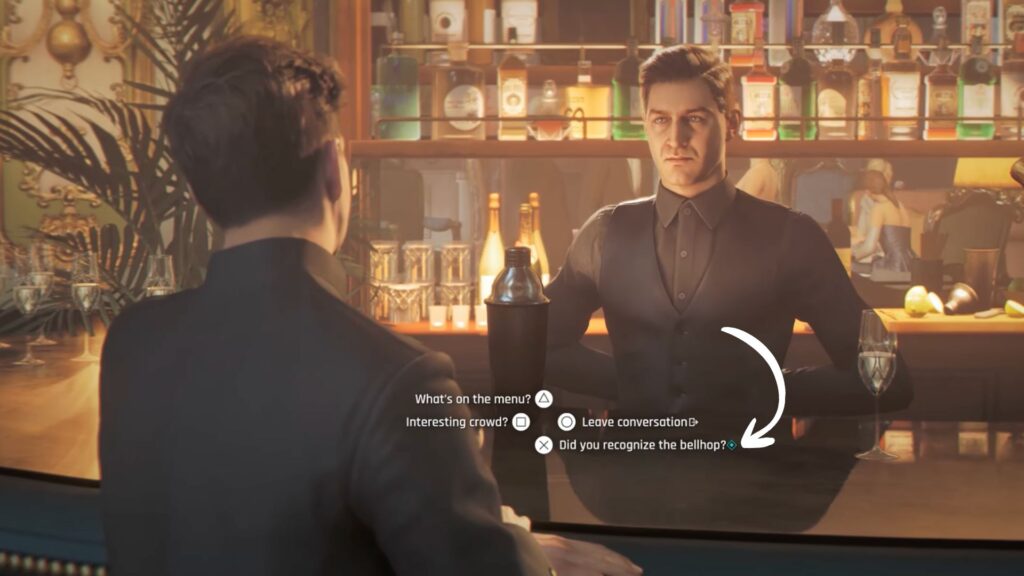
Talk to the bartender and ask about the bellhop. He will tell you the man was asking for directions to the backstage area. Continue straight through to the piano lounge and then out into the museum hall beyond it. Then take the left and go down the stairs to the reception area.

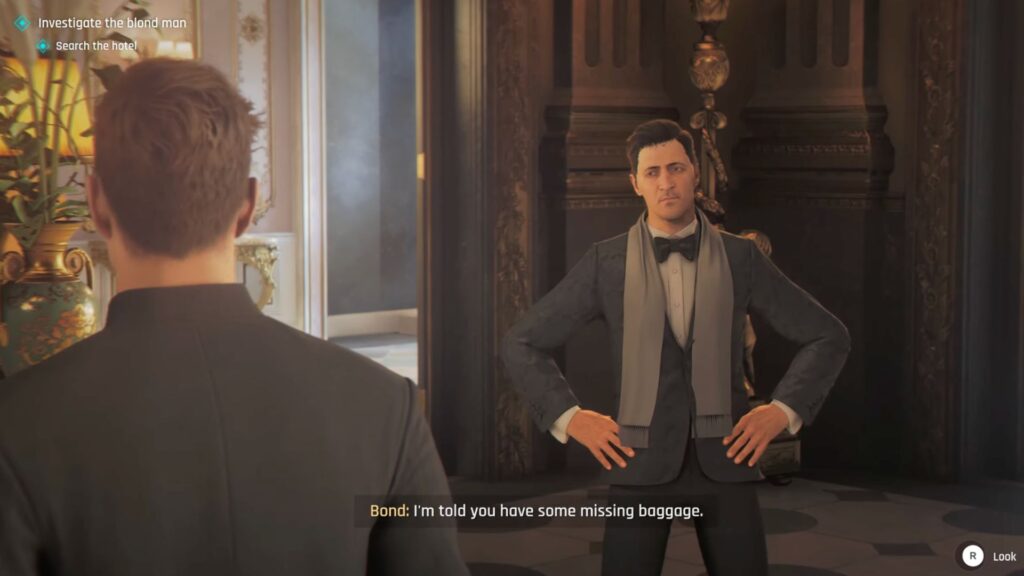
As you approach the desk, you will overhear a man asking about the same bellhop. The receptionist tells him there is no bellhop matching that description. The man asking is named Mr. Prendergast and it turns out the luggage thrown from the balcony in Chapter 2 belongs to him.
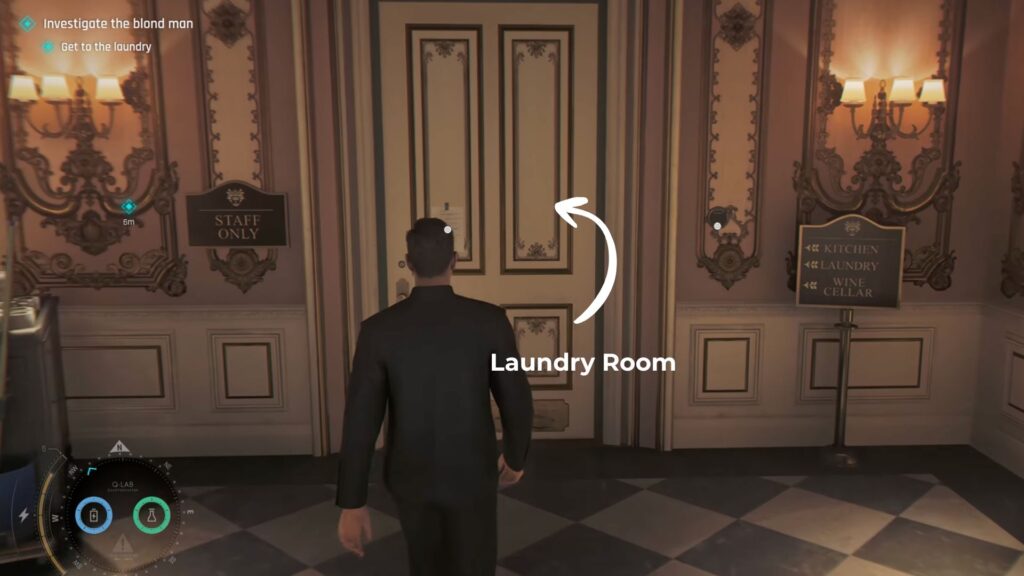
Once Mr. Prendergast moves away, speak to the receptionist yourself. She is not much help. Talk to Mr. Prendergast directly and he will tell you he saw the bellhop go through a door marked Laundry.

Getting into the Laundry Room
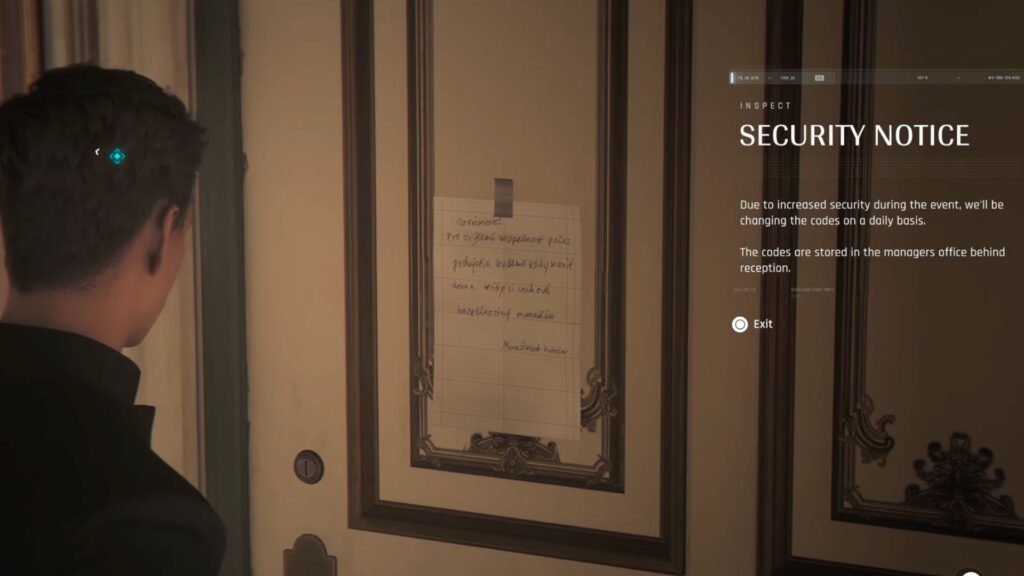
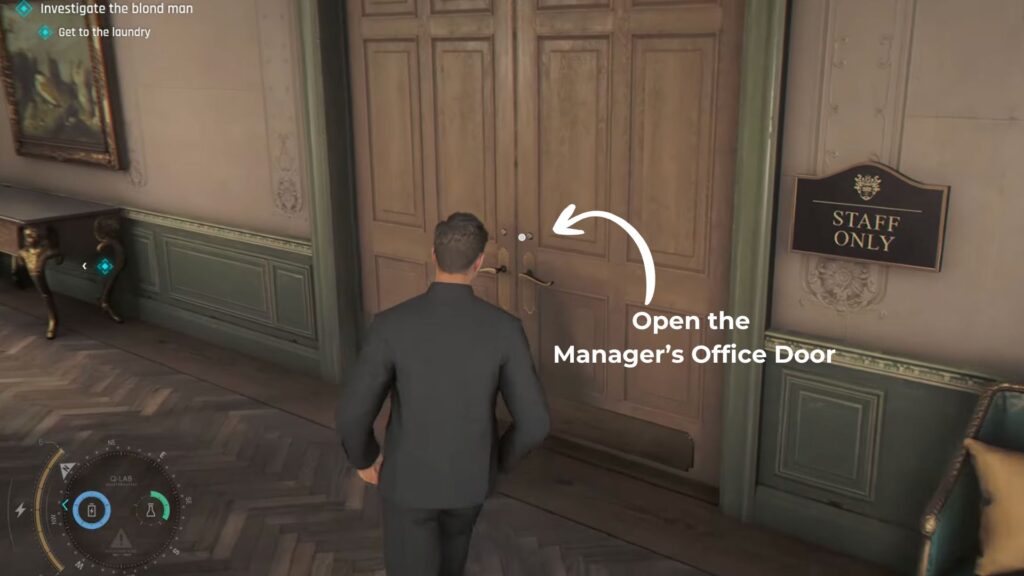
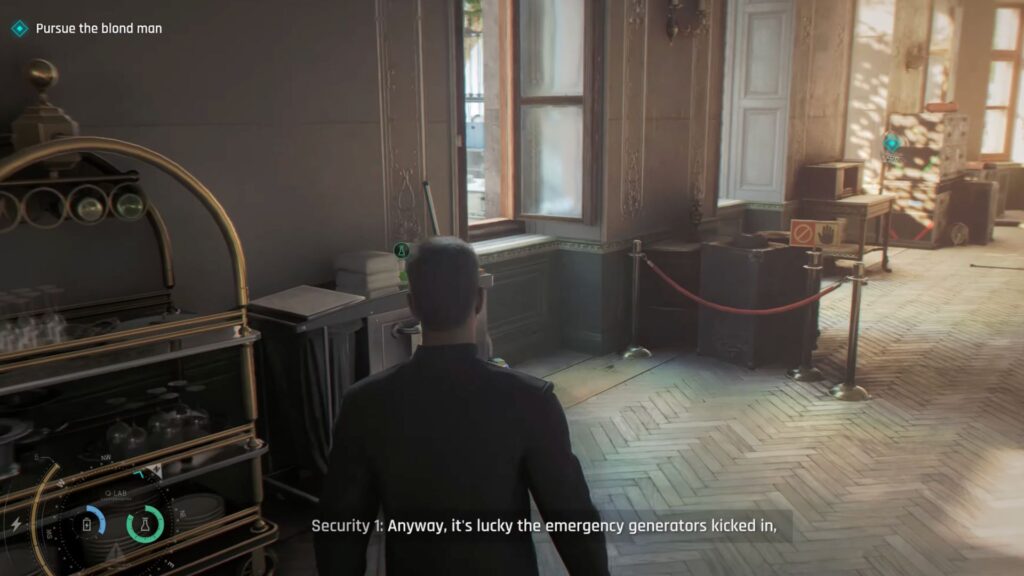
The Laundry door is to the left of the reception area but before you can enter you will see a security notice stating that the hotel changes its door codes daily during the event. The codes are kept in the Manager’s office behind reception so that is where you need to go.

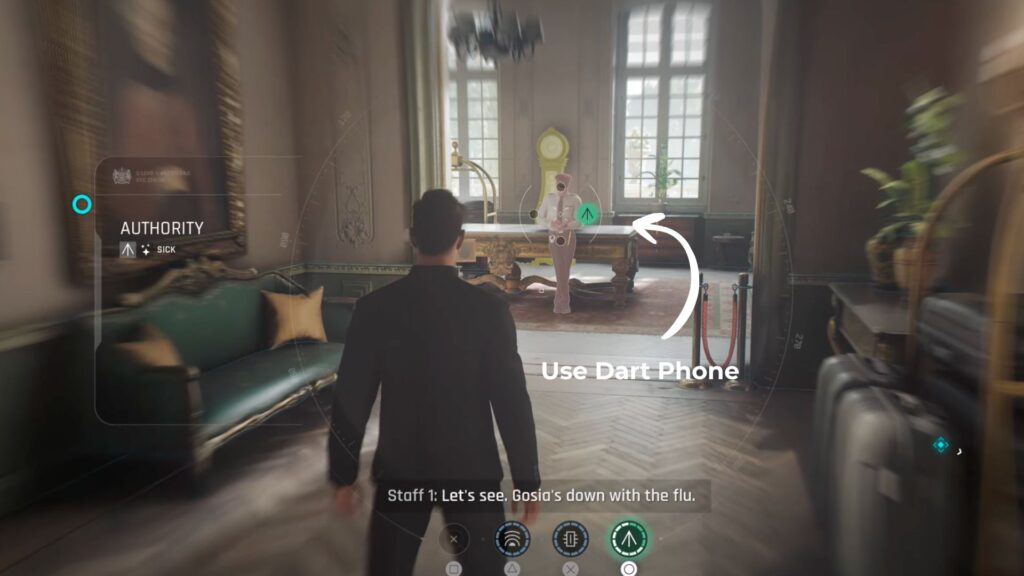
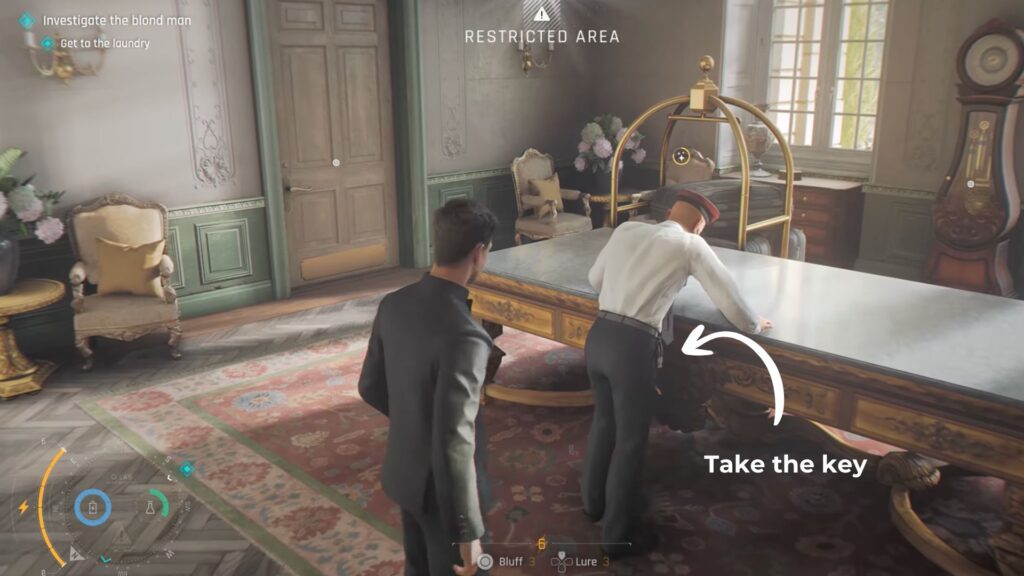
Use your Dart Phone on the security guard nearby to make him feel disoriented, then take the Staff Key from his pocket. Use it to unlock the Manager’s Office.
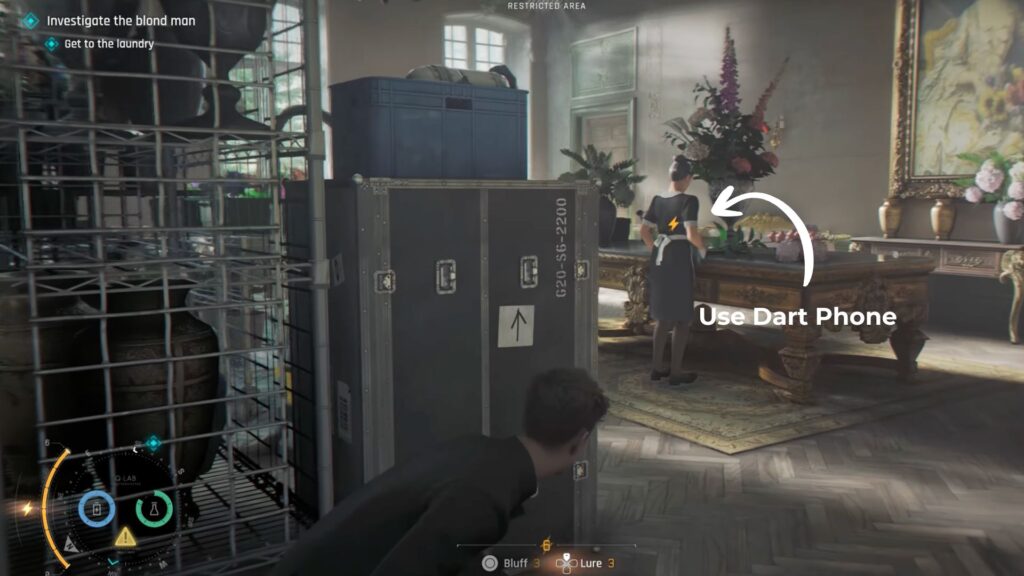
Staff are still inside so stay low. Use the Dart Phone on the first housekeeper standing near the large table, then crouch and move to the wooden door in the corner of the room.
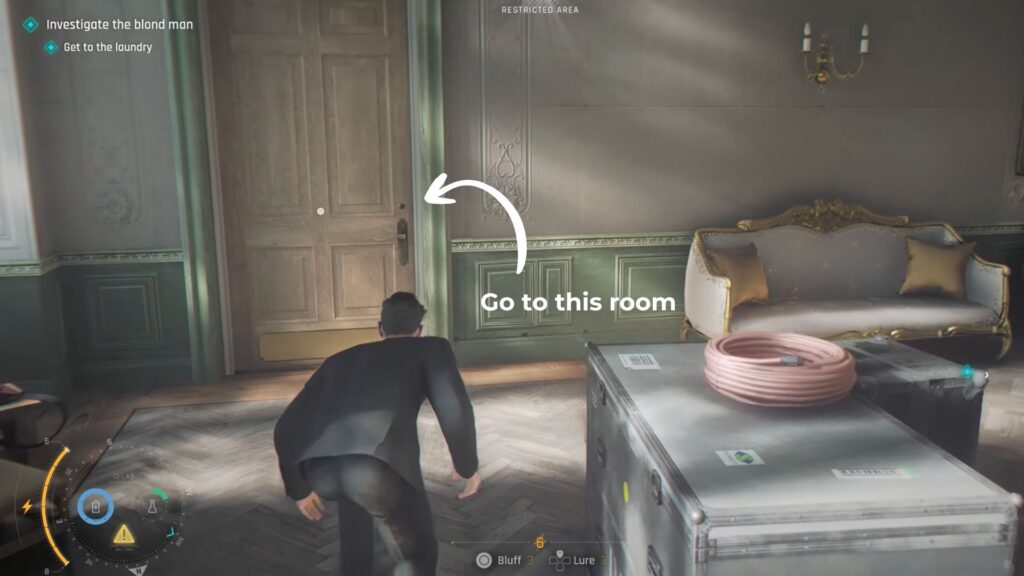
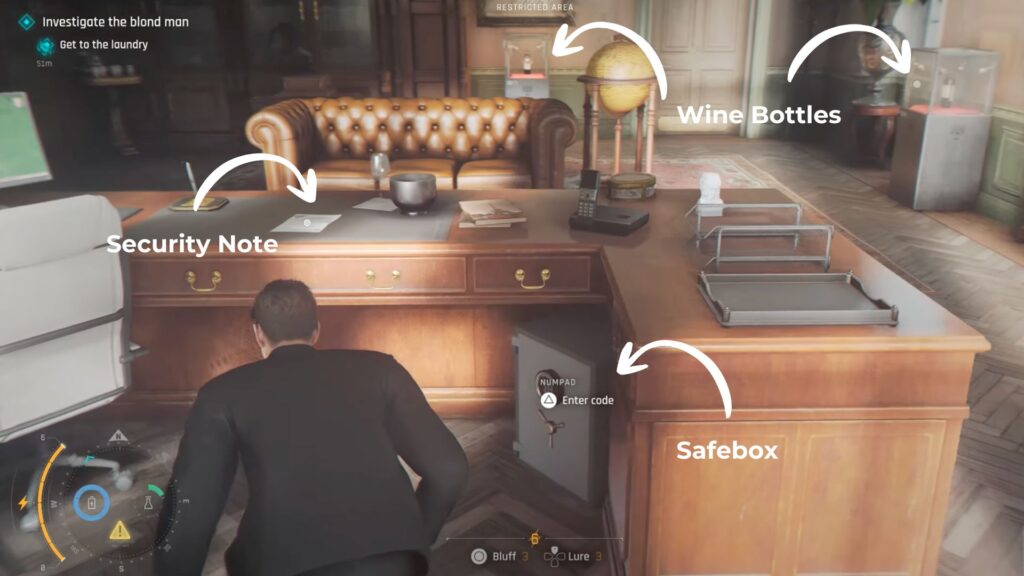
Inside you can inspect several items:
- Chateau de 46 vintage wine from 2014
- Vino Sacramental vintage wine from 1952
- Ruiandske Modre from 2008
- A security note on the desk showing Laundry Code 1805
- Wine Tasting Notes inside the console table on the left side of the room
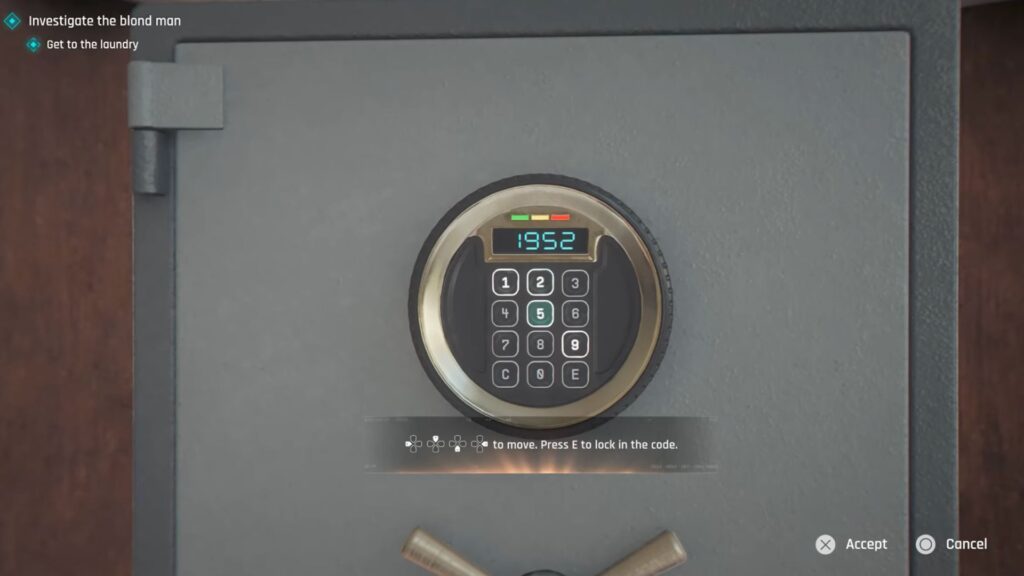
Go to the manager’s desk and look underneath it for a safe. Enter the code 1952 to open it and take the Cellar Key from inside.
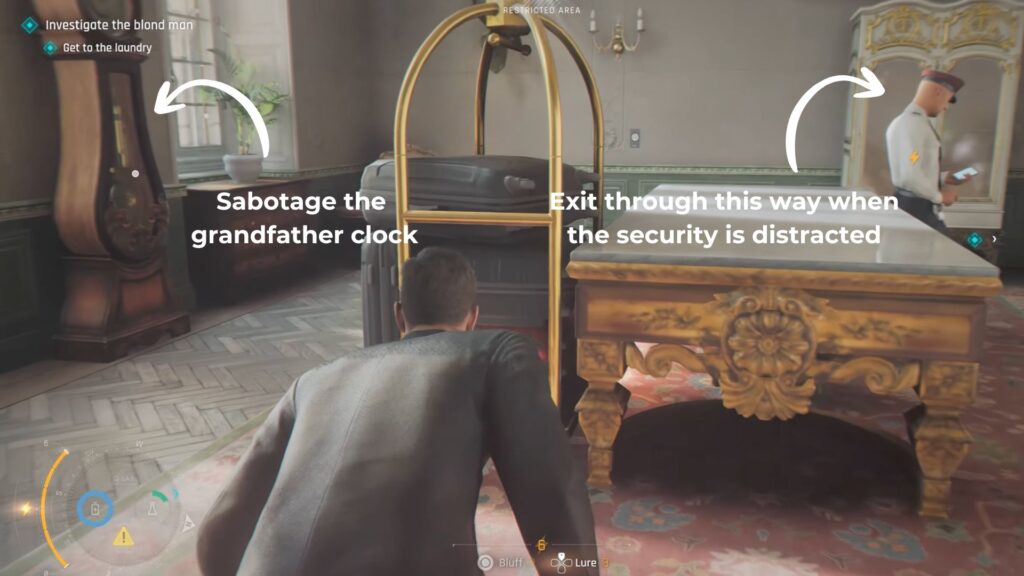
Head back out through the other door which connects to the small area where the first security guard is standing. Sabotage the grandfather clock on the left to distract him and slip out.
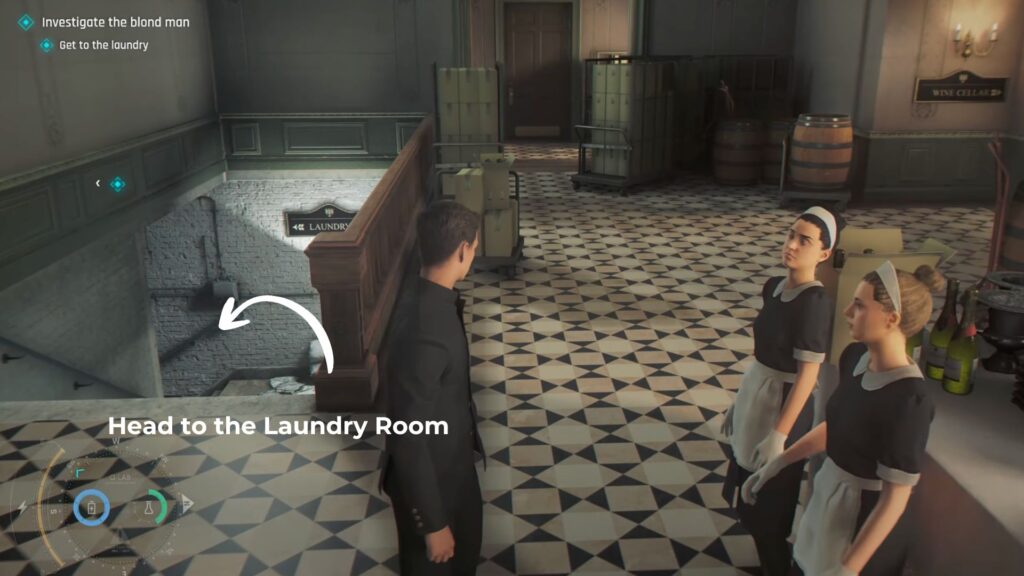
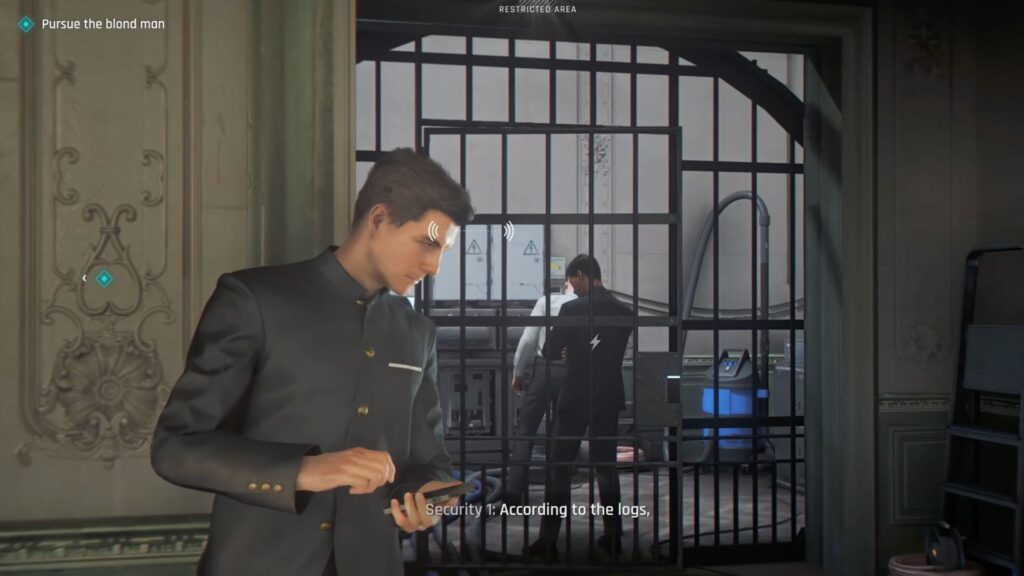
Return to the Laundry door and enter the code 1805 to unlock it. Head down the stairs on the left toward the laundry room.

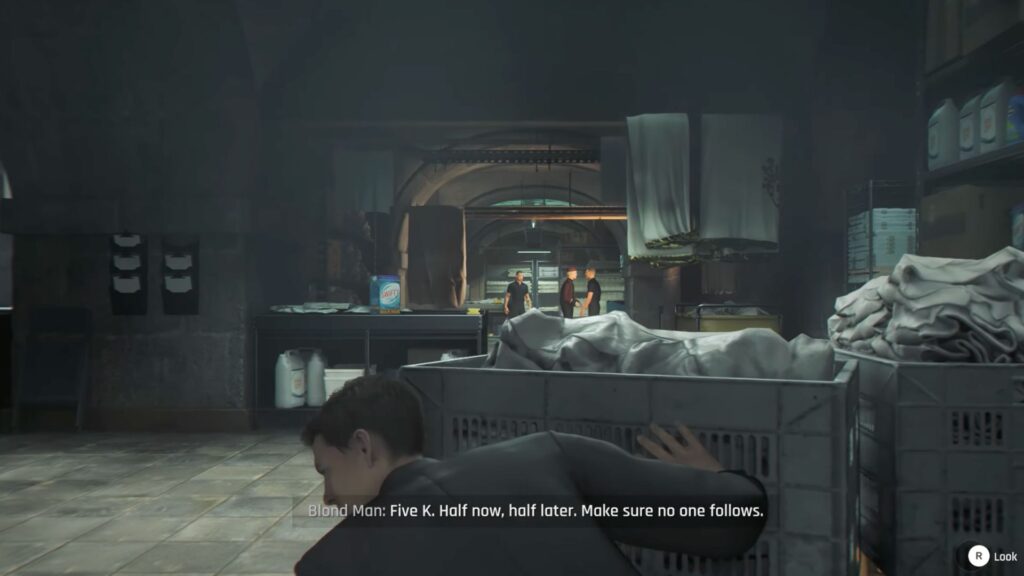
The Laundry Room
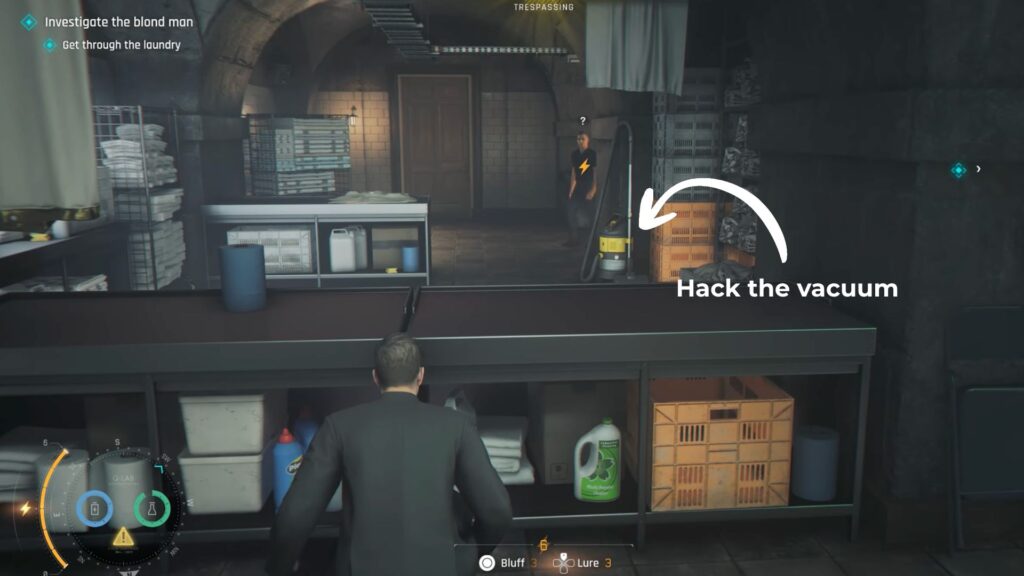
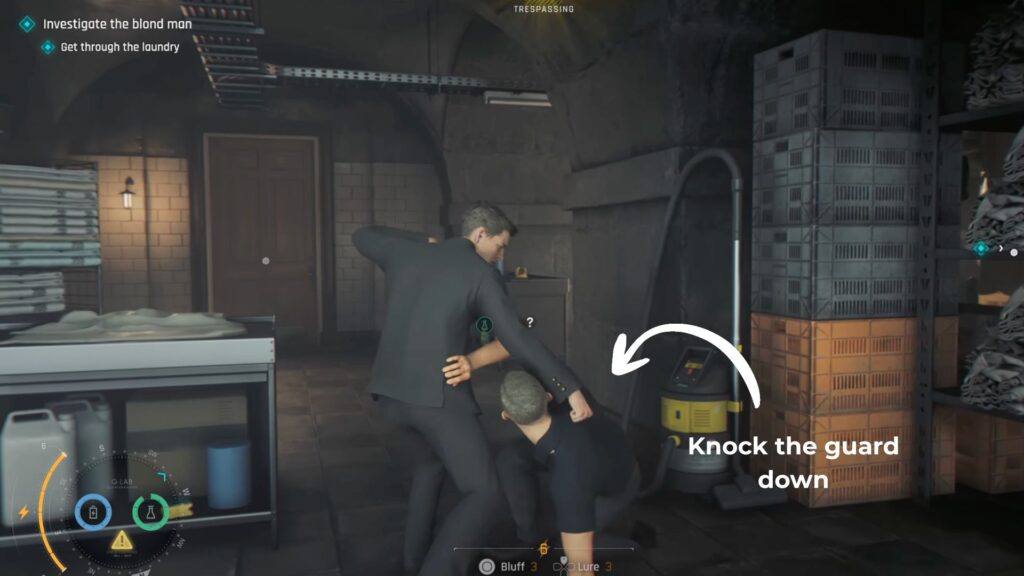
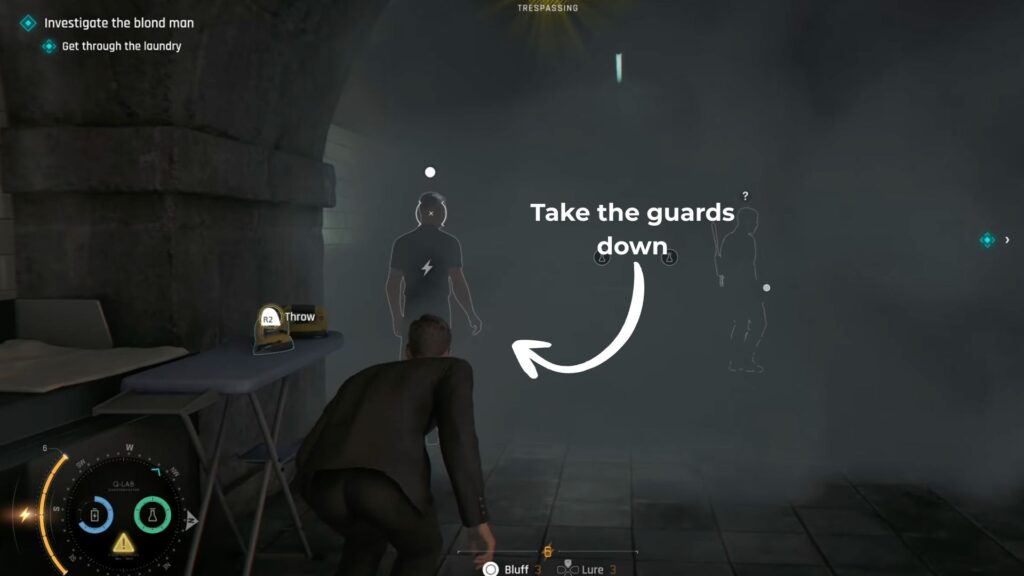
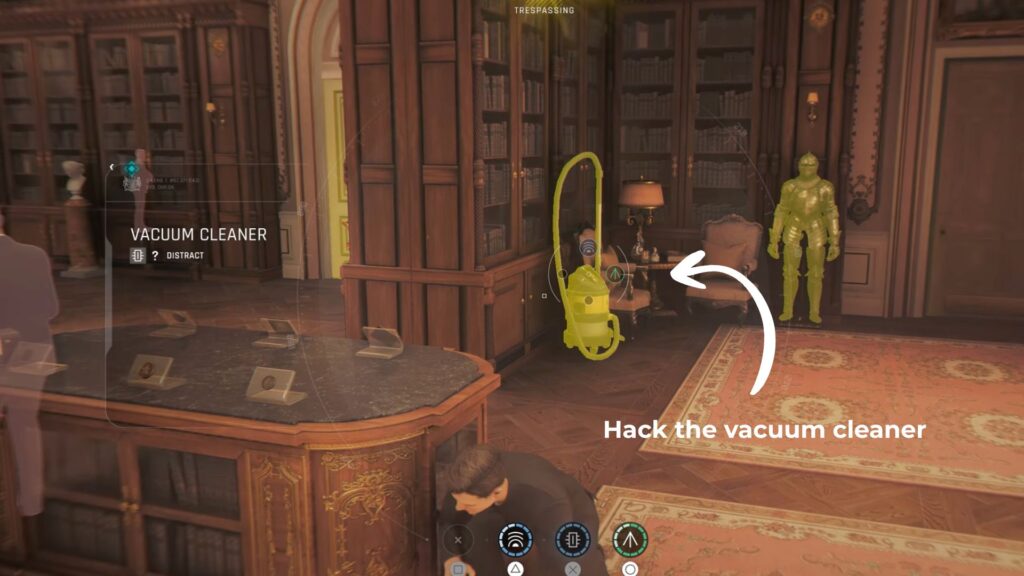
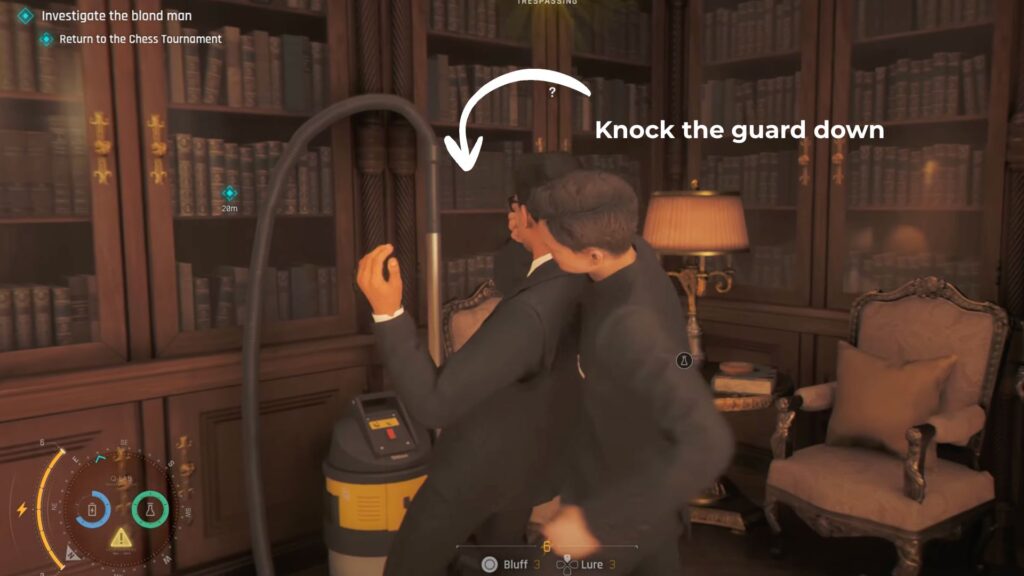
The blond bellhop is visible talking to two other men. These guards cannot be bluffed so you will need to distract them. Cross to the left side of the room and hack the vacuum cleaner, then quickly get back to the entrance area and hide behind the tables.
When one of the men comes to check the noise, take him down. When the second man notices his partner is gone and comes to look, take him down too.
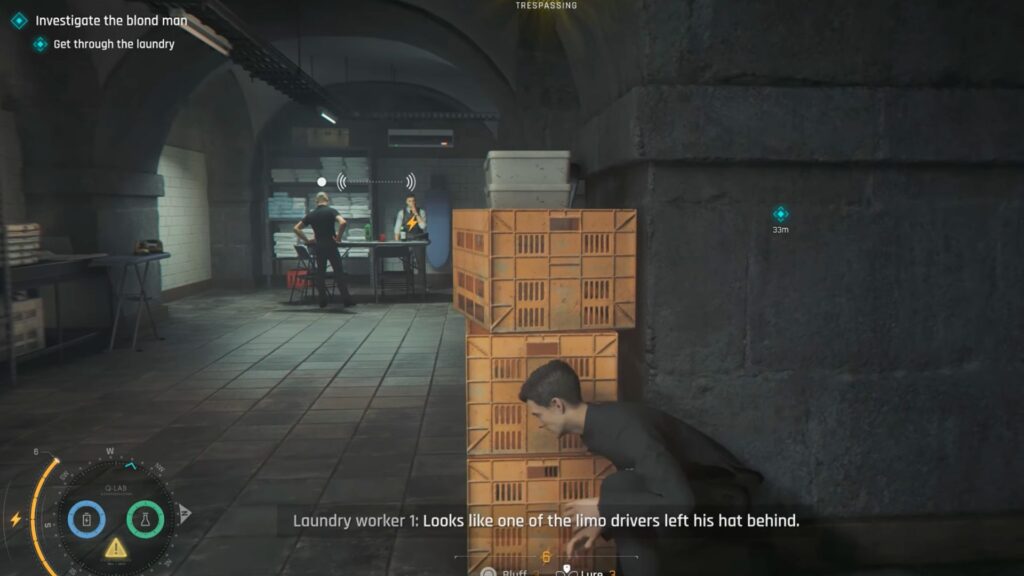
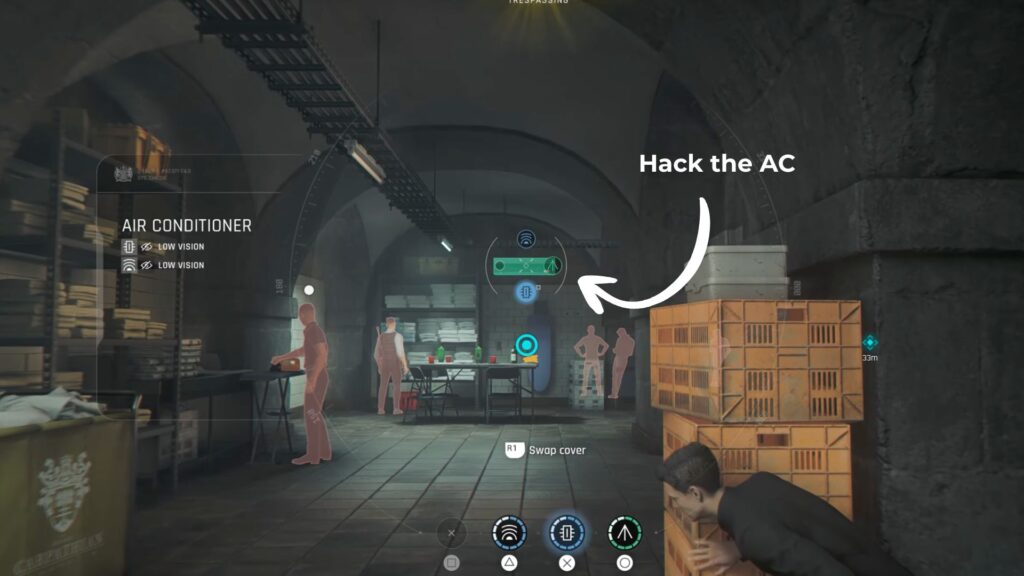
Continue left and hide behind the orange colored containers to overhear the laundry workers talking. You pick up your first clue, the Chauffeur Hat. Hack the AC above both workers to create fog and take them down one at a time.
The remaining workers will now be more alert. Keep your Q-Lens active to track their positions through walls. There are quite a few of them in this area.
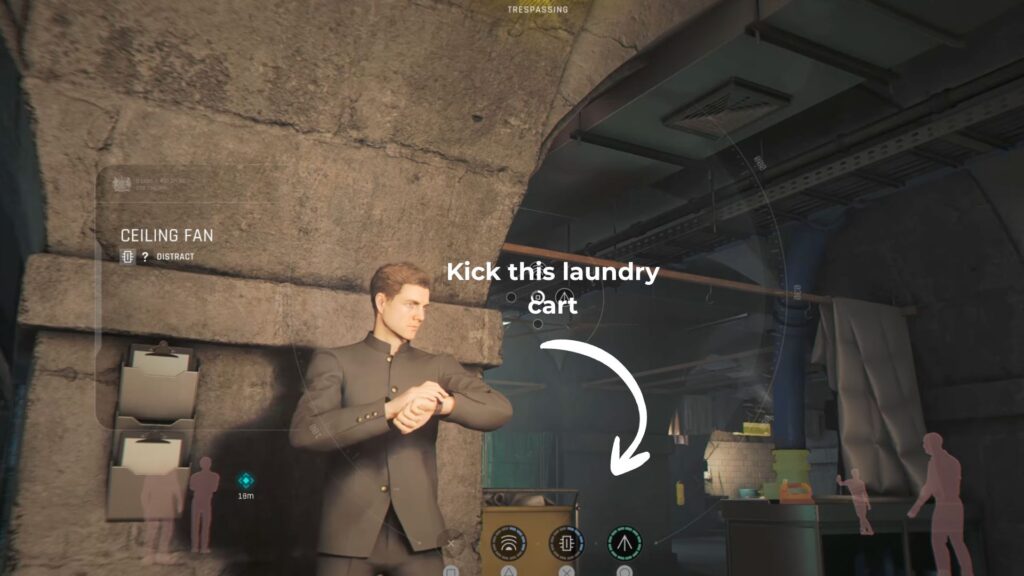
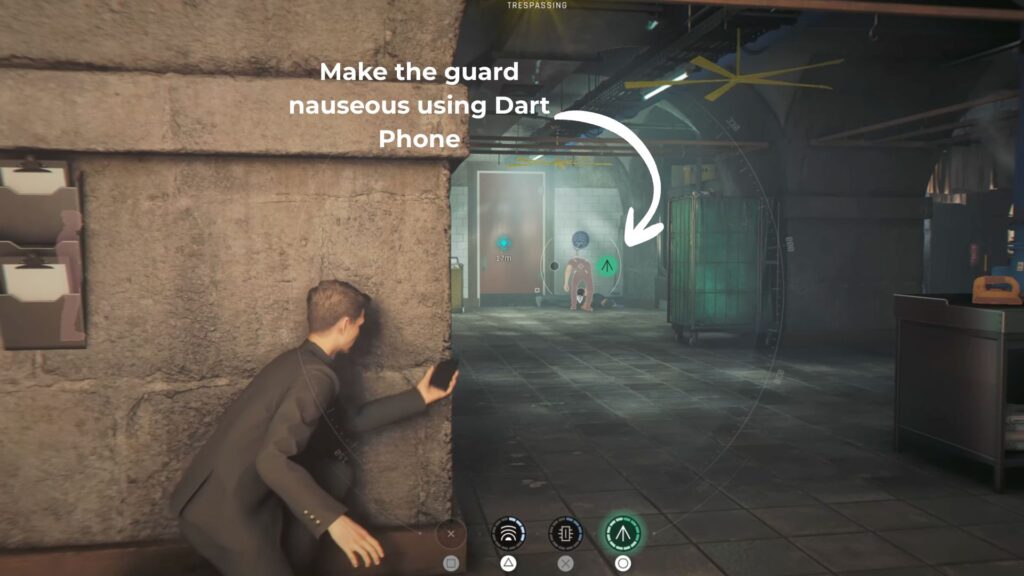
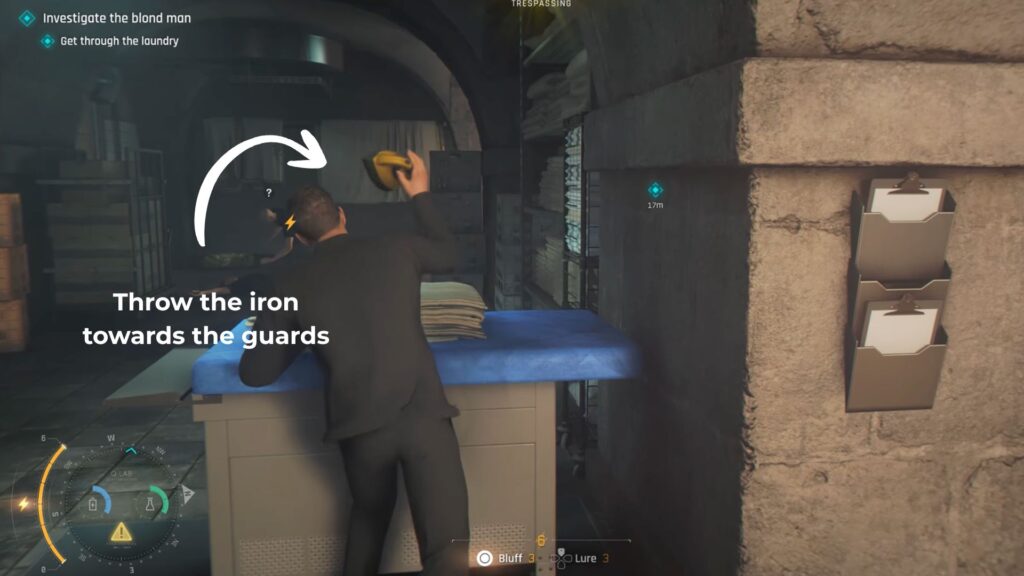
Right close to one pillar, you can see a laundry cart. Kick it towards the guard standing in front of the red door. When his friend comes to check, use the Dart Phone to make him nauseous.
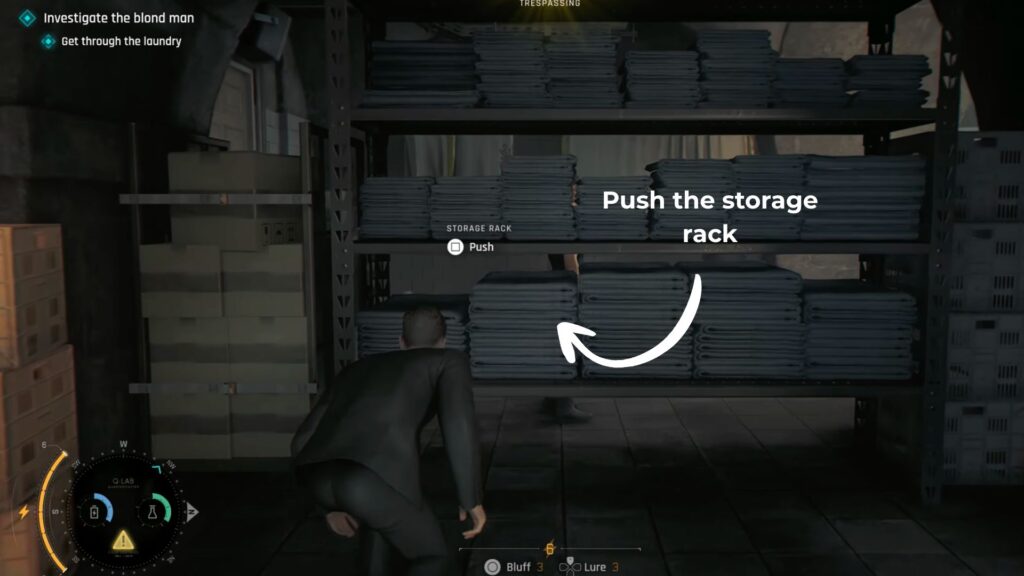
Push a storage rack into another worker to take them down. When the nauseous worker comes to look, throw the iron from the nearby table and take him down. You can now enter the red door.
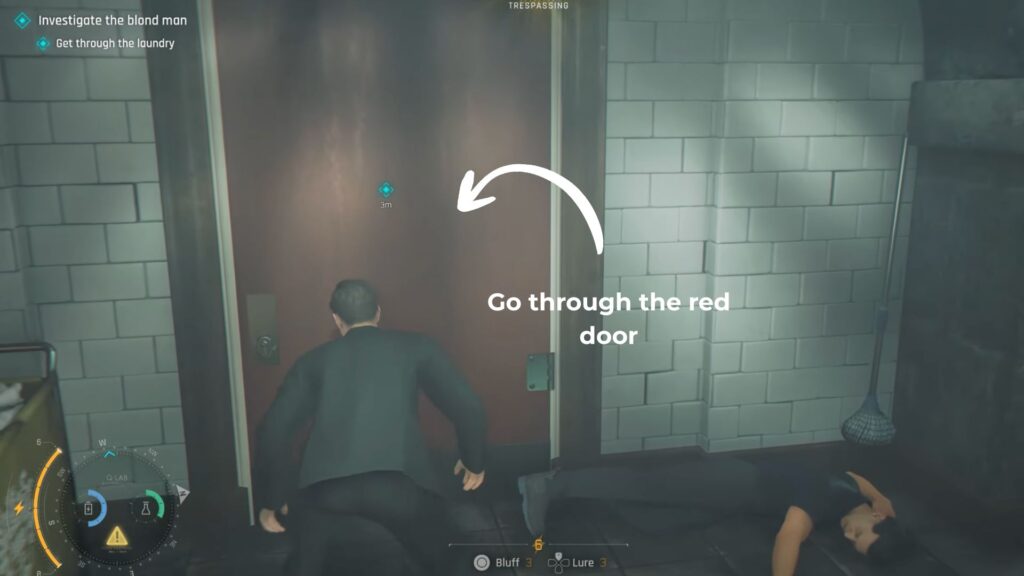
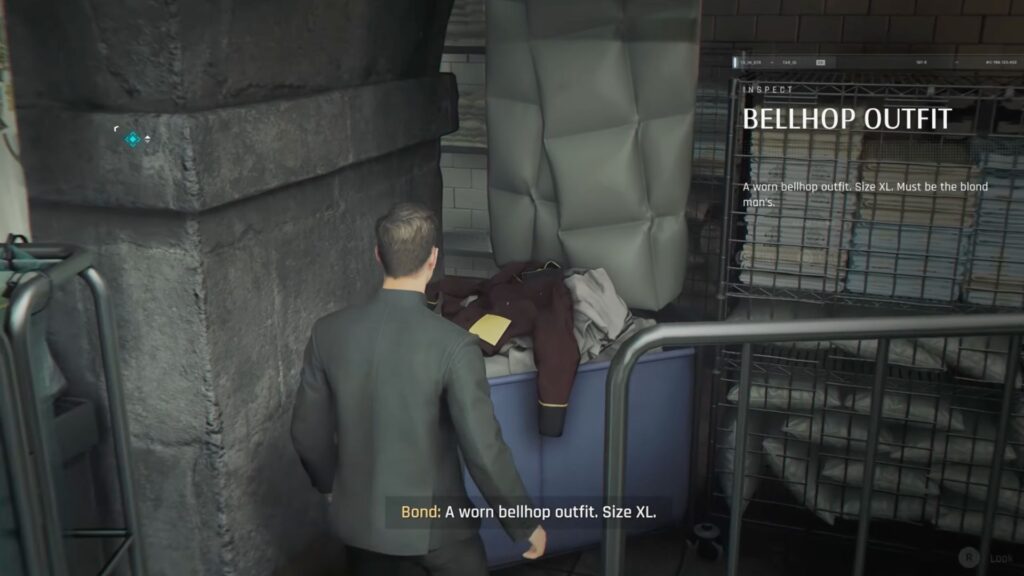
Unfortunately, the bellhop is already gone. Inspect the room to find:
- A Bellhop Outfit in XL size with a paper in the pocket showing the number 206
- A Laundry Bag in XL size at the back of the room, empty
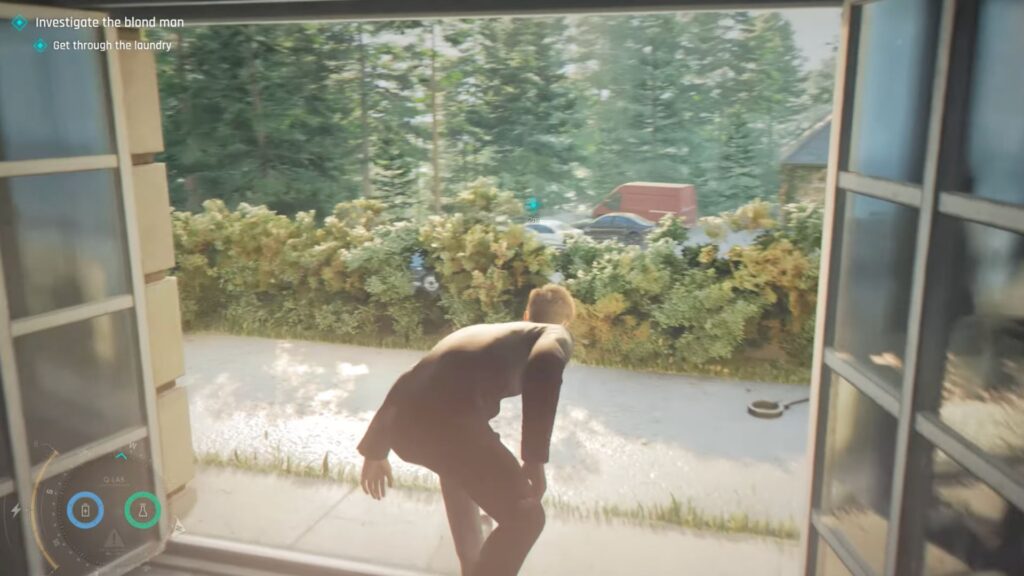
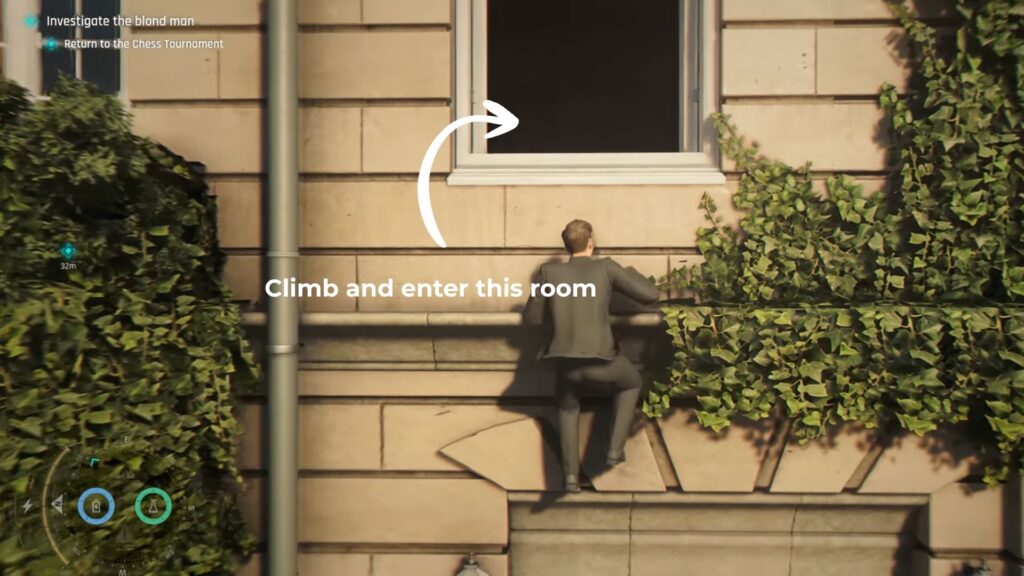
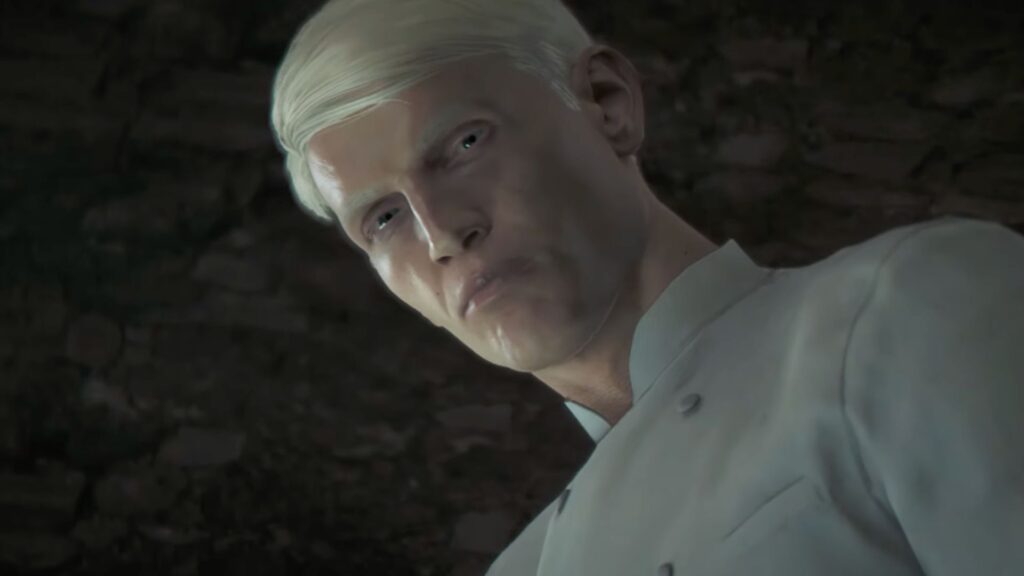
The blond man has already changed his disguise. There is a wooden door near the laundry bag that you can kick open. It leads to an open window. Go through it.
Second Floor
Climb the pipe you will see on the wall, and then enter the room on the second floor. Two guards are inside so stay crouched and move to the room on the left.
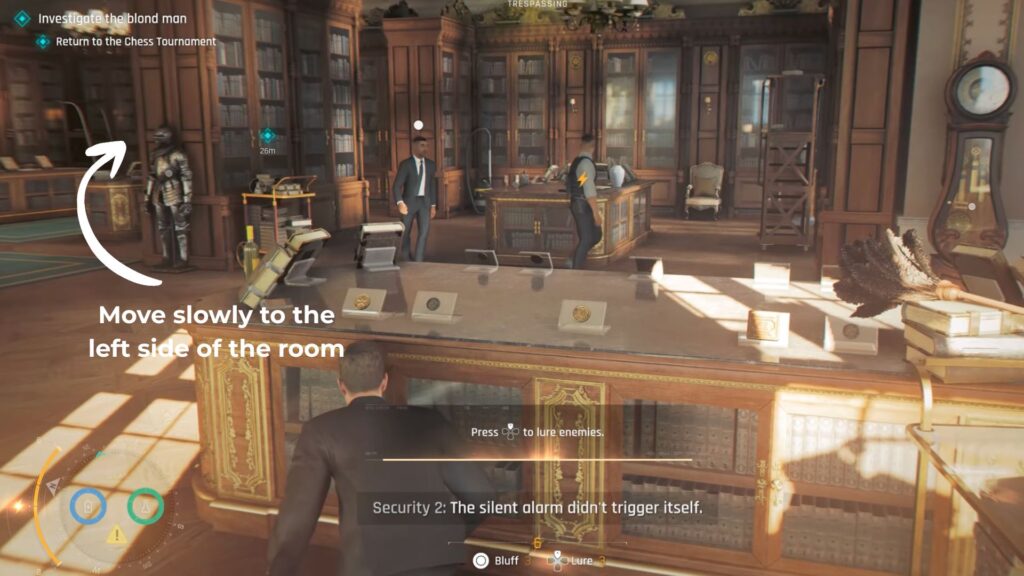
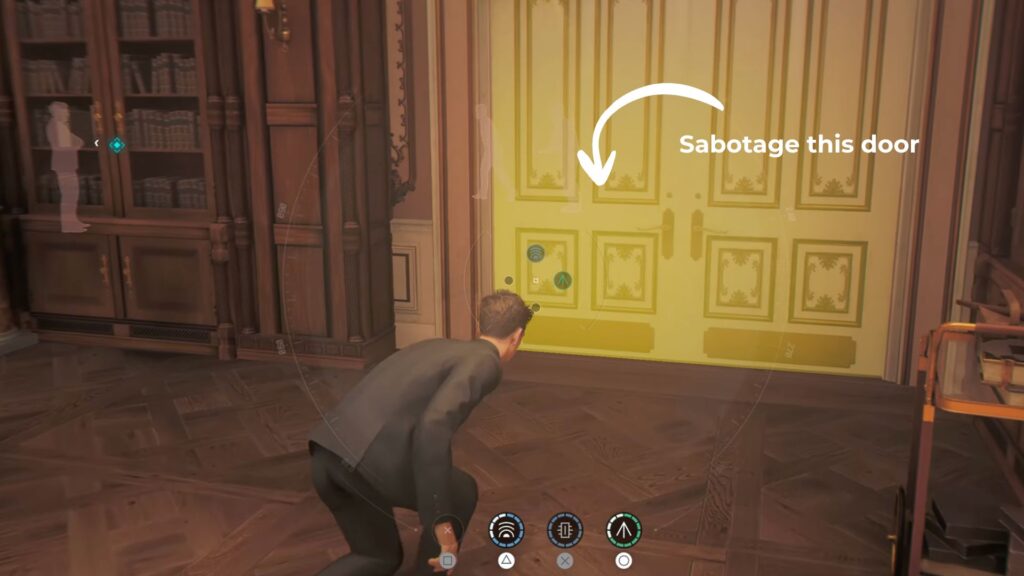
After you enter the room, close the door behind you and sabotage it so no one can follow. Two more people are standing inside this room.
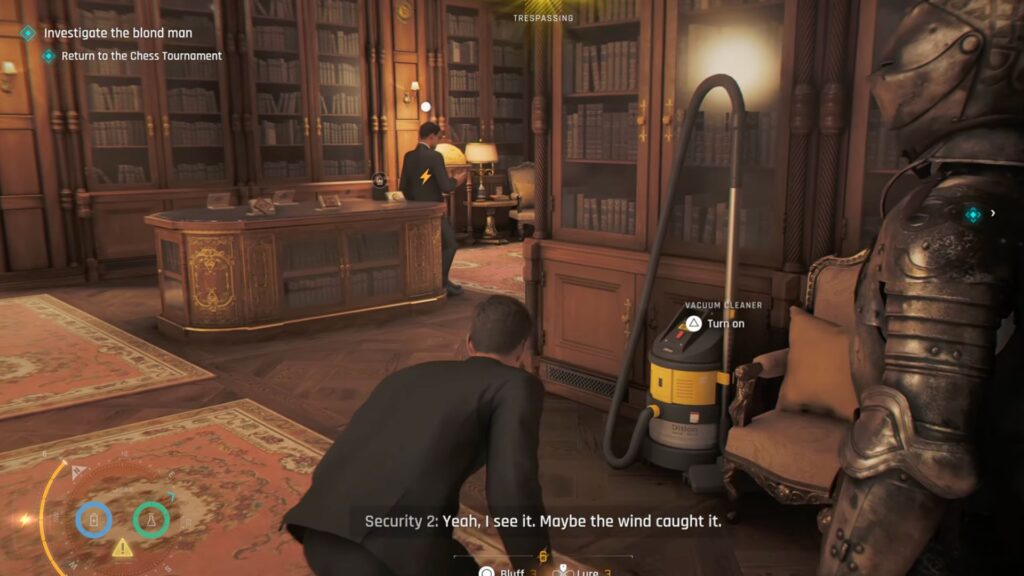
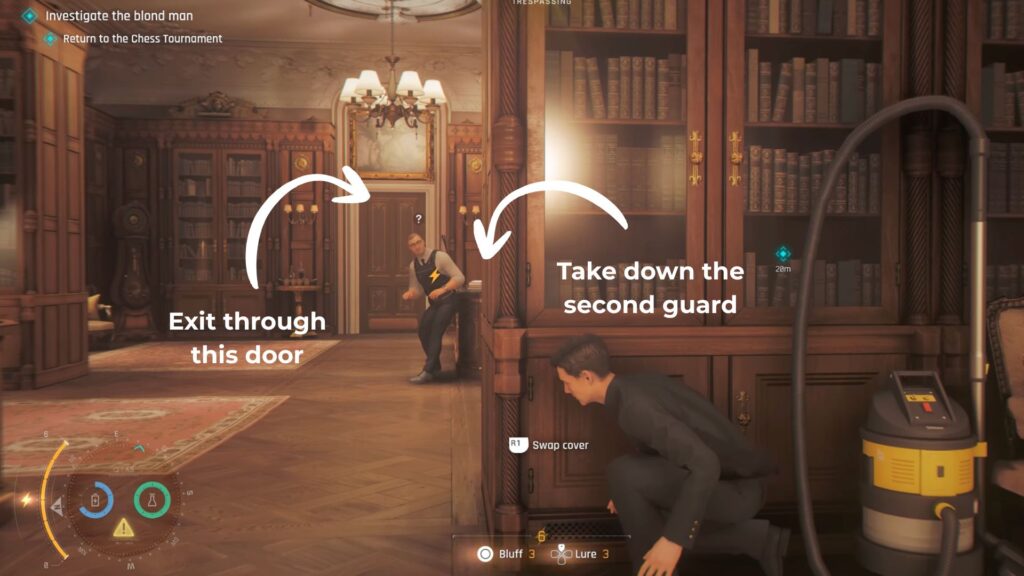
Hack the vacuum cleaner to draw one of them over and take him down when he gets close. Take down the second one the same way.
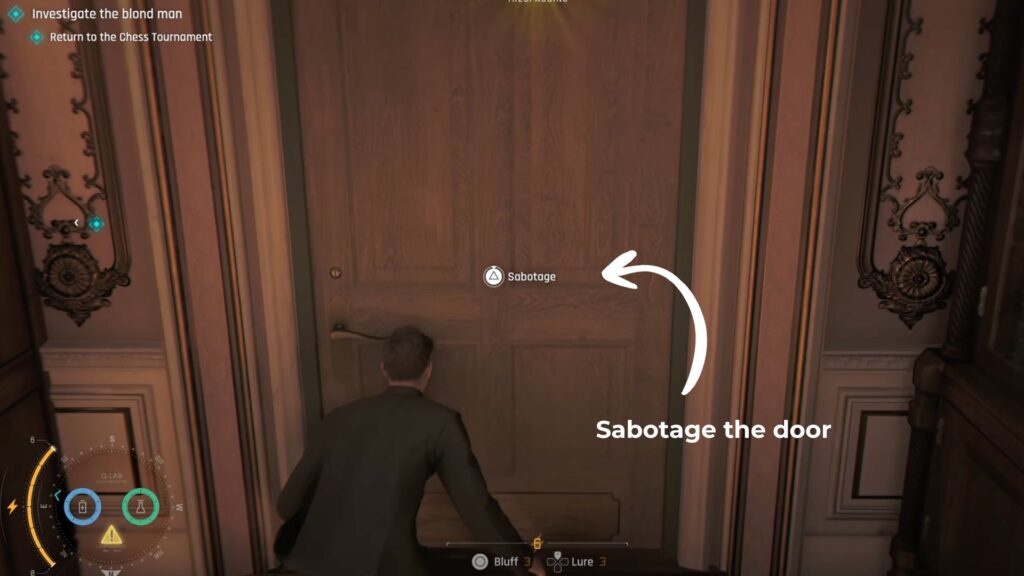
Sabotage the large white door on the right to keep it sealed, then continue into the next room. Completing this section unlocks the Silent Study challenge.
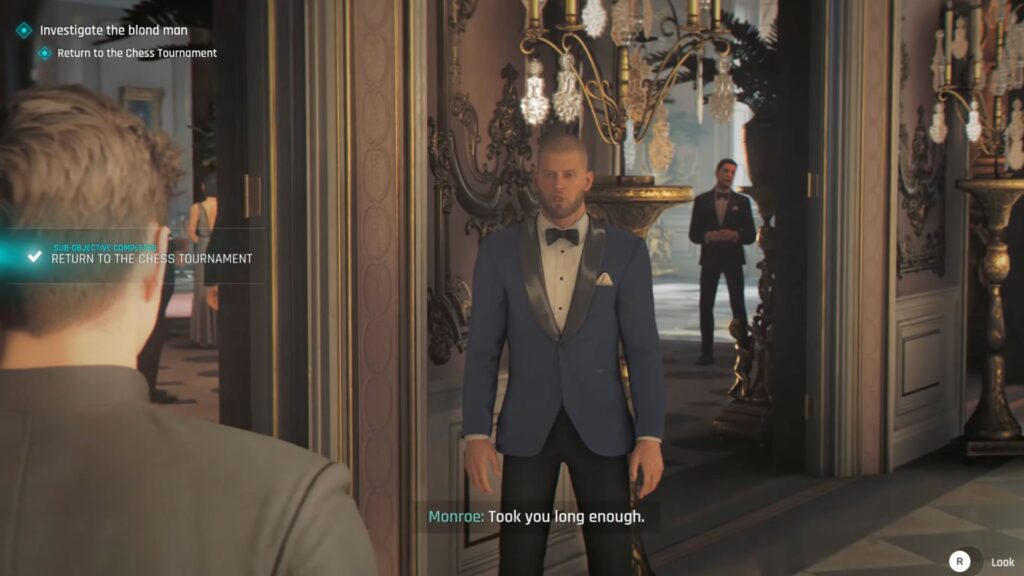
Coming back out you will return to the chess tournament area where Monroe is waiting. He tells you he spotted a tall blond man in a suit going by the name Locke, heading upstairs from reception. Your new objective is to Search the Hotel.
Tracking Locke
Speak to the receptionist again. She tells you the name is Joseph Locke, an insurance consultant from Vienna staying in room 206 on the second floor.
On the way upstairs you overhear two staff members talking about Chief Kovac, who apparently went up to room 206 with the man from the insurance company.
Head upstairs. The left wing has a security guard at the entrance. Hack the vacuum cleaner and the grandfather clock to distract the housekeeper and the guard in the aisle.
When you get close to the first housekeeper, you will be able to snatch a key from her, but she only has the key for room 205. Keep going until you find another housekeeper near a food cart. Talking to her gives you information about the guests on the second floor including a couple, a woman, and a man with a strange accent who is Mr. Locke. The rooms are not connected inside but the balconies share a ledge.
When you check the door to room 206, the lock has already been forced and keycards will not work. So you need to go out from the window at the end of the aisle and climb out.
Hang on the ledge and jump across the hanging plants. Wait for the couple on the next balcony to go inside and keep going.
Room 206’s window is open so climb through it. The room has been completely turned over. Inspect the room to find:
- A keycard holder on the seat in front of the bed, no keycard inside
- A security protocol document on the dressing table
- A copy of Bratislava Weekly on the bedside table, stamped by the hotel, with a story about the mysterious death of a scientist in Orlando
- A wool suit in XL size behind the kicked-open bathroom door, matching Locke’s disguise
- Chief of Security R. Kovac’s wallet lying open inside the fireplace
Searching the room unlocks the Elementary challenge.
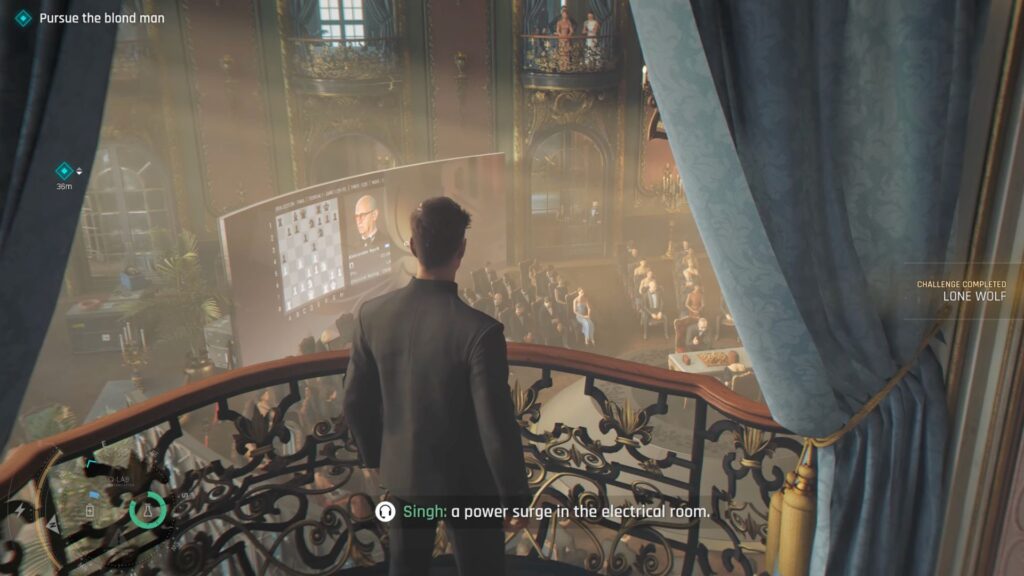
A knock at the door triggers a cutscene. Housekeeping has arrived so bluff your way out. The scene cuts back to the chess tournament area and the Lone Wolf challenge completes. Your next objective is to pursue the Blond Man.
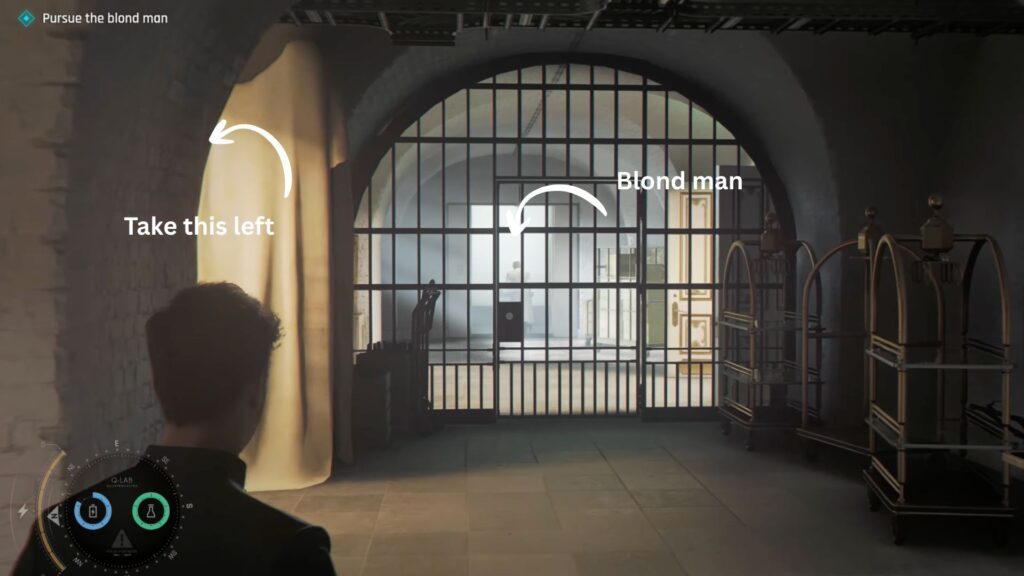
Pursuing the Blond Man
Singh reports through your earpiece that there has been a power surge in the electrical room. Head toward the right wing. Staff are talking about the sound of breaking glass in the study room.
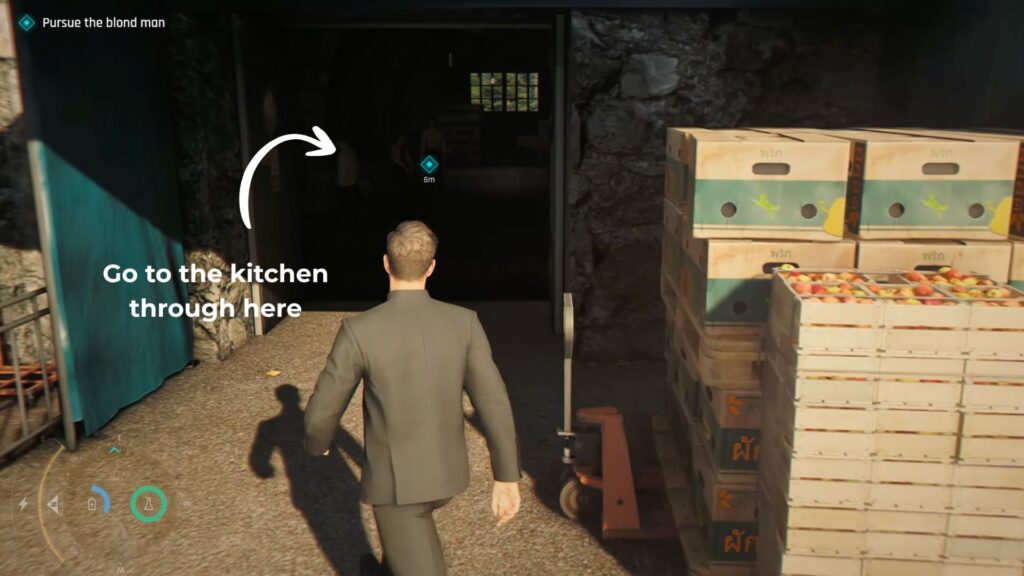
Continue down to the bar lounge and instead of going through to the piano lounge, take the room on the right behind the blue curtain.
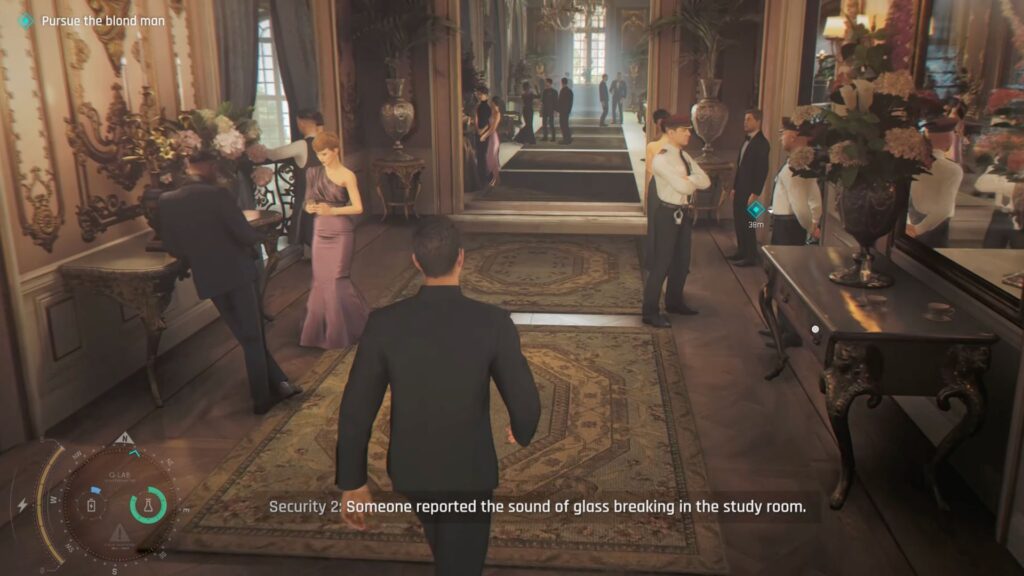
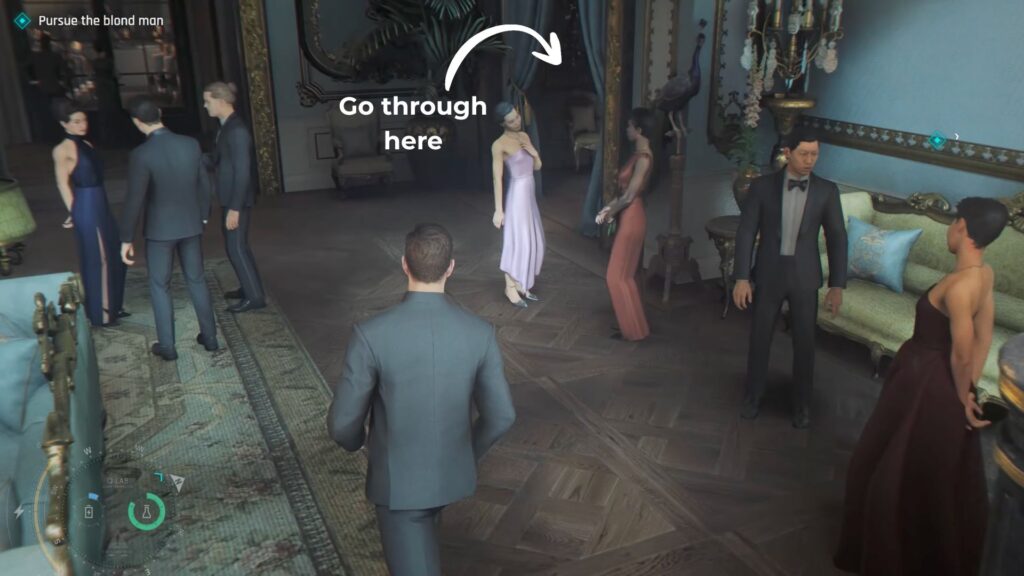
Continue to the next room, an aisle with windows running along it. Stand close to the first door and listen in. The guards are talking about the power cut, the security system being down, and someone entering the building just before the surge.
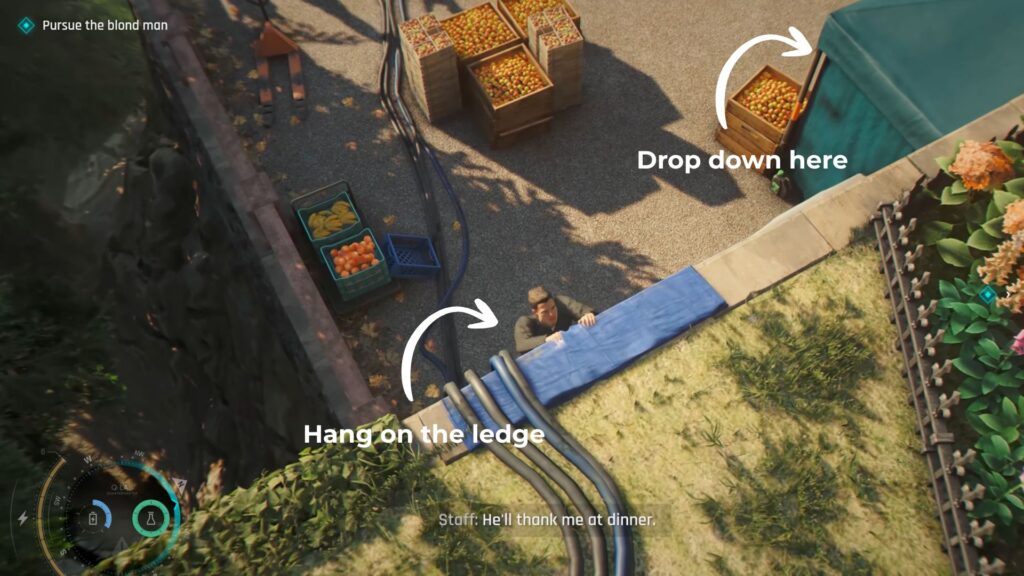
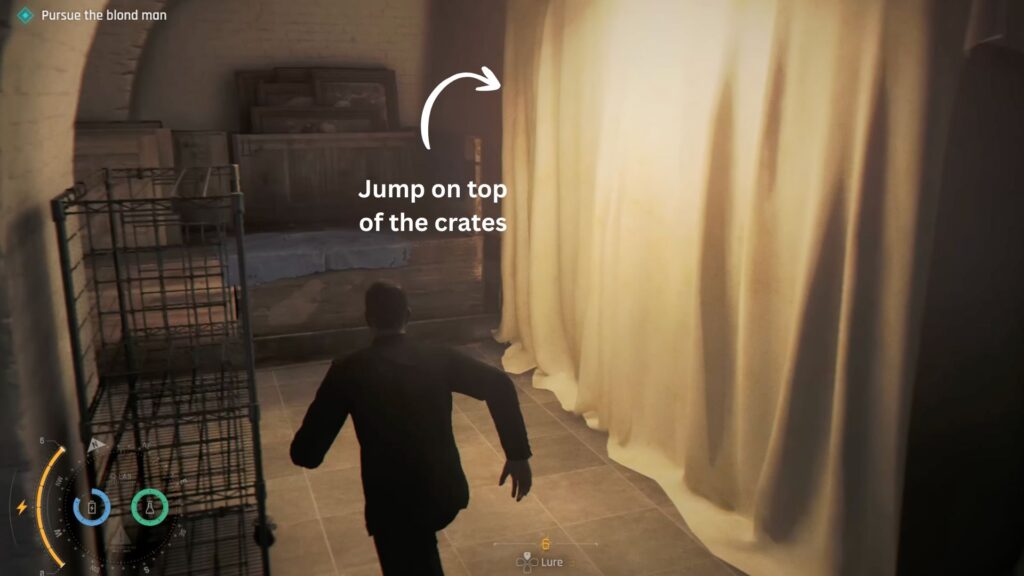
Go out through a window onto the back lawn. You will spot the blond man pushing a cart loaded with crates. Walk to the edge of the lawn, hang on the ledge, and drop into the building below.
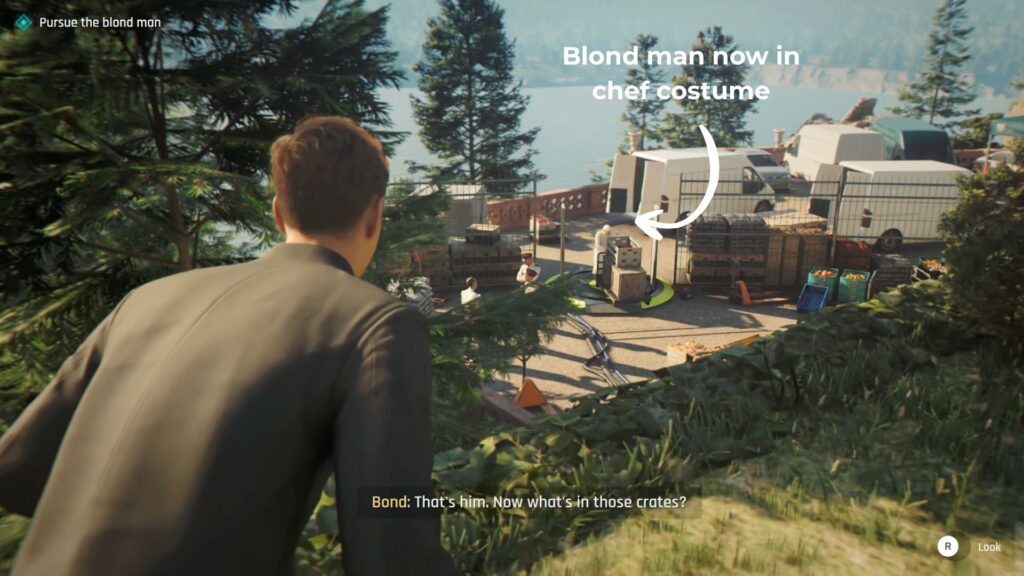
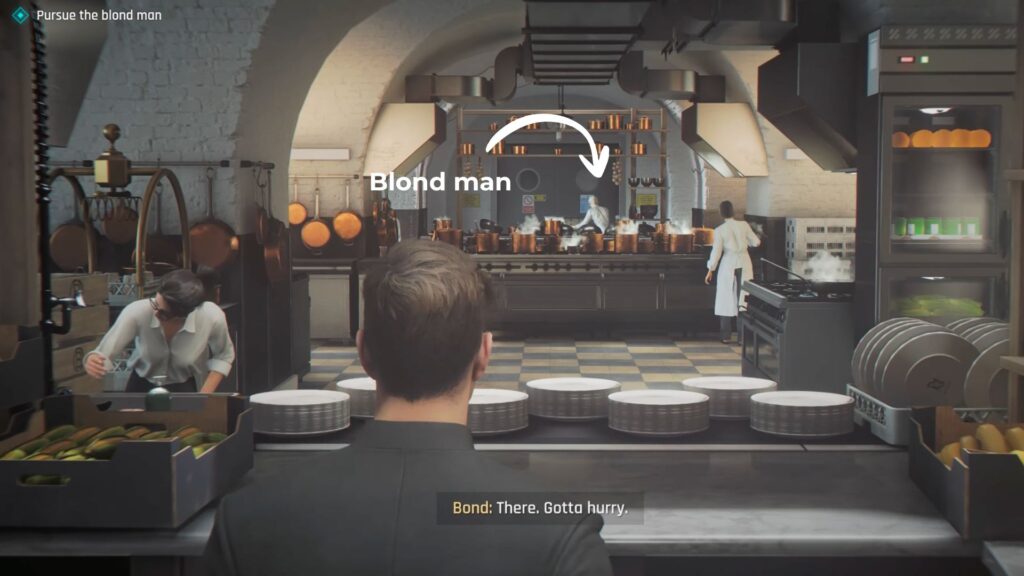
Continue through the kitchen where you catch sight of him again. Monroe reports through your earpiece that the missing security chief has been found stuffed inside a laundry cart in the basement. Follow the direction the blond man, who is heading through the kitchen to the black door at the far end.

Opening the black door triggers a cutscene. A woman in housekeeper’s clothing, the same woman who opens room 206, is picking the lock on the door and then enters the room.
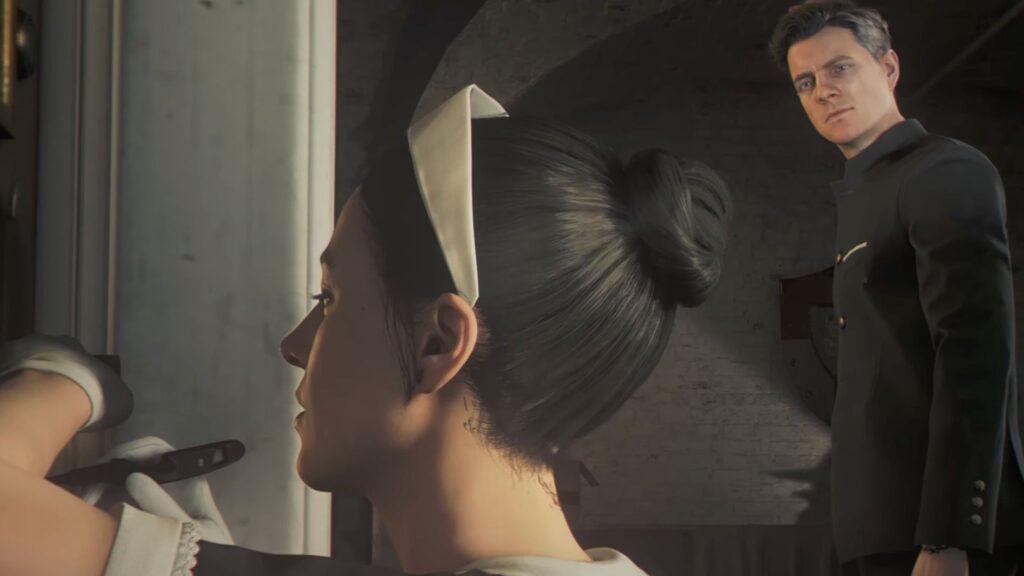
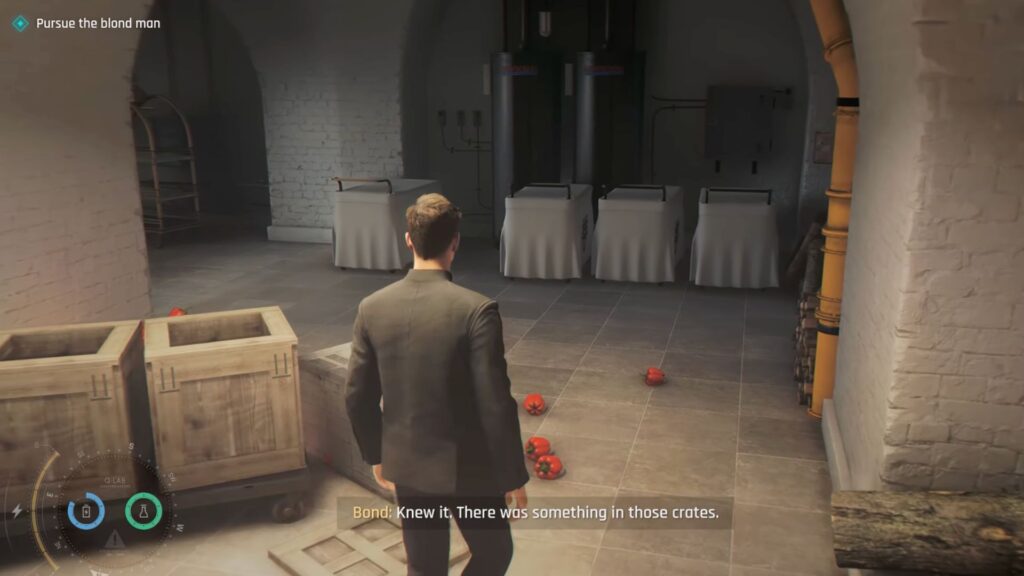
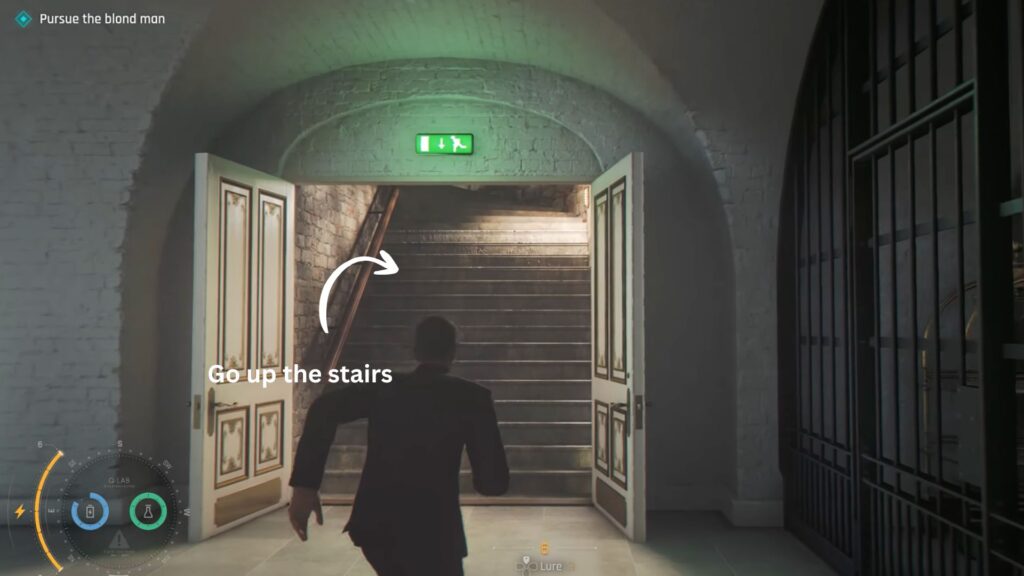
Bond follows her inside. Red pepper is scattered across the floor from the crates. Keep going until you reach a locked steel gate with the blond man stepping into an elevator on the other side. You cannot follow so find another way.
Climb the crates on the left of the gate and run up the stairs to try to reach him in time. When you get to the top he is already out of the elevator. Follow the path straight and you end up back in the Bar Lounge. Keep going through the Chess Tournament hall and into the dining room.
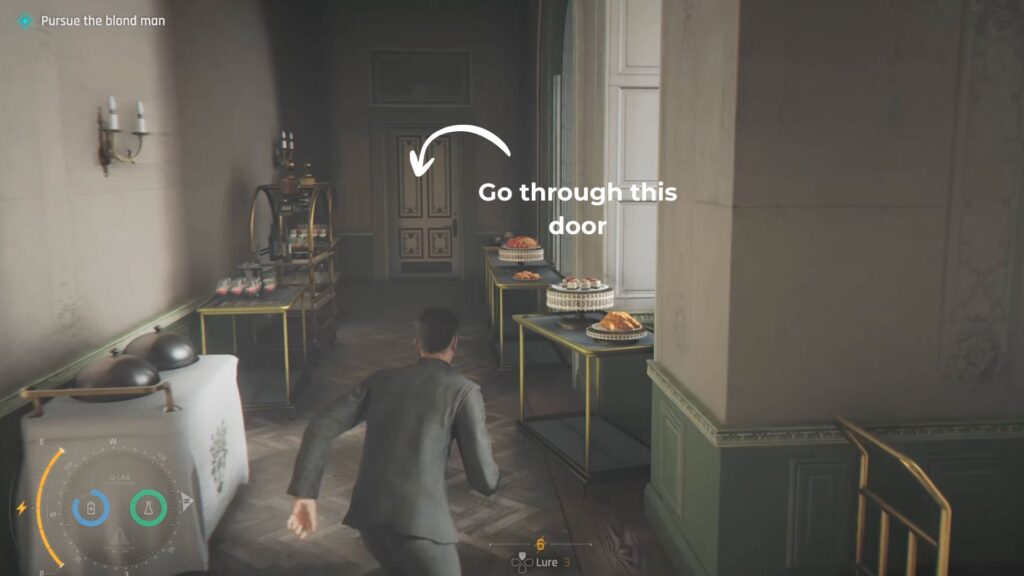
The Secret Passage
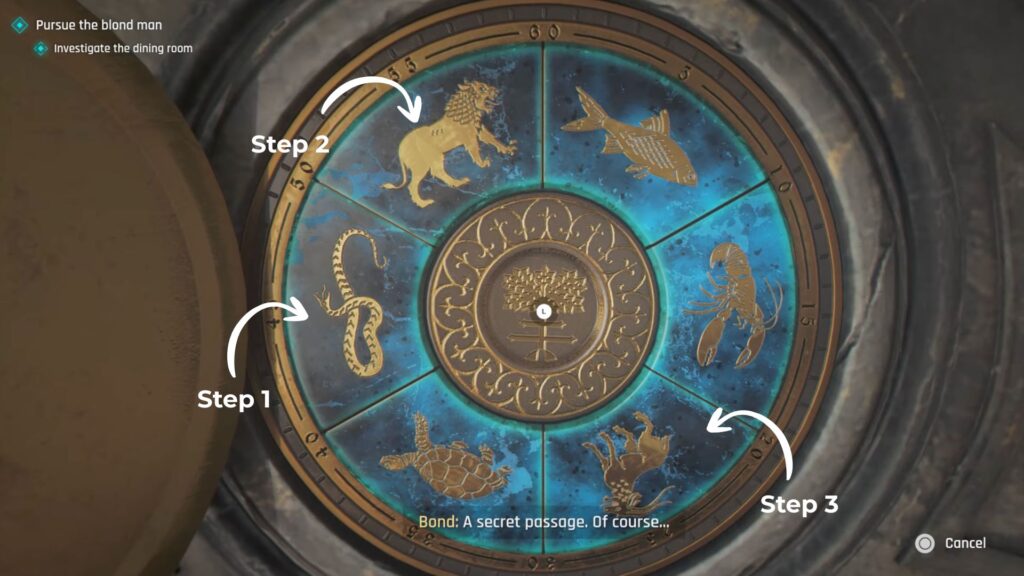
Search the dining room first and look at the flags on the walls of the dining room. They show a goat with a lion head and a snake tail.
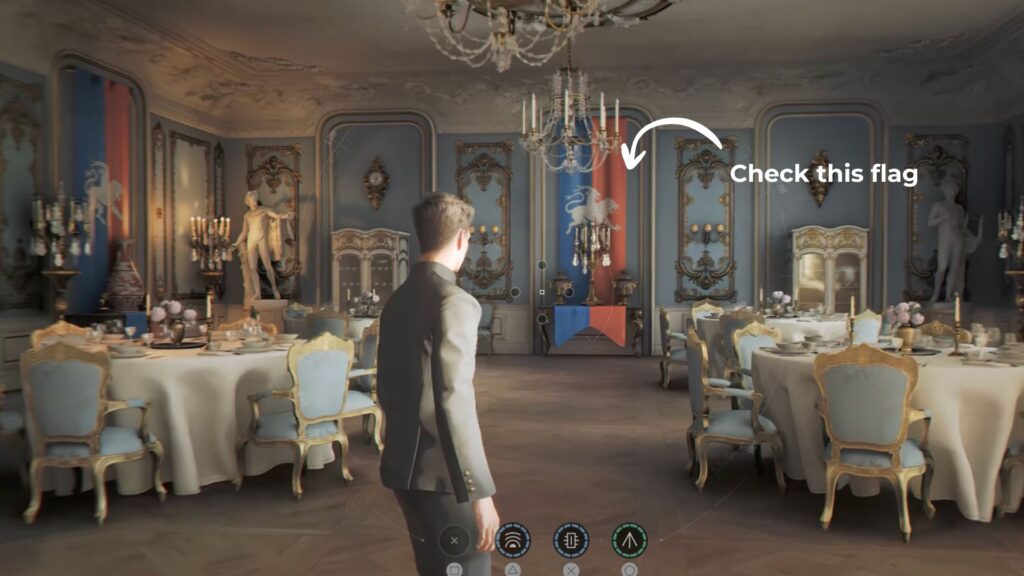
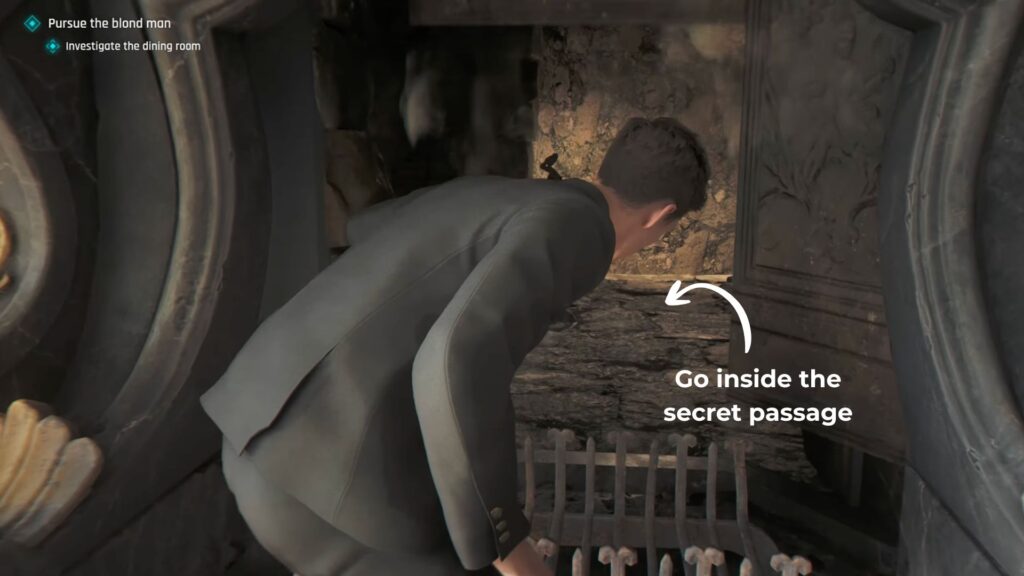
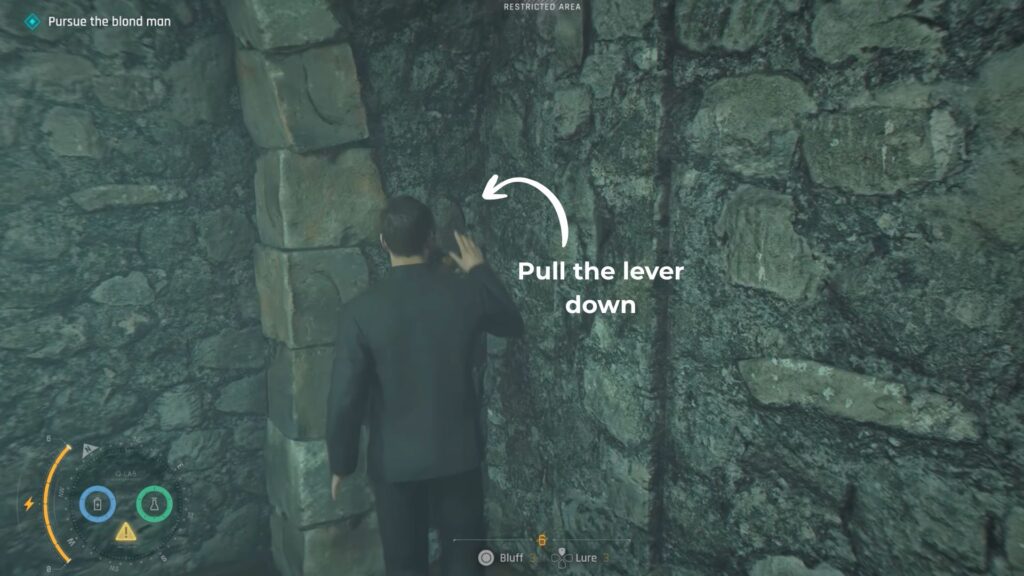
You will notice that above the fireplace there is a passage with six animal dials. Enter the code in this order: Snake, Lion, Goat. The door opens into a tunnel. Follow it down
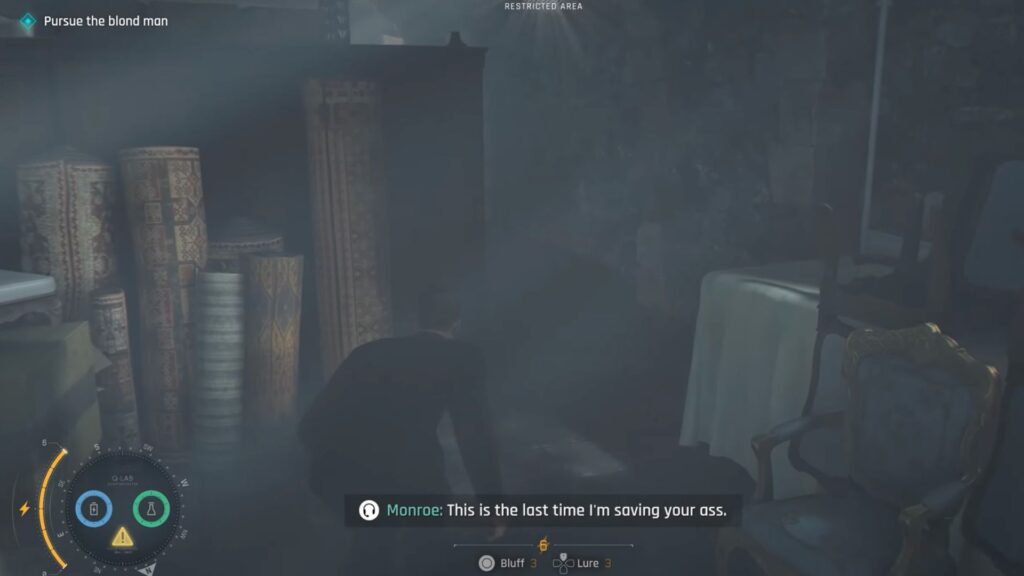
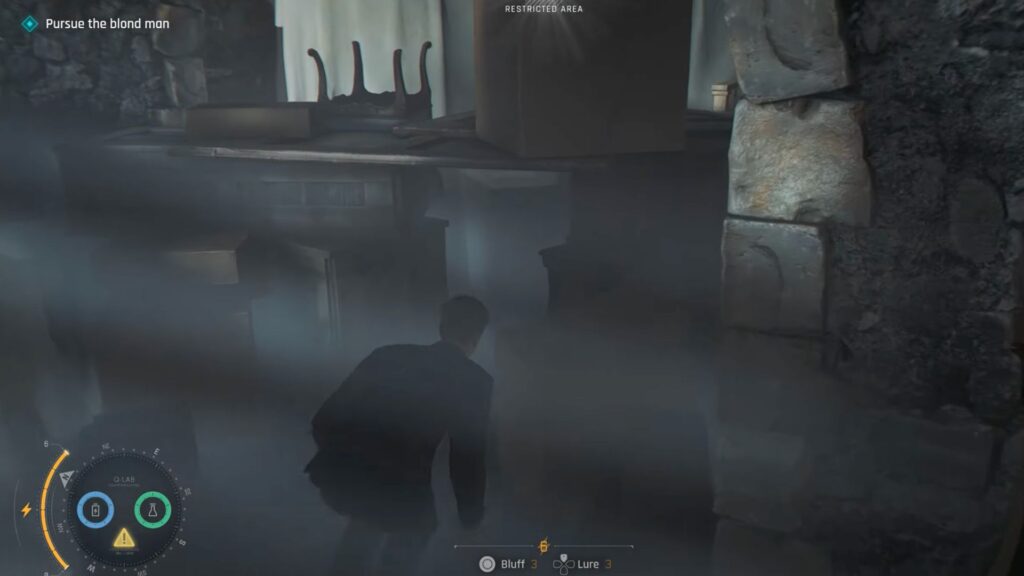
The underground area is full of objects. Keep moving through by crouching or jumping over everything.Keep going until you reach the end room with a lever on the wall. Pull it and the door opens.
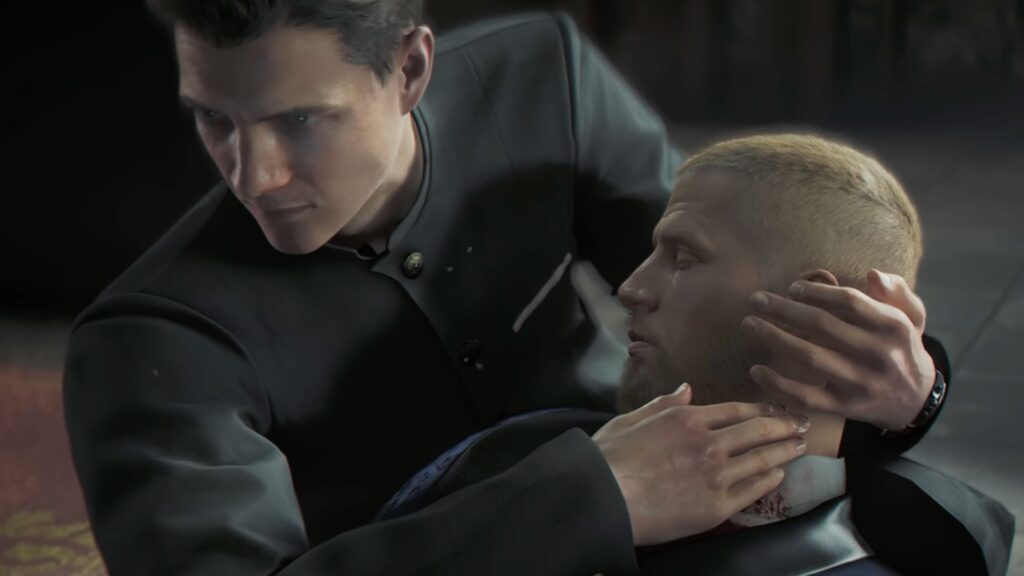
When it opens, something shocking happens. Monroe has been shot. Before you can react, the blond man kicks you from behind and you finally see his face.
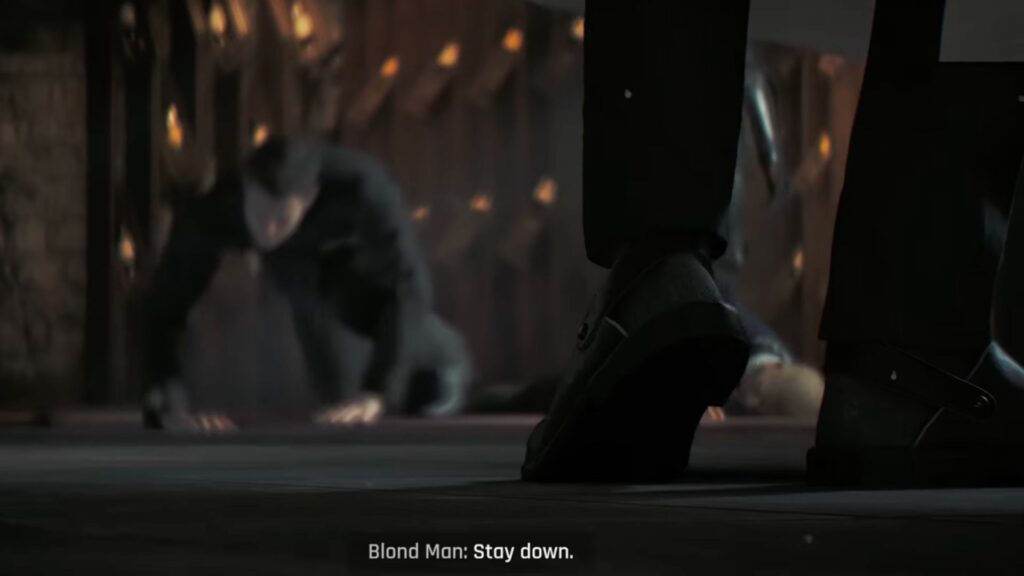
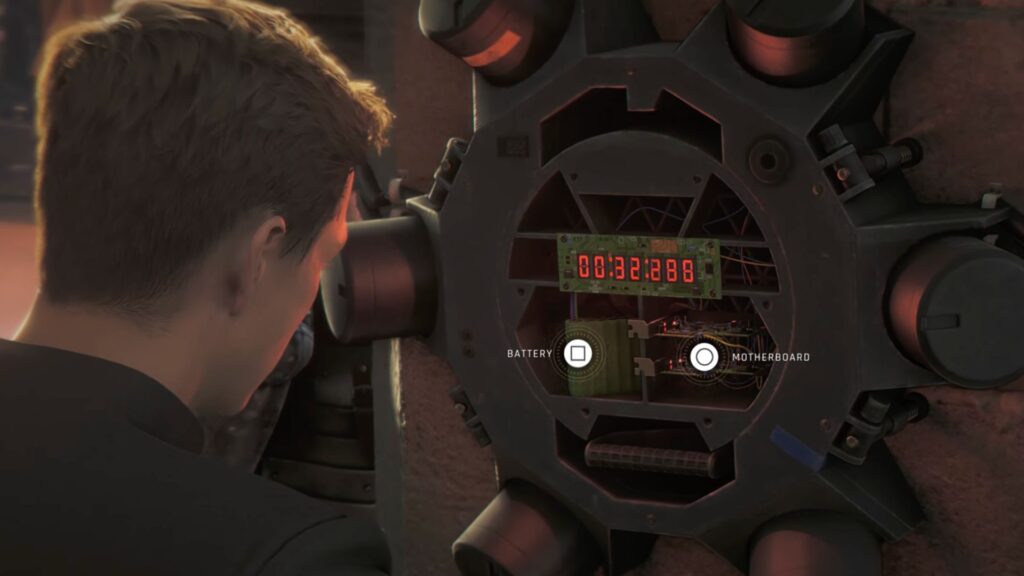
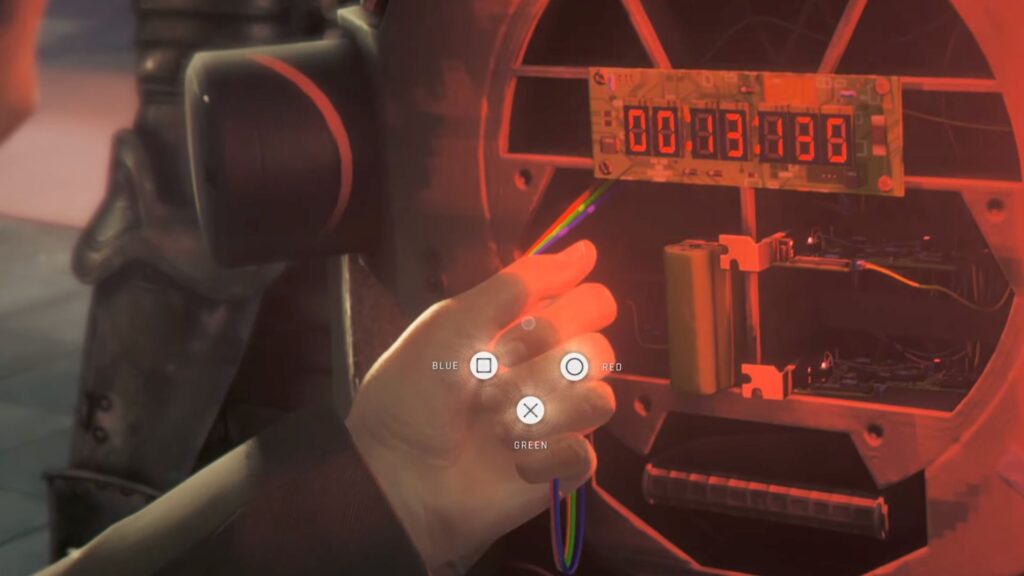
Your objective now is to Neutralize the Blond Man. Fight him with melee attacks and use whatever is around you, including wine bottles you can throw. After knocking him down, you need to defuse a bomb on the as fast as possible.
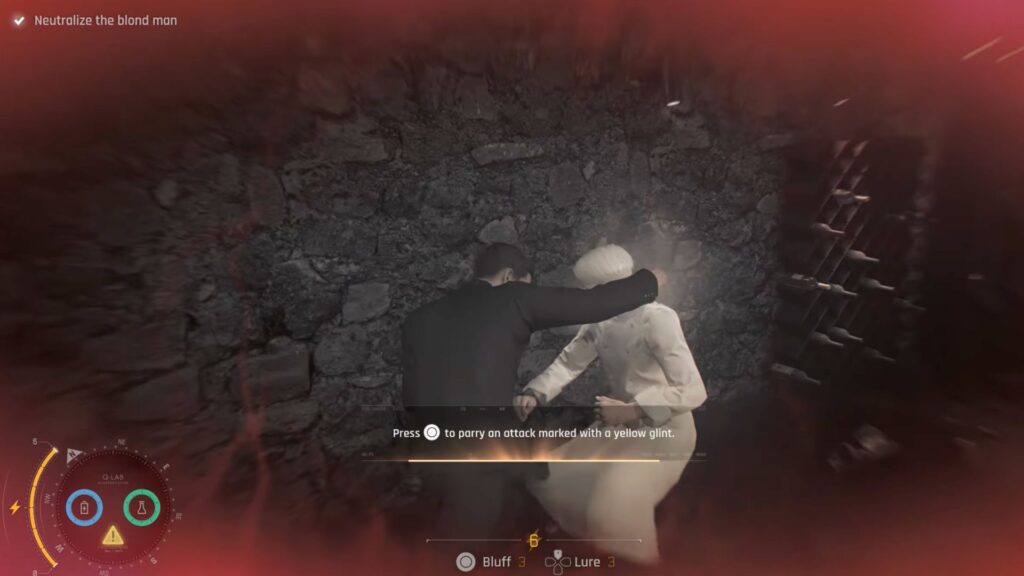

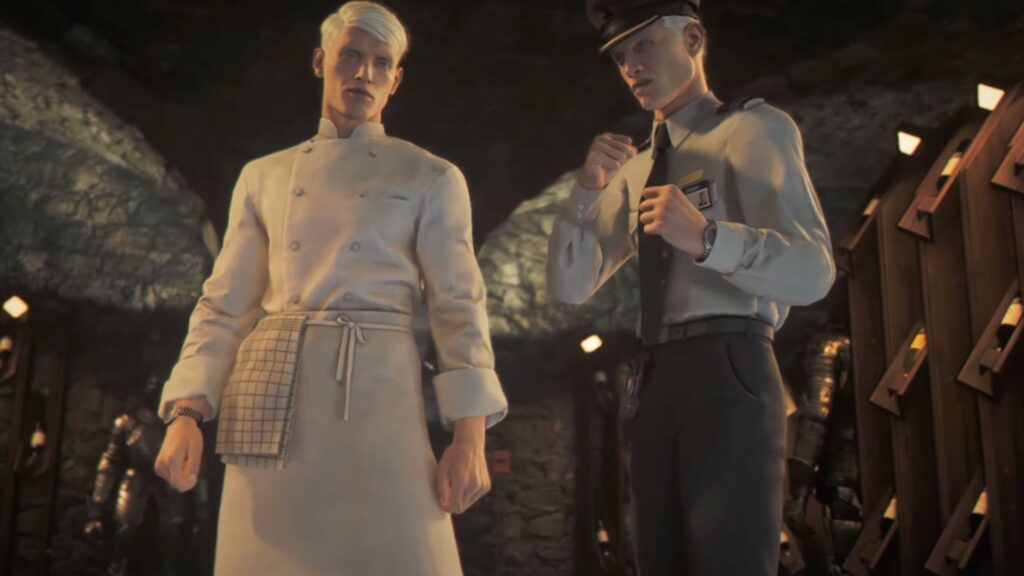
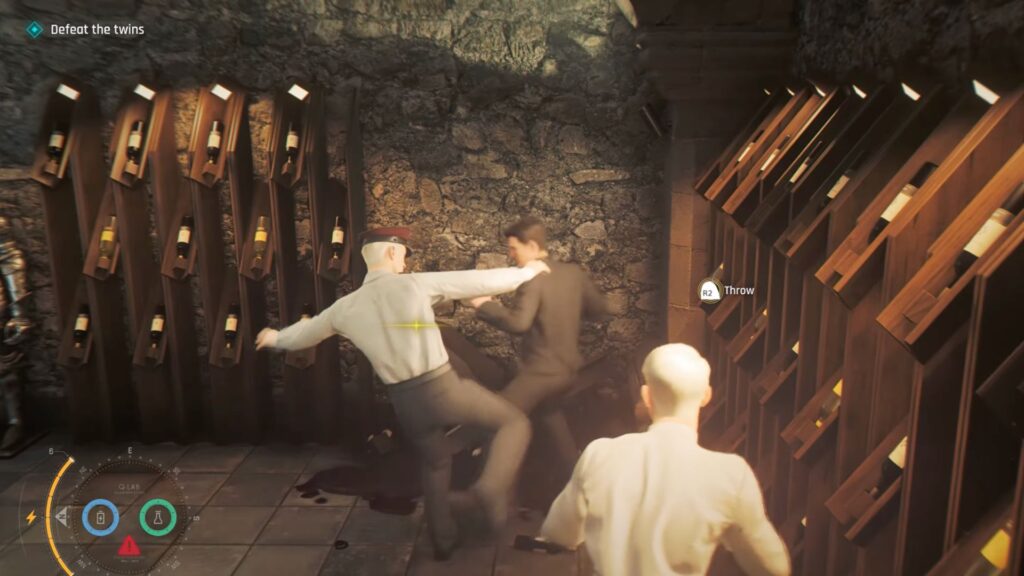
Before you finish, the blond man hits you from behind again. Turns out, he has a twin. It is now two against one.
Use everything from the tutorial, parrying, combo attacks, and counter attacks. A cutscene plays where Bond finds a hidden sword in the pillar and both twins draw knives. However, before the fight stars again, the bomb is about to go off and the twins escape. Bond breaks the fire alarm.
Now defuse the bomb. The battery and motherboard options both fail. Pull out the wire and choose between Blue, Red, or Green. Pick any one and it stops. Then a second bomb from behind Bond goes off unexpectedly.
Getting Out
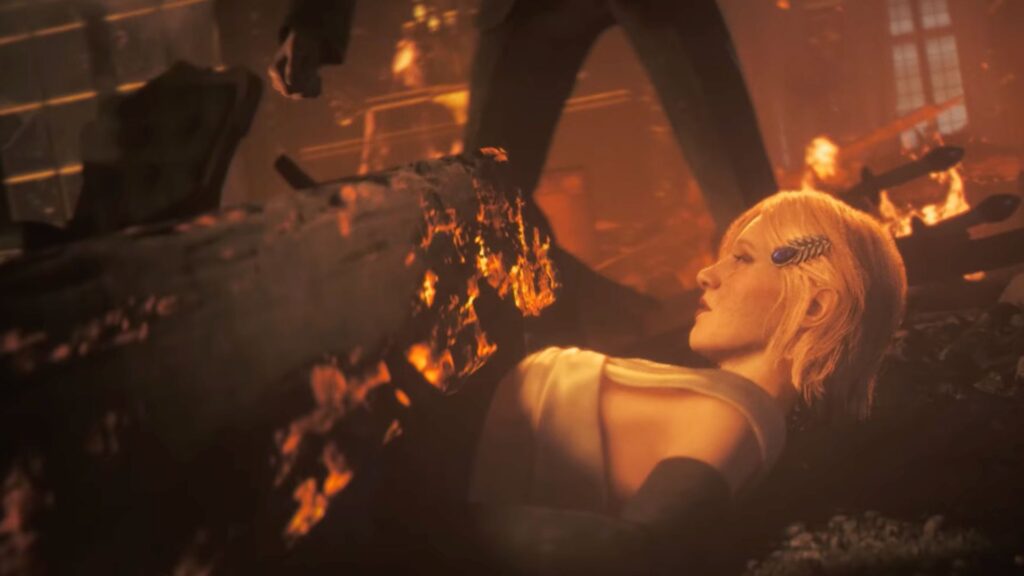
Get out of the area and you will hear Cressida calling for help. Climb the wall and find her trapped under a wooden beam. Bond pulls her free but the chandelier above is also coming down. You get her clear but she cannot move and cannot feel her legs.
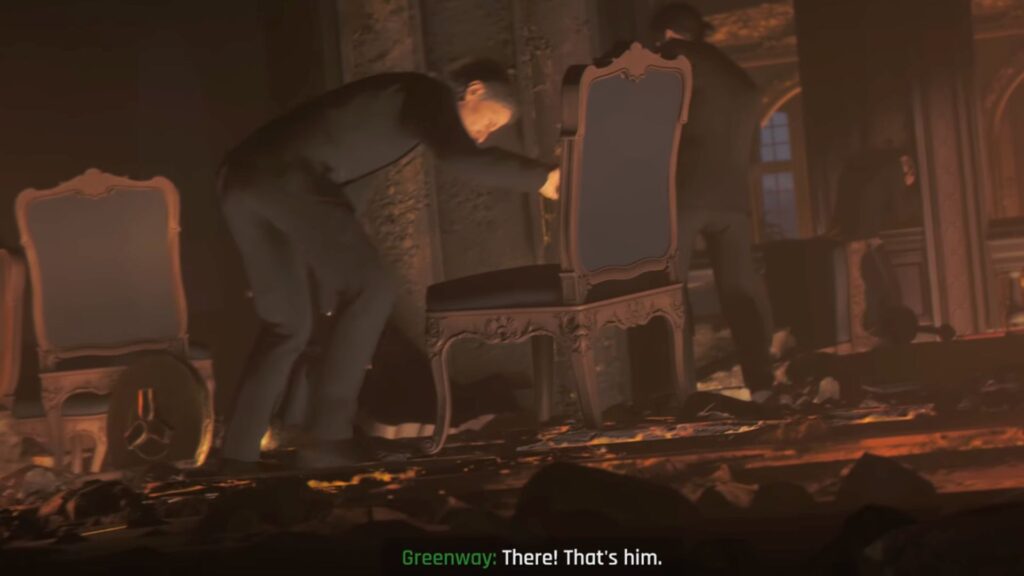
Greenway arrives, helps with Cressida and tell you that he saw 009 and orders you to run and catch 009. Your next objective is to Pursue 009. Keep running and follow the direction Greenway is pointing.

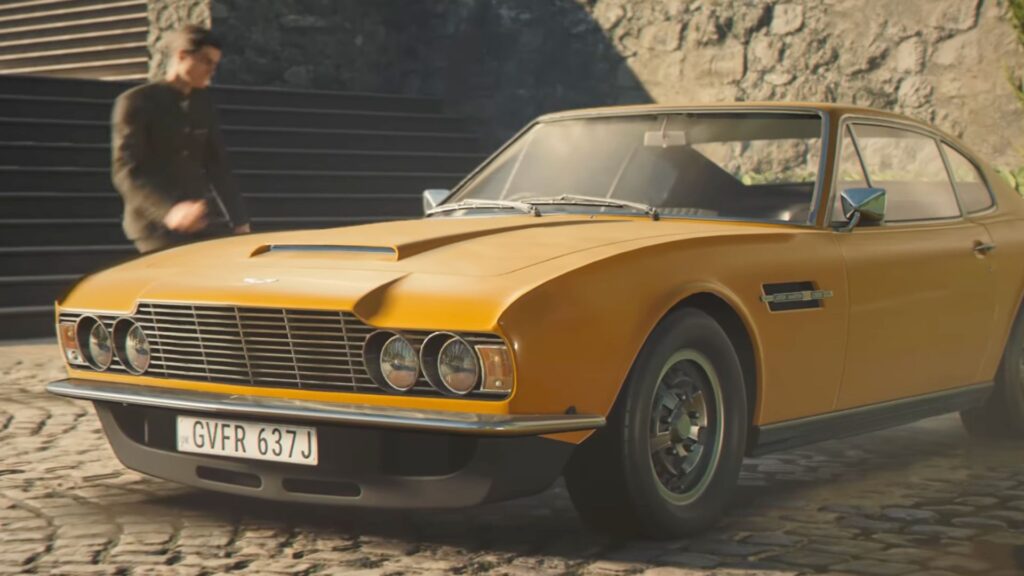
009 gets into a car so you will need one too. You take the yellow Aston Martin just right in front of the entrance. Then, the mystery woman shows up again, with a key just as you figure it out yourself how to turn on the car.
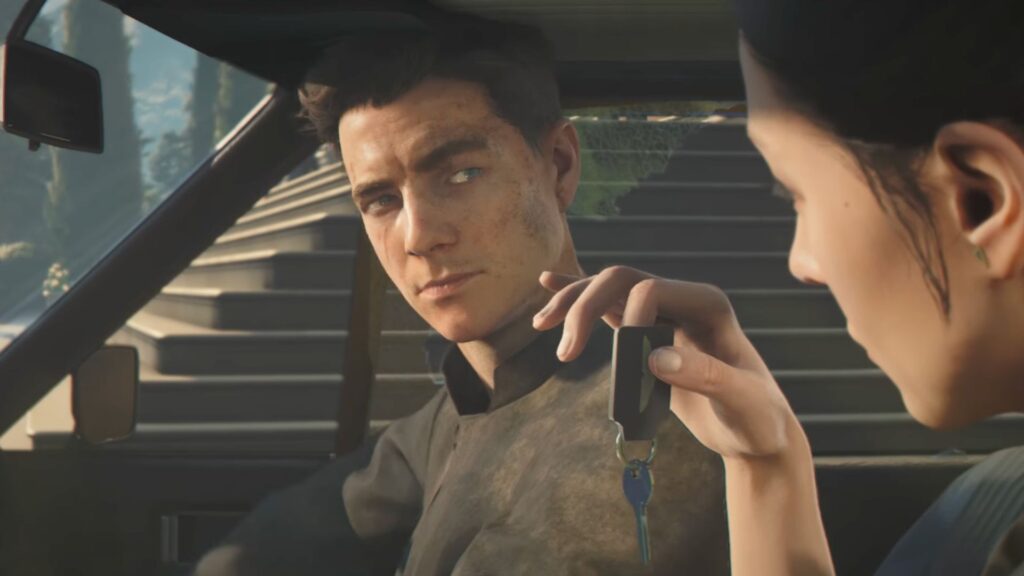
The driving sequence takes you through the Alpine mountains, tunnels, and open fields. The mystery woman guides you the whole way, too, so just focus on driving and listening to her. During the drive you find out her name is Agent Charlotte Roth of the DGSE, French Intelligence.


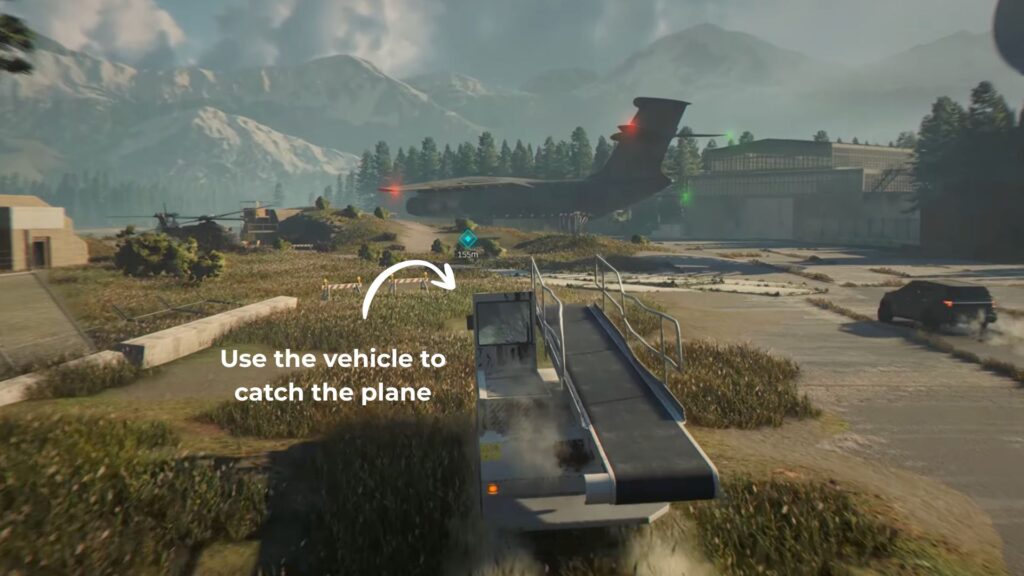
The Airfield
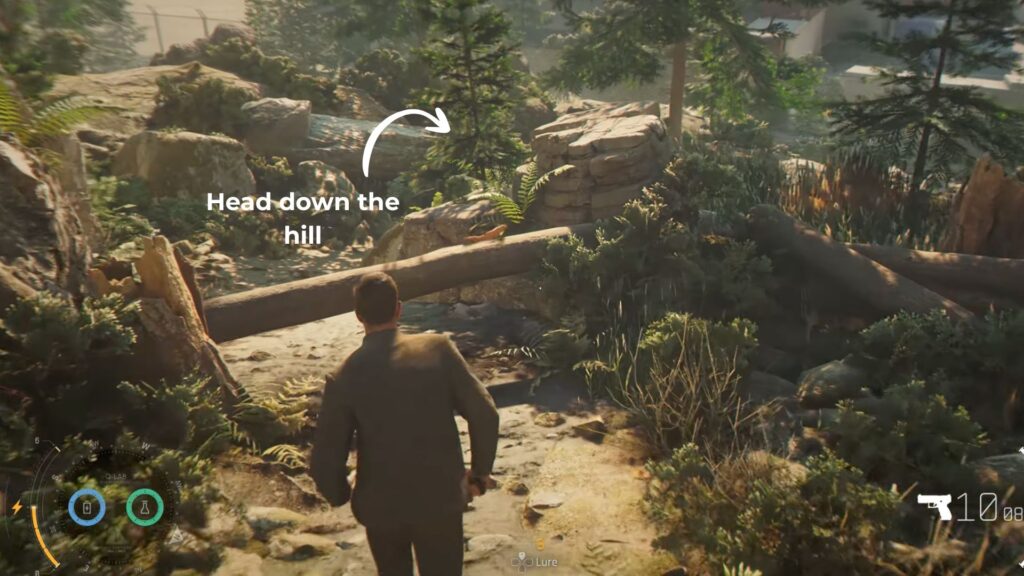
Beckett’s car stops on a hill just beside an airfield where he plans to escape by plane. Agent Roth hands you her pistol so that you can do whatever needed to do.


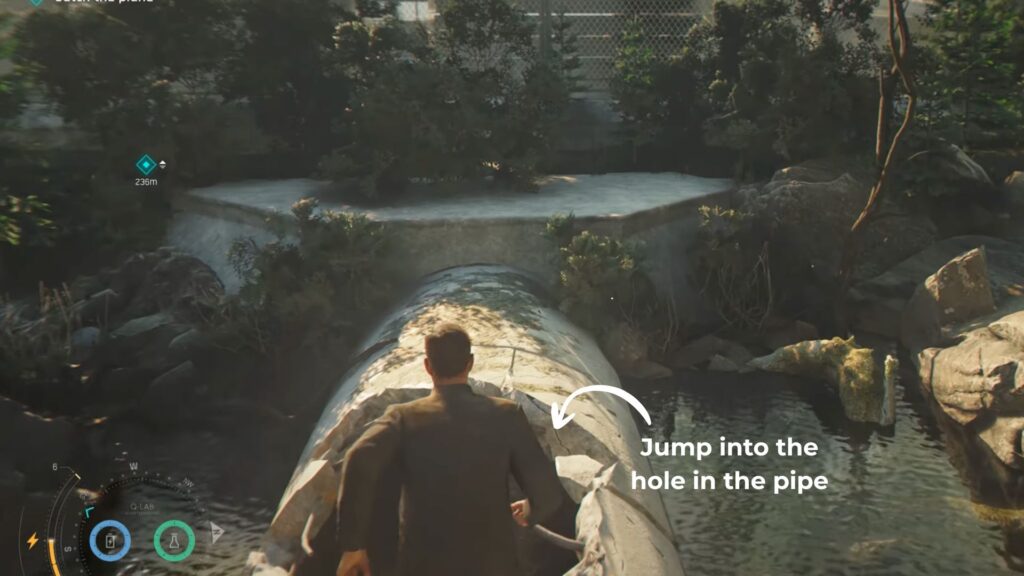
Head down the hill, cross a small river, and there will be a massive pipe with a hole. Jump down and you will reach the airfield.
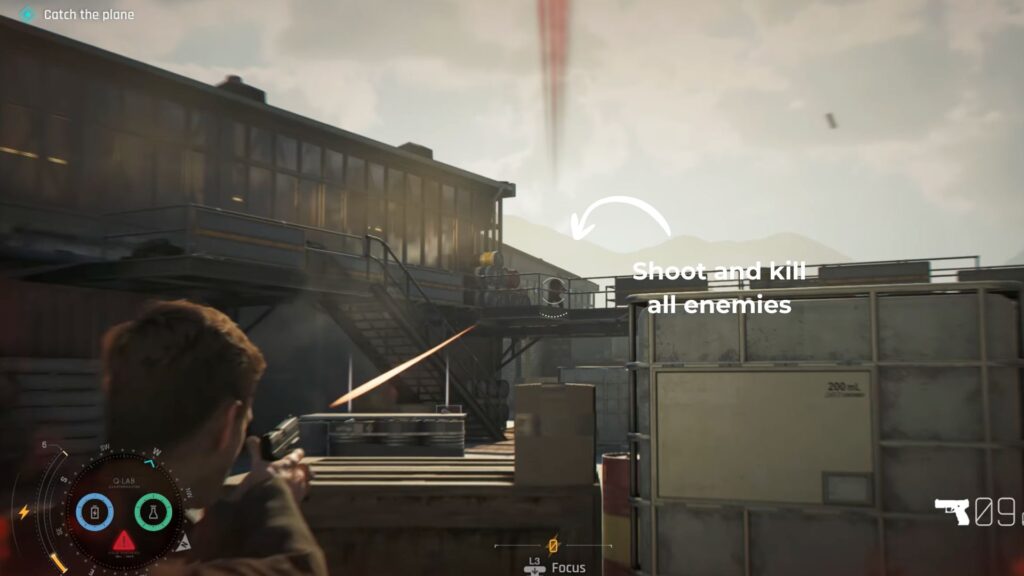
Enemies are all over the area and you have a license to kill so take them all on. More weapons are scattered around so pick them up when you need them. As you push toward the plane more enemies arrive. Clear them all.

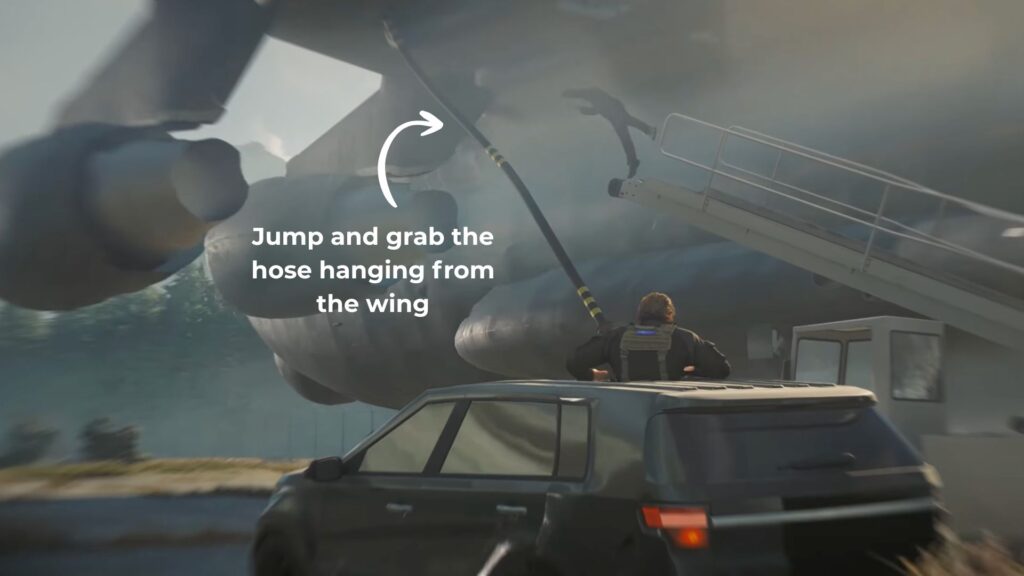
When you try to board, the plane begins to move. An airport vehicle clips you but you can use it to drive closer to the plane. When you are beside the plane, jump and grab the hose hanging from the wing, of course, in 007 fashion.
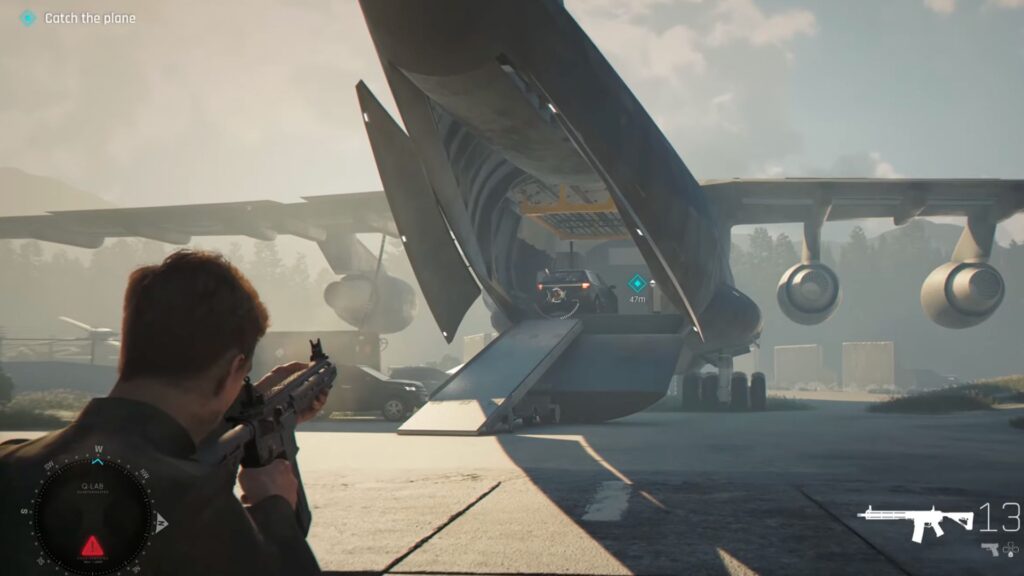
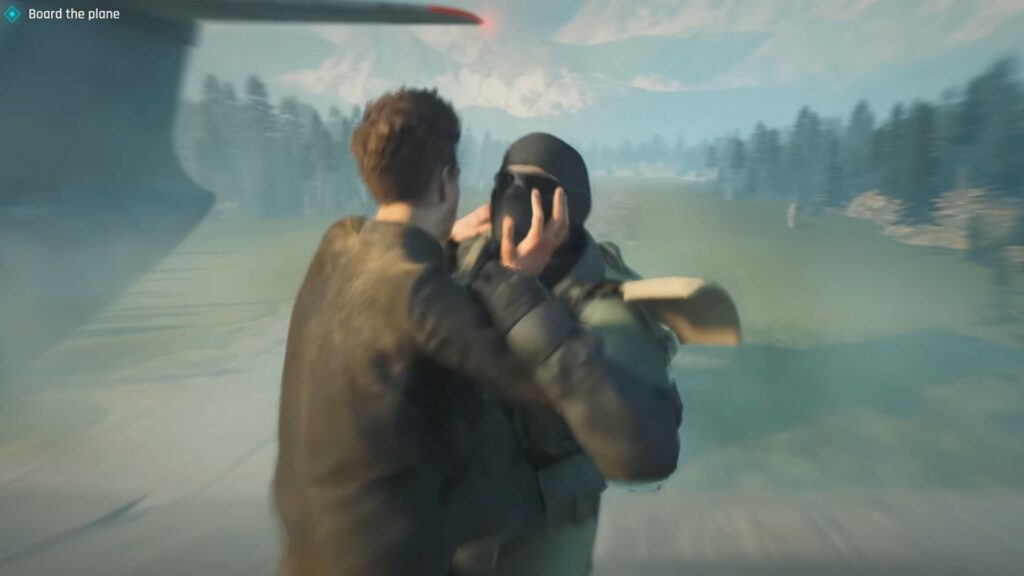
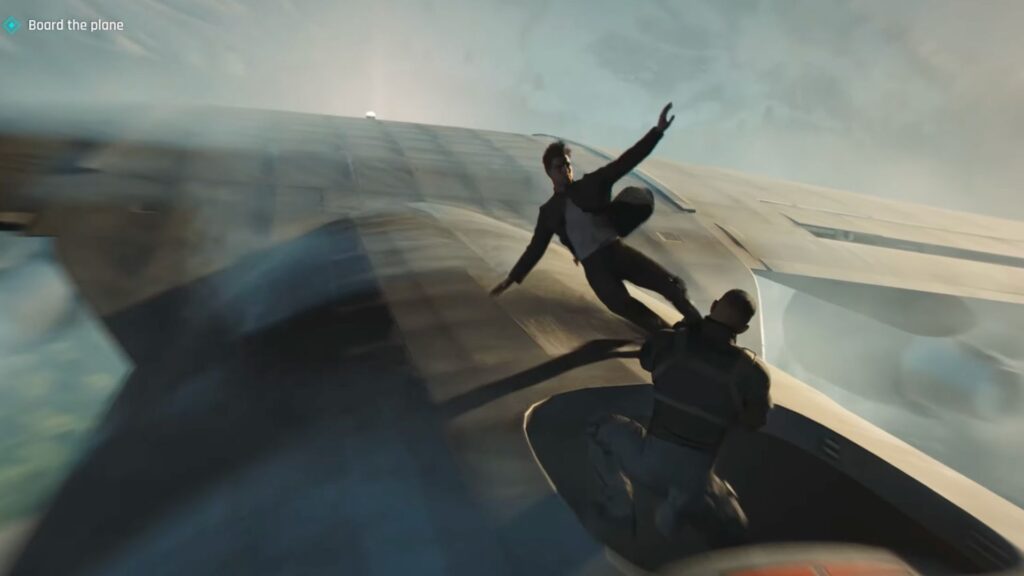
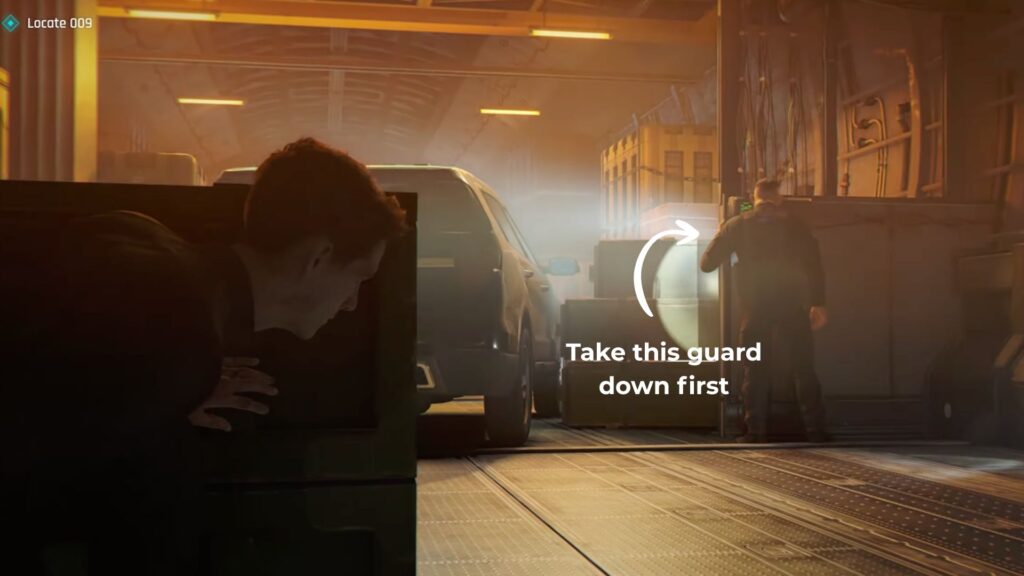
If you think you can easily enter the plane, you are wrong. There are more fights on top of the wings before you can get inside. A total of three guards are on top so take them all down.

Once on board, you need to hack the airplane controls. There is a guard standing in front of it, so take him down first, and then you can start hacking.
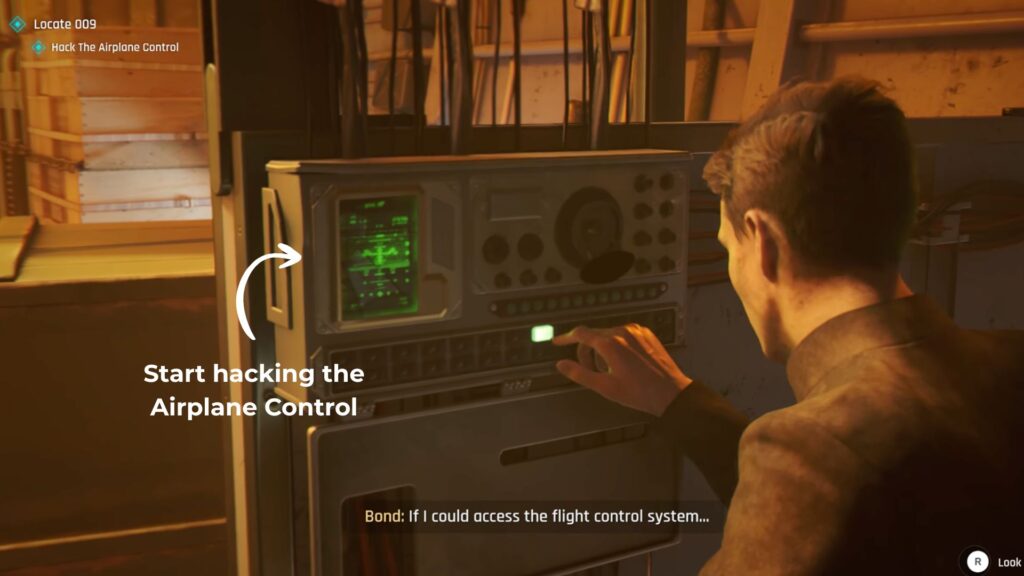
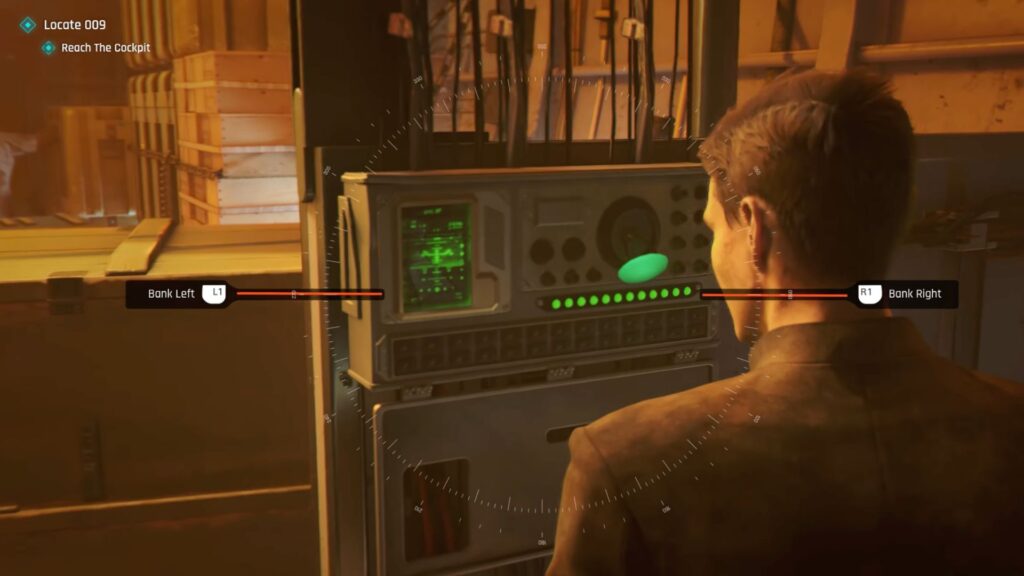
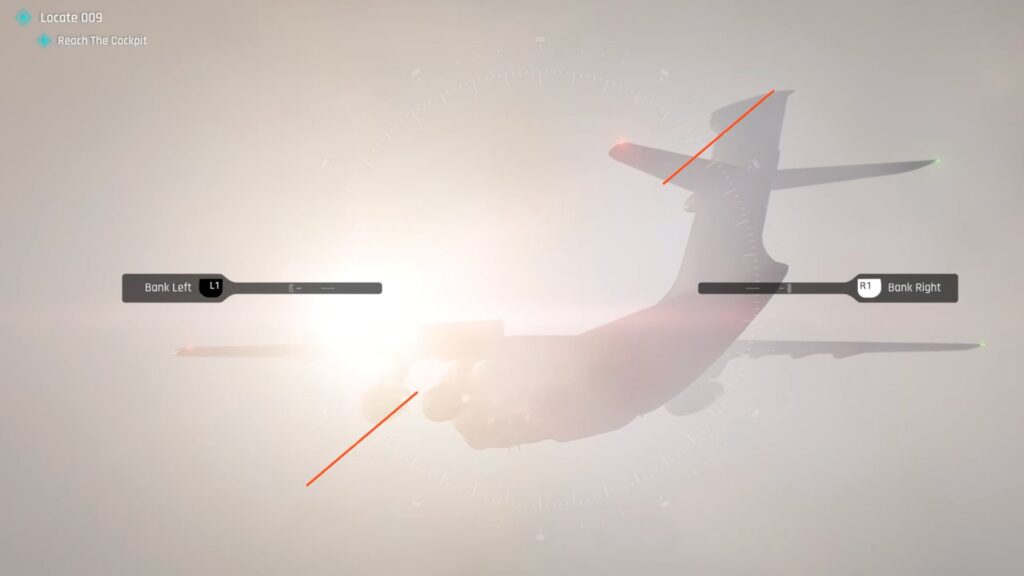
A mini game starts for hacking the plane. Press the button prompts to bank the aircraft left or right to create turbulence. The mini game keeps going while Bond moves deeper into the plane so you need to manage the turbulence controls and shoot enemies at the same time.
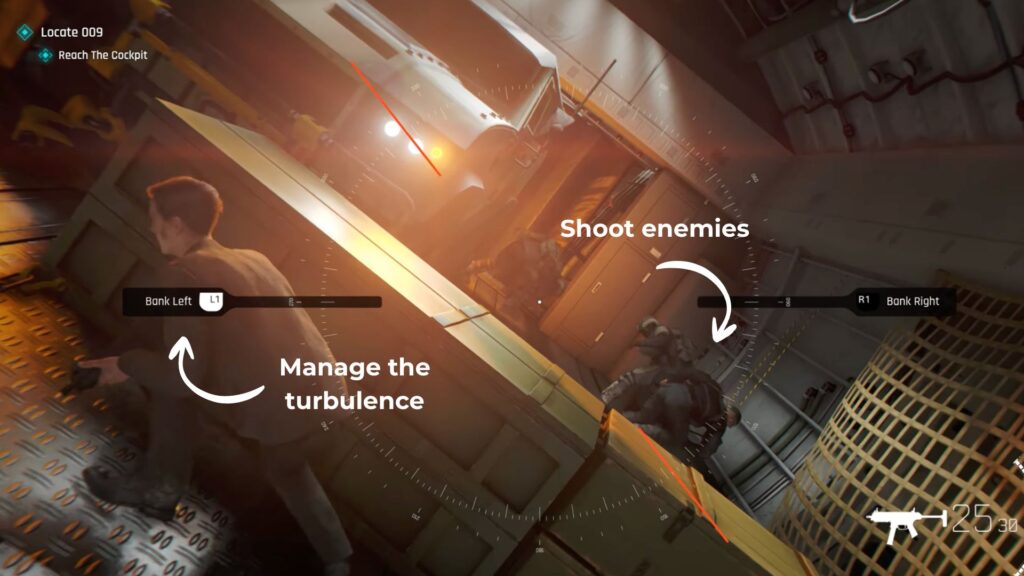
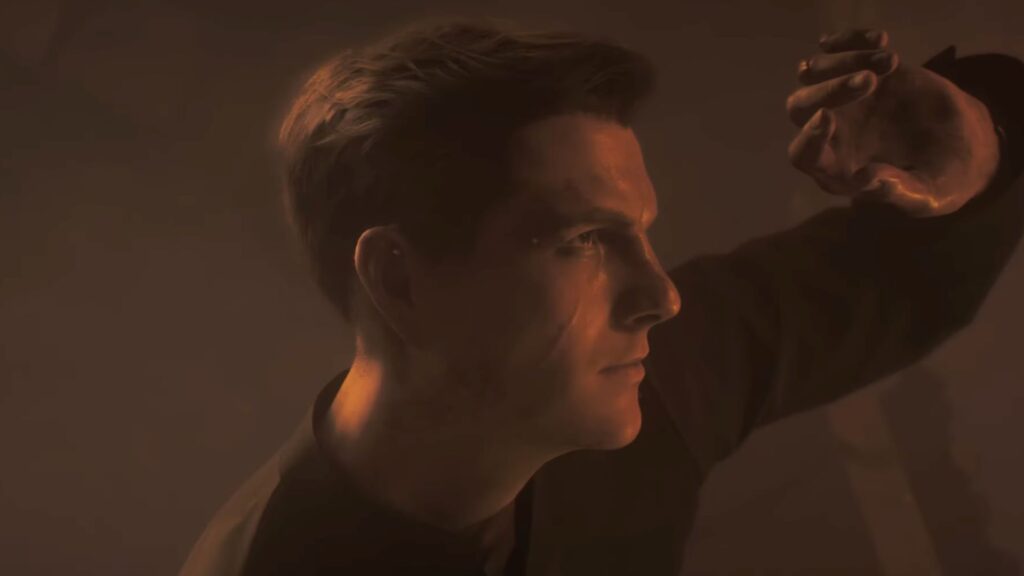
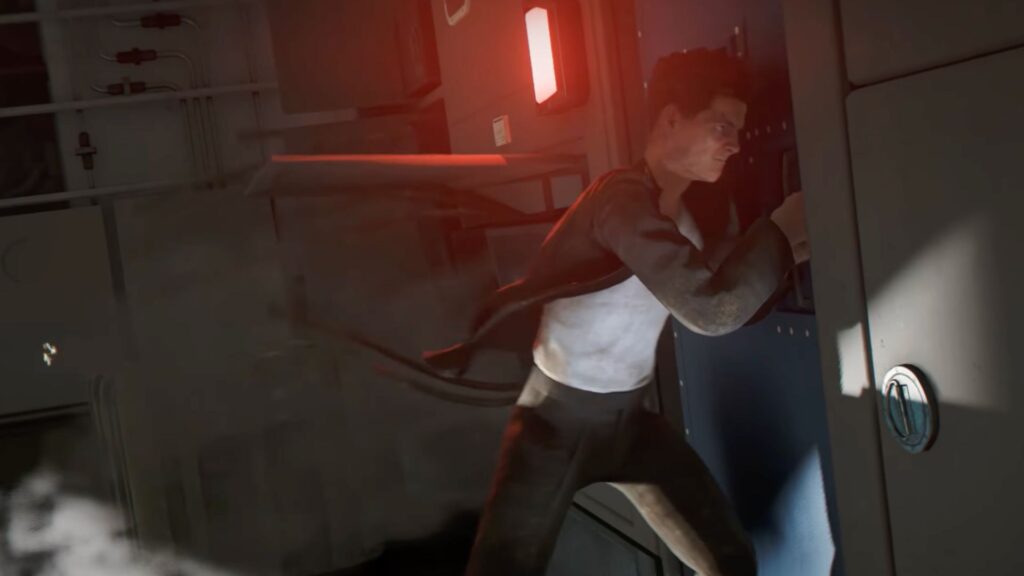
When you reach a stuck blue door, it suddenly opens and Bond falls out of the plane. However, before that happened, a cutscene starts where Bond is actually throws his watch and stick it to the plane’s wall.

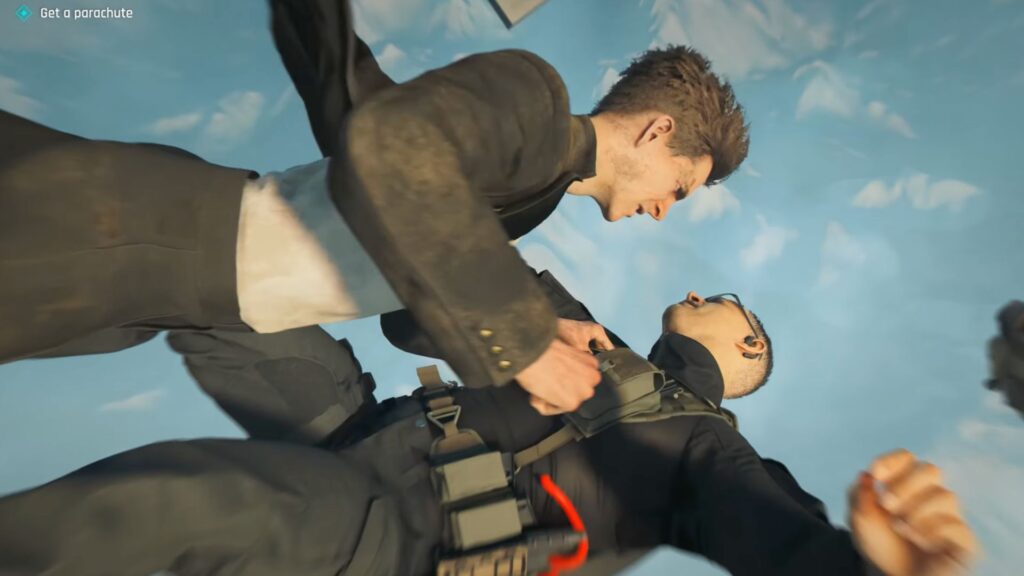
Your next objective is to Get a Parachute while falling. Two enemies are in the air alongside you. Catch one of them and fight mid-air. Once you knock them down, take their parachute.


The Aftermath
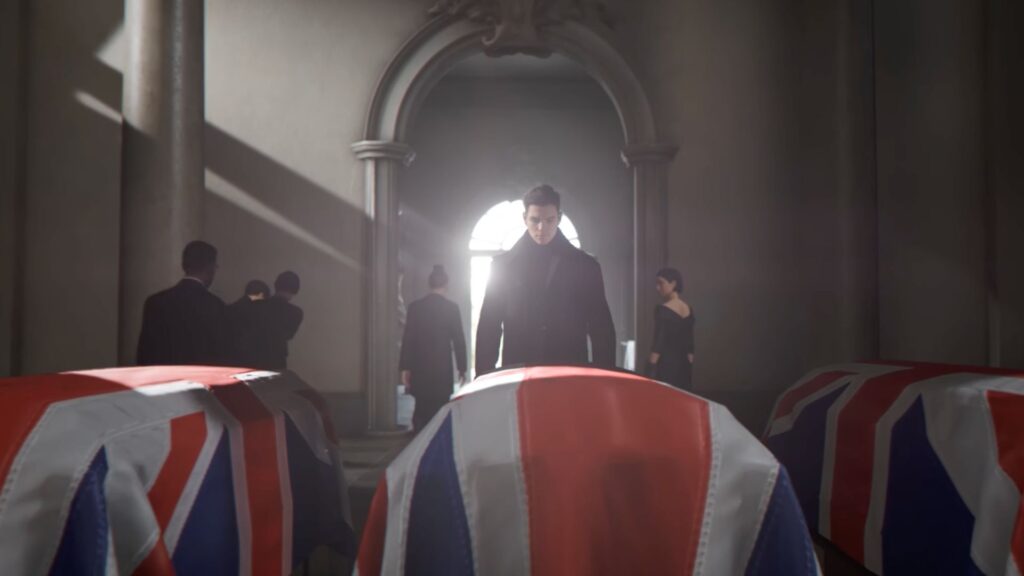
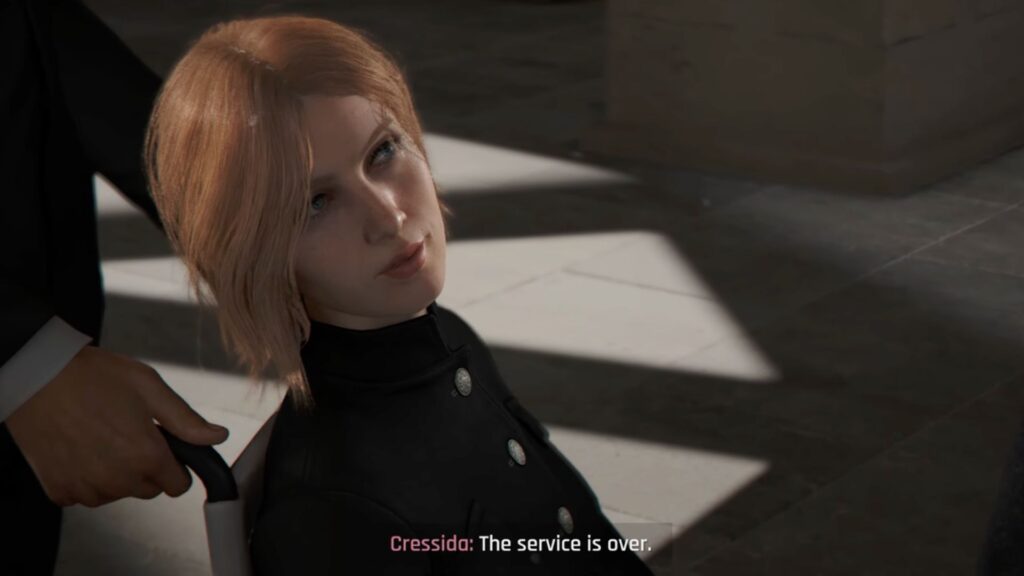
A cutscene plays when you land. Three caskets are present but only one really matters to Bond. It is a service for Monroe. While Bond is mourning, Cressida arrives in a wheelchair telling that the service has ended already.
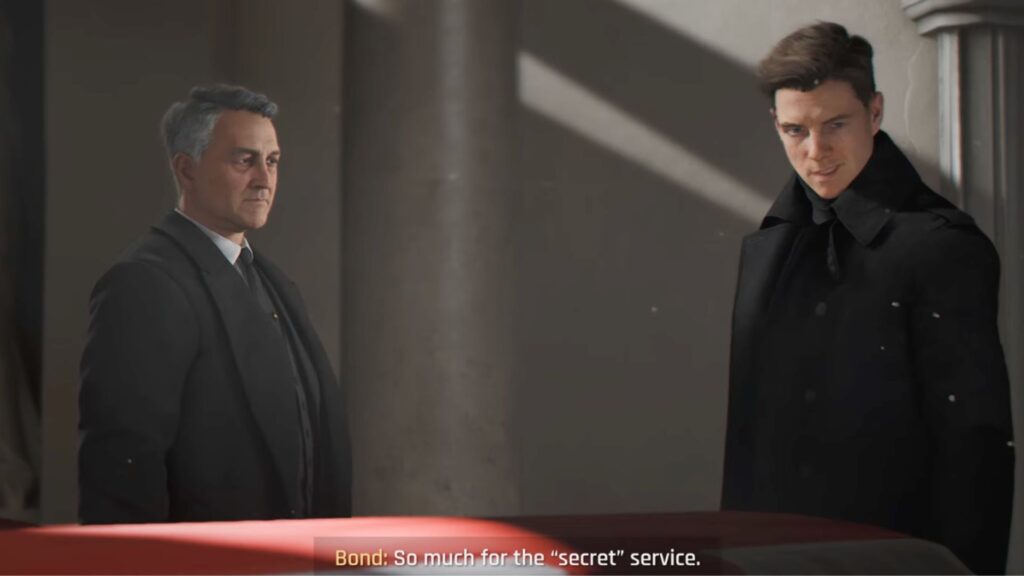
Sir Nicholas, one of the creators of THEIA, speaks to Bond and tells him he is impressed by him. Then, Greenway arrives with a broken hand and tells Bond that M wants everyone back at MI6.
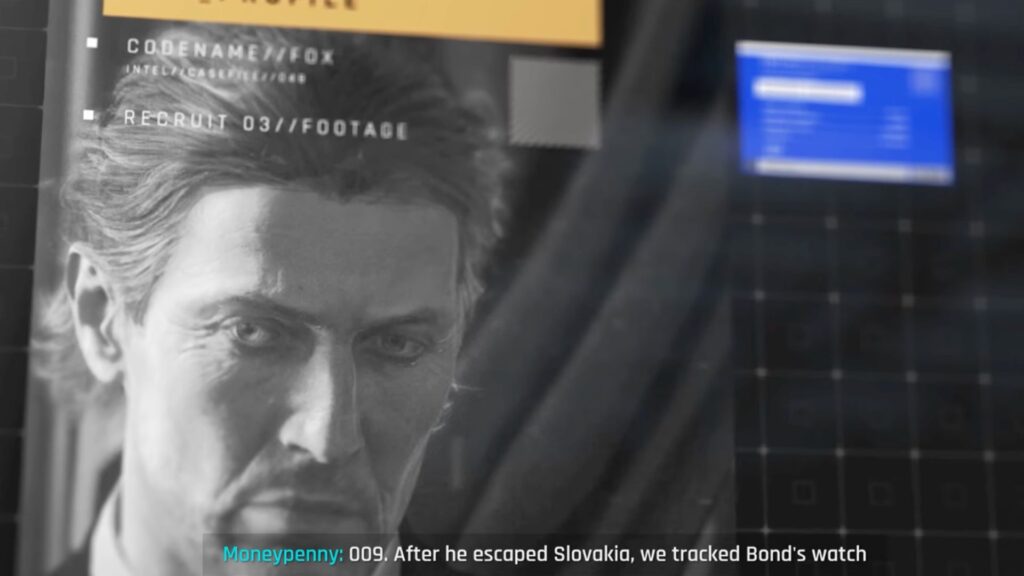
Turns out, THEIA has managed to track 009 using the watch Bond threw into the plane before falling. He has been traced to Mauritania. M orders Greenway to take point and Bond to follow his lead. This time, the two of them will be working together.
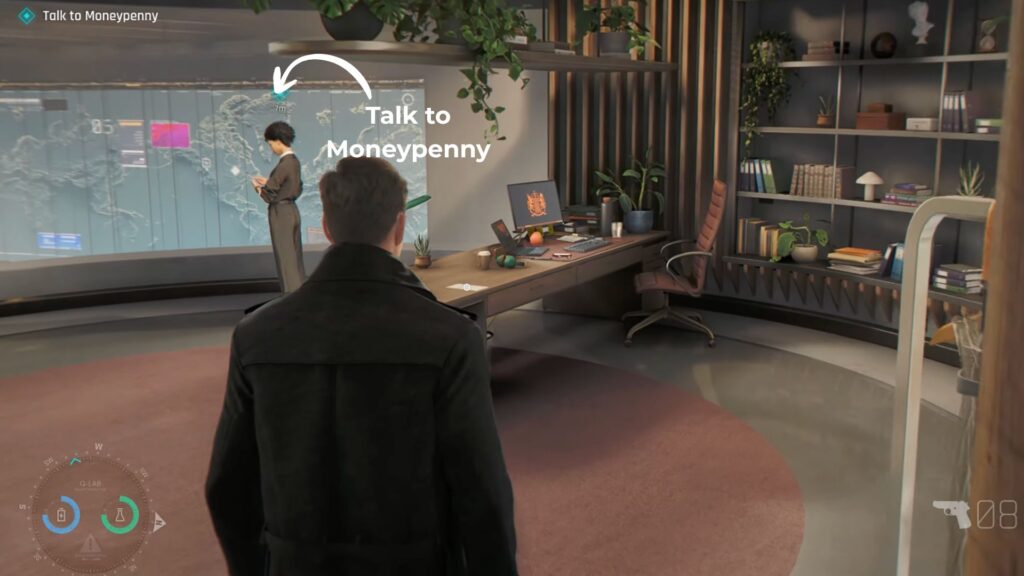
Back at MI6
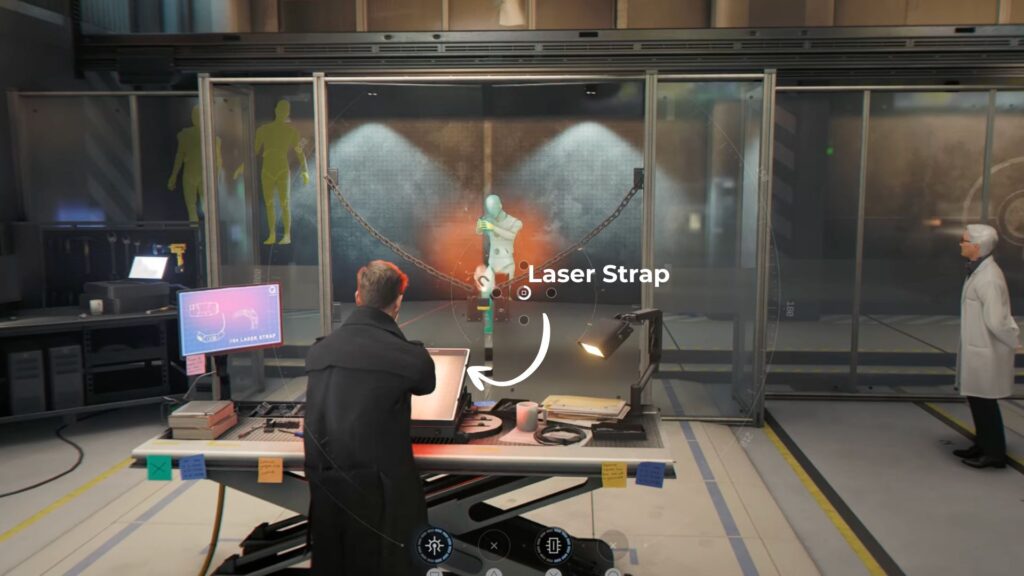
Head to Q-Lab. You will get a new watch and a new earpiece that is virtually undetectable.
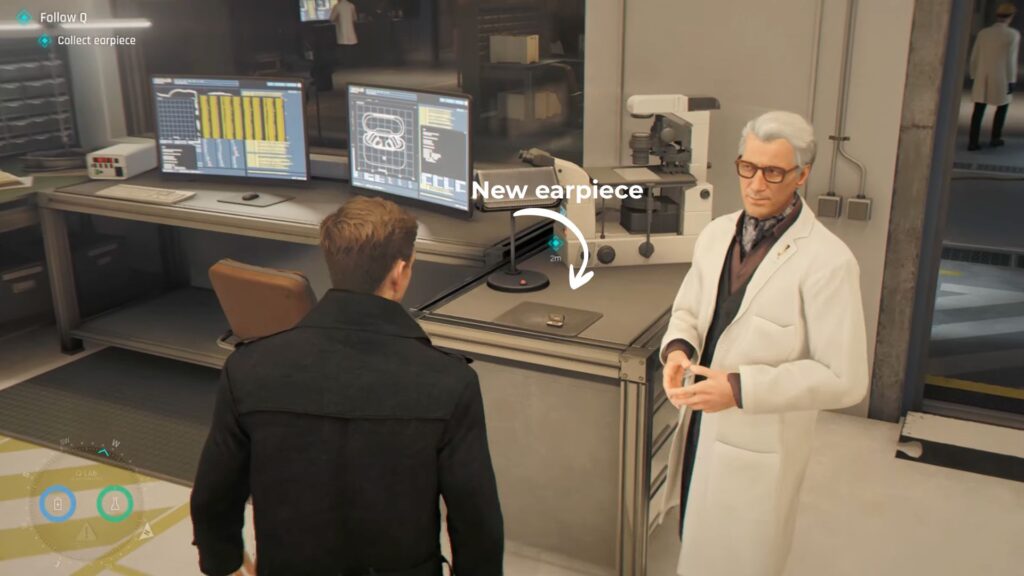
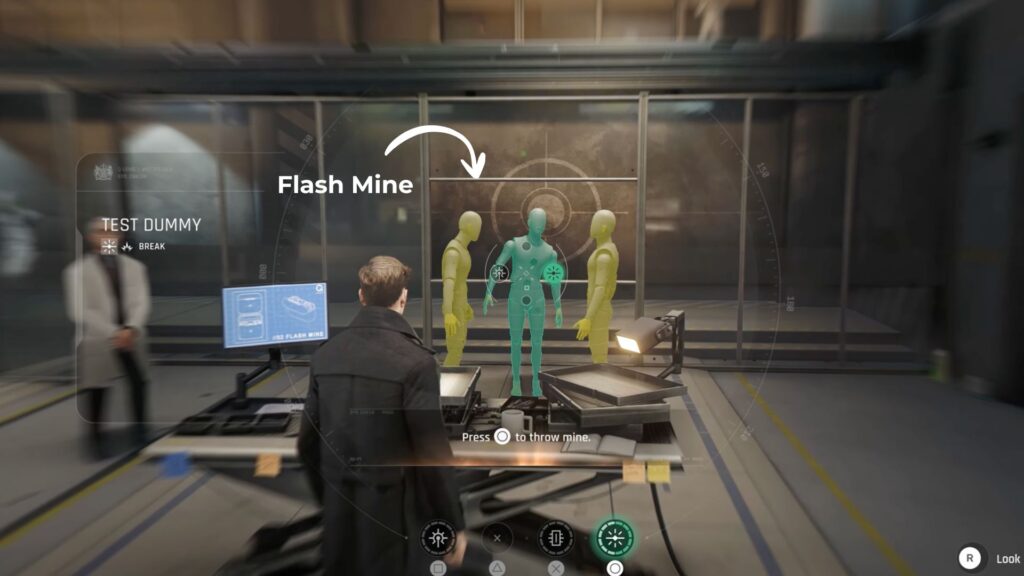
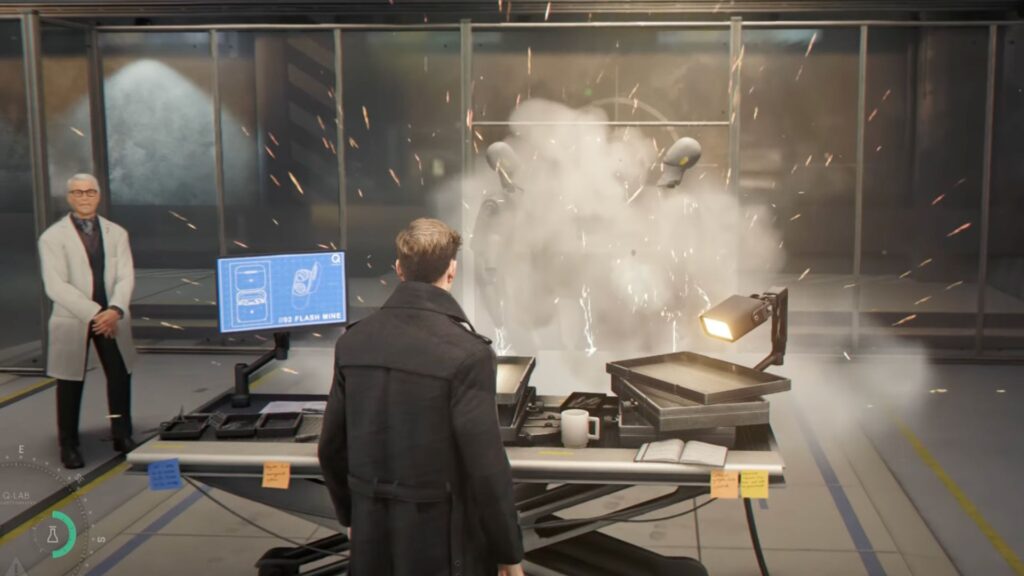
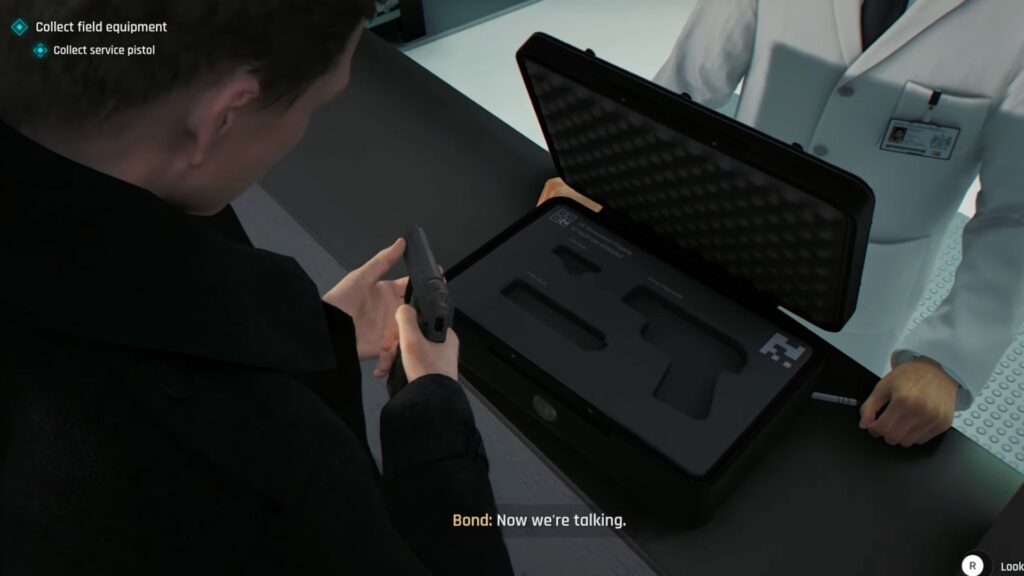
Two new gadgets are also available. The Laser Strap can fire a laser to break objects or temporarily blind enemies, and the Flash Mine can be thrown to release a blinding blast. Pick two items for your loadout and collect your new service pistol from Waters before leaving.
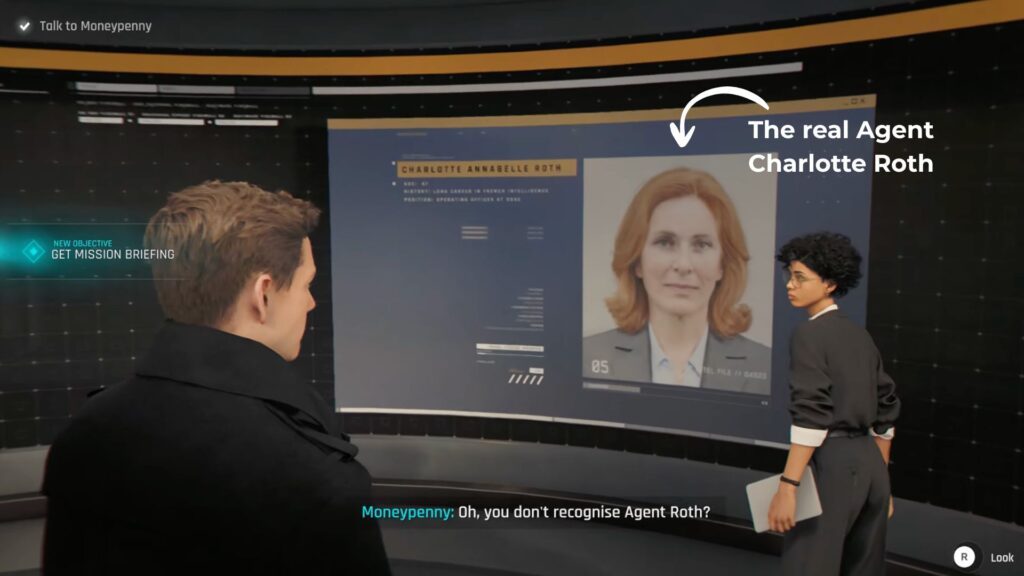
Next, go to Moneypenny’s office. She shows you an image of the real Agent Charlotte Roth, a red-haired woman about to retire. She looks nothing like the mystery woman from the car, meaning the woman who helped you is not the real Agent Roth.
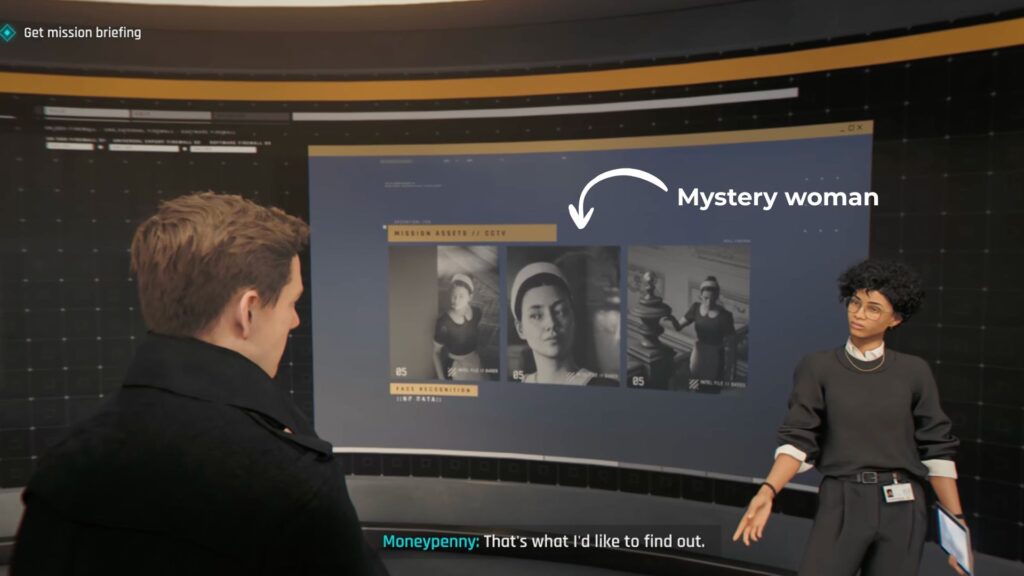
Moneypenny also confirms that the blond twins are called Niko and Tero Murto, an assassin duo from Tampere, Finland.

Beckett’s movements have been partially traced. He was last seen in the Turkish province of Sanliurfa before THEIA lost him in Egypt.

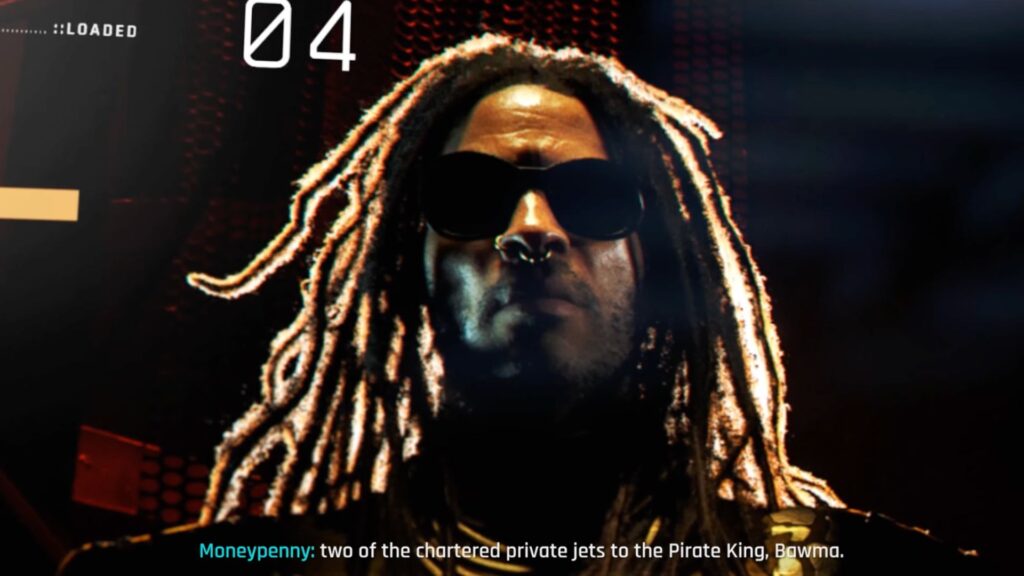
The private jets used in his movements are linked to a man known as the Pirate King Bawma, whose base of operations is in Aleph, Mauritania. Beckett may be part of his inner circle.

Your mission is to travel to Aleph, find 009, and bring him back. This leads directly into Chapter 4: The Past Never Dies.