
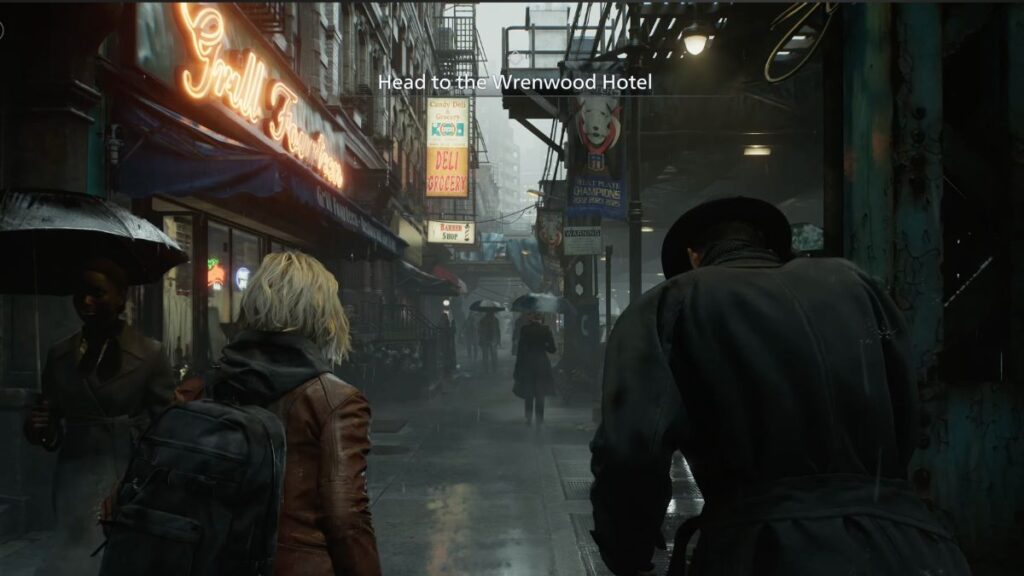
The game opens with a cutscene in an office where Grace is handed a case. When it ends, you find yourself out on the streets of Wrenwood. Chapter 1 begins here.
Resident Evil Requiem Wrenwood Walkthrough (Grace)
Wrenwood Streets
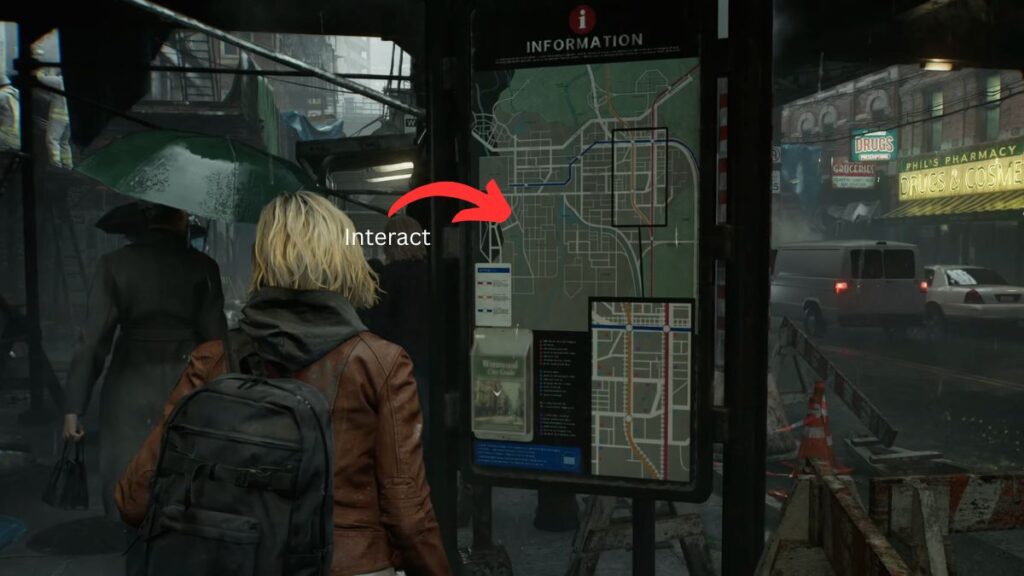
Once you gain control of Grace, move forward as the game walks you through the basic controls. When you reach the front of the barber shop, look to the right side at a nearby pole; there’s a map attached to it. Interact with it by pressing X to collect the Wrenwood City Guide, which is the first collectible file in the game. There are 75 collectible files in total.
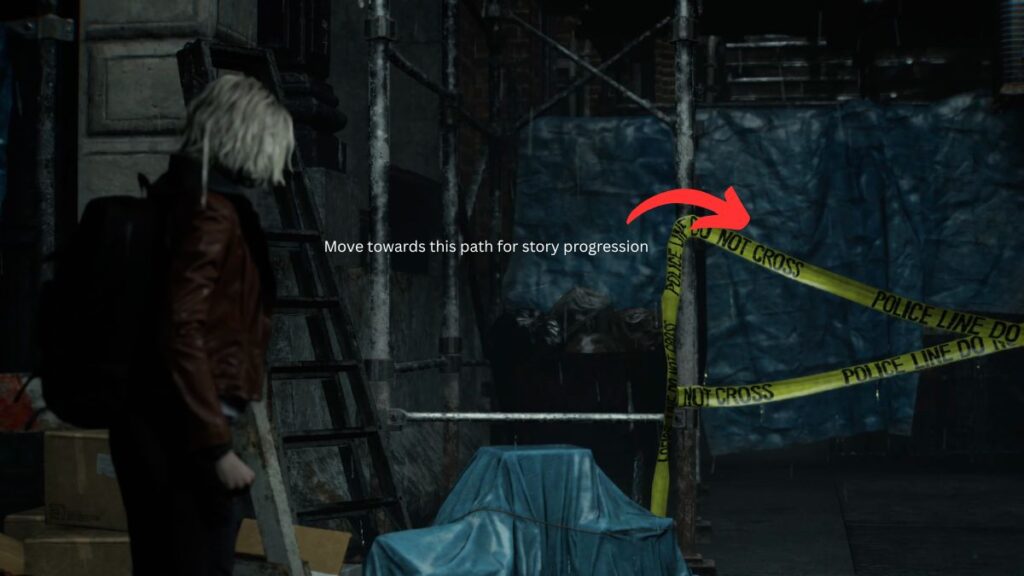
Continue along the same path past some missing posters until you spot a “Do Not Cross” tape barrier on the left side. A scene will play where a police officer clears you to cross to the other side.
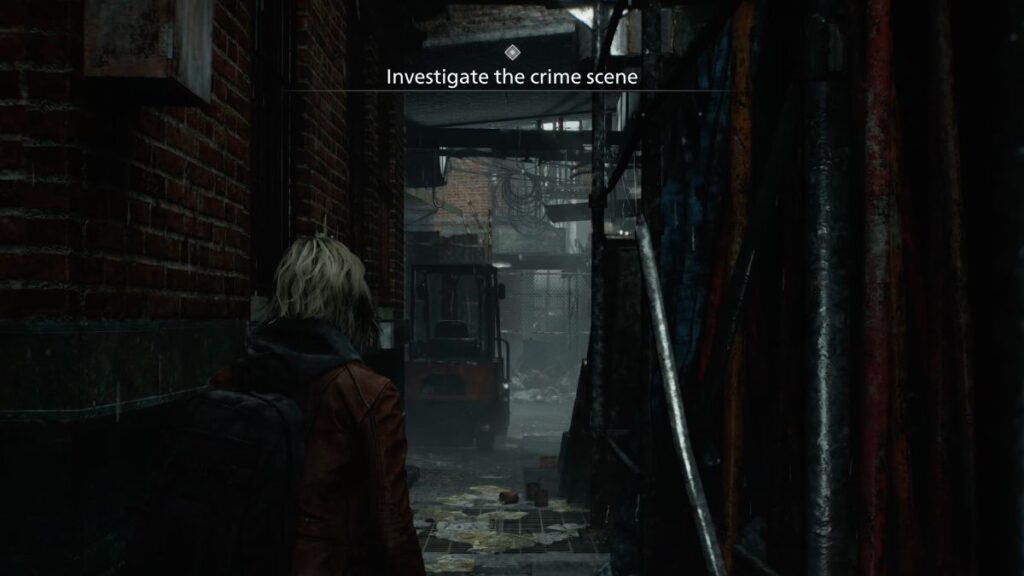
The Crime Scene
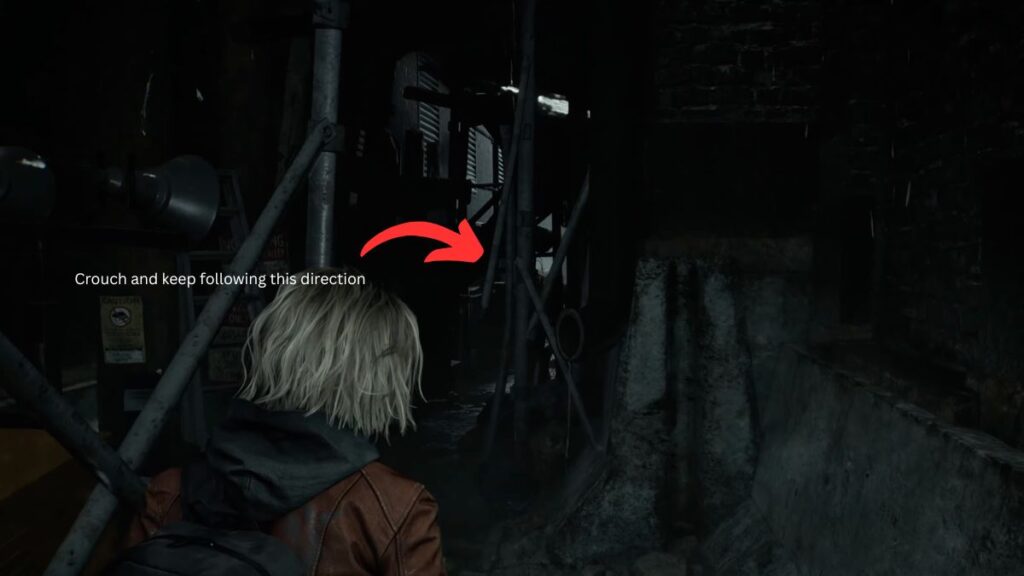
Once you’re in the new area, you’ll be prompted to investigate the crime scene. The path is linear, so keep moving forward until you reach a congested area where the game will prompt you to crouch by pressing R3.
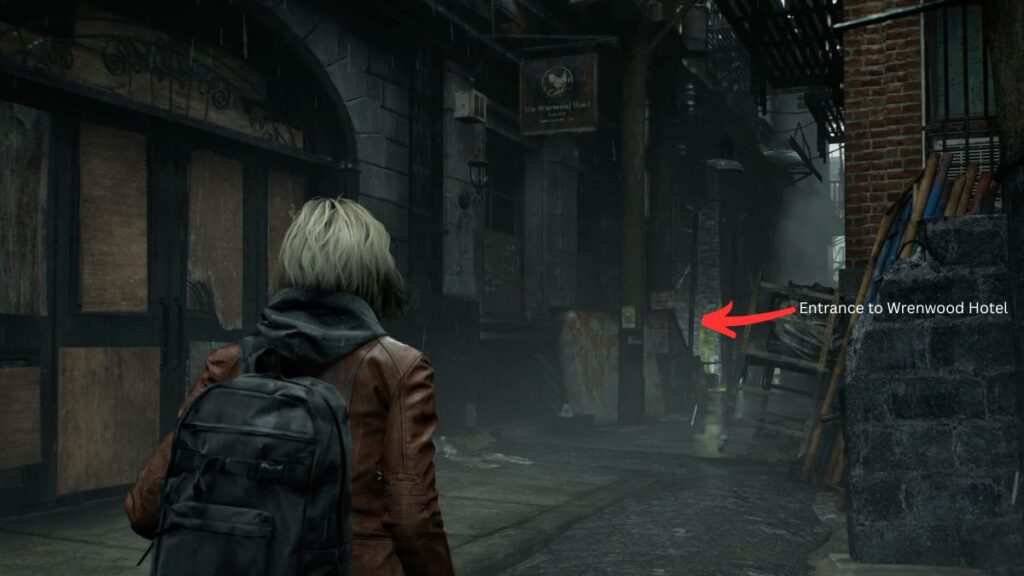
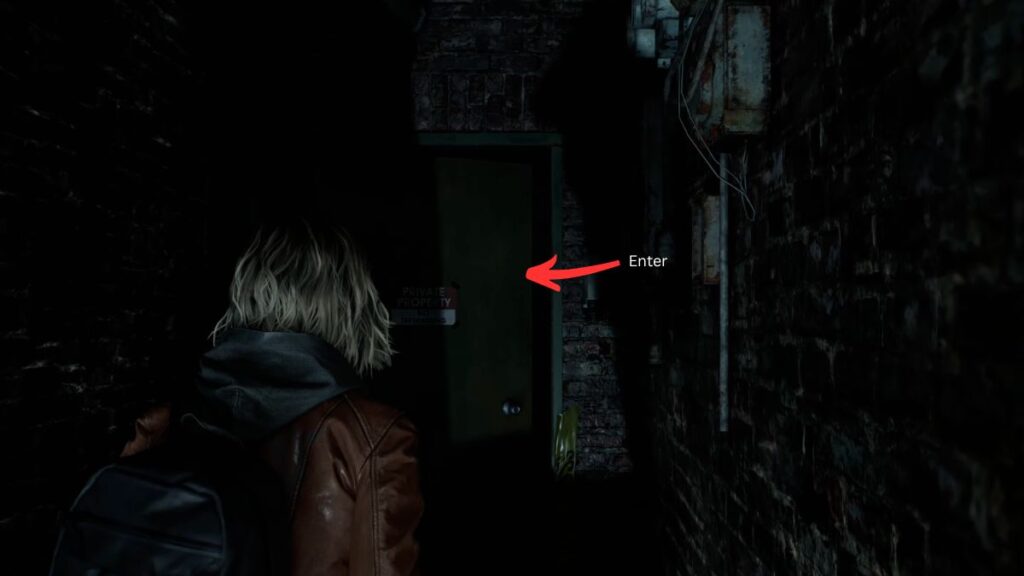
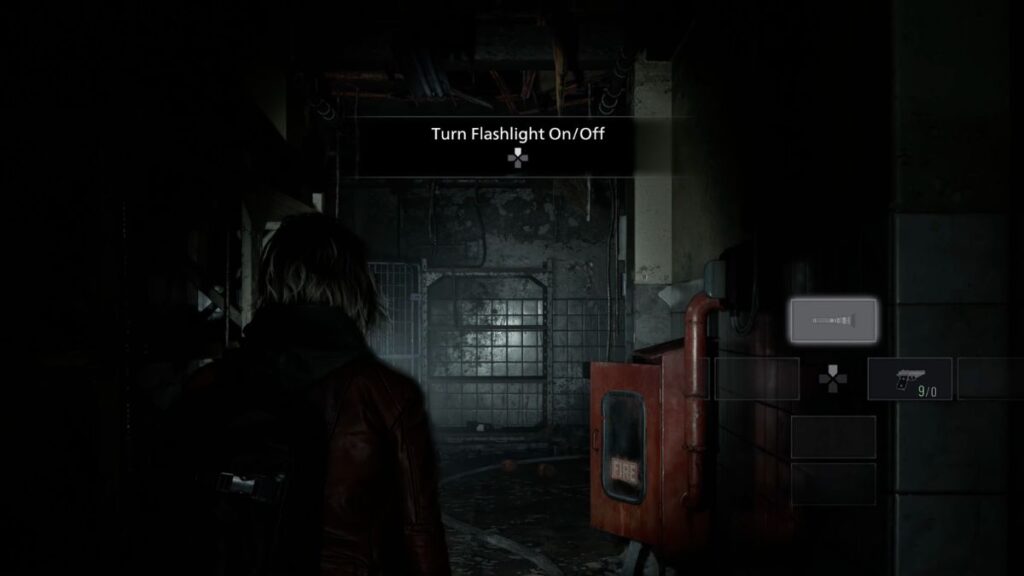
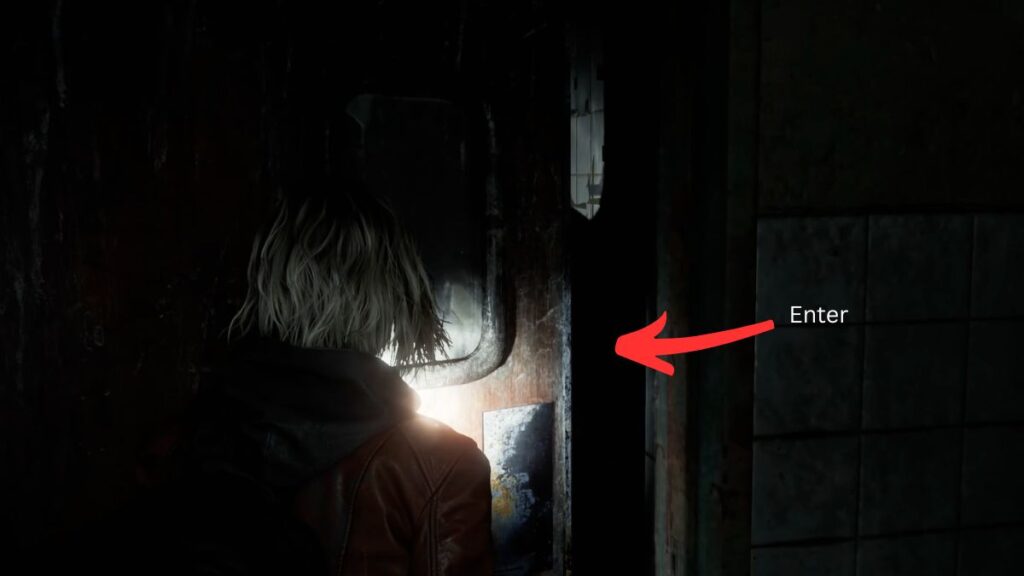
On the left, you’ll notice the Wrenwood Hotel, but its main door is locked. Head past the sign into the alley and look to the left. You’ll see more police tape and a green door marked “Private Property.” Head inside. The building is very dark, so press Up on the D-pad to turn on your flashlight.
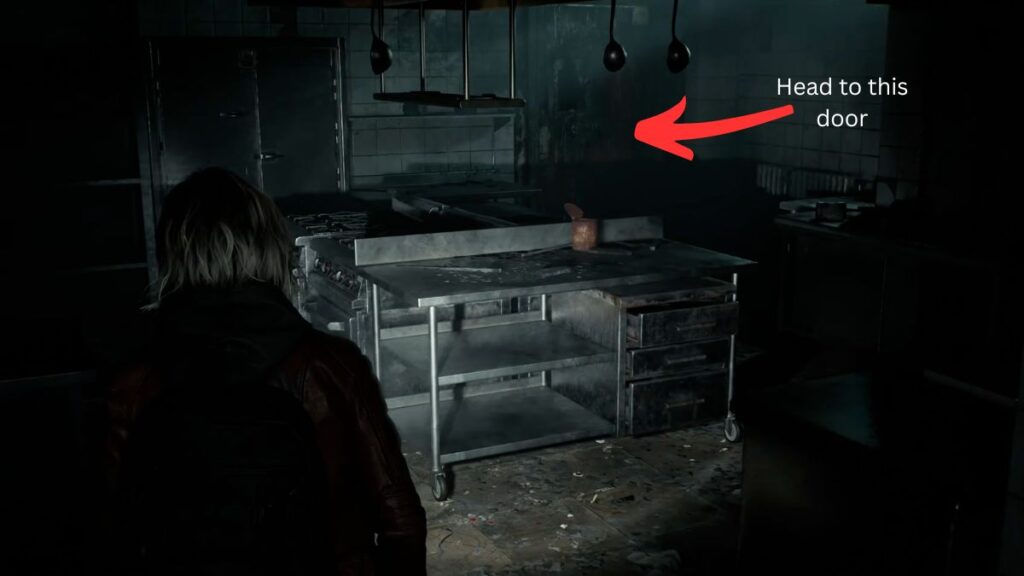
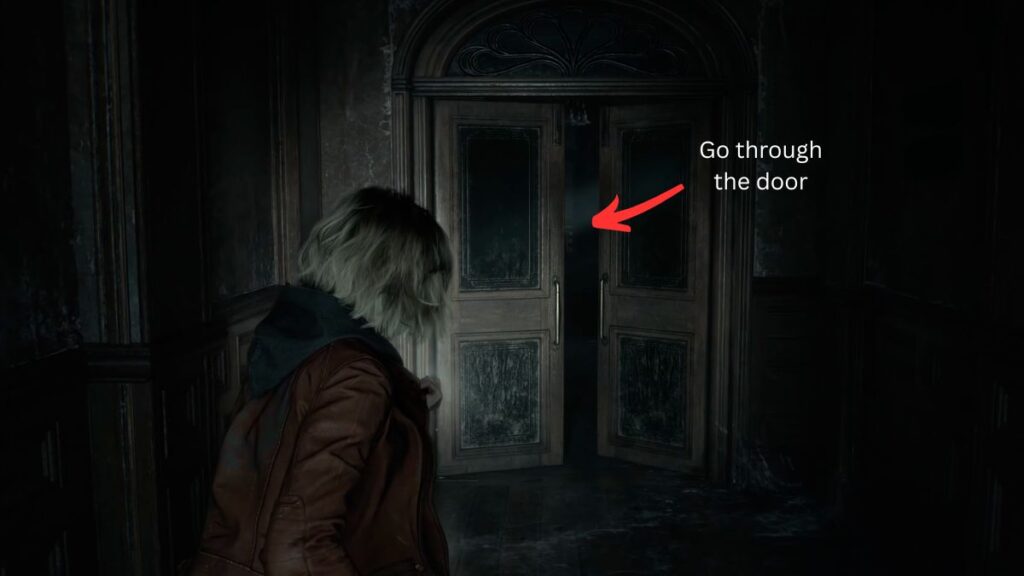
Follow the path and take a right turn. As soon as you turn, you’ll see a red door on the left. Enter through the door to get to the kitchen area. Approach the door on the far right side of the kitchen, which will trigger a brief cutscene. Go through the door once it ends.
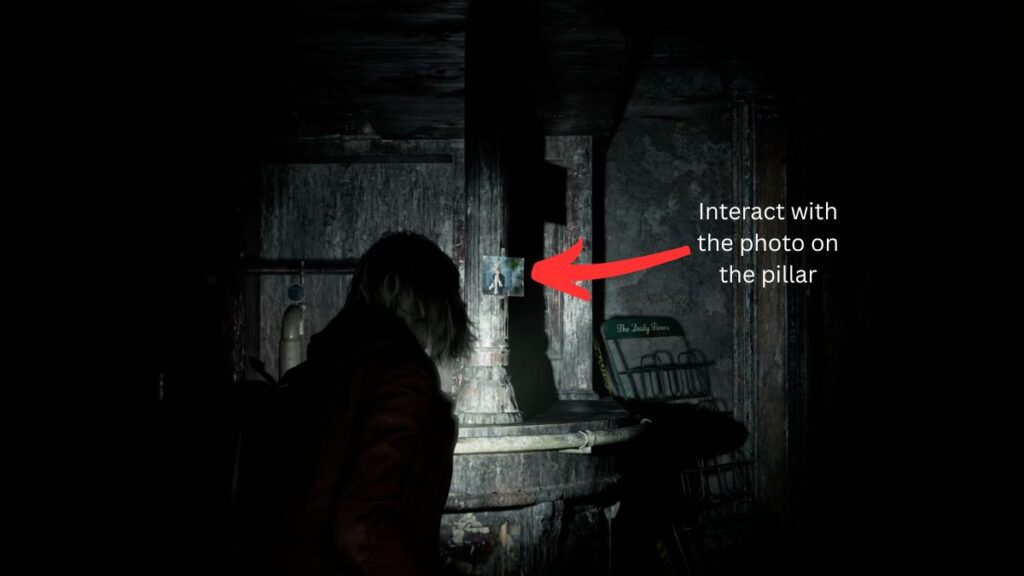
The Investigation
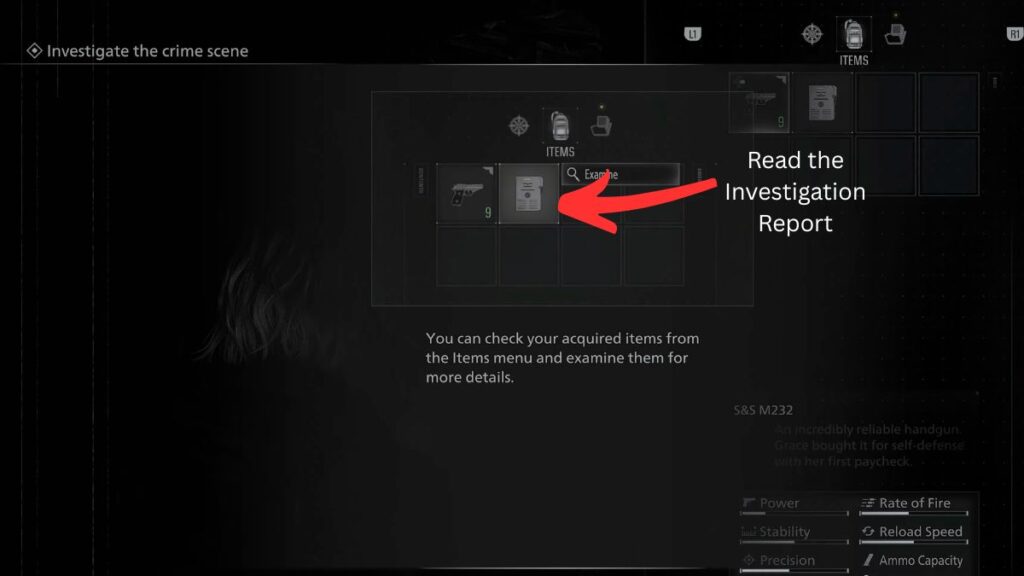
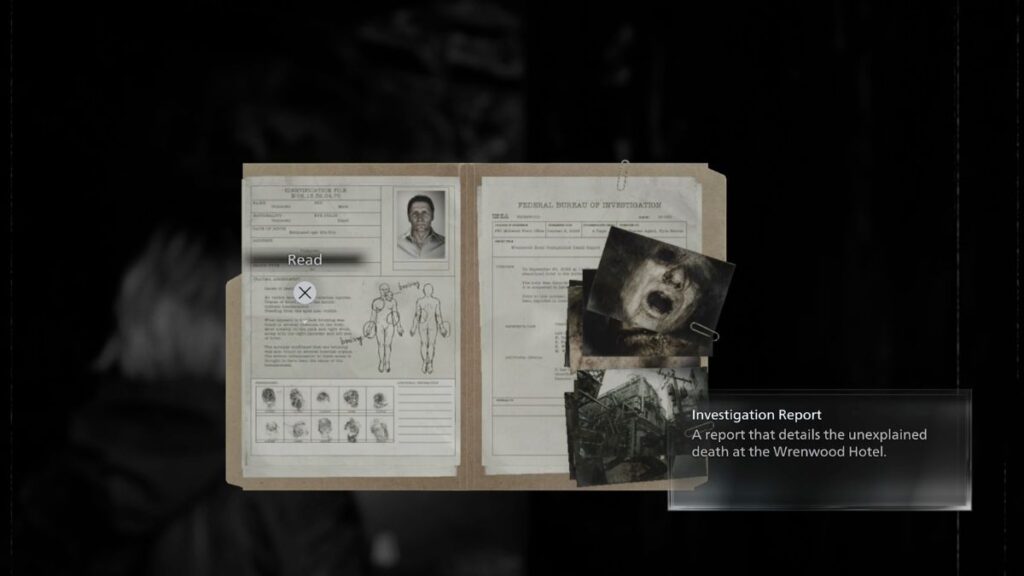
Inside, you’ll be prompted to read the investigation report. Press Triangle to open your inventory, select the file, and press X to read through it completely.
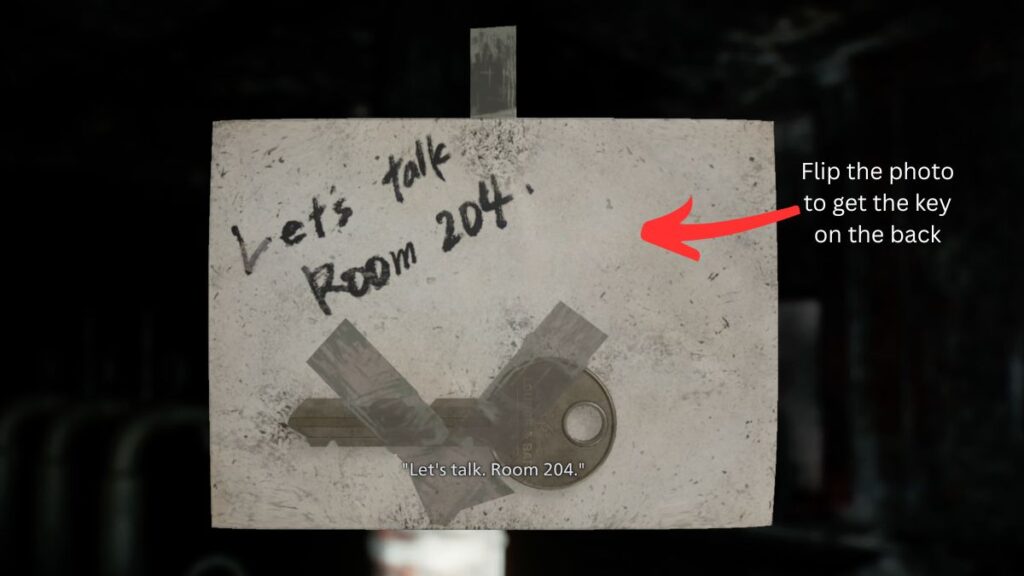
Once you’re done, look at the pillar in the room, and you will notice there’s a photograph on it. Interact with it to examine it, then rotate the photo to look at the back. You’ll find an old key taped there with a note that reads “Let’s talk, Room 204.”
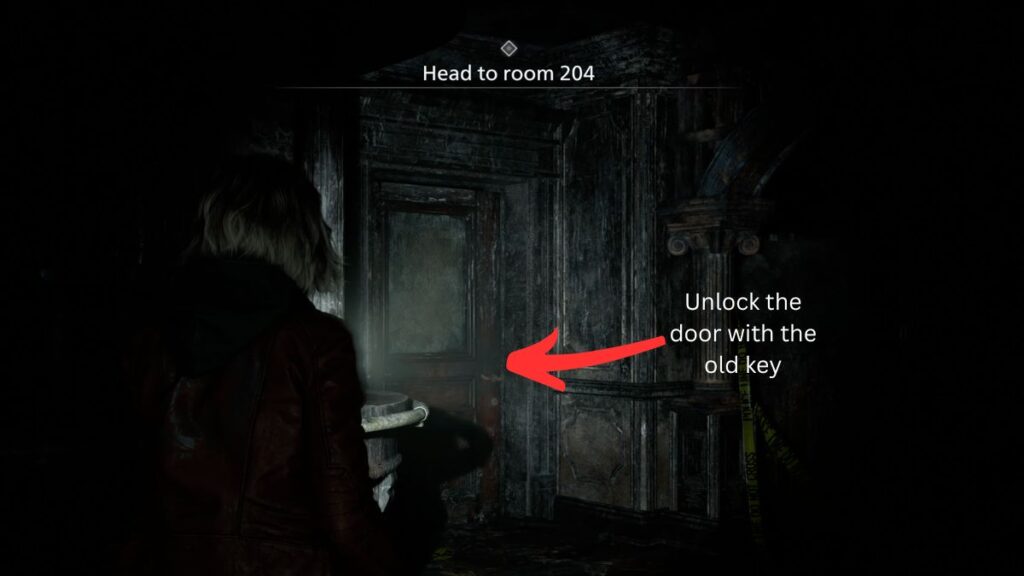
A cutscene plays immediately after. Grace hears a door slam, panics, and draws her gun. Once you regain control, you’ll be prompted to head to Room 204.
Finding Room 204
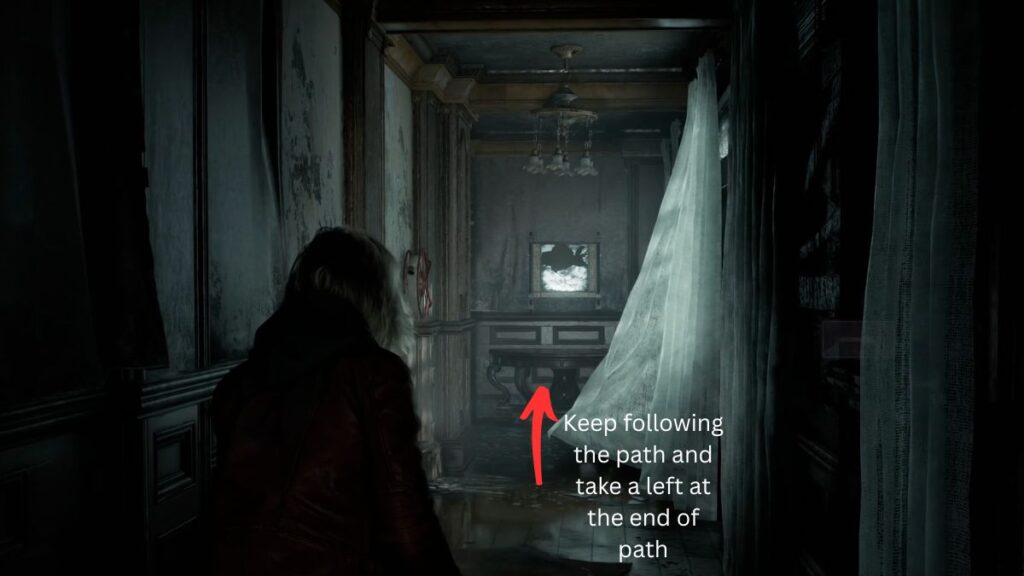
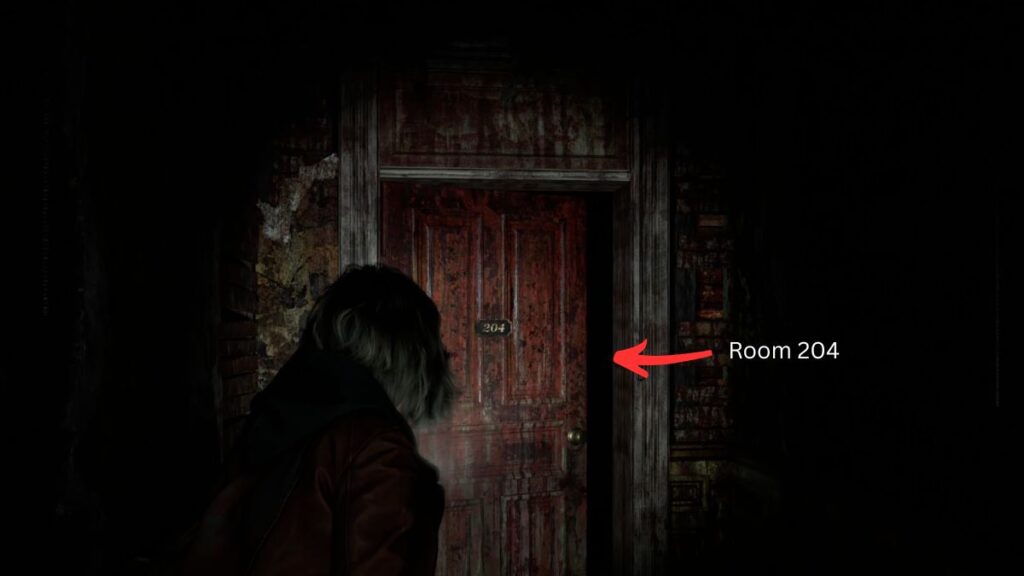
Move past the bar and look for a door on the right side. Use the old key from the photograph to unlock it. Walk down the hallway and take the left turn when you reach it. Keep following the path until you come to a door that’s already half open and go through it.
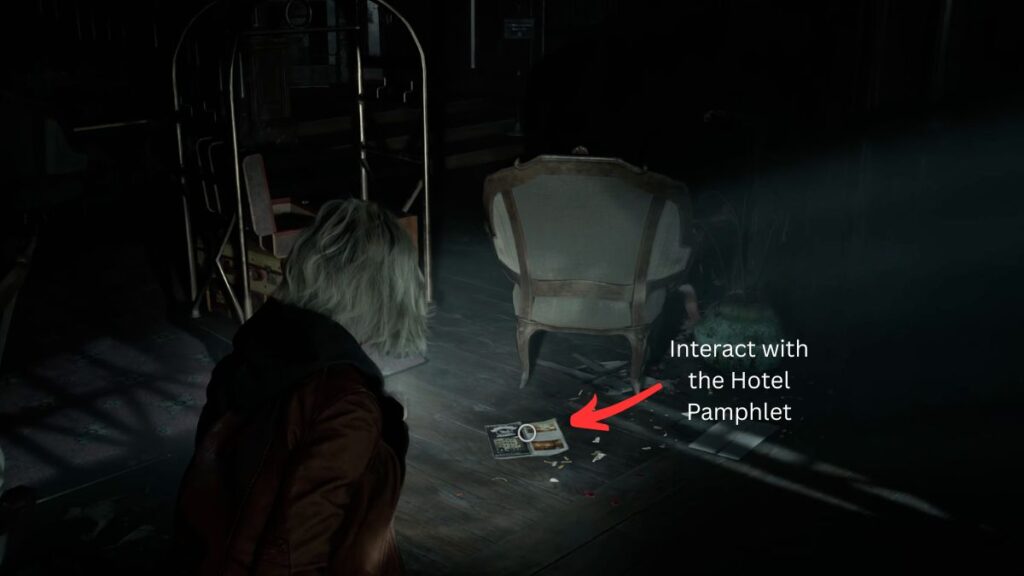
You’ll find yourself in the hotel lobby. On the left side near the luggage, you’ll see an interact prompt. It’s a hotel pamphlet, which gets added to your files.
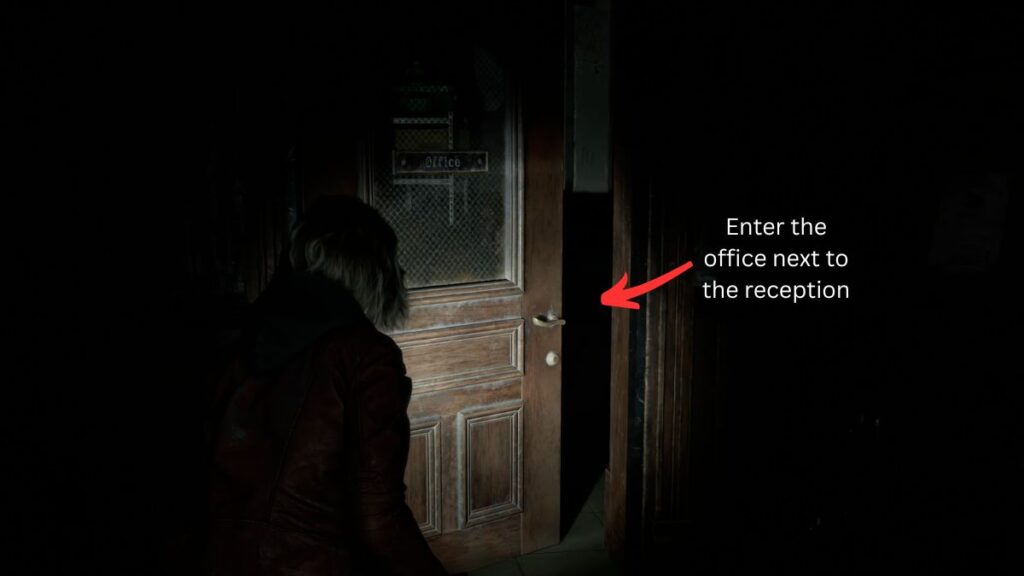
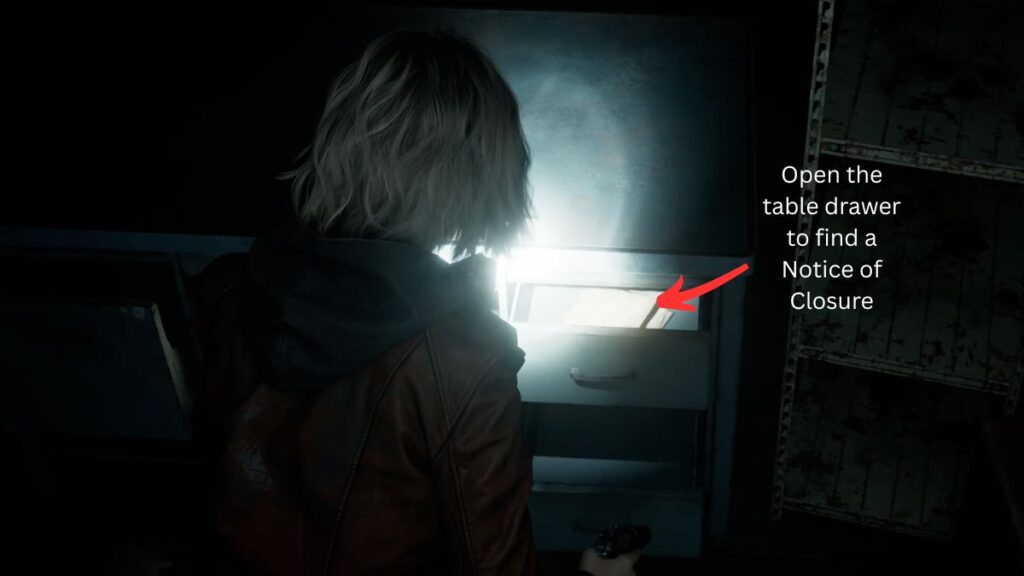
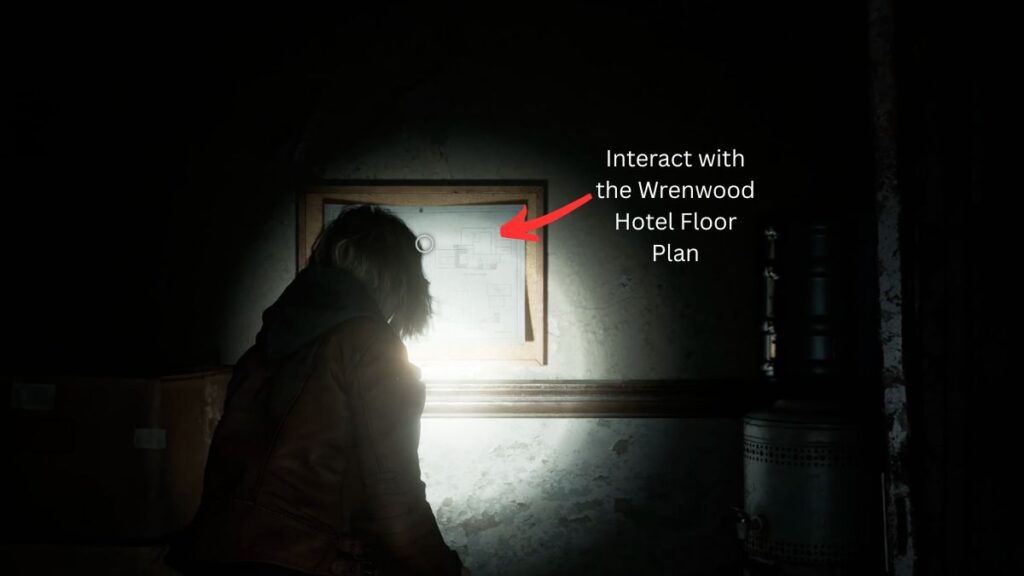
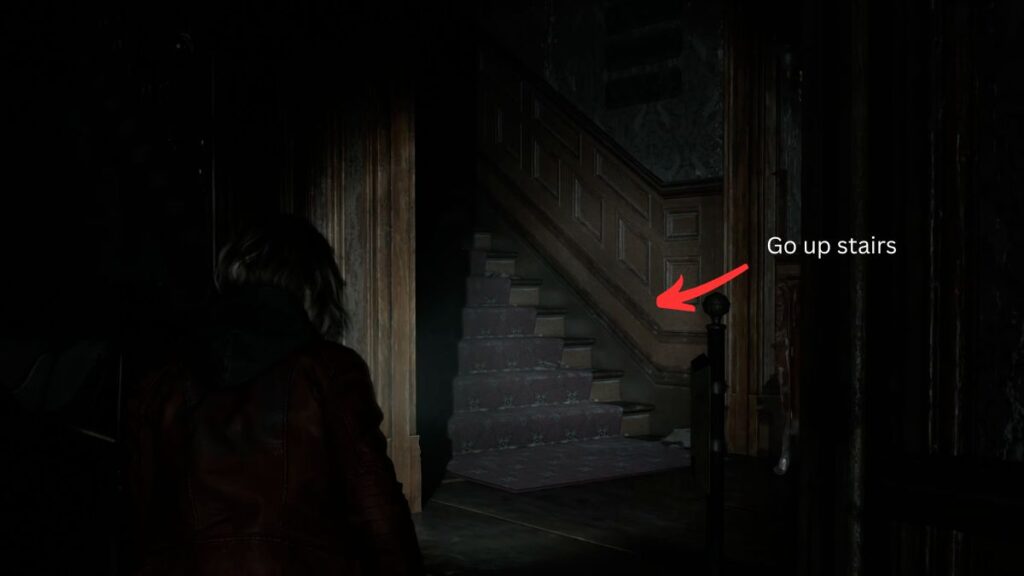
Head behind the reception desk and through the door into the office. You’ll find a blue table — open the top drawer to collect a Notice of Closure. After that, interact with the frame hanging on the wall to obtain the Wrenwood Hotel Floor Plan.
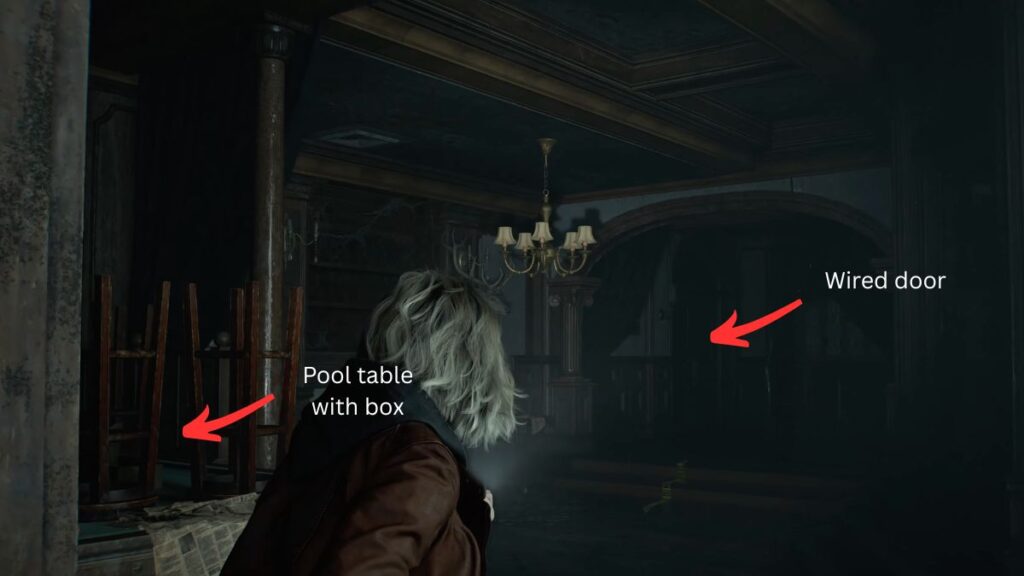
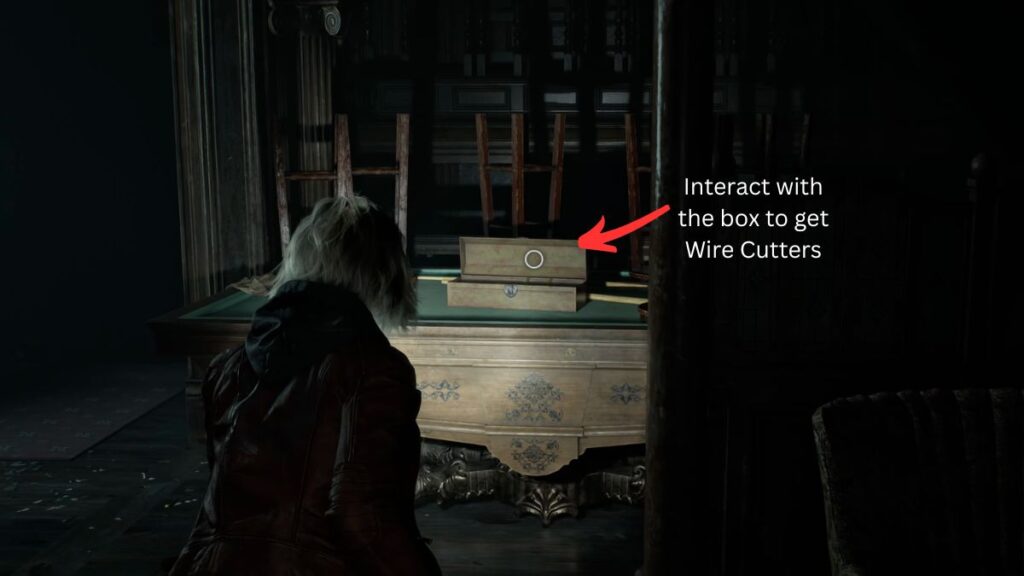
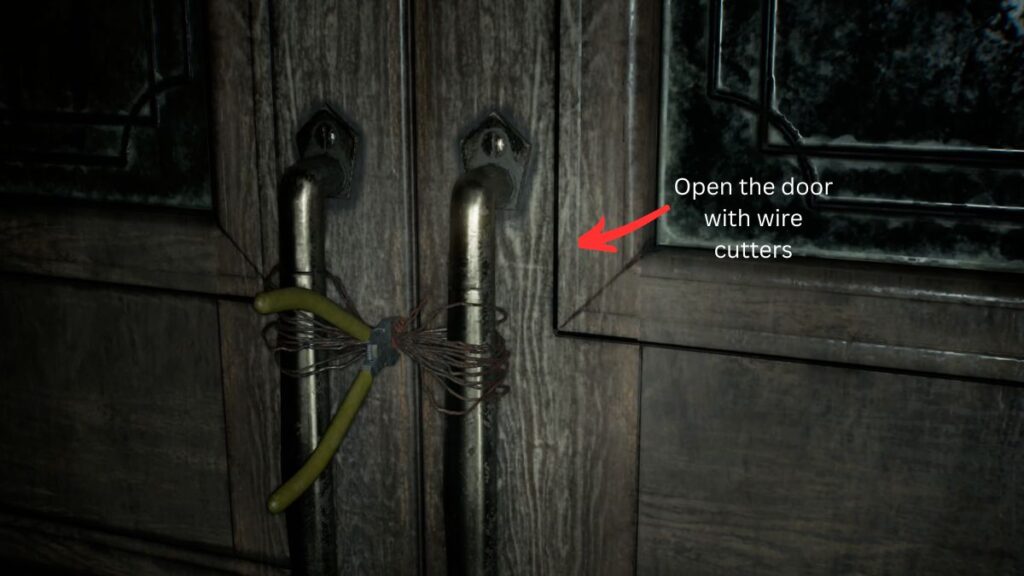
With the floor plan in hand, head upstairs. At the top, you’ll spot a pool table. Interact with the box sitting on it to collect the wire cutters. Continue along the path to the sealed door ahead and use the wire cutters to get it open.
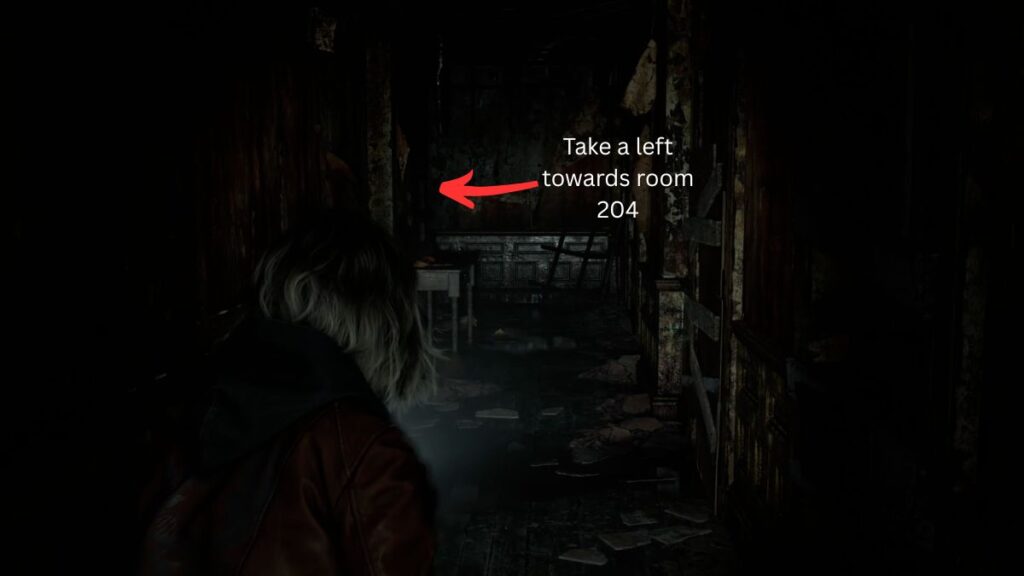
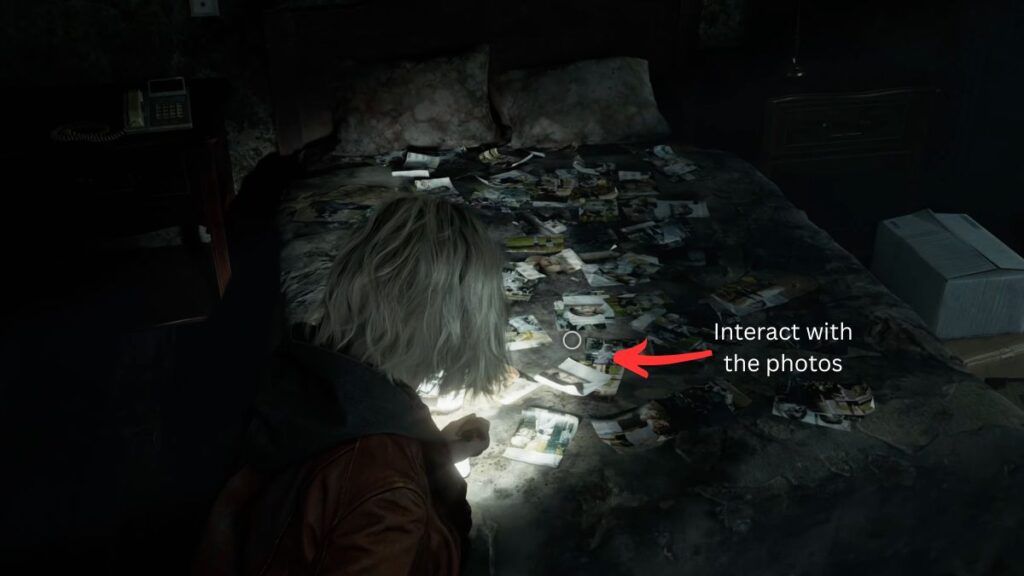
Follow the hallway to Room 204. Inside, you’ll find a radio playing a report — turn it off by pressing X. Look around the bed and you’ll notice several photographs of Grace. A short cutscene will then play as Grace notices one photo in particular.
The Flashback
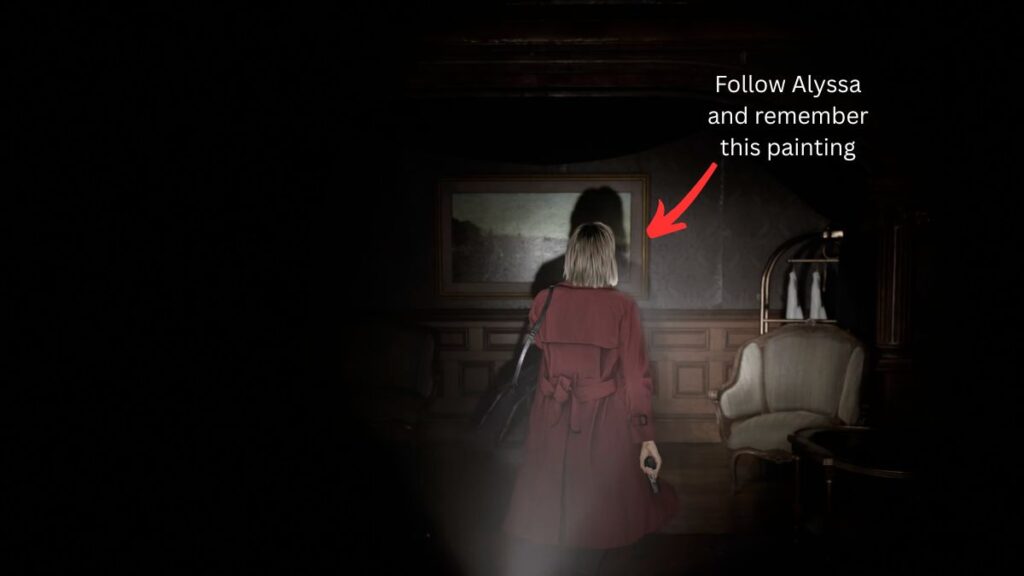
The cutscene takes you back eight years, when Grace was living with her mother in Room 204. Grace receives a phone call, the power suddenly cuts out, and her mother Alyssa urges her to escape the hotel.
Follow Alyssa to escape, and mid-escape, a second cutscene plays showing Alyssa hiding something behind a painting on the wall. The flashback ends, and you return to the present with Grace staring at her mother’s photo, realizing she left something hidden. You’ll be prompted to find what Alyssa hid.
The Hidden Item
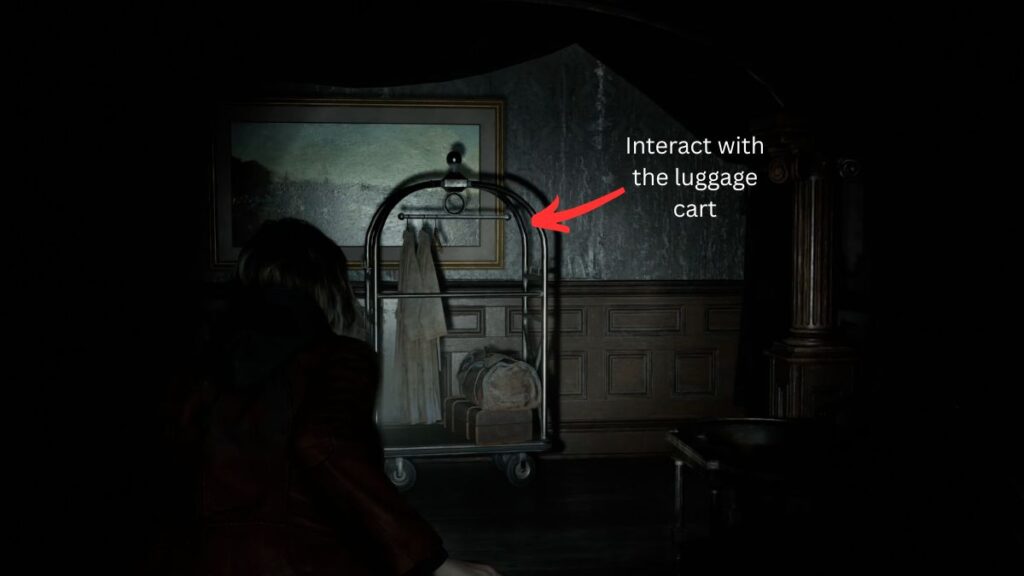
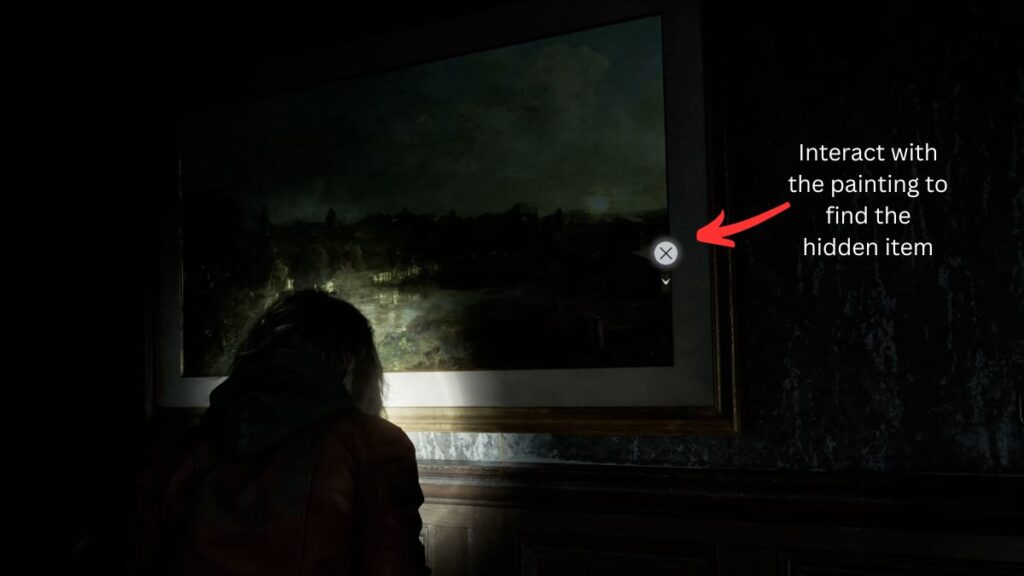
Head back down to the hotel lobby. You’ll recognize the same painting and luggage cart from the flashback. Interact with the luggage cart to move it out of the way, then retrieve the leather wallet from behind the painting.
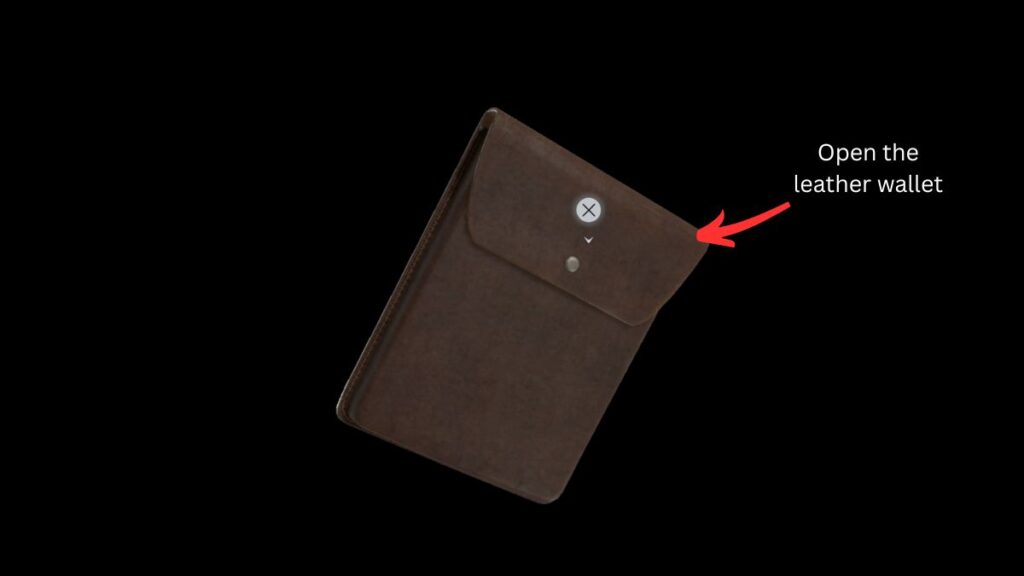
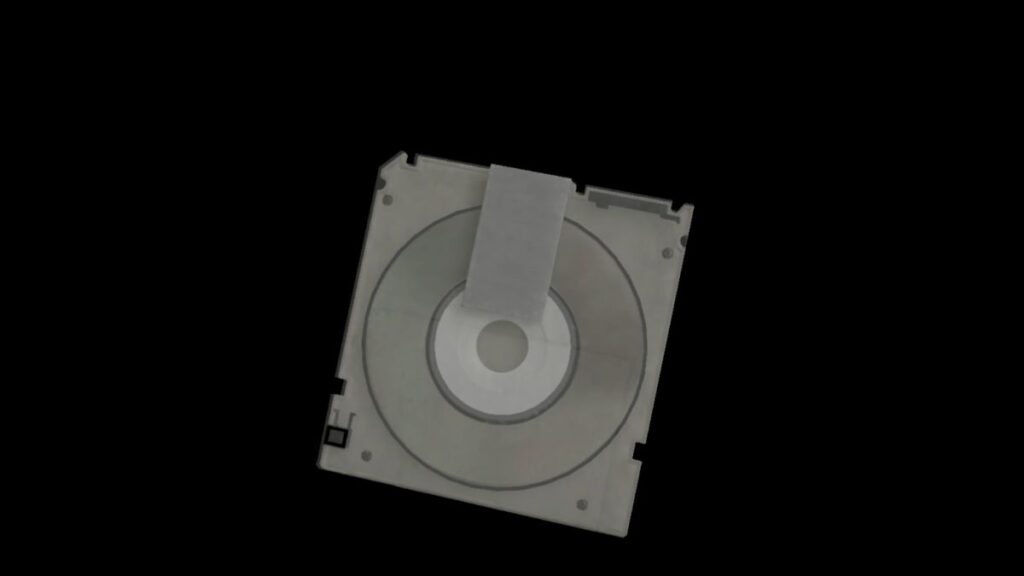
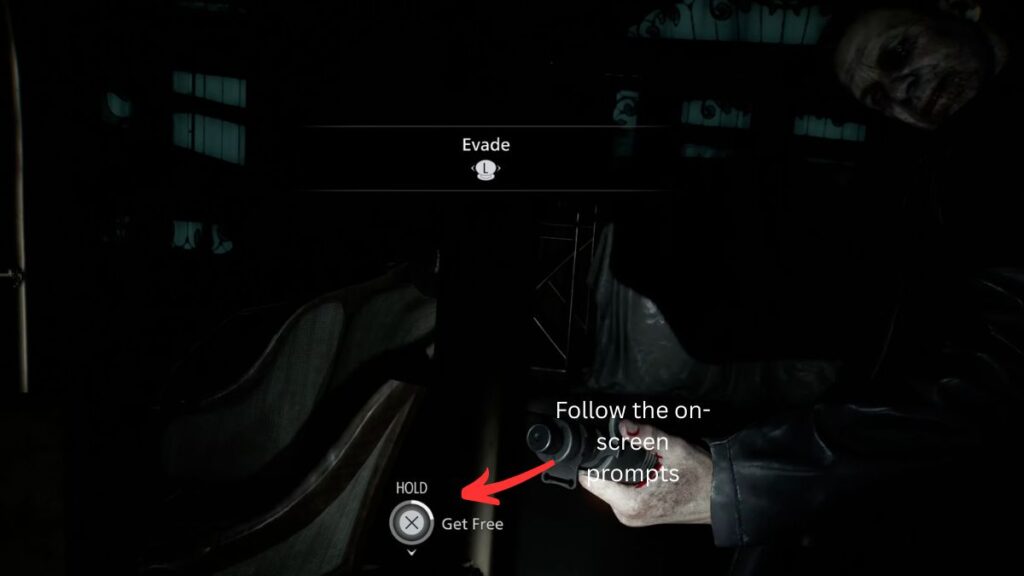
Open the wallet to find Alyssa’s Journal inside. Keep scrolling through the wallet’s contents to find a disk, which triggers another cutscene. Follow the on-screen prompts to continue through it.
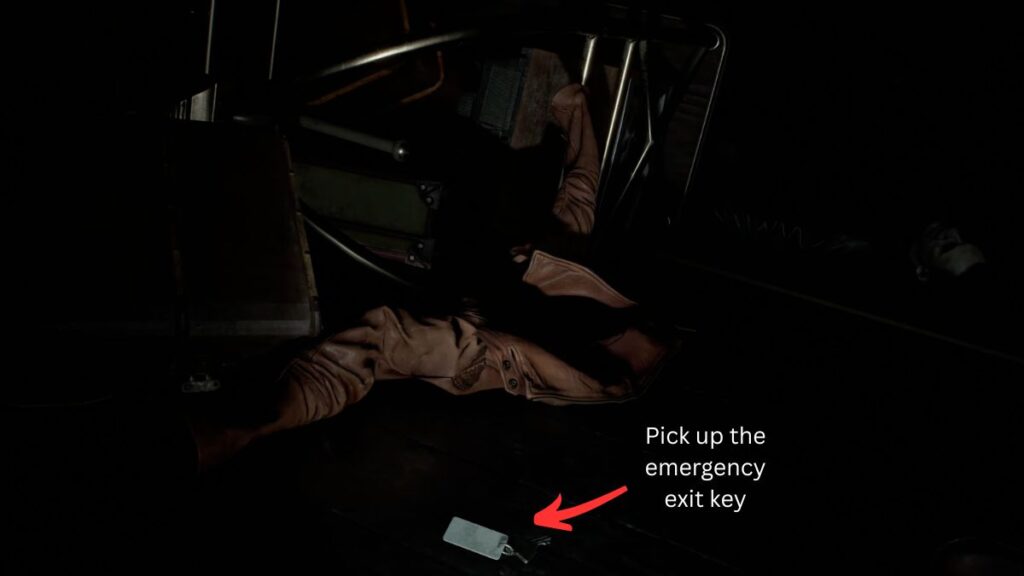
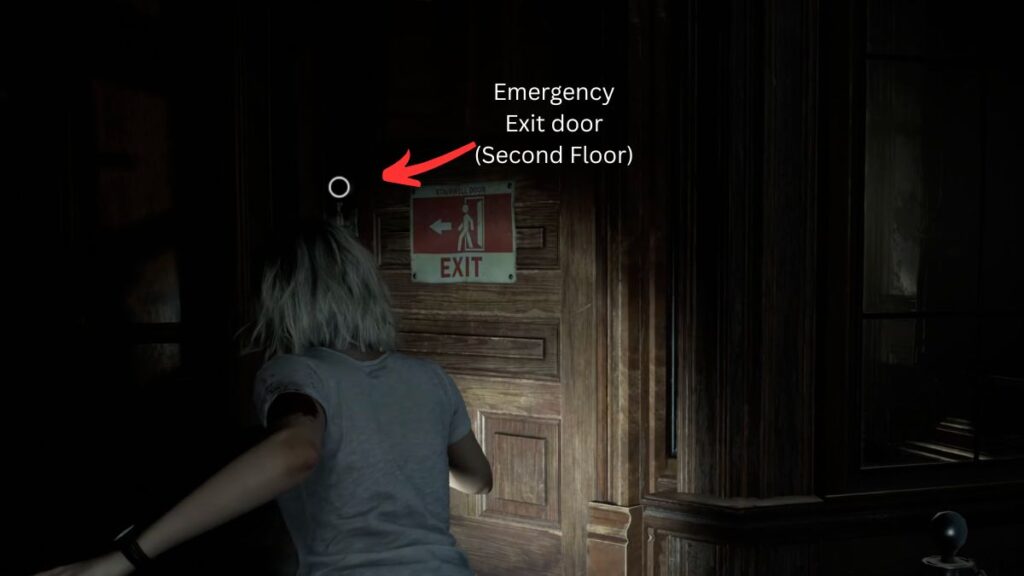
Once you free yourself, pick up the emergency exit key and the fire poker. When you fully regain control of Grace, run upstairs to the second floor and find the emergency exit door. Interact with it to use the emergency exit key, leading into another cutscene.
All Collectibles
| Category | Item | Location/Notes |
|---|---|---|
| Collectible Files | Wrenwood City Guide | On the pole to the right of the barber shop — first collectible in the game |
| Hotel Pamphlet | Near the luggage in the hotel lobby | |
| Notice of Closure | Top drawer of the blue table in the reception office | |
| Wrenwood Hotel Floor Plan | Frame on the wall in the reception office | |
| Alyssa’s Journal | Inside the leather wallet retrieved from behind the lobby painting | |
| Keys | Old Key | Taped to the back of the photograph in the investigation room |
| Emergency Exit Key | Collected after the flashback sequence in Room 204 | |
| Tools | Wire Cutters | Inside the box on the pool table, upper floor |
| Fire Poker | Collected alongside the emergency exit key after the flashback | |
| Disk | Disk | Found inside Alyssa’s leather wallet — triggers a cutscene |
Chapter 1 serves as Resident Evil Requiem’s introduction to both Grace and the mystery surrounding her mother Alyssa’s past at the Wrenwood Hotel. The chapter is largely linear and focused on building the story, with the flashback sequence in Room 204 setting up the central mystery driving the rest of the game.