
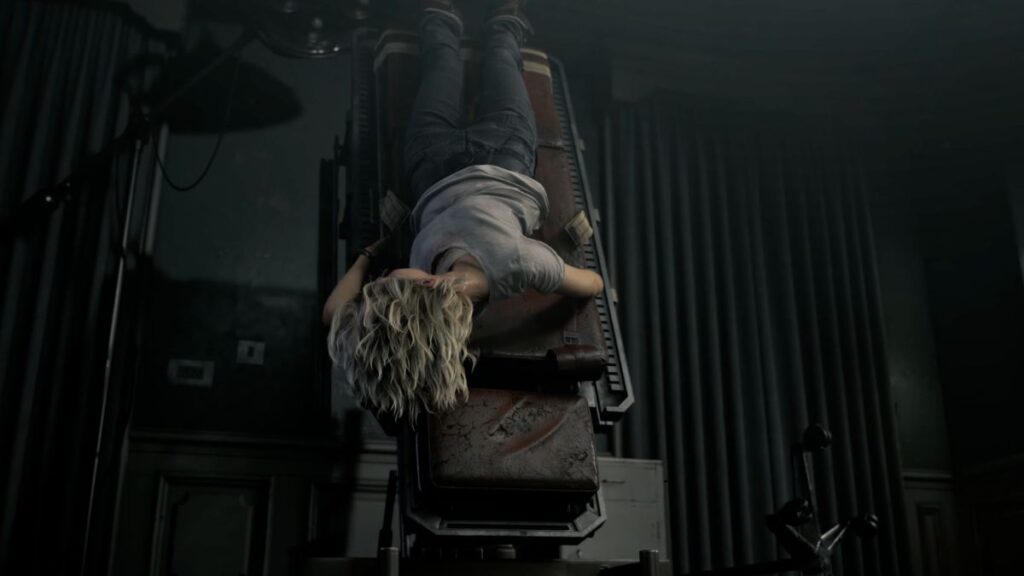
The previous cutscene transitions into a new one where Grace wakes up tied upside down with her blood being drawn. This section begins the moment she frees herself.
The First Room
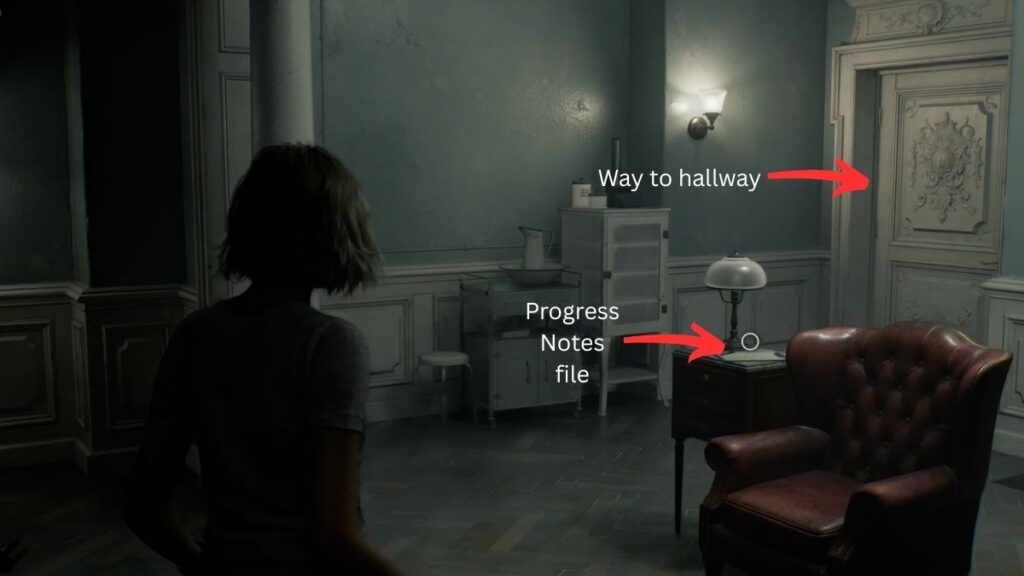
Once you’re free, you’ll notice a chair and a nightstand directly in front of you. Check the table beside the lamp to collect the Progress Notes file. Head through the room and into the hallway beyond.
The Dark Hallway
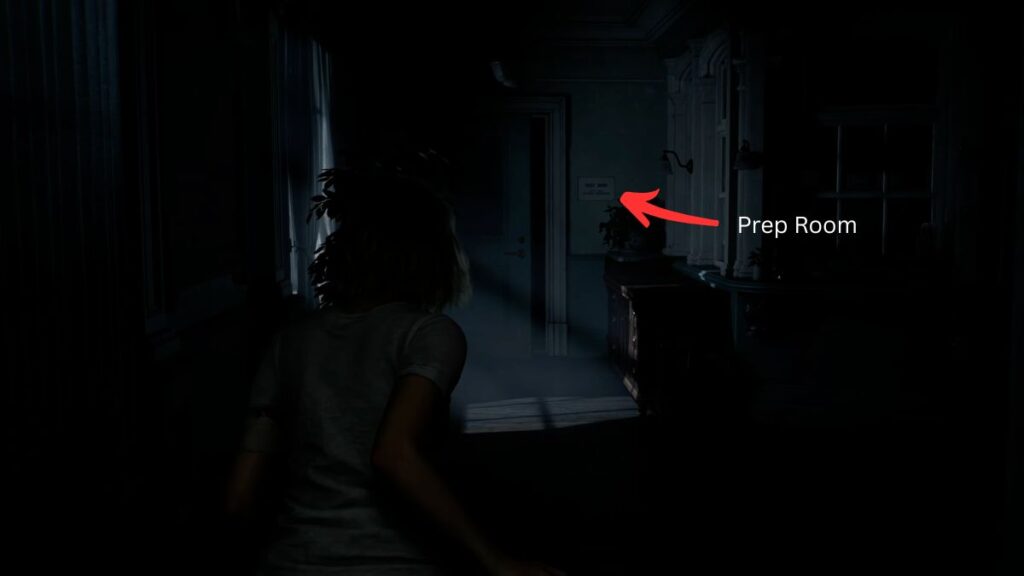
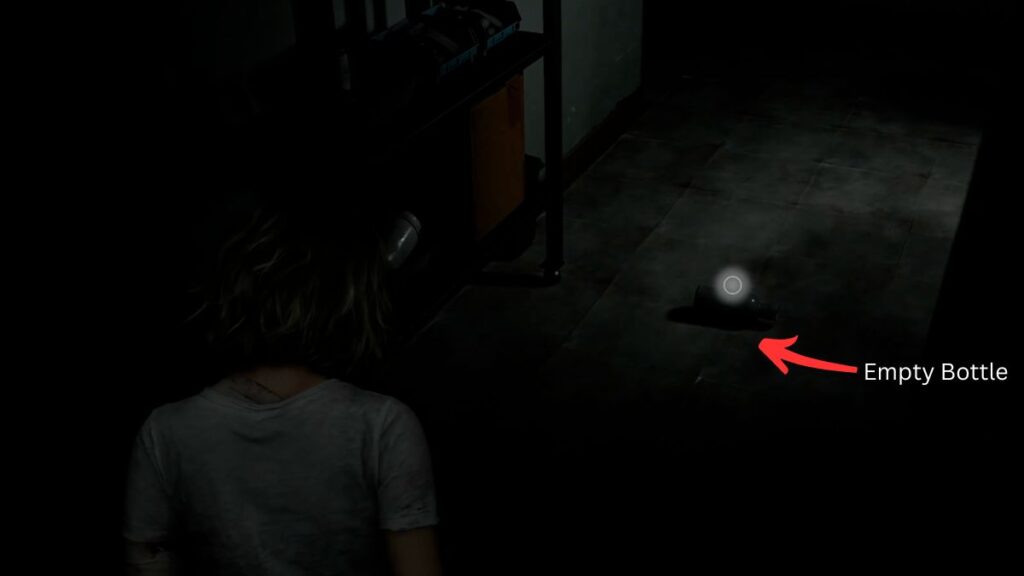
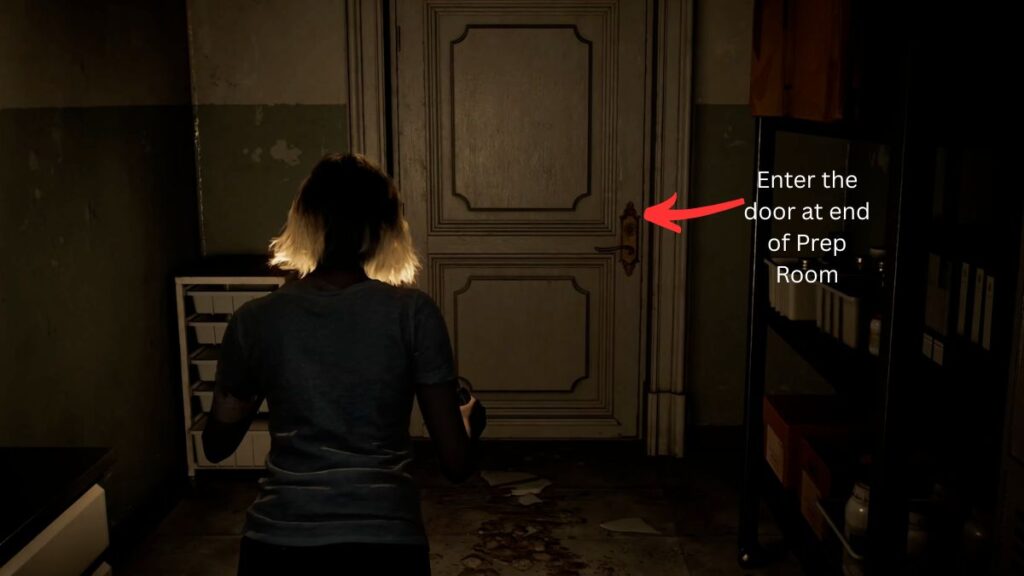
The hallway is very dark. You will see too paths one on the right and one straight. Follow the path forward, you will enter the prep room and keep an eye out for an empty bottle on the ground pick it up. Use R2 + L2 to throw this bottle and this will come in handy so remember that!
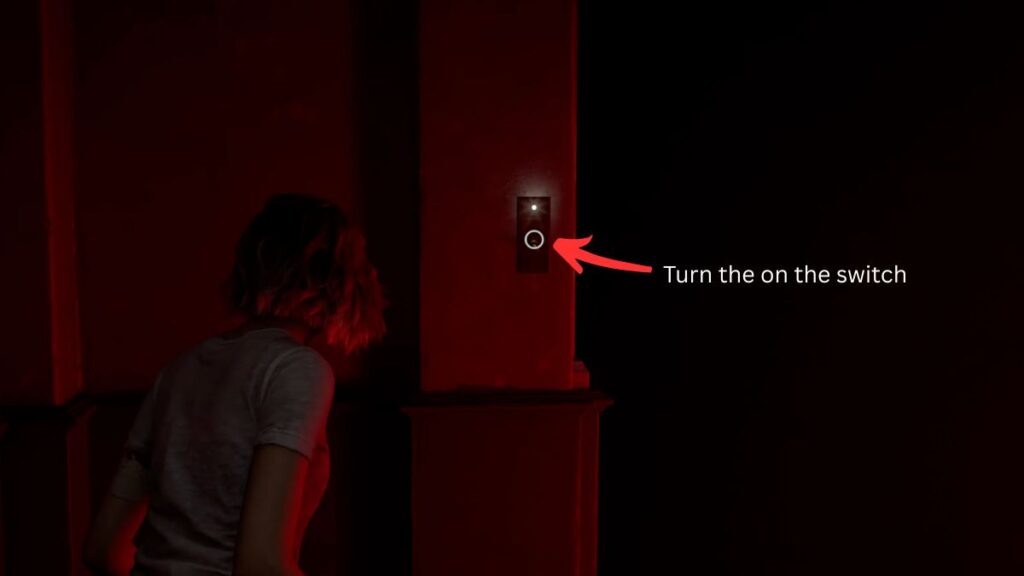
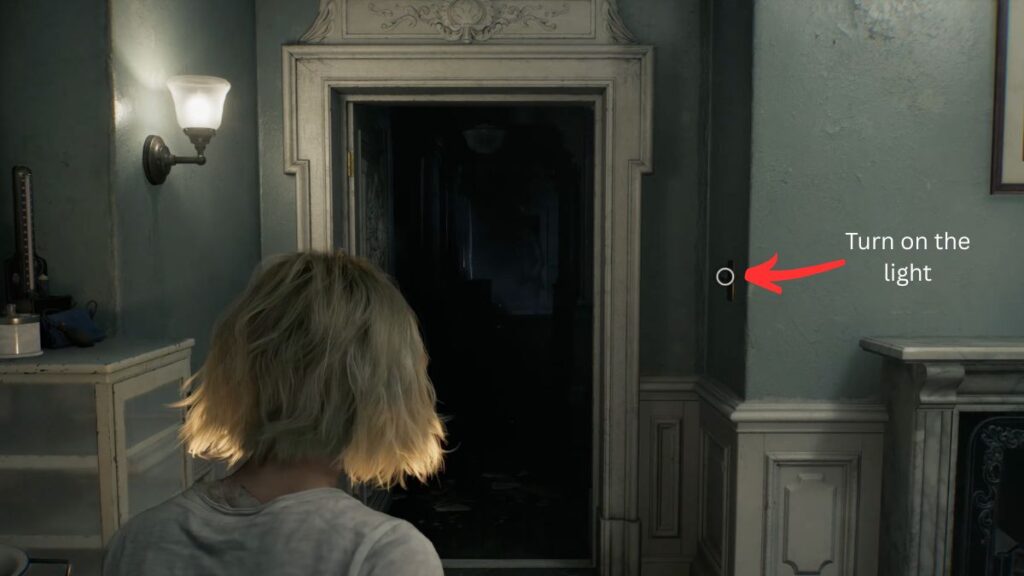
After that return to the right turn, you’ll find a red light in distance and follow it. On your way you will come across a wall switch. Interact with it to turn on a light at the far end of the hallway, revealing a horse statue in the distance.
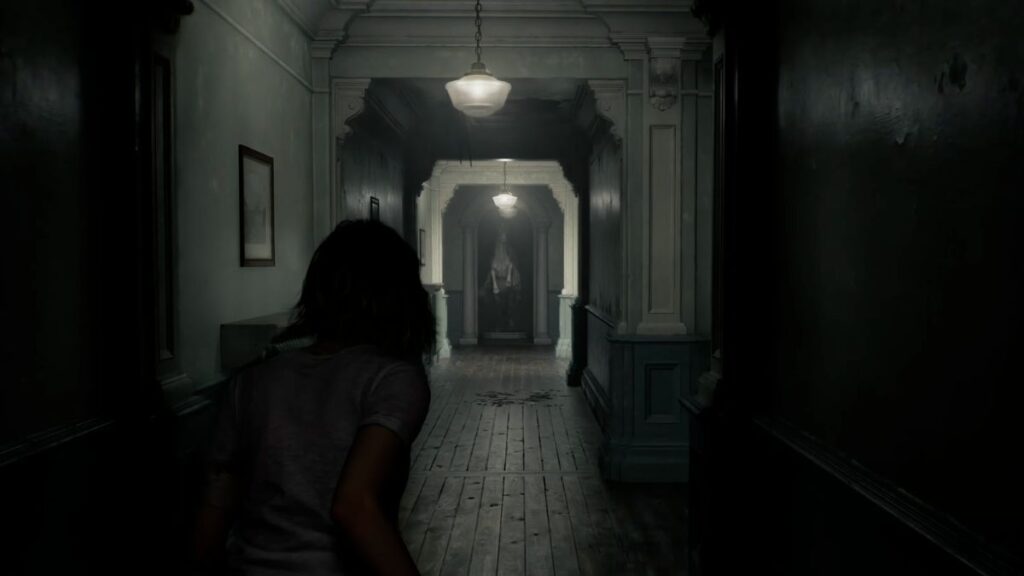
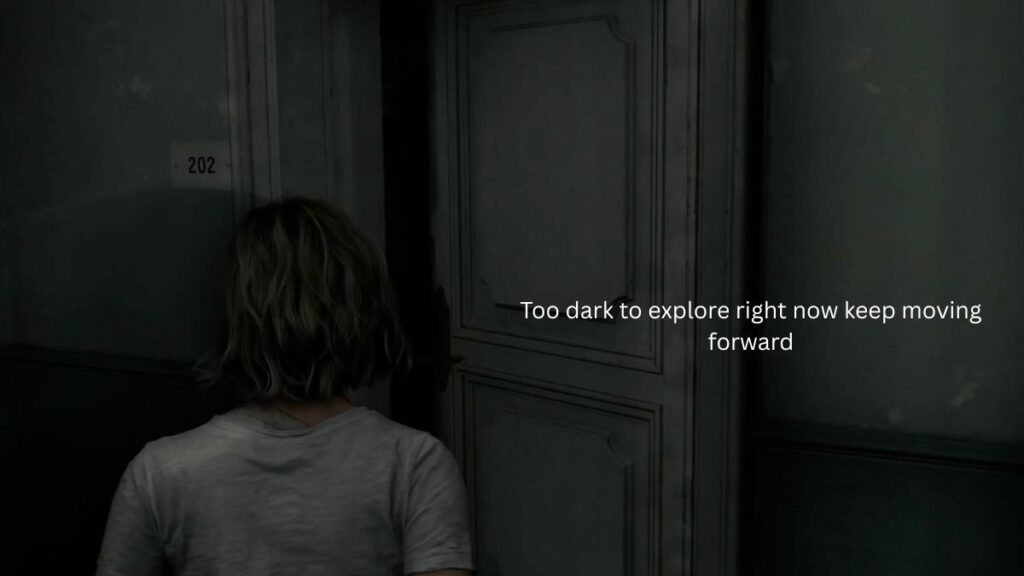
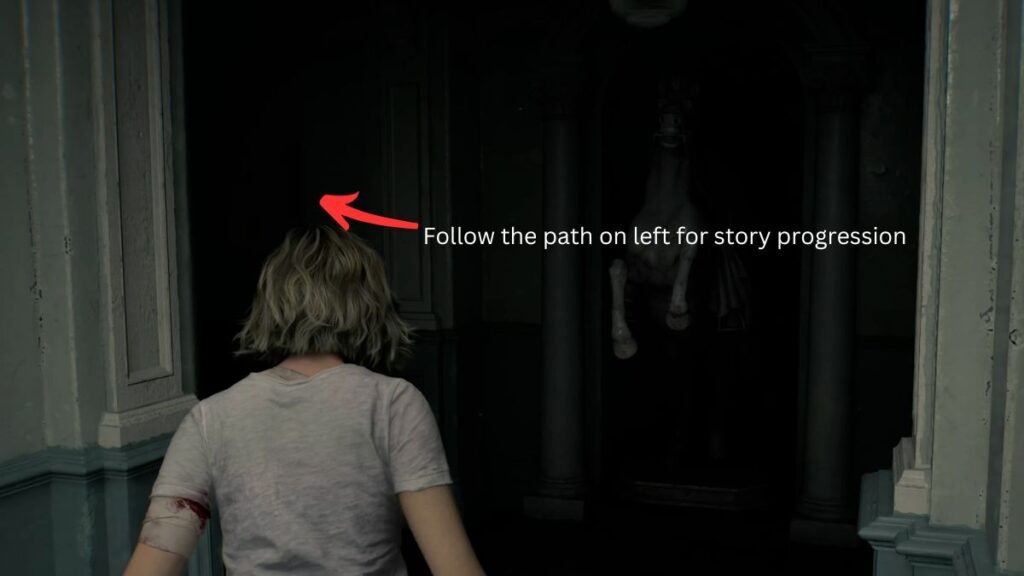
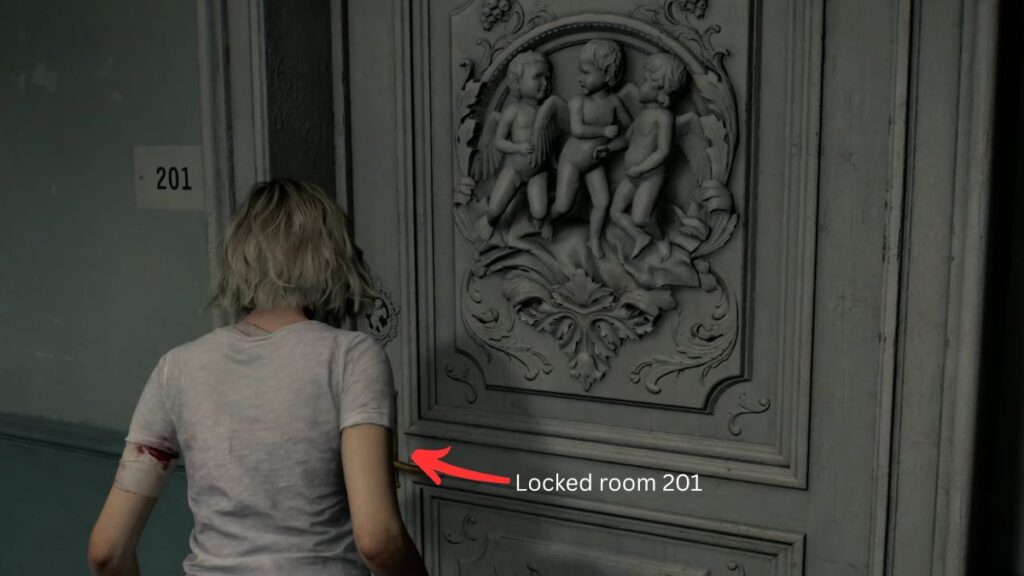
As you move down the hallway, you’ll pass Room 202 on your left, it’s too dark to explore right now, so ignore it and keep moving. Shortly after, you’ll reach Room 201 on the right, which is locked. Continue past it toward the horse statue at the end and take a left to keep following the main path.
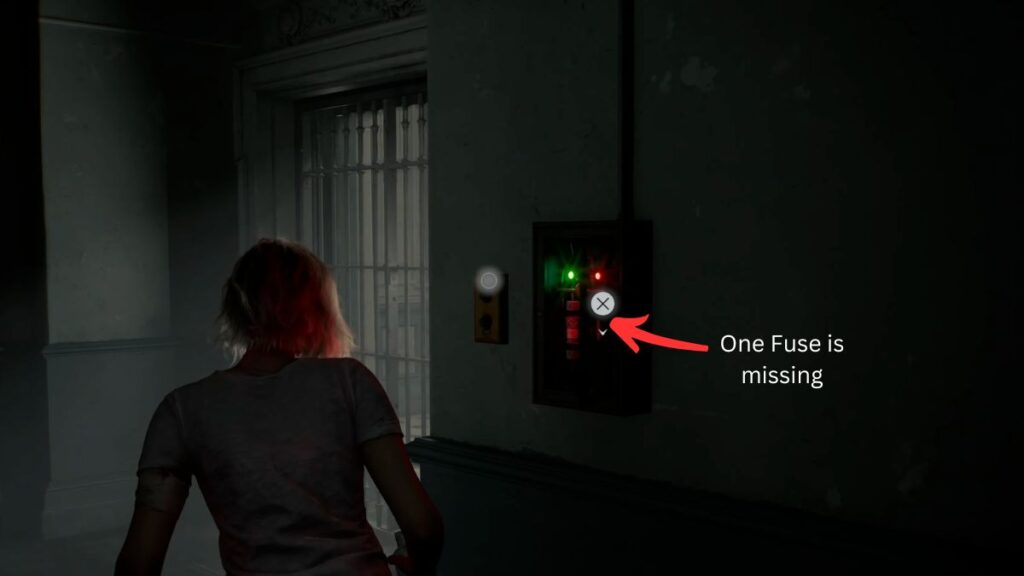
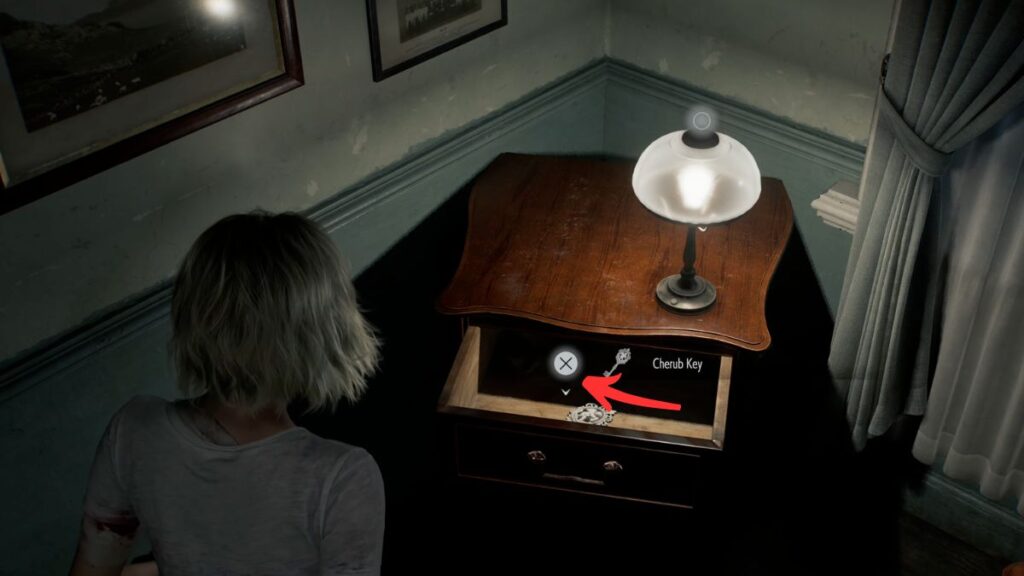
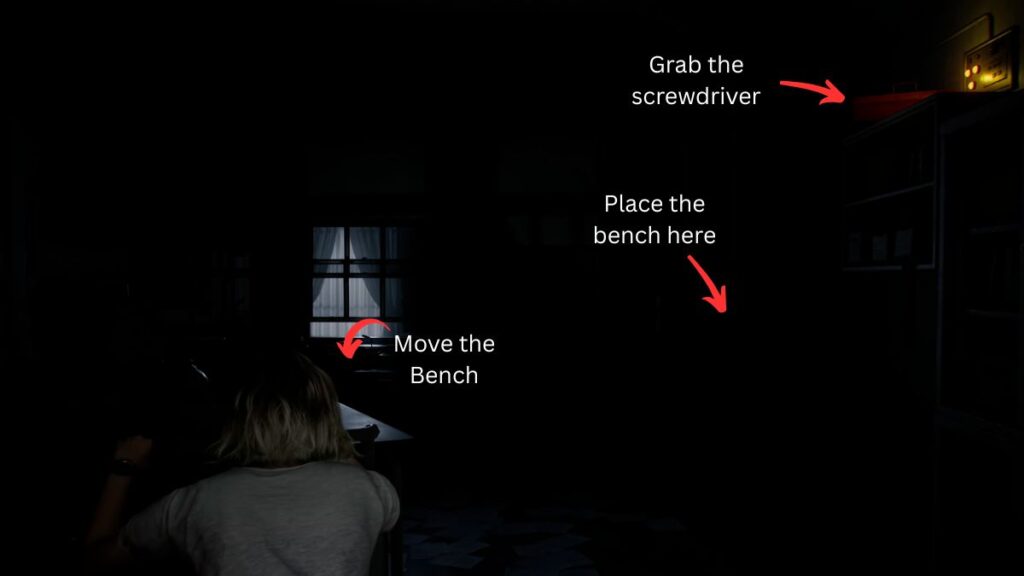
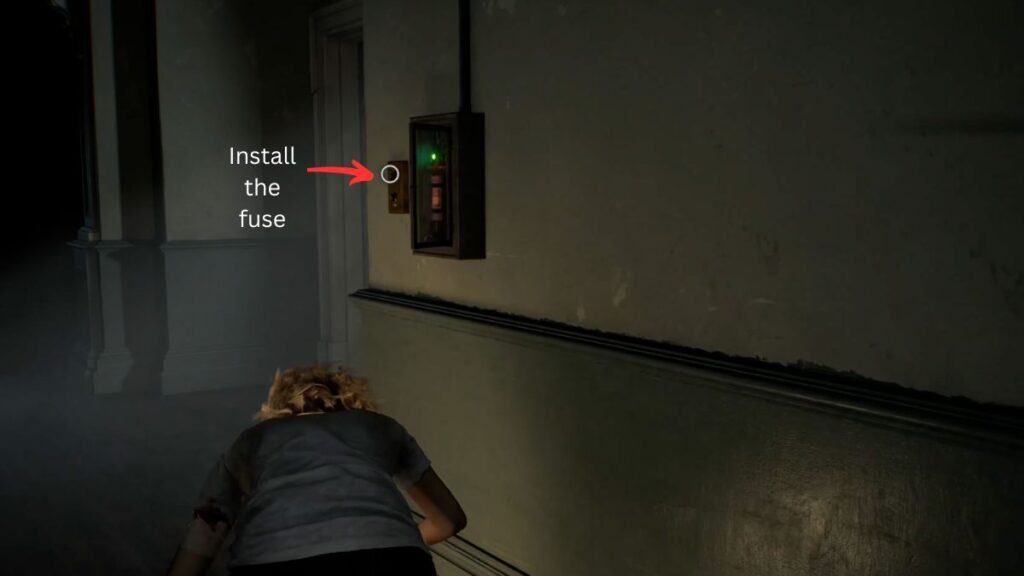
On the right side, you’ll come across a closed gate with a set of green and red switches on the wall. Interact with them, but nothing will happen, the fuse box nearby is only half full. Your next objective is to find a fuse. Keep moving forward and look to the left corner where you’ll find a small table with a lamp. Open the first drawer to collect the Cherub Key.
Room 201
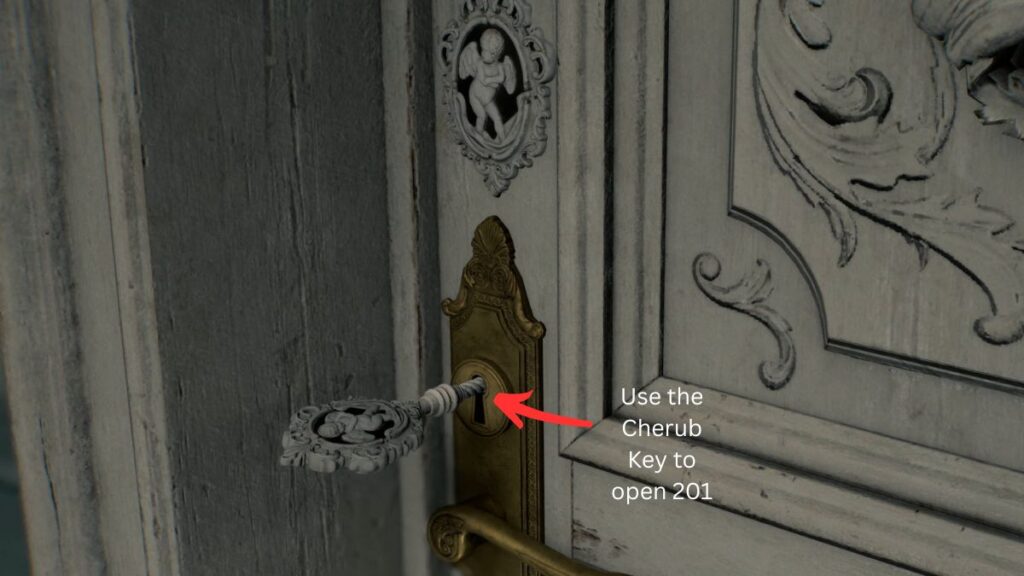
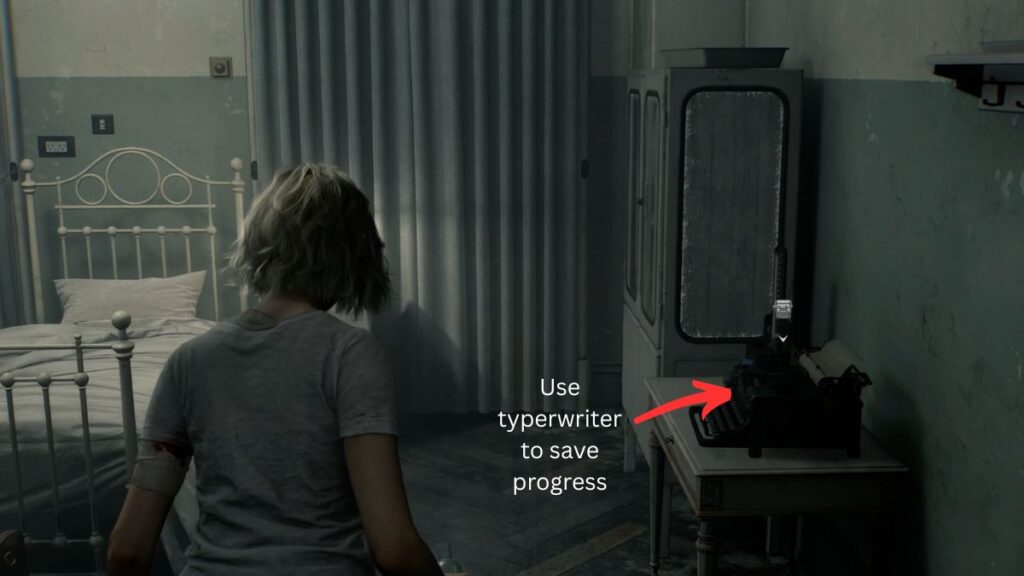
Head back to the locked Room 201 and use the Cherub Key to get inside. Compared to everywhere else you’ve been, this room is noticeably clean and well lit. On the right side, you’ll find a typewriter, use it to save your progress.
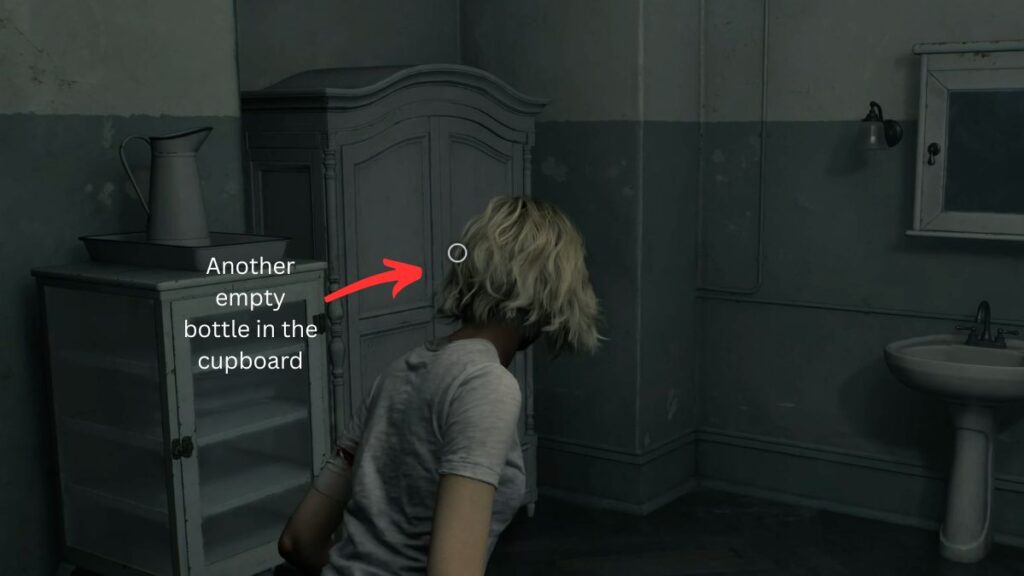
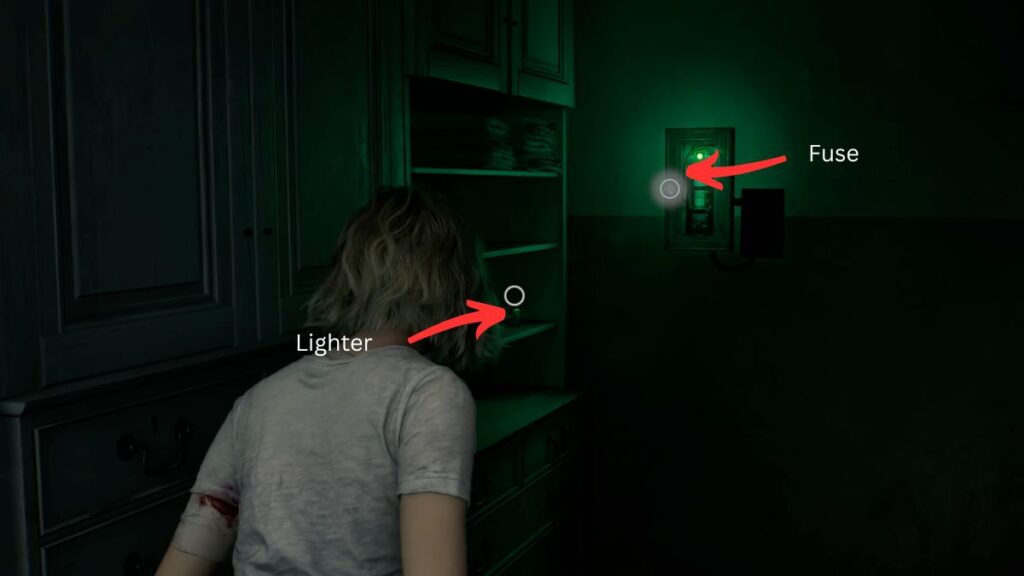
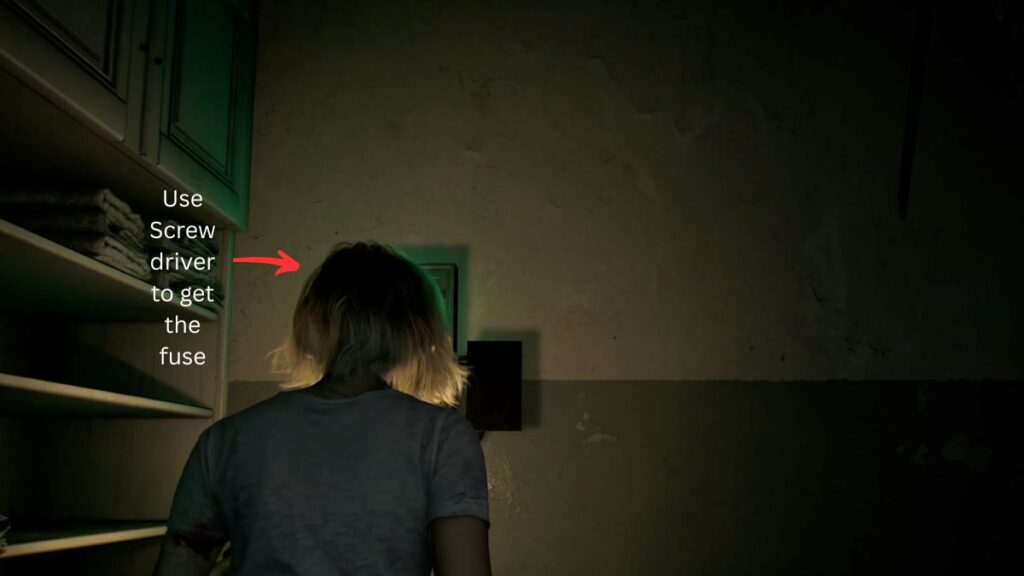
On the left side of the room, check the wardrobe along the wall facing the bed to find another empty bottle. Continue into the small adjoining room, where you’ll spot a lighter sitting on the shelves. You’ll also notice a fuse locked behind a glass panel nearby, but you’ll need a screwdriver to get to it. Keep that in mind and head out for now.
Room 202
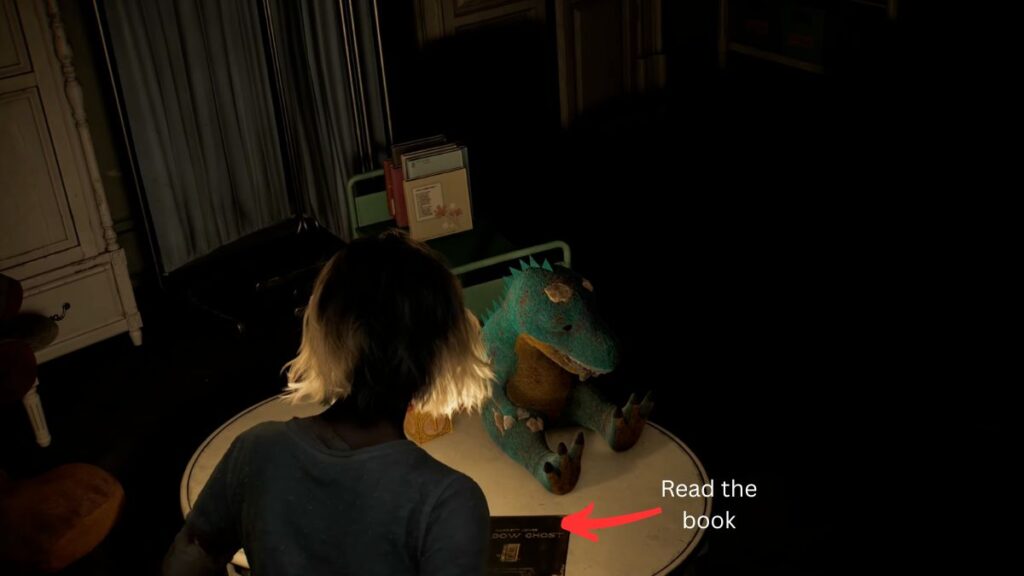
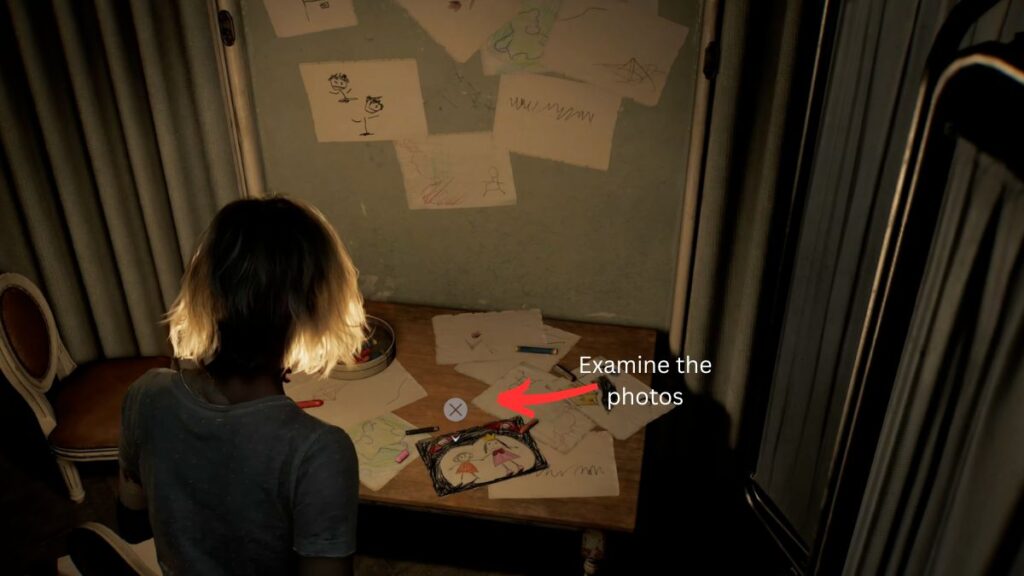
Now that you have the lighter, head back to Room 202, the one you skipped earlier. With your lighter out, you’ll be able to see well enough to explore. Inside, find the storybook on the table and give it a read as it might give you a hint of what is coming next and will also give you the solution on how to save yourself from the threat by telling you to “Stay in Light”, then examine the hand-drawn paintings on the desk.
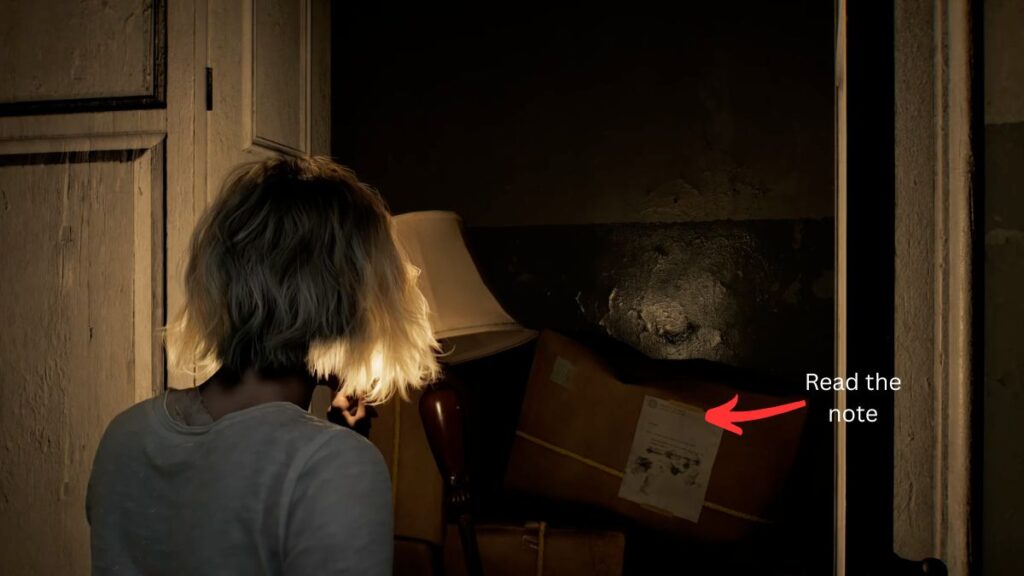
Open the closet to find a note on a cardboard box, which gives you another file. Read the note carefully as it mentions that a screwdriver has been left inside a toolbox at the nurse’s station (which is in the back of prep room we first entered)
The Prep Room and the Girl
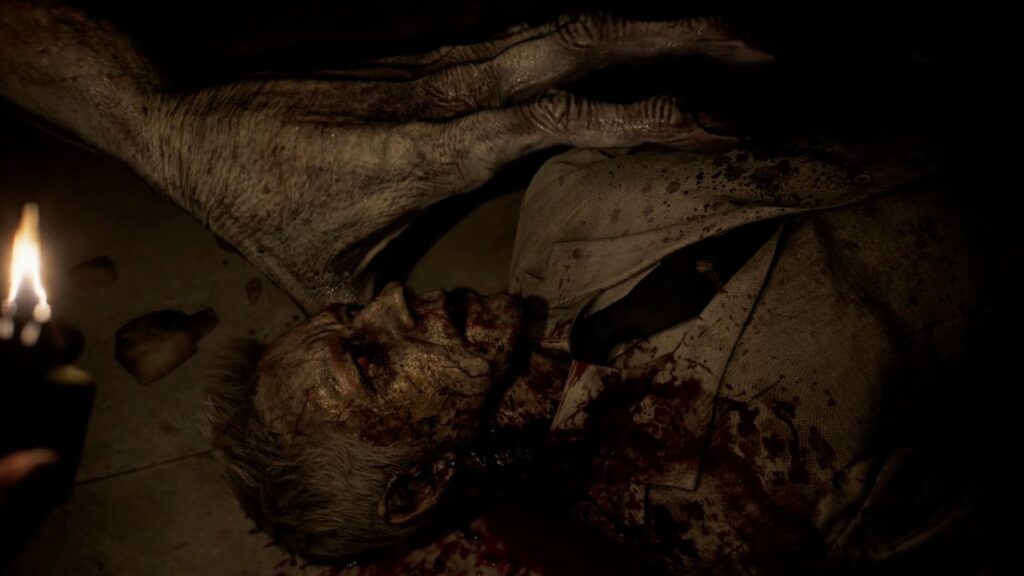
Head back down the hallway past the red light and into the Prep Room with your lighter out. Follow the room all the way to the far end, which opens into the nurse’s station. A short cutscene plays as you inspect a dead infected, a massive hand slowly reaches in, and a large creature tears the head clean off the body. Grace bolts back to the very first room she woke up in.
Keep the lights on inside the room, as this creature as the Girl is afraid of well-lit spaces and won’t enter them. This is your first major enemy encounter, and from this point forward she’ll be hunting you throughout the chapter. Always remember: bright rooms are your safe zones.
The Nurse’s Station
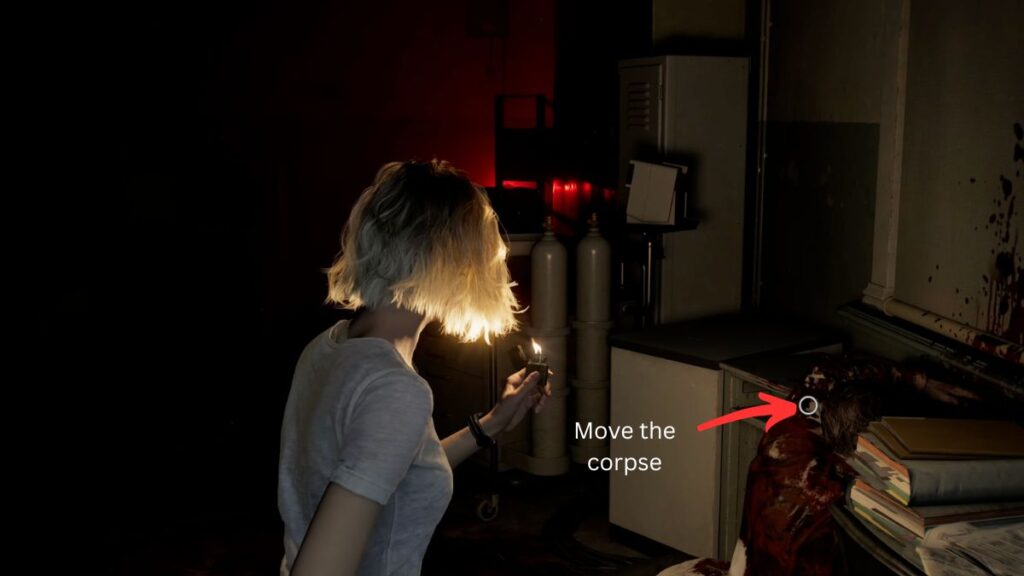
Once the Girl moves away, head back out toward the dark Prep Room. You’ll find a blood-covered body on the ground nearby and next to it is a Med Injecter, a device that can fully restore your health. Hold onto it.

Turn right to find an office desk in the area and remove the body slumped over it, but the drawers there are empty as well.
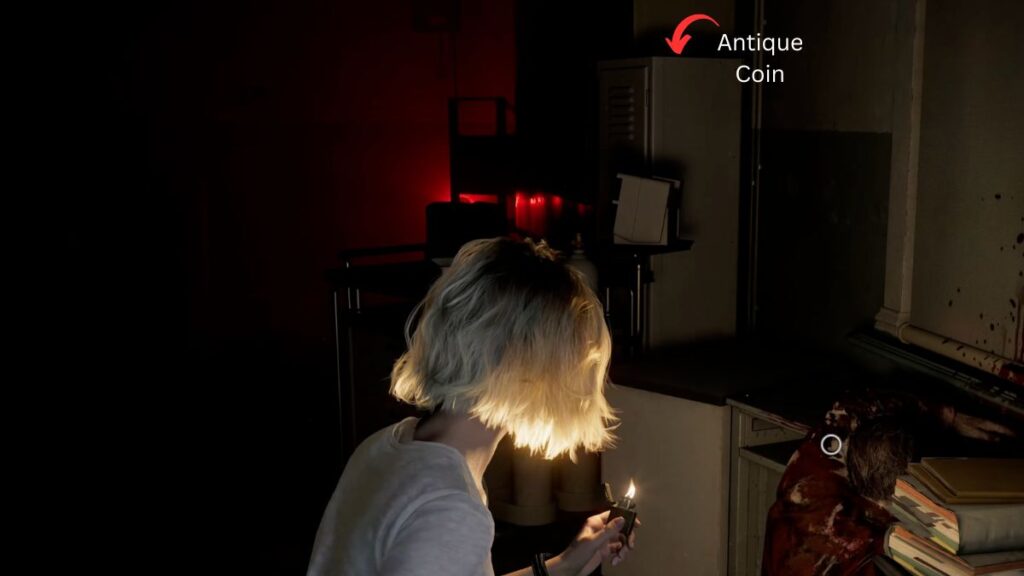
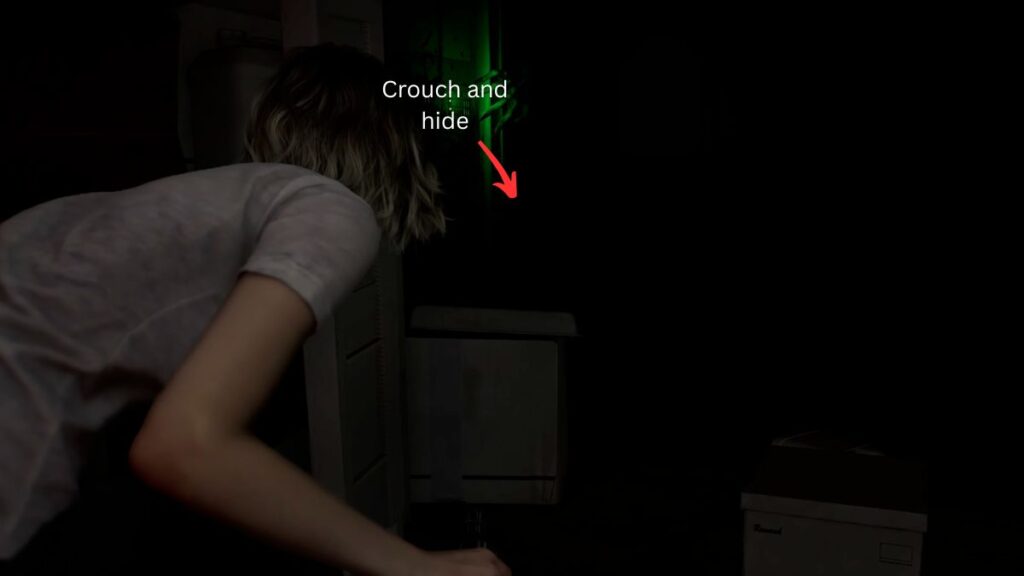
Look for a medical cart blocking one of the lockers. Go around it and climb on top to find an Antique Coin — the first of 22 in the game. After collecting it, pull the cart closer to the locker so you can use it to climb up and reach the screwdriver.
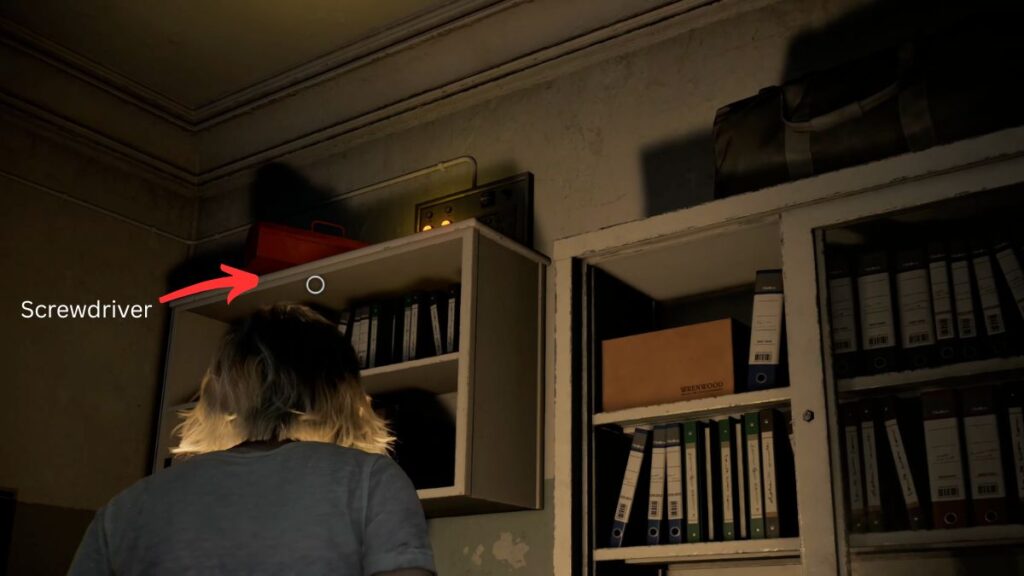
Be warned — the noise of moving the cart will alert the Girl, and she’ll begin stalking the room. Climb up and grab the screwdriver quickly, then drop down and hide beneath the barricade in the debris before she finds you.
The Escape
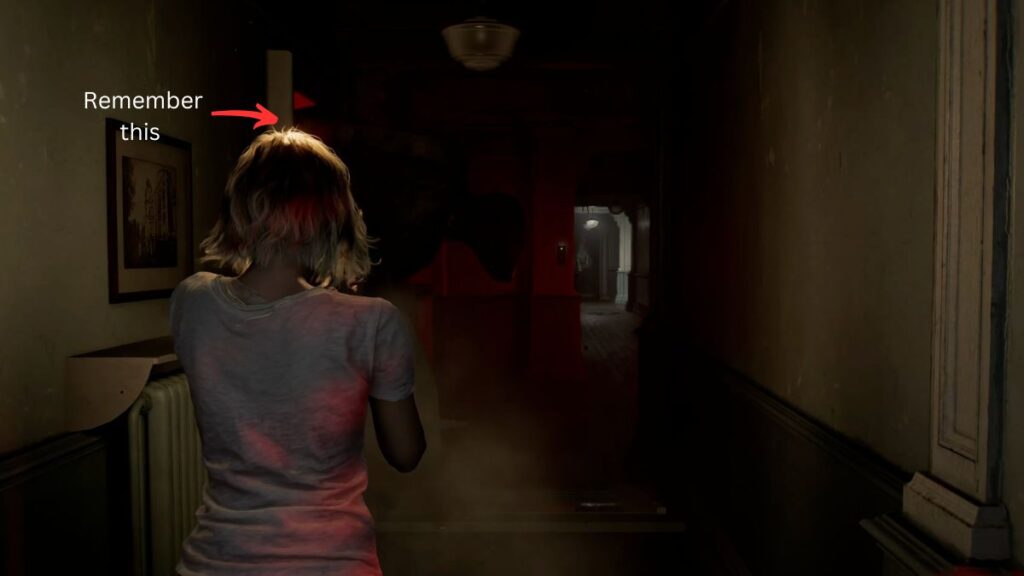
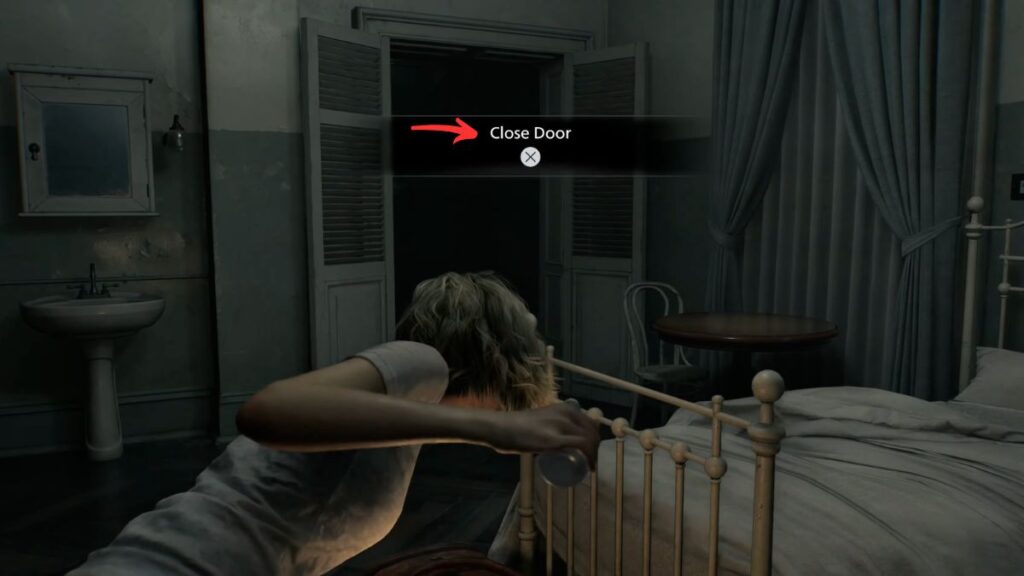
As soon as the Girl walks past, make a run for the hallway. She’ll smash through a door and cut off your escape route. Quickly double back through the Prep Room, use the hole she just created in the door to push through, and run straight to Room 201. Get inside and close the door behind you.
Use the screwdriver to unlock the fuse from behind the glass panel. The moment you pull it free, the Girl will burst through a hole in the ceiling above the hallway. Run out of the room immediately and follow the path back to the locked gate. Install the fuse into the box to open it.
A cutscene plays — Grace makes it through the gate. But just as it seems like she’s in the clear, the Girl grabs her by the leg and drags her back into the dark hallway. The chapter ends with Leon arriving at the care center.
All Collectibles
| Category | Item | Location/Notes |
|---|---|---|
| Collectible Files | Progress Notes | On the nightstand beside the lamp in the first room |
| Cardboard Box Note | Inside the closet in Room 202 | |
| Keys | Cherub Key | First drawer of the table near the lamp at the end of the main hallway |
| Tools | Lighter | On the shelves in the small adjoining room inside Room 201 |
| Screwdriver | On top of the locker in the nurse’s station — move the medical cart to reach it | |
| Empty Bottles | One in the dark hallway, one in the wardrobe in Room 201 | |
| Antique Coins | Antique Coin #1 | On top of the medical cart in the nurse’s station — 22 total in the game |
| Fuse | Fuse | Behind the glass panel in the small room inside Room 201 — needs screwdriver |
| Enemies | The Girl | First major encounter — avoid her by staying in well-lit rooms |
The chapter ends on a cliffhanger, cutting to Leon’s arrival at the facility and setting up the events of Chapter 4.