
With the perimeter blockade standing between Leon and the city center, your objective is to track down three missing detonator parts spread across Raccoon City. Before heading out, take some time to loot the surrounding area — check the trucks, car trunks, and container boxes nearby for Shotgun Shells, Ammo, and other supplies before committing to the mission.
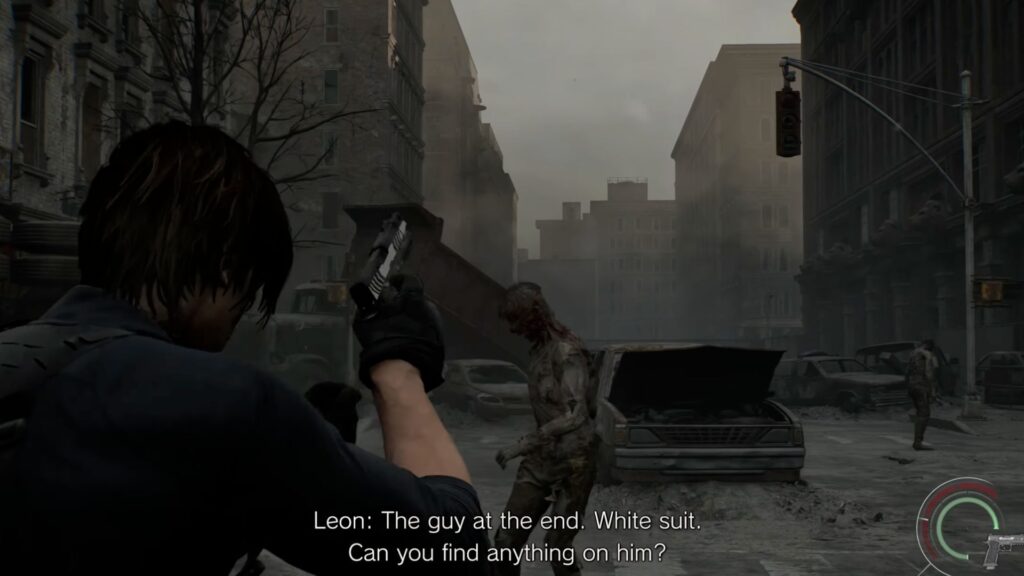
Resident Evil Requiem Raccoon City Walkthrough Part 2 (Leon)
The Logistics Warehouse
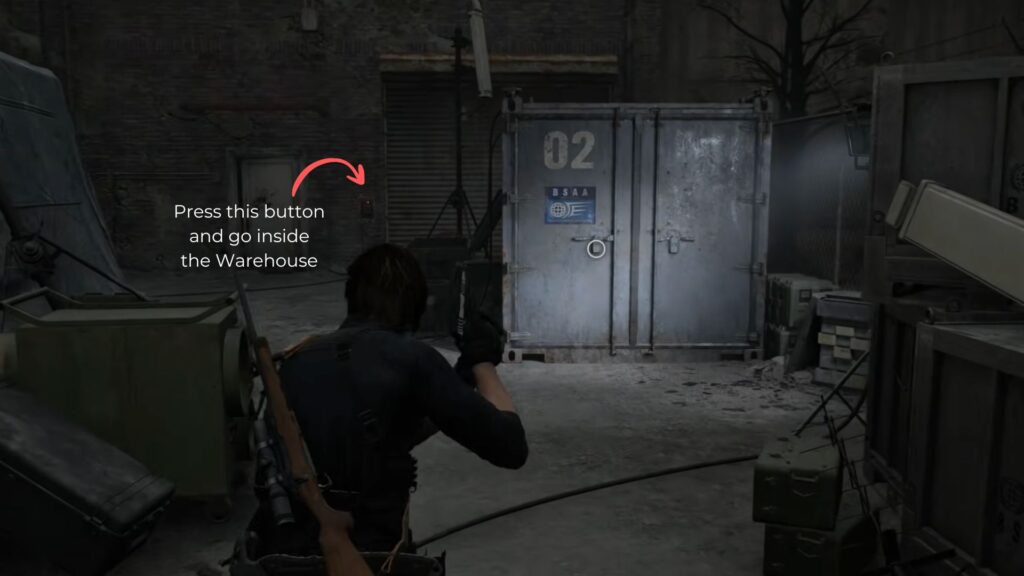
Exit the tent and find the building sitting behind the locked blue BSAA container. Head straight toward the rolling door with a button beside it. Press it to open the door and enter the Logistics Warehouse.
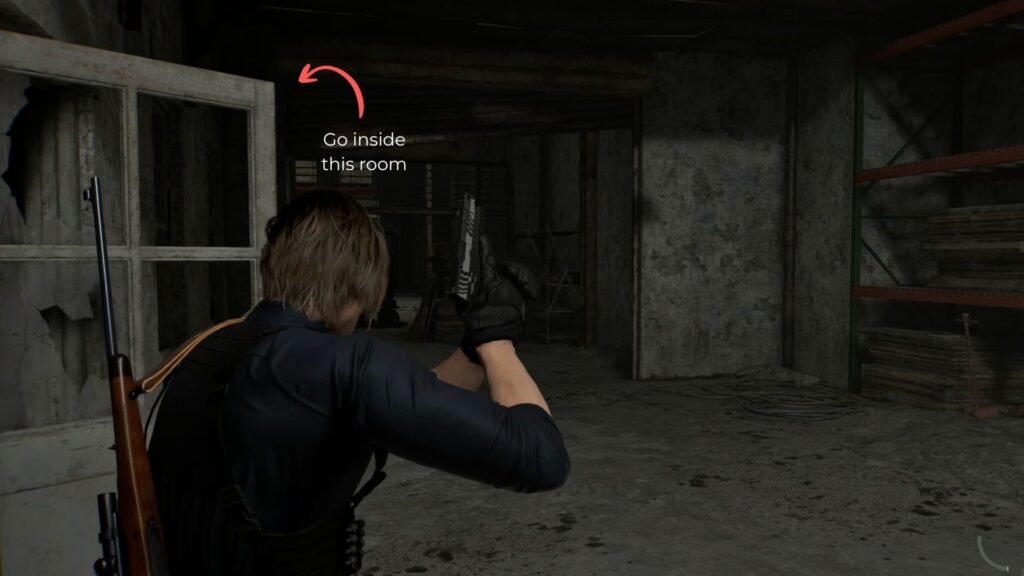
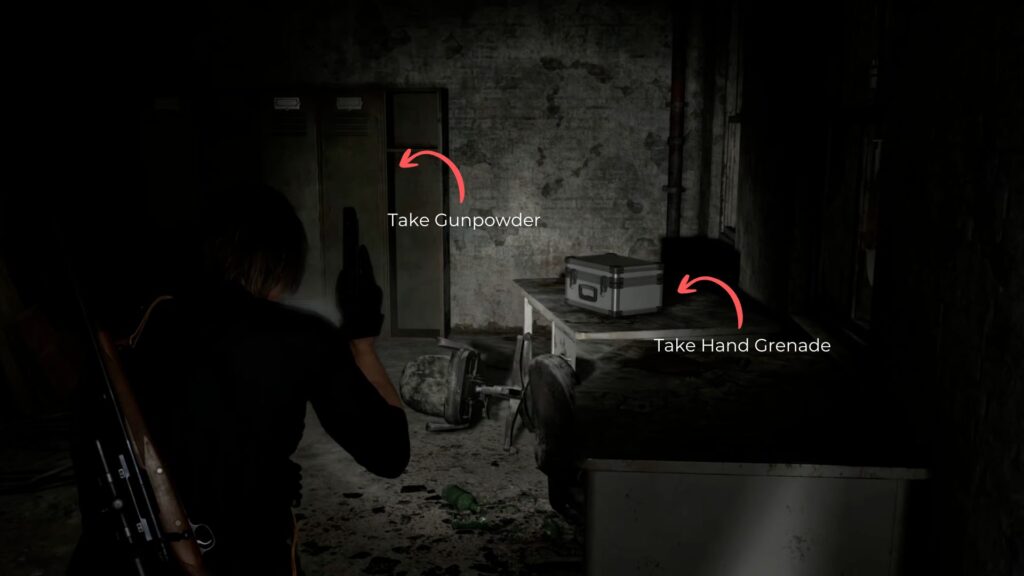
Take an immediate left into the first room with a half-open door. Inside you’ll find a Hand Grenade in a case and several lockers containing Gunpowder.
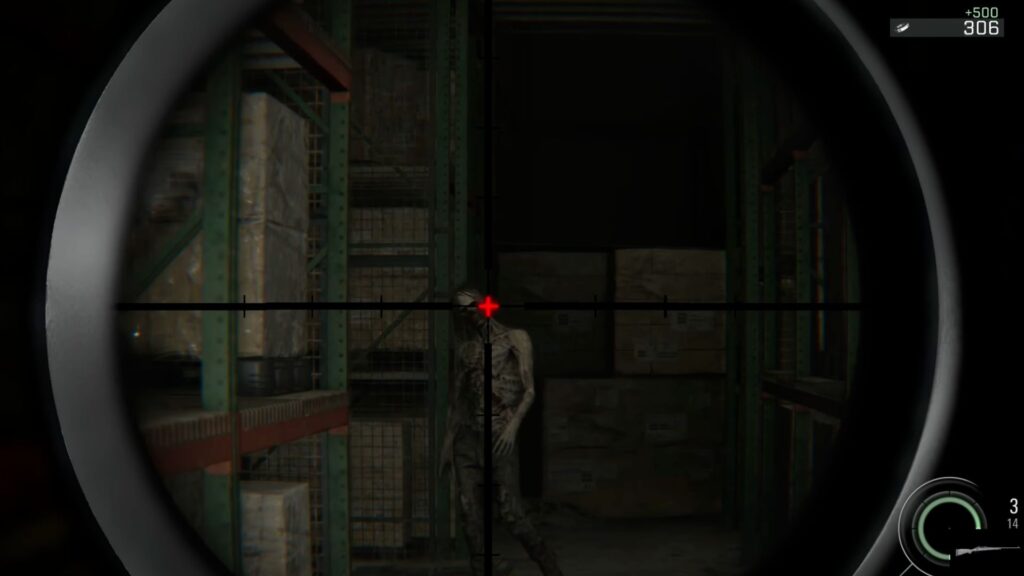
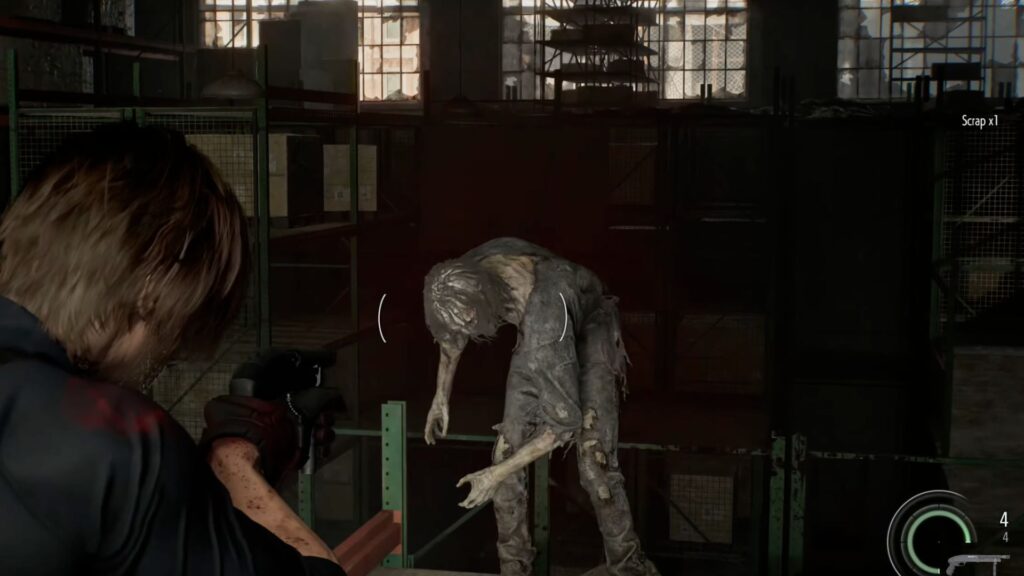
Head deeper into the warehouse. Leon will note the unsettling lack of bodies here. The high shelves stacked with crates appear completely abandoned with no sign of BSAA personnel or victims.
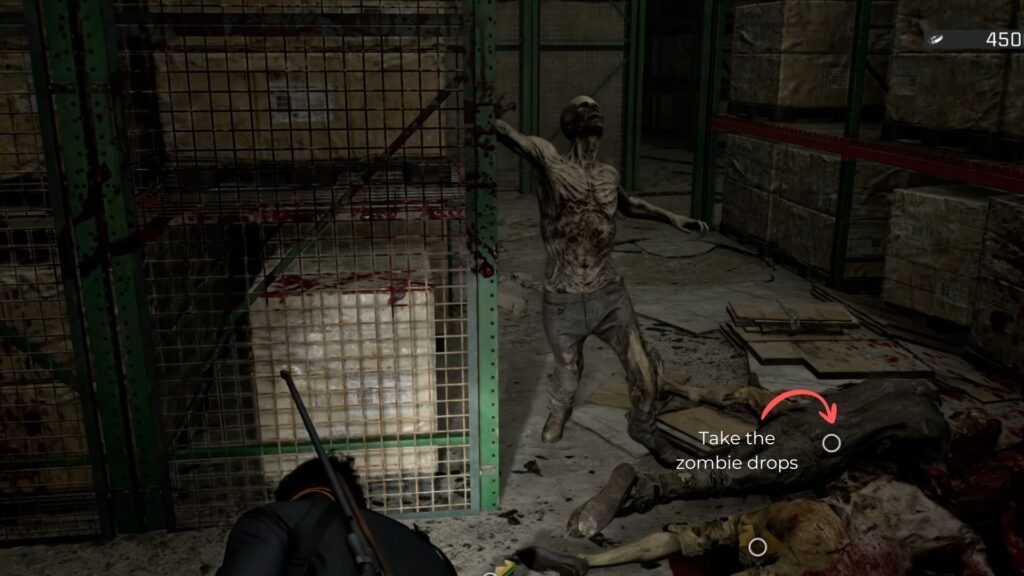
However, that changes quickly. As you push further inside, zombies will begin clawing their way up from beneath the dirt and rubble. Use whatever weapons you’re comfortable with. After clearing them out, loot the Shotgun Shells and Gunpowder dropped on the floor before moving on.
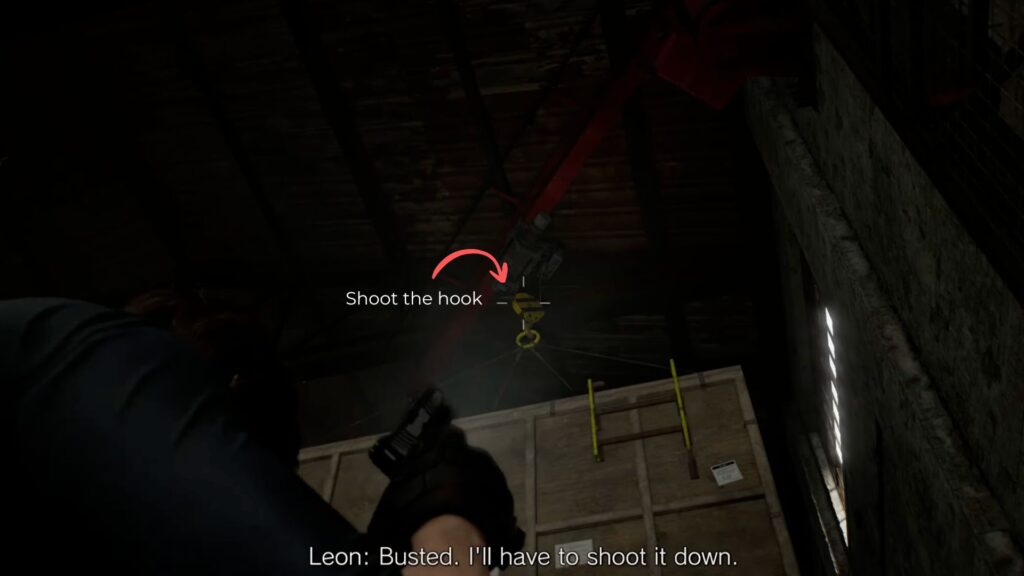
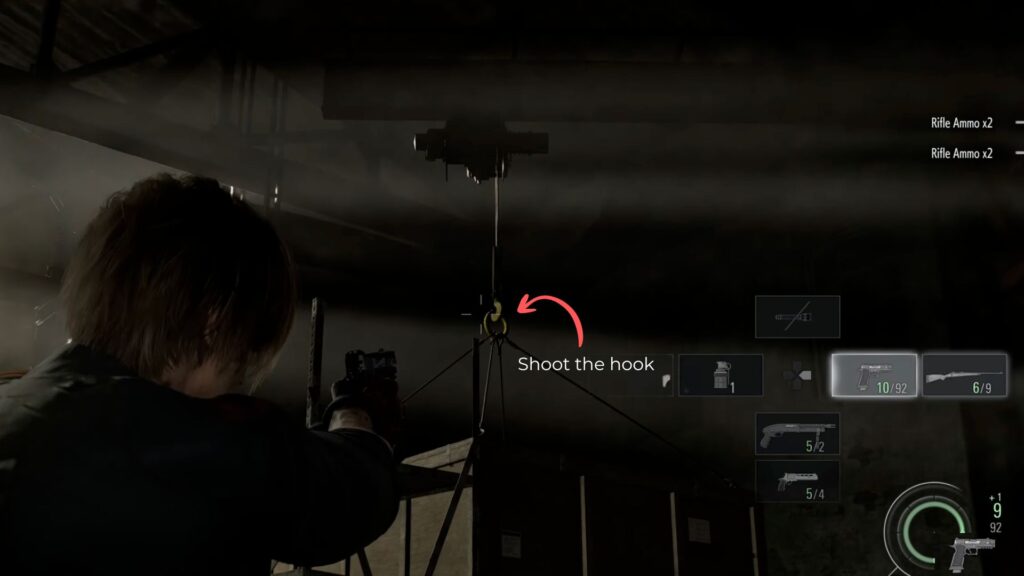
Look up toward the ceiling and you’ll spot a large crate suspended from a crane hook above you. Shoot the hook to drop the crate, which gives you a surface to climb up from the ground floor.
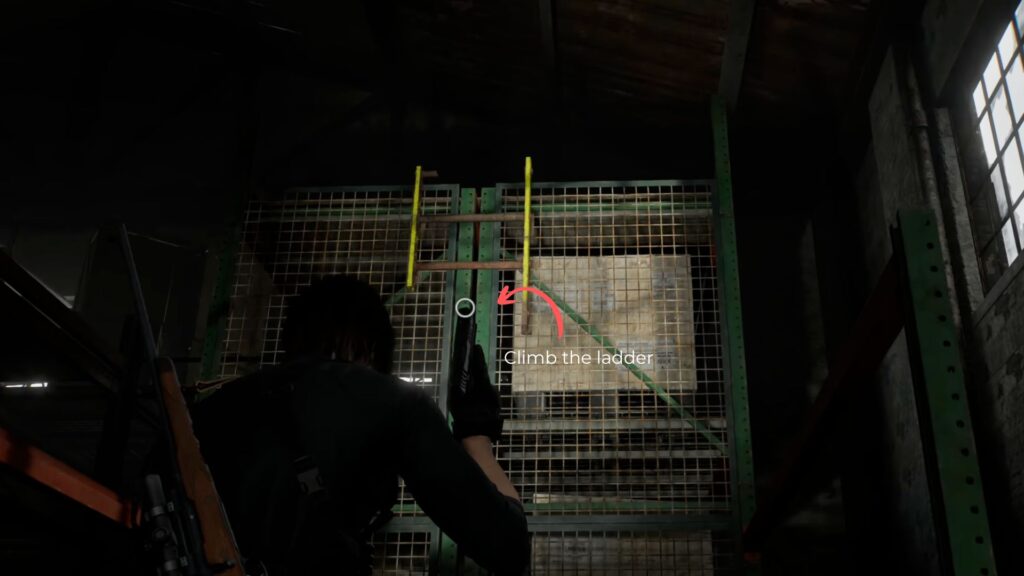
Keep climbing the stacked crates until you reach the top platform. There are armed zombies waiting up here, so deal with them before exploring. Once it’s clear, grab the Green Herb on your right.
From the edge of the upper platform, you can see lower crates below. Drop down and take out any zombies that lunge at you.
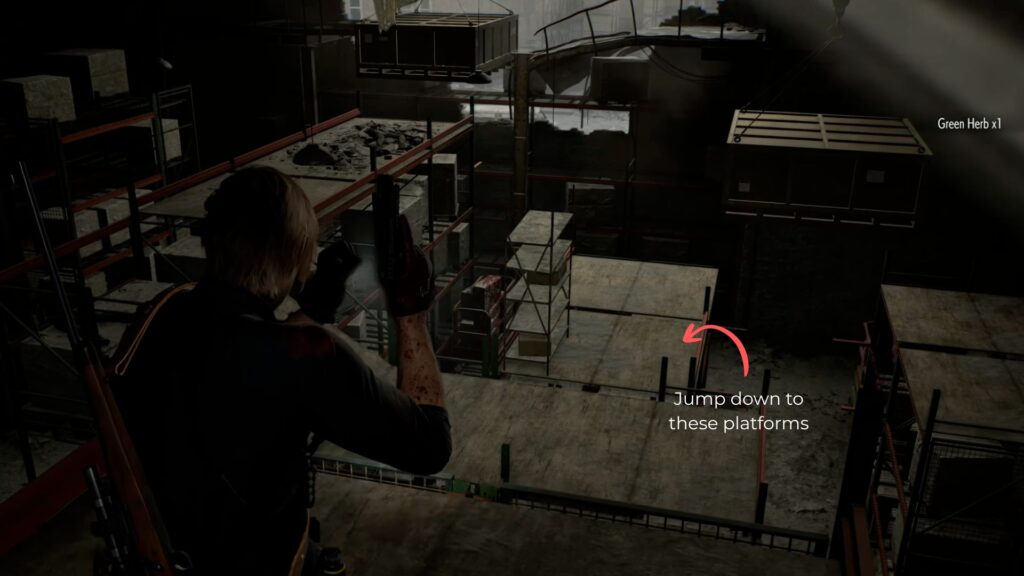
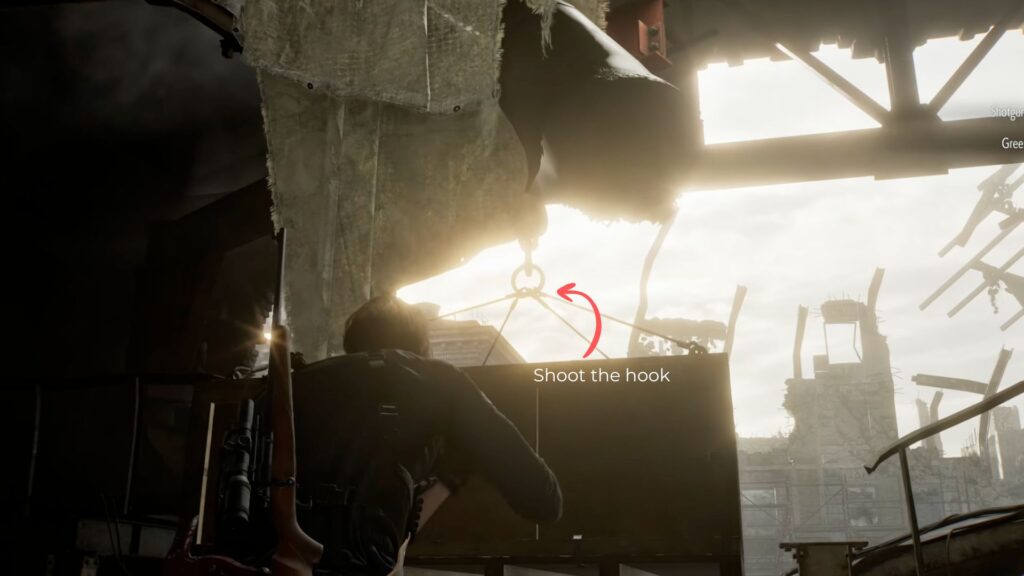
Look up again from this new position to spot more hanging crates overhead. Shoot their hooks to form additional bridges across the area and open up the path forward.
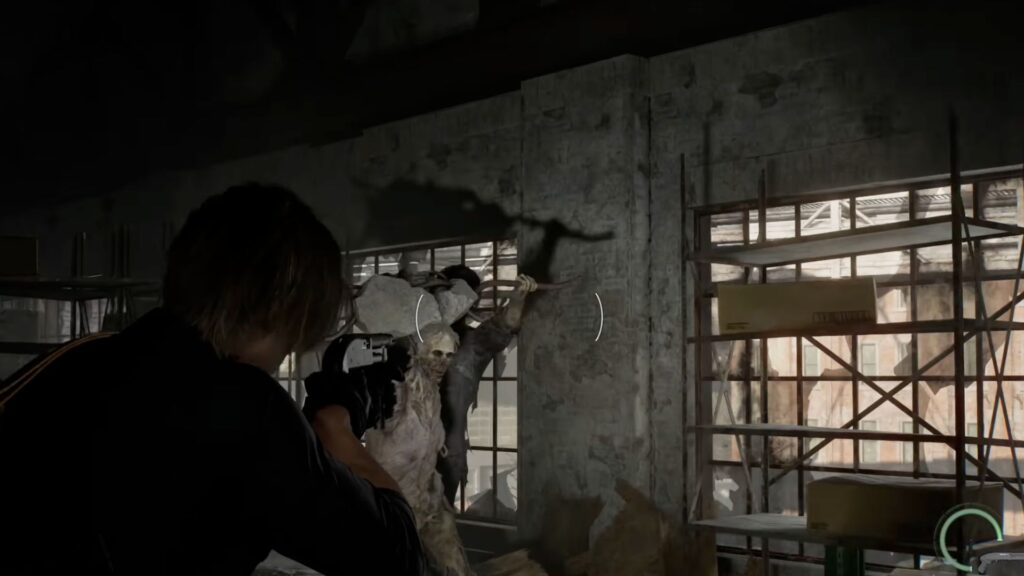
Keep following the path until you reach a white door on the right side. A female zombie will burst out as you approach, so shoot her, then head inside the dark room.
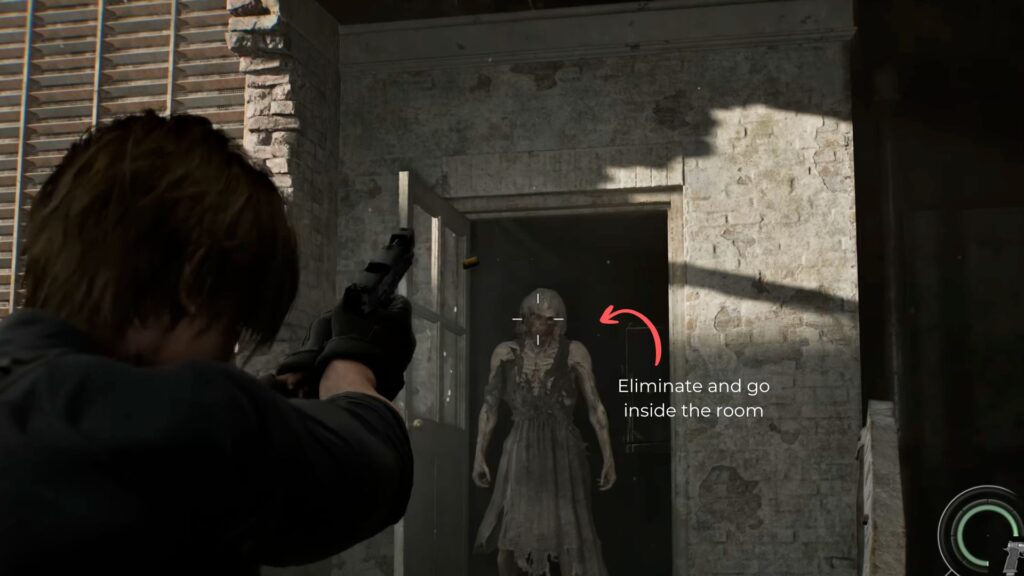
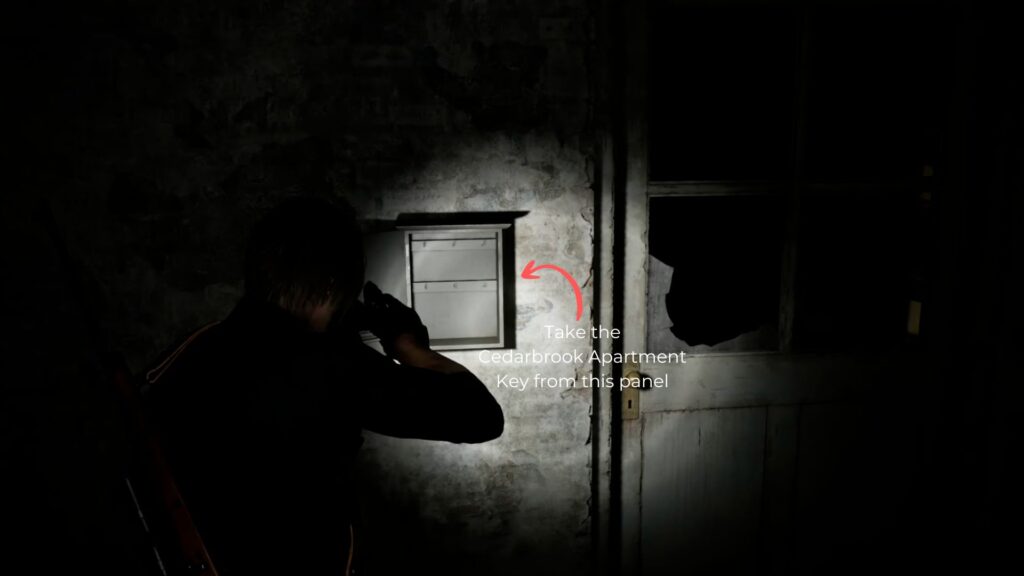
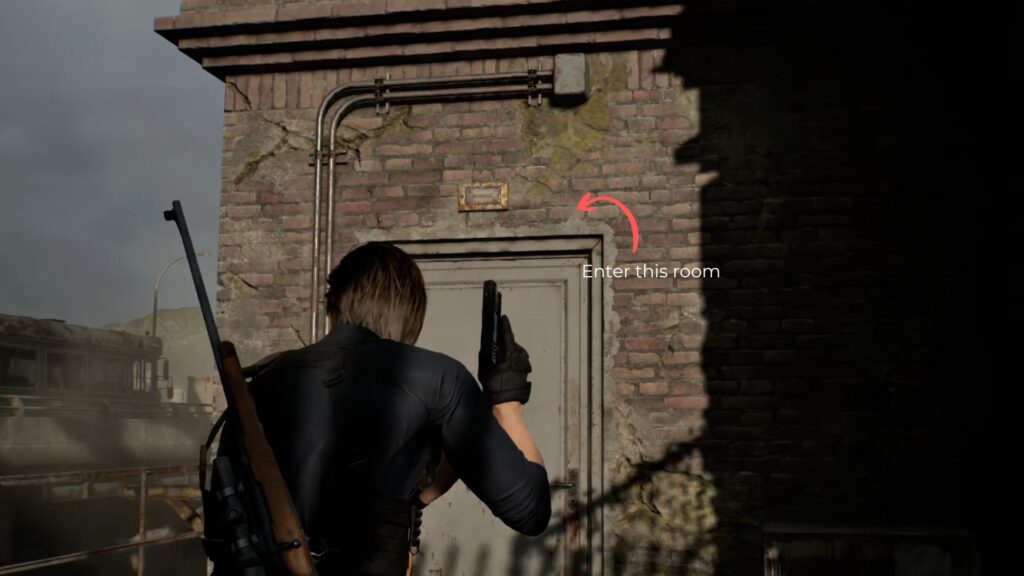
Check the wall to collect the Cedarbrook Apartment Key, then exit through the other door on the far side of the room.
The First Detonator Part
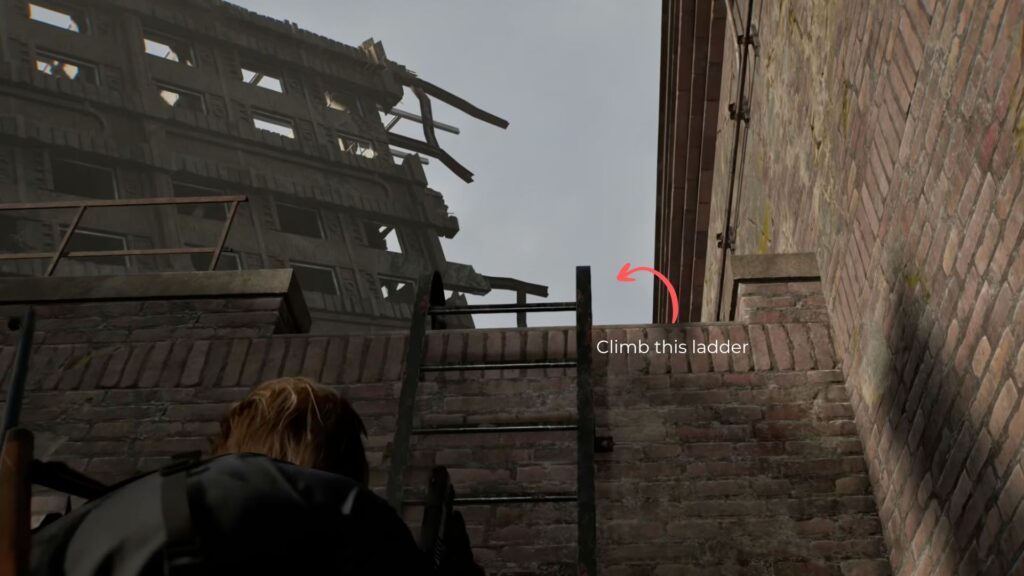
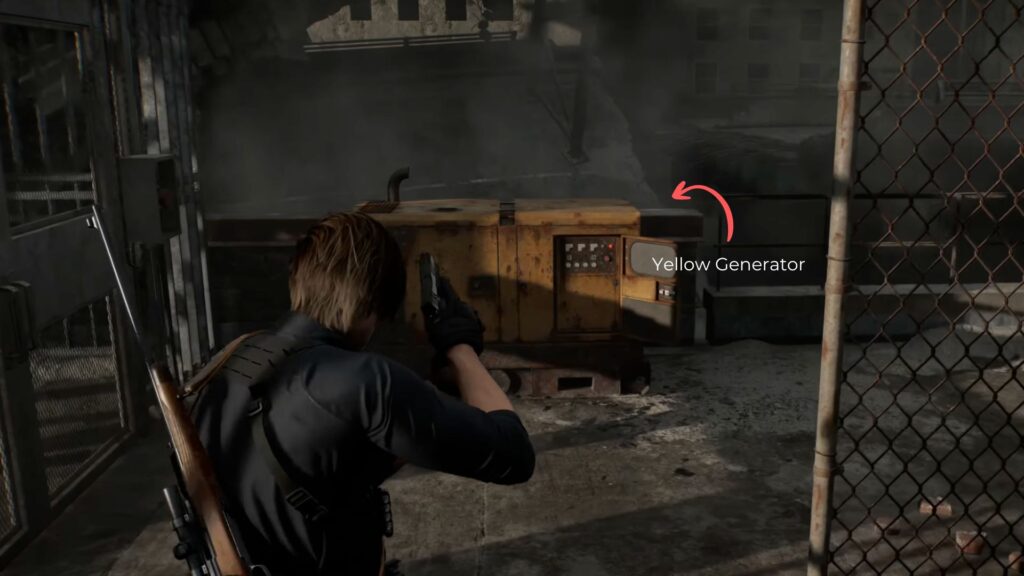
From the balcony outside, climb the ladder on the wall to reach the rooftop. Up here you’ll find a yellow generator connected to a zipline that leads across to the other side of the blockade — this will eventually get you to the final detonator part, but the generator has no fuel yet. Leave it for now.
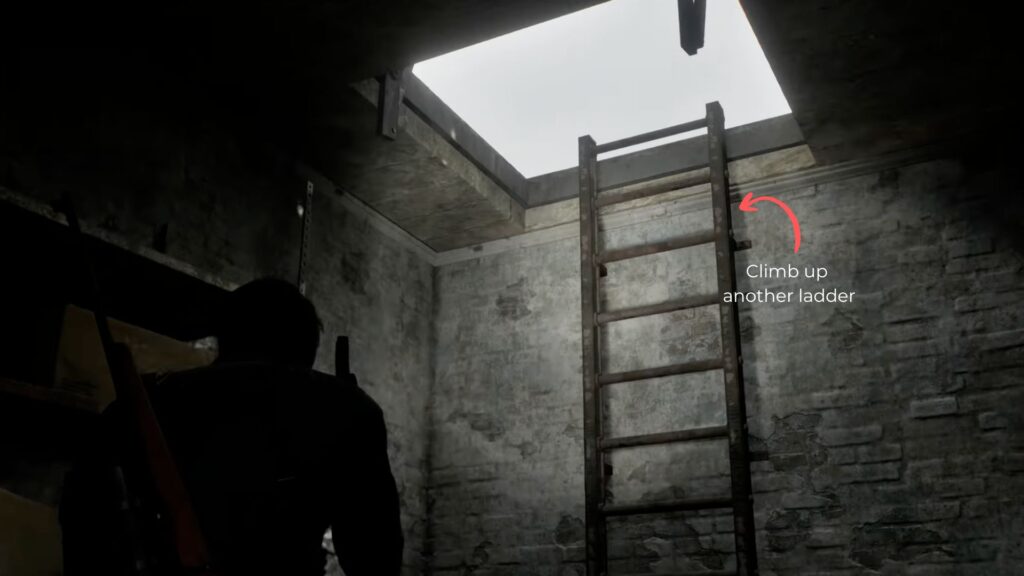
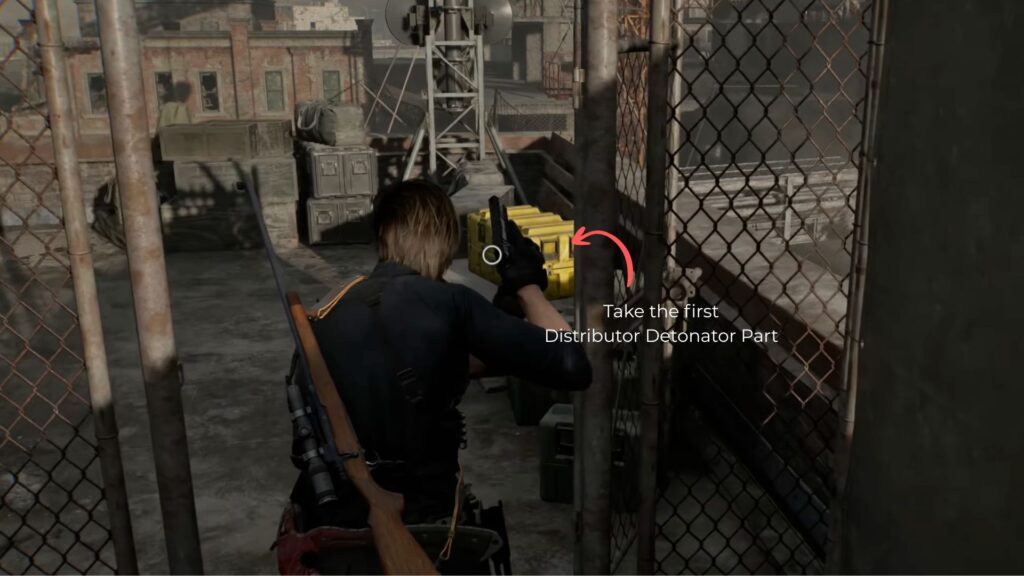
Go past the generator and into the room beyond, where another ladder leads up. At the top, grab the Green Herb and then open the yellow crate to collect the first Distributor Detonator Part. Leon will check in with Sherry after picking it up.
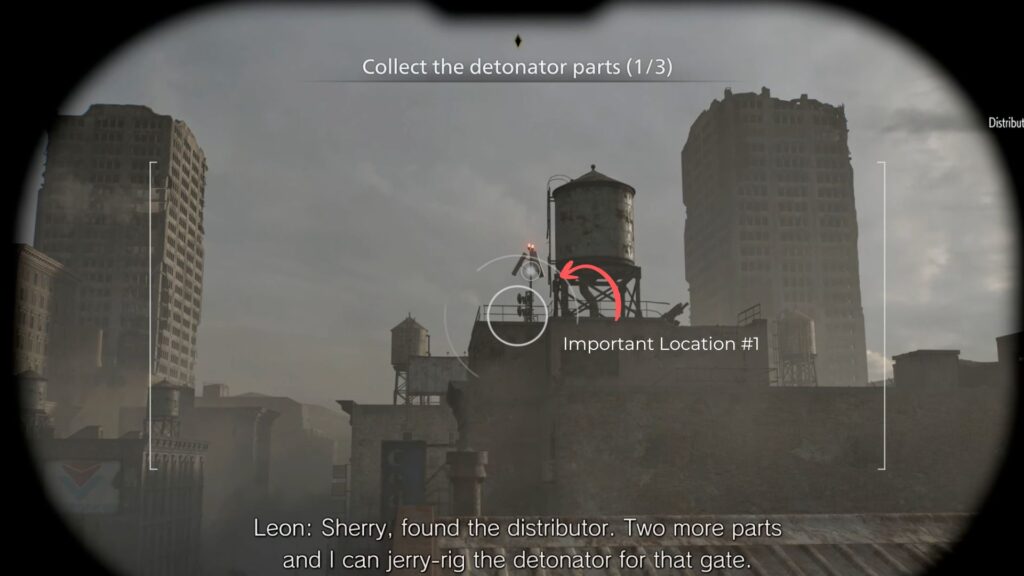
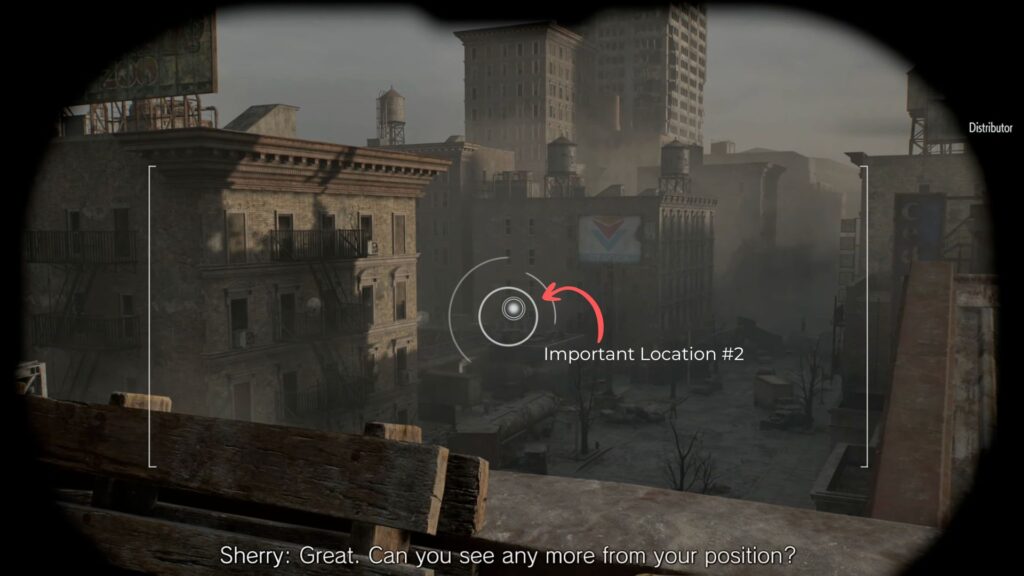
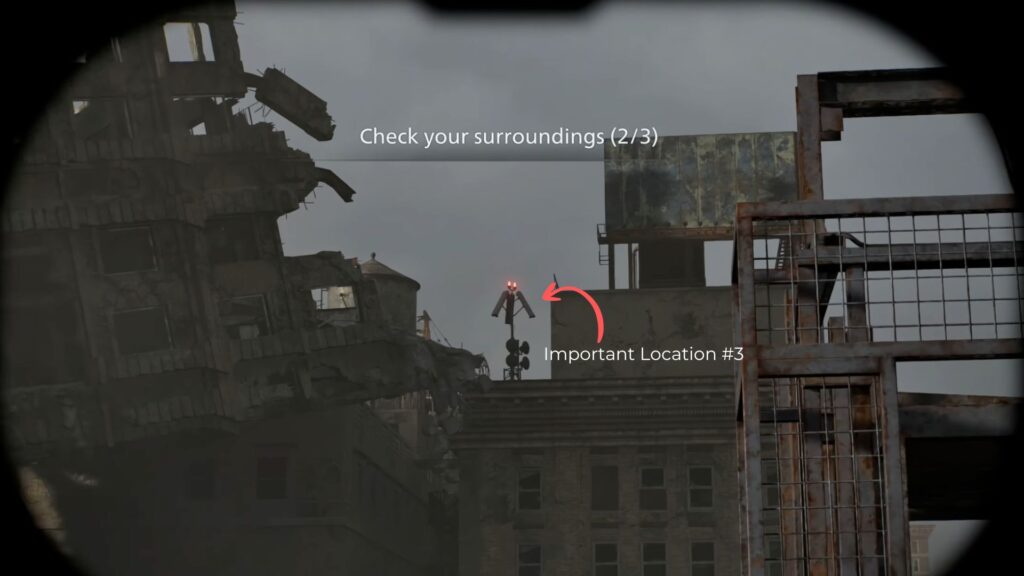
While you’re up here, use your binoculars to scan three locations:
- Look straight ahead to spot the Signal Receiver location
- Then shift slightly left to find a gas station
- Next, keep turning left until you spot the third and final detonator part position on top of another building across the city
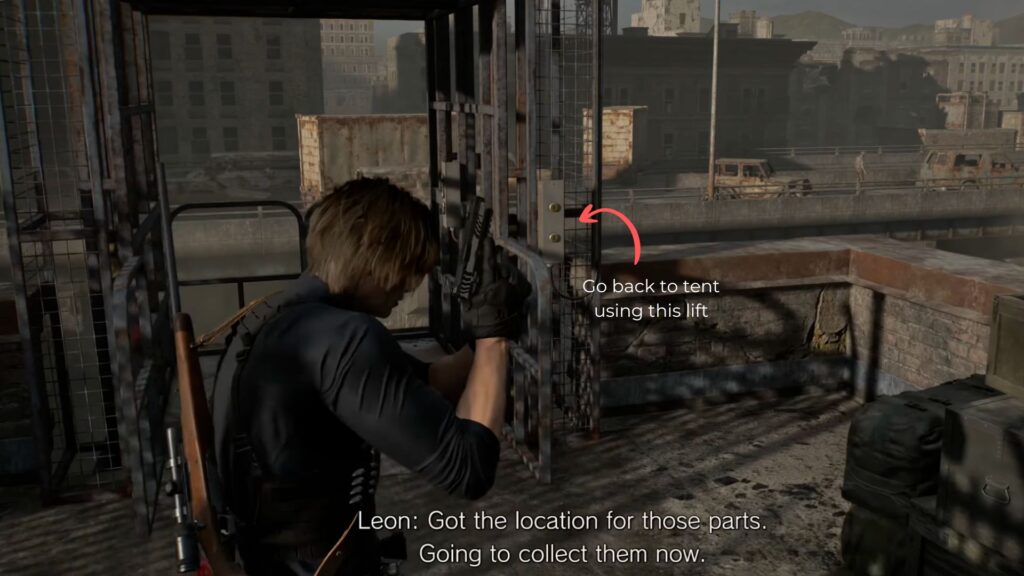
Rack up kills on any zombies you can see from up here because every kill earns combat credits. When you’re ready to come down, use the lift across from the yellow crate to return to the ground floor. Stop by the tent to check the Supply Box and spend any credits you’ve accumulated on weapons, ammo, or upgrades.
The Underground Parking Garage
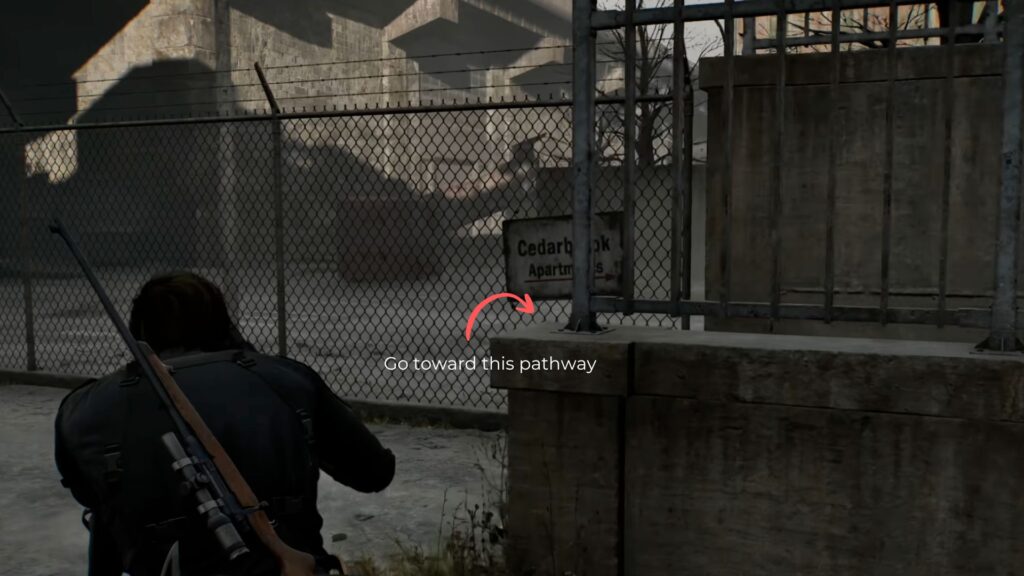
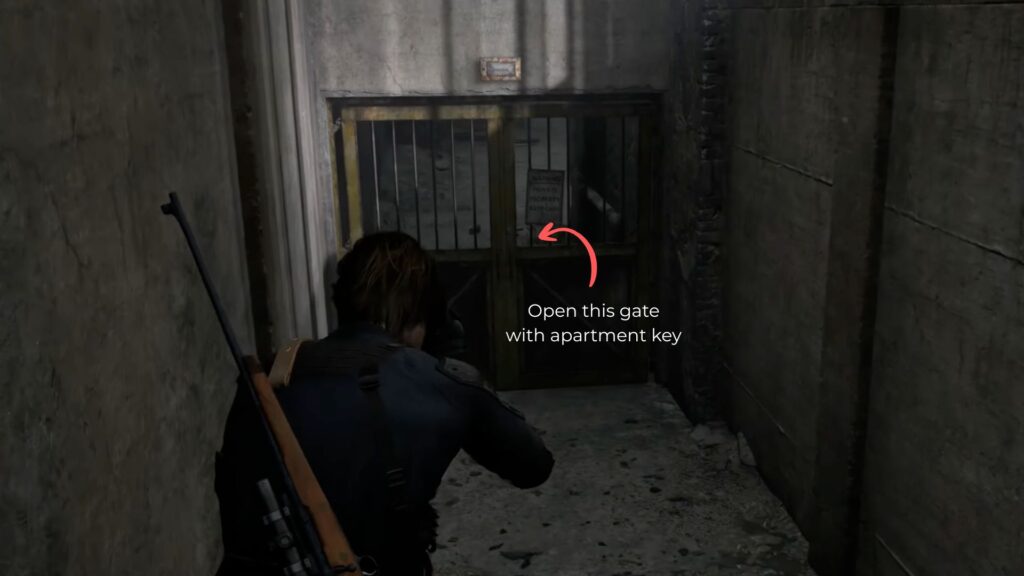
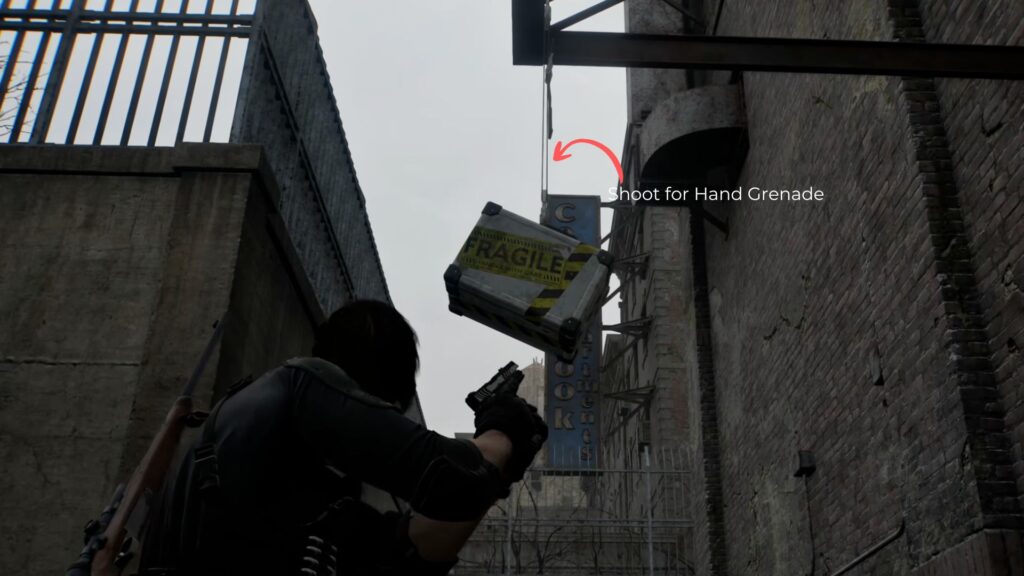
From the tent, find the passageway leading downward. Use the Cedarbrook Apartment Key to open the gate ahead. Just past the gate, there’s a briefcase hanging from a steel beam overhead. Shoot it down to collect a Hand Grenade.
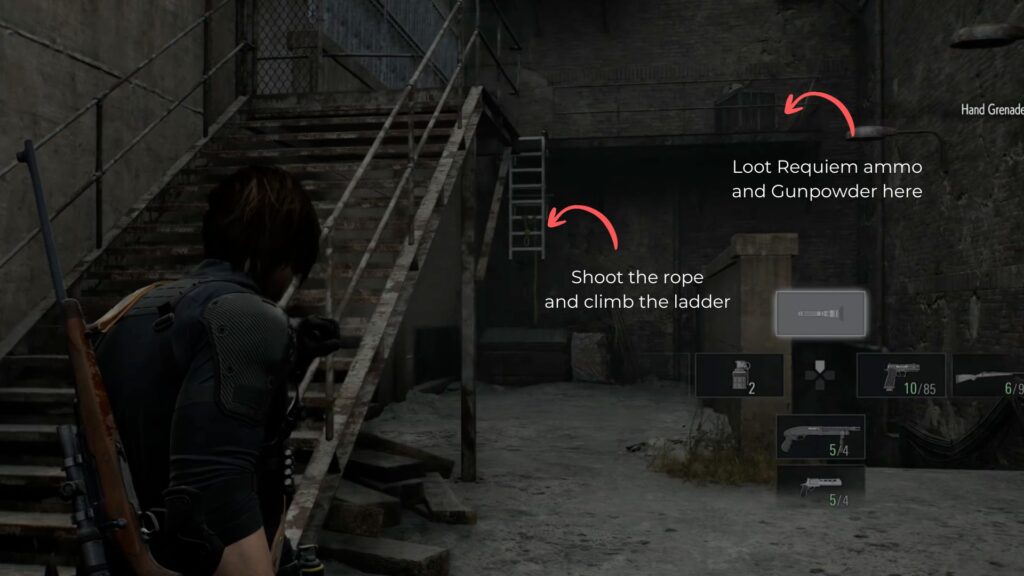
A short way ahead, you’ll find a staircase leading up but the door at the top is locked from the other side. Look behind the stairs and you’ll spot a hanging ladder against the wall. Sgoot the rope to drop it and climb up. At the top, collect the Requiem Ammo and a Gunpowder before heading back down.
Take the path leading into the underground parking lot. It’s very dark in here, so turn on your flashlight.

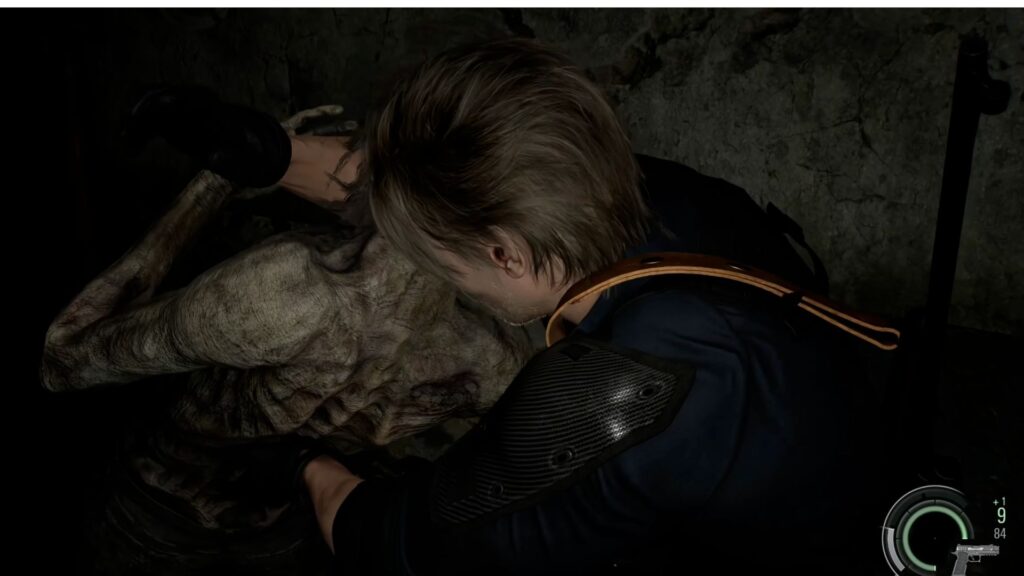
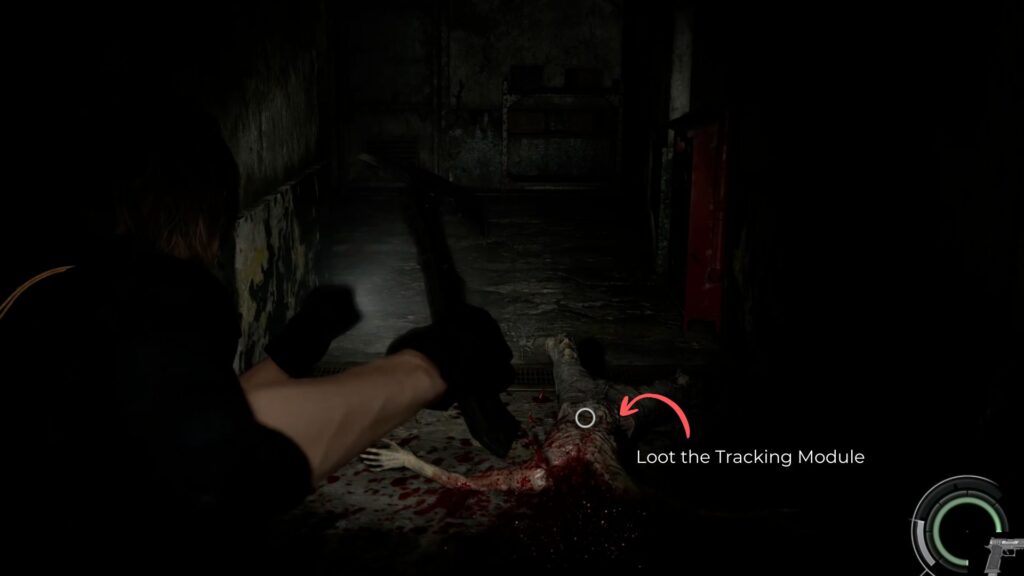
Follow the path until you spot a lone zombie standing in the middle of the corridor. This is a good opportunity to use a stealth kill. You will need to crouch and sneak up from behind to decapitate it cleanly, which prevents it from mutating into a Blister Head. After taking it down, pick up the Tracking Module it drops.
Head into the next room where stairs lead down to a flooded underground parking garage sealed behind a shutter. More zombies are down here, so take them out with stealth kills where possible to avoid alerting others.
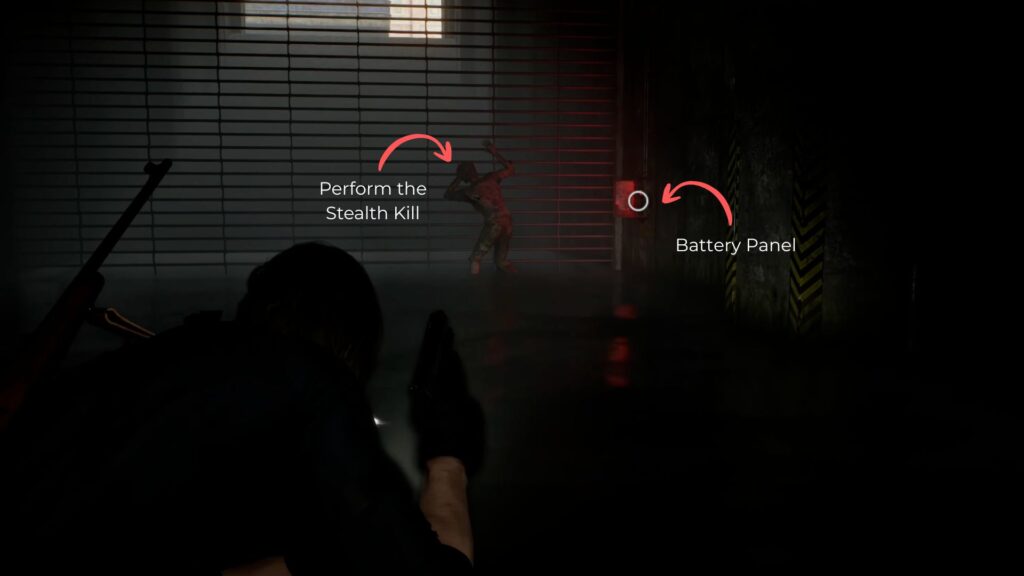
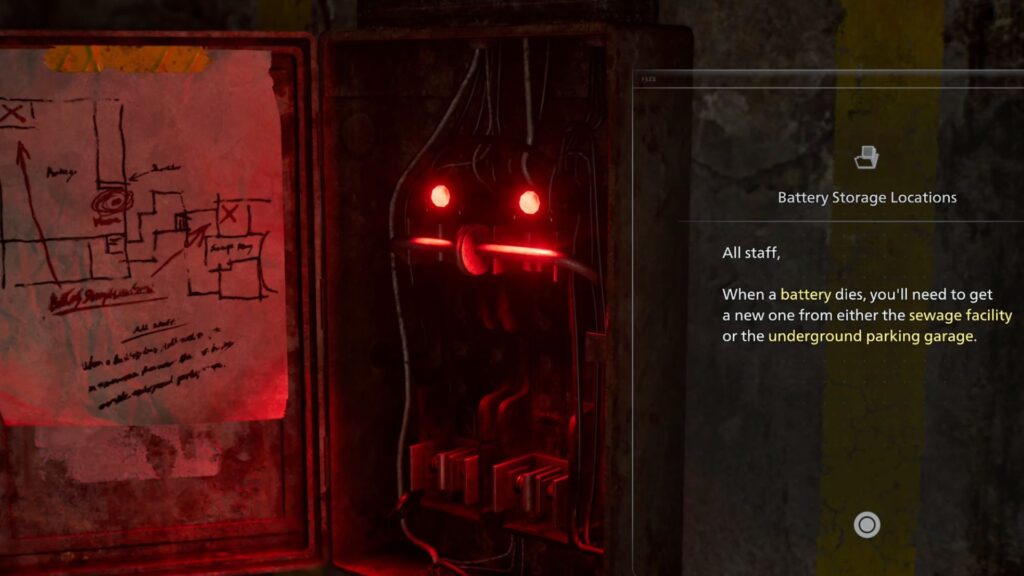
When you interact with the control box on the wall, you’ll find the shutter requires two batteries. One from the Sewage Facility and one from deeper part of the parking garage. Time to find both.
Battery One – The Sewage Facility
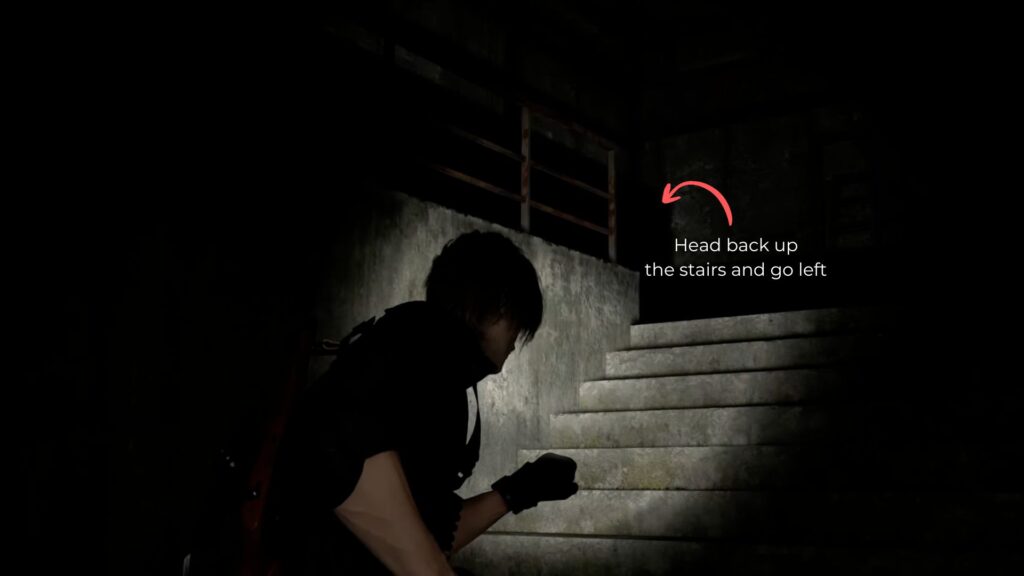
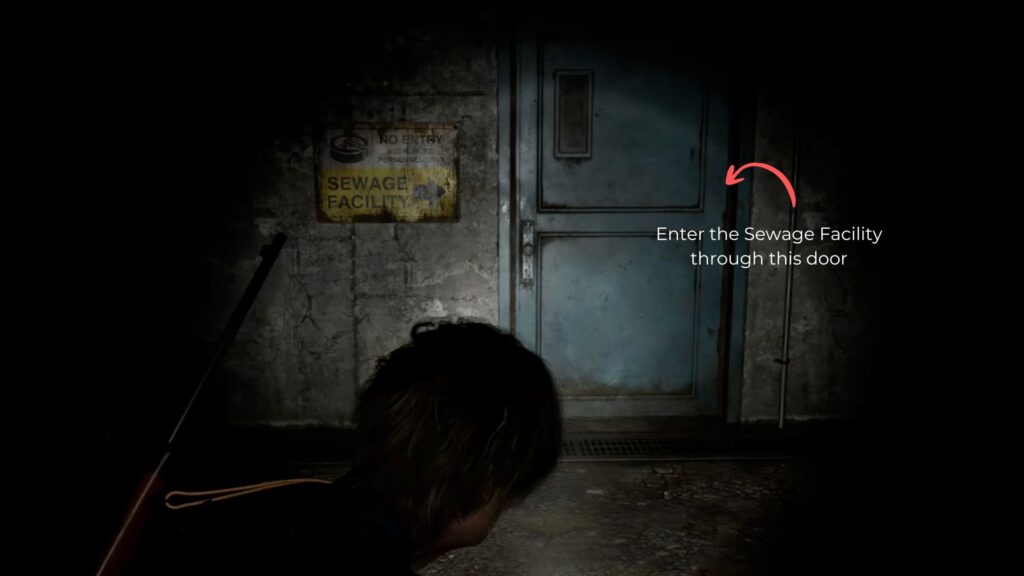
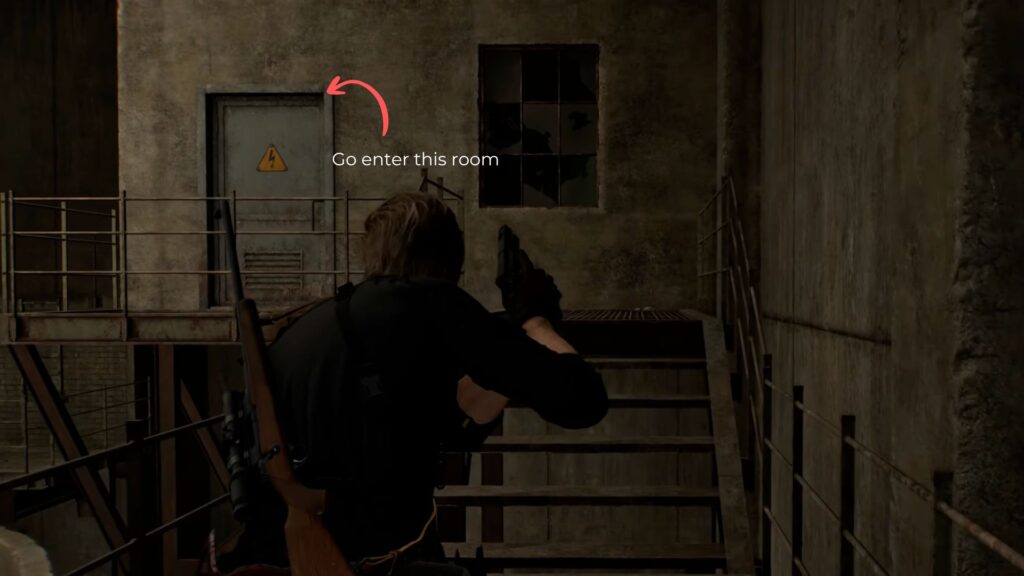
Now what you need to do is head back up the stairs and go through the blue door marked with the Sewage Facility sign. The rooms along this path are mostly empty, so keep moving forward until you reach a sealed door that requires a crank. You don’t have one yet, so note the location and continue.

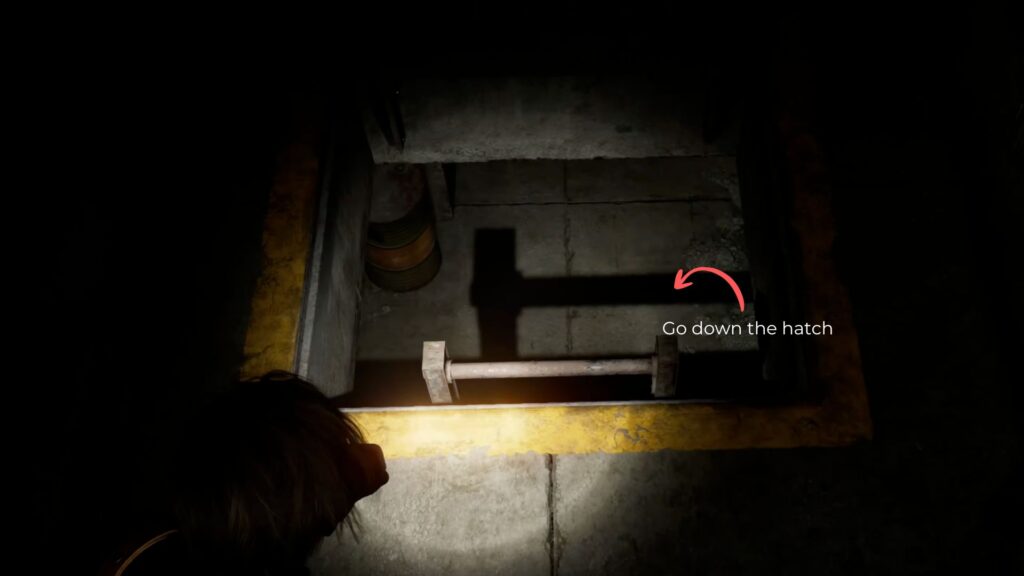
On the right side of the door, there’s a hatch. Drop down through it, grab the Green Herb on the right, and push through the two blue doors into the main Sewage Facility.
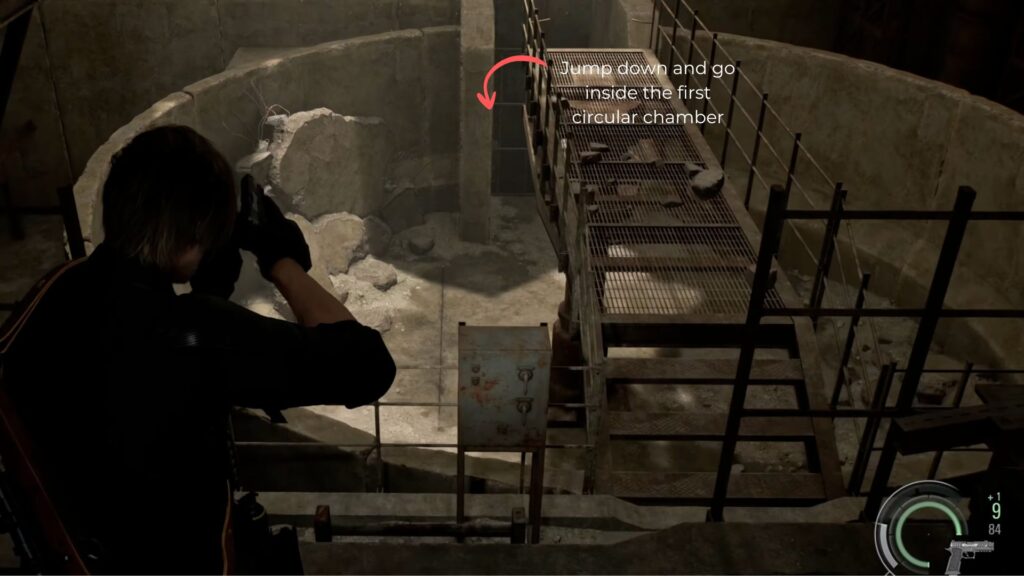
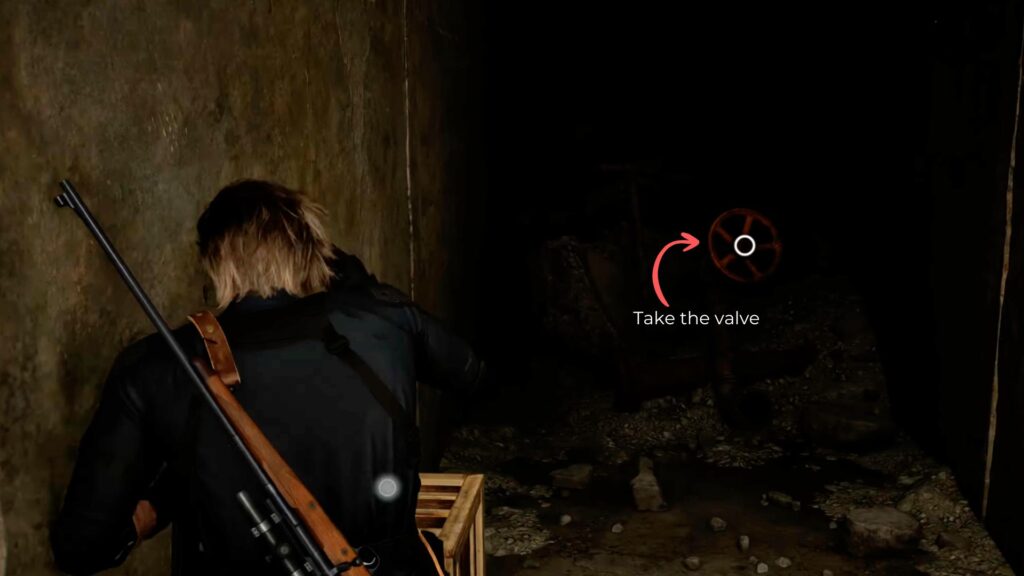
Two circular chambers sit below. Head down into the first one. Inside, locate the Valve Handwheel and watch out for zombies crawling out from beneath the rubble as you move around.
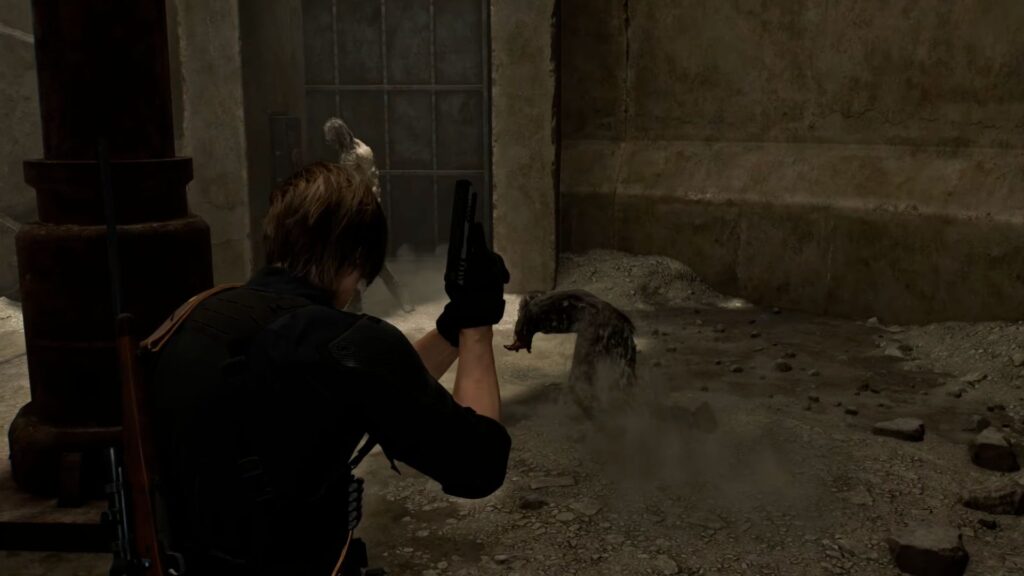
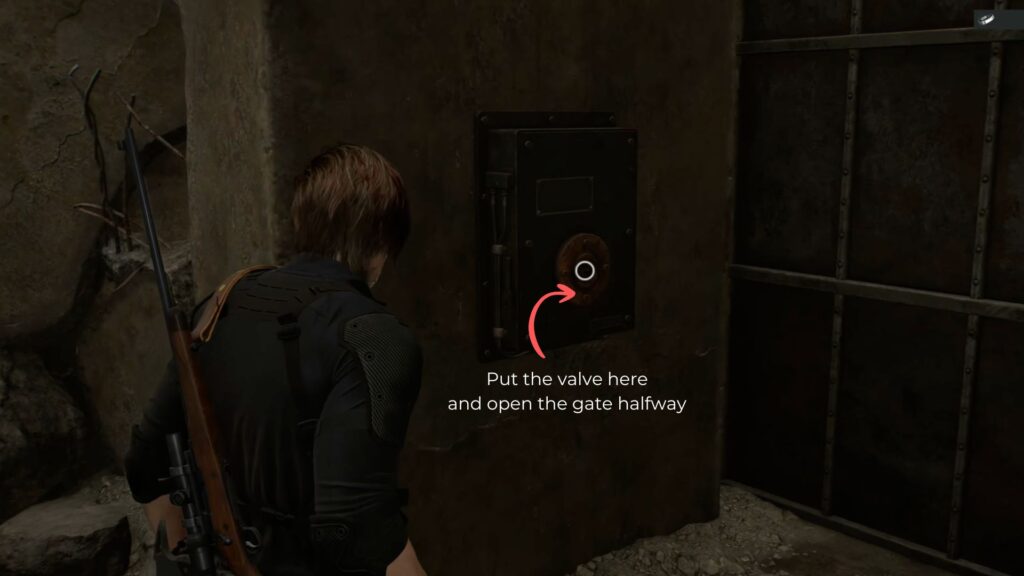
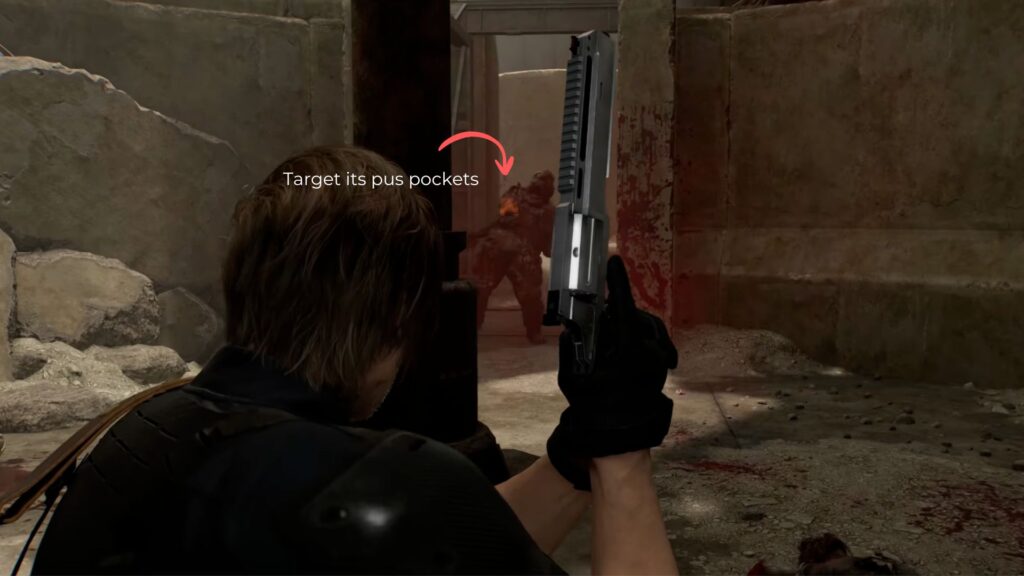
Across from the valve, there’s a door that it controls — but when you get it halfway open, a Blister Borne will charge out. Throw a grenade for the first blow.
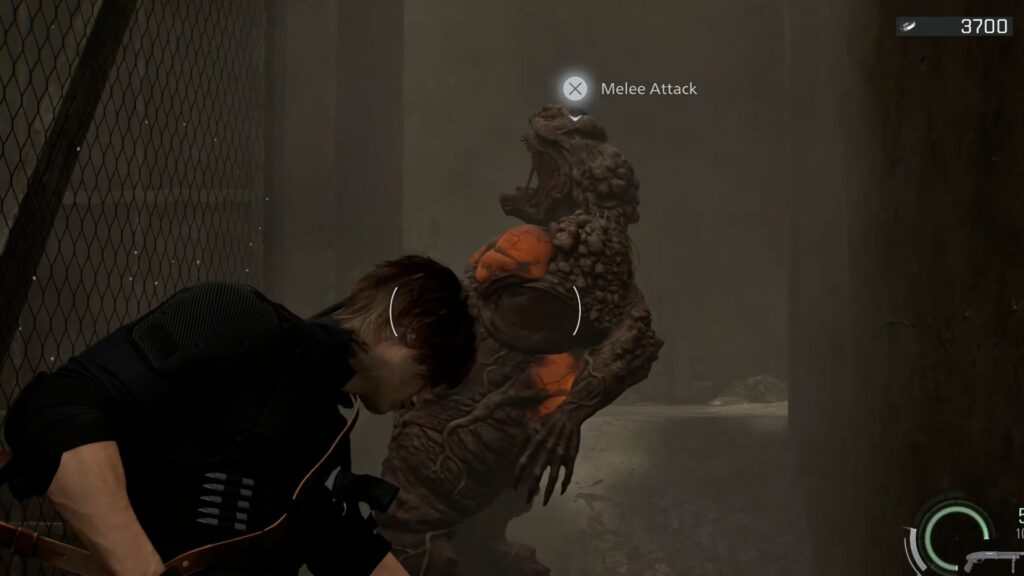
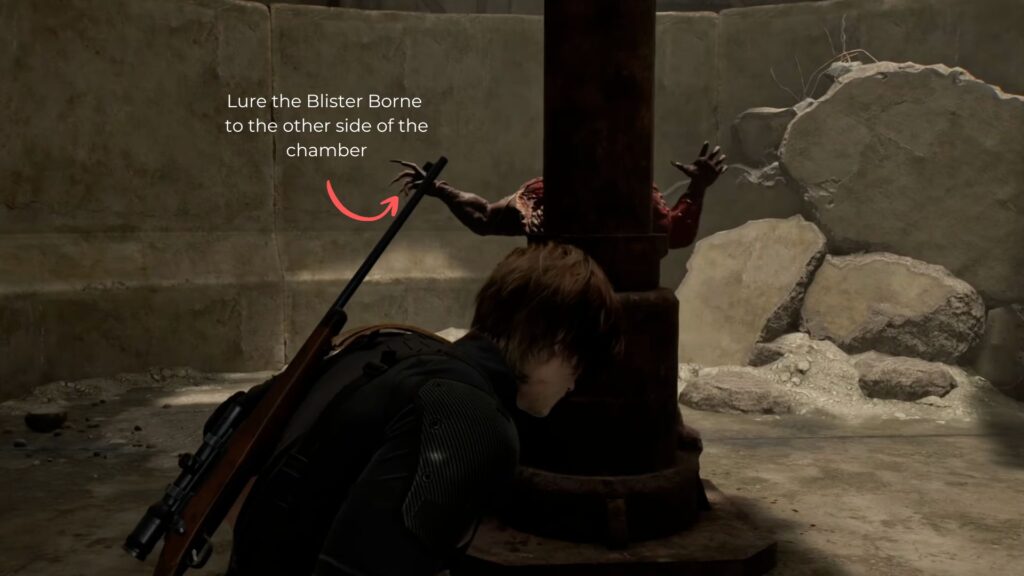
Pull back immediately and lure it to the far side of the chamber, using the large central pipe structure as cover between you. Throw grenades to keep it at a distance and shoot all his pus pockets from your side of the pipe.
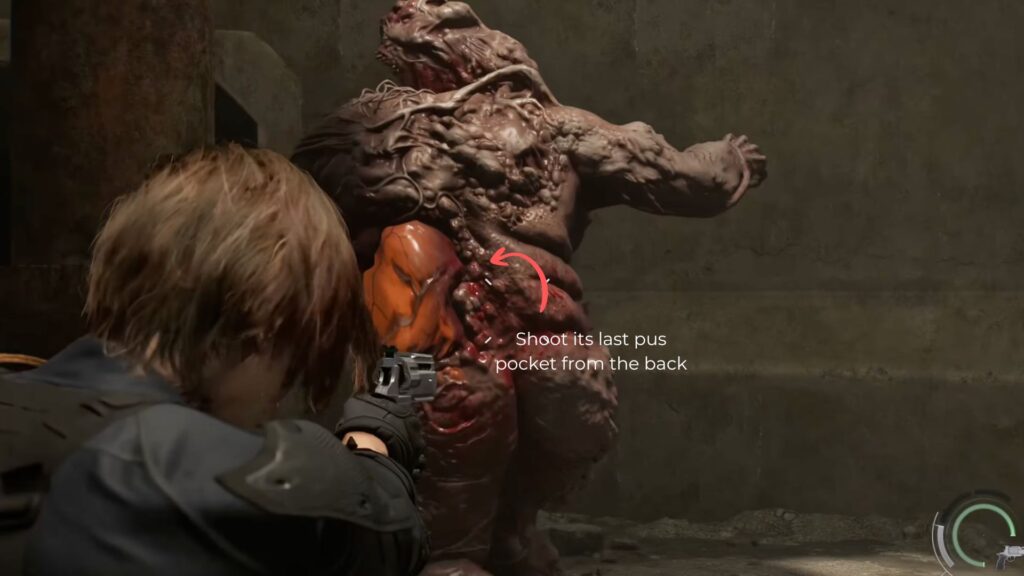
When it tries to charge at you, run back toward the valve door and shoot its pus pocket from behind to bring it down. Watch out for additional zombies in the chamber throughout the fight.
Once the Blister Borne is down, finish turning the valve to open the door fully. Collect the Shotgun Shells in the area behind it, then push forward through the next section.

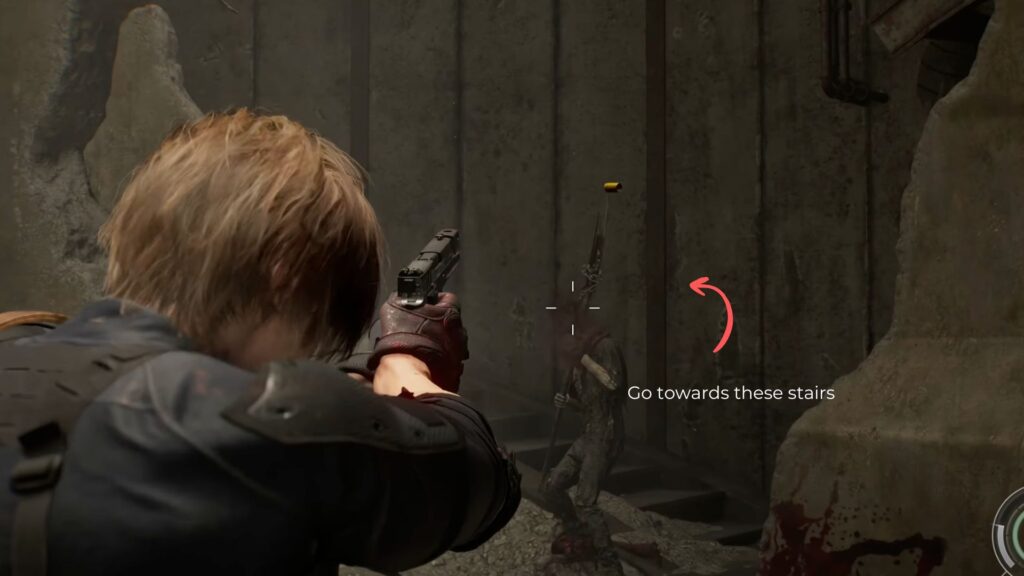
More zombies and Blister Heads are waiting ahead — clear them out, then find the crack in the wall with stairs climbing up on the other side.
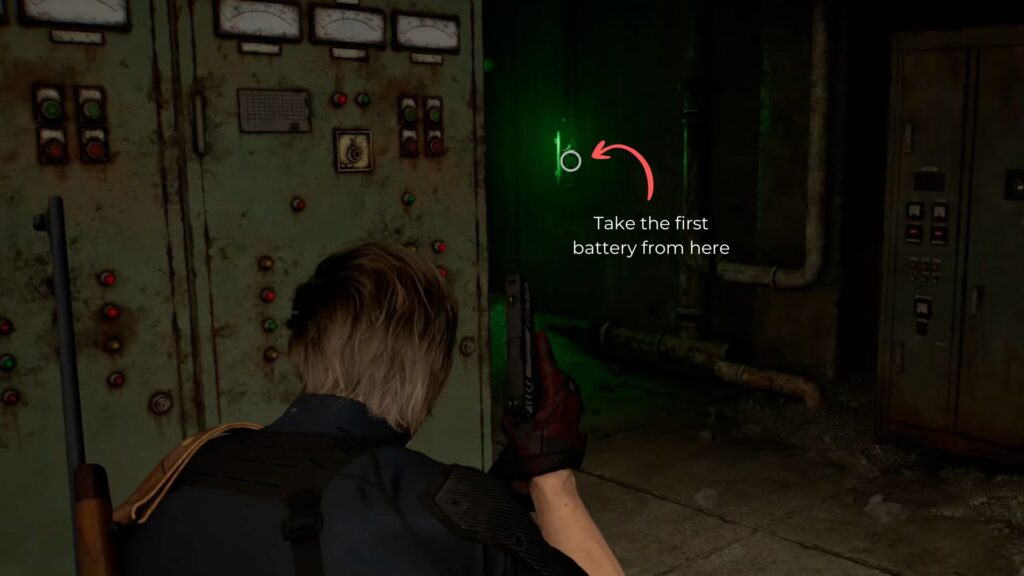
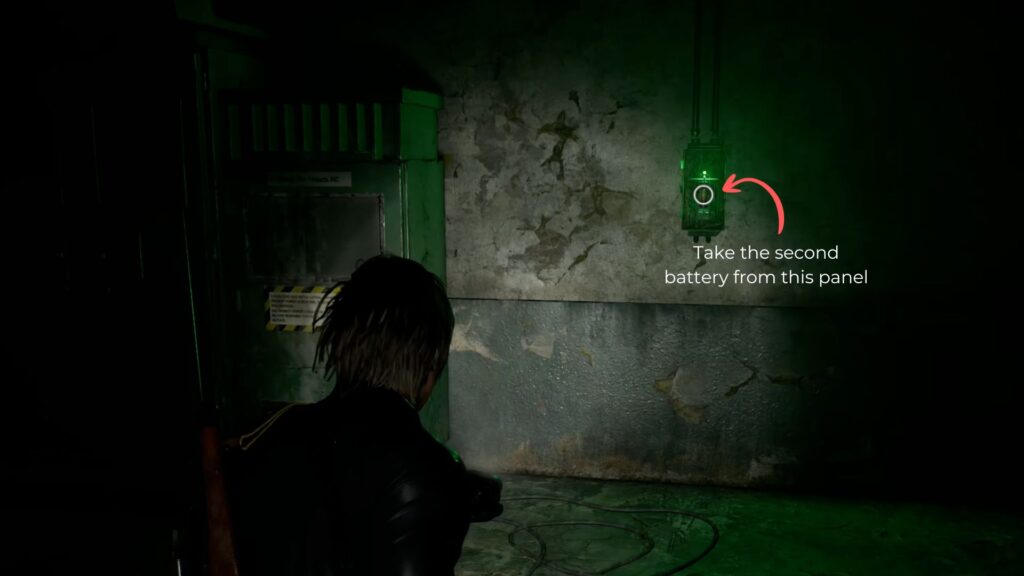
Follow the path to the room at the top where the first battery is mounted on the wall with a green indicator light. From this room, you can also return directly to the hatch using the ladder nearby, making the trip back much quicker.
Battery Two – The Flooded Parking Lot
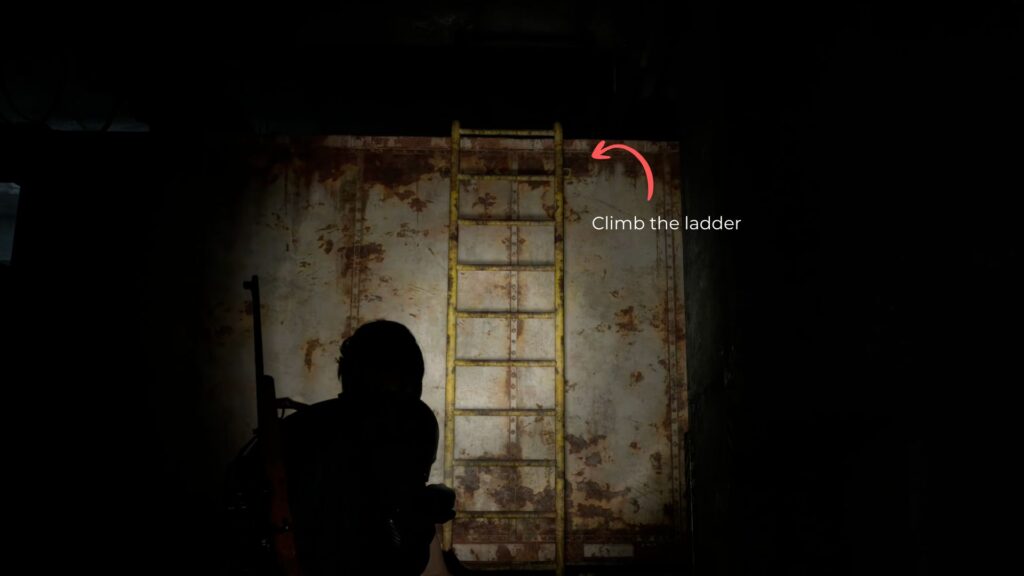
Head back down to the flooded parking lot and look for a ladder on the far side of the battery panel. Climb it, walk across the top of the truck, and drop down into the flooded area on the other side.
Zombies are wading around below. You can use melee attacks and stealth kills, snipe them, wherever you can to avoid drawing a crowd.
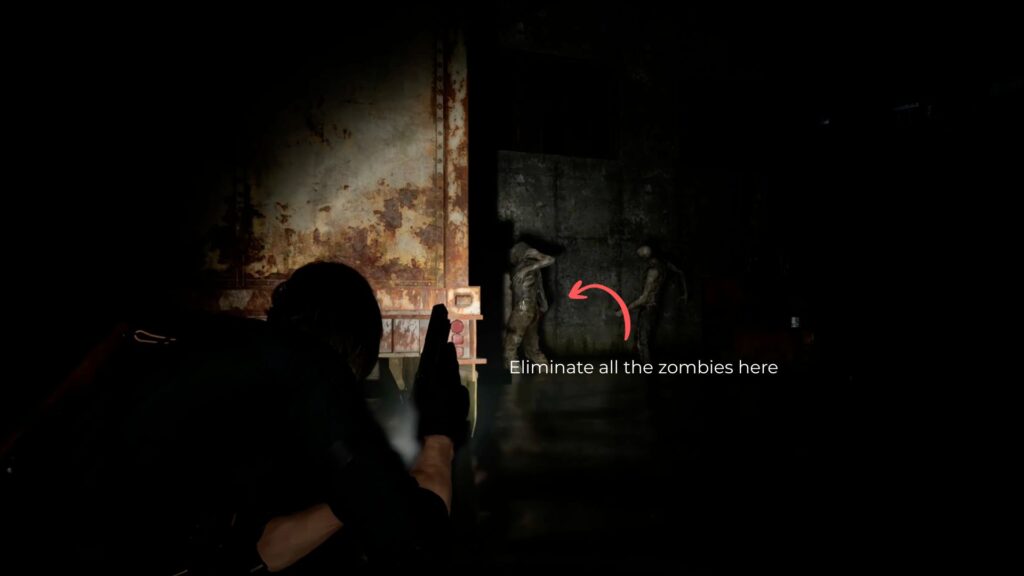
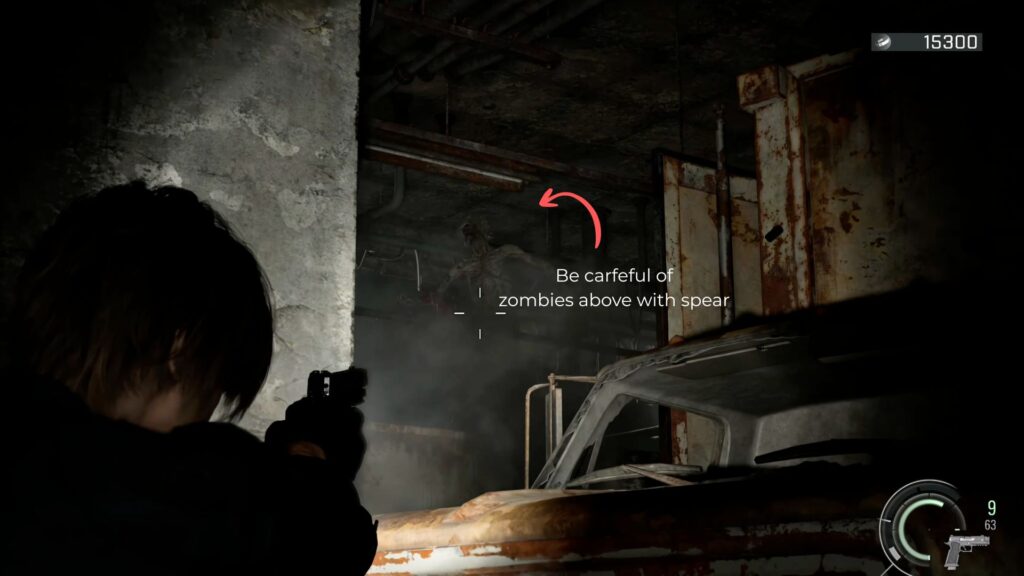
It’s very dark down here, so keep checking your map to track the battery’s position. Move slowly, crouch when needed, and pick off zombies quietly as you go. Keep an eye out for a zombie on top of one of the trucks throwing spears — take it out from a distance before it catches you off guard.
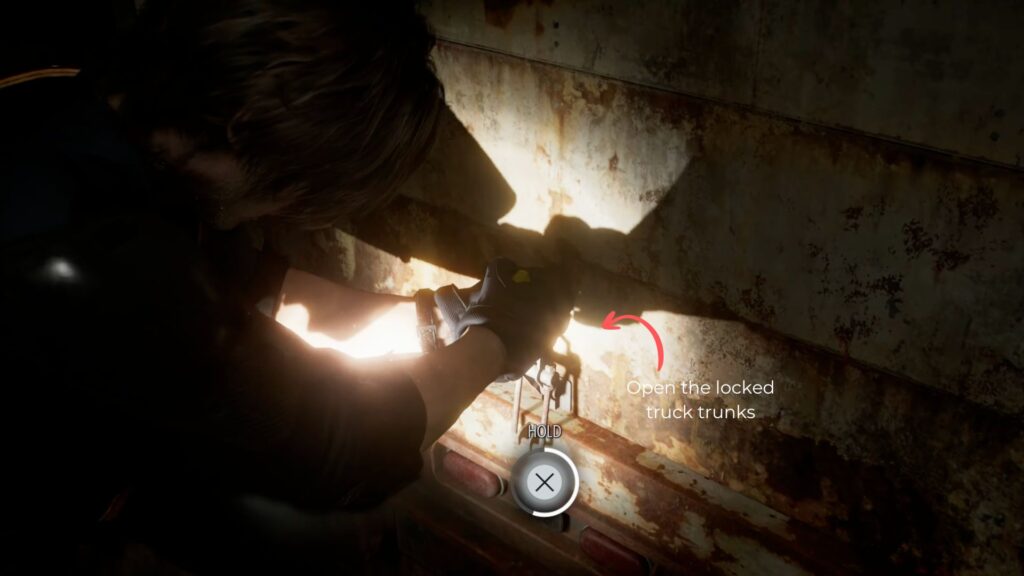
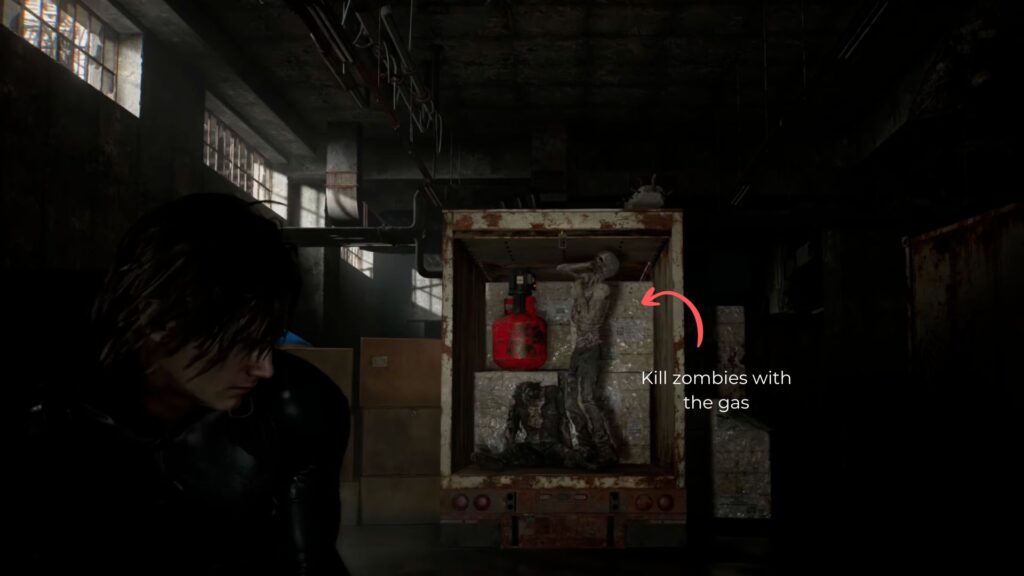
Further ahead, you’ll find a trucks with a holdable trun. Open them to collect some Shotgun Shells and Machine Gun Ammo. The next truck along has a zombie waiting inside. You can shoot the gas canister nearby to deal with it quickly.
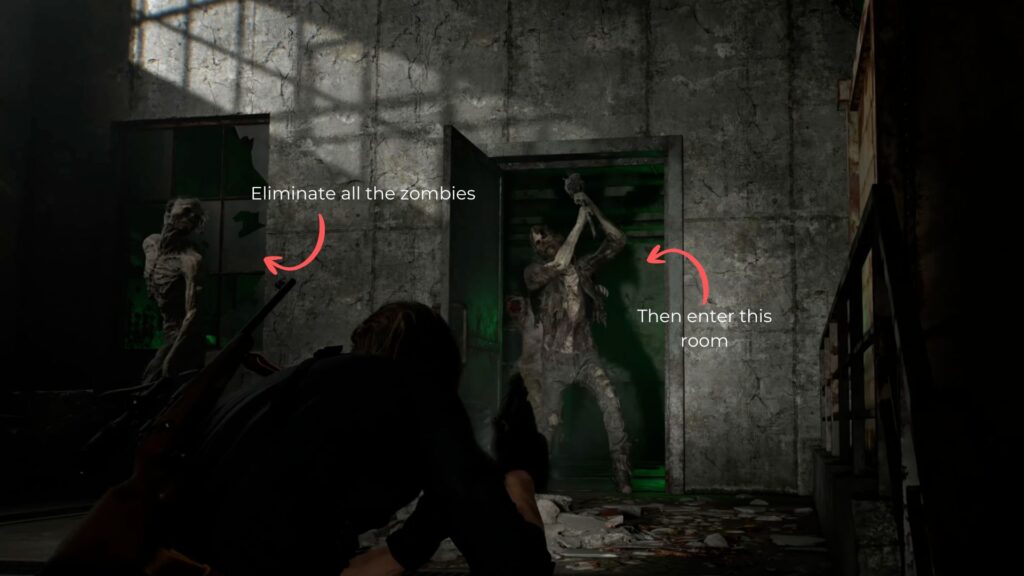
As the parking lot starts getting slightly brighter, you’re getting close. You’ll find a short set of stairs with zombies guarding a room at the top. Clear them out with whatever weapons you have available.
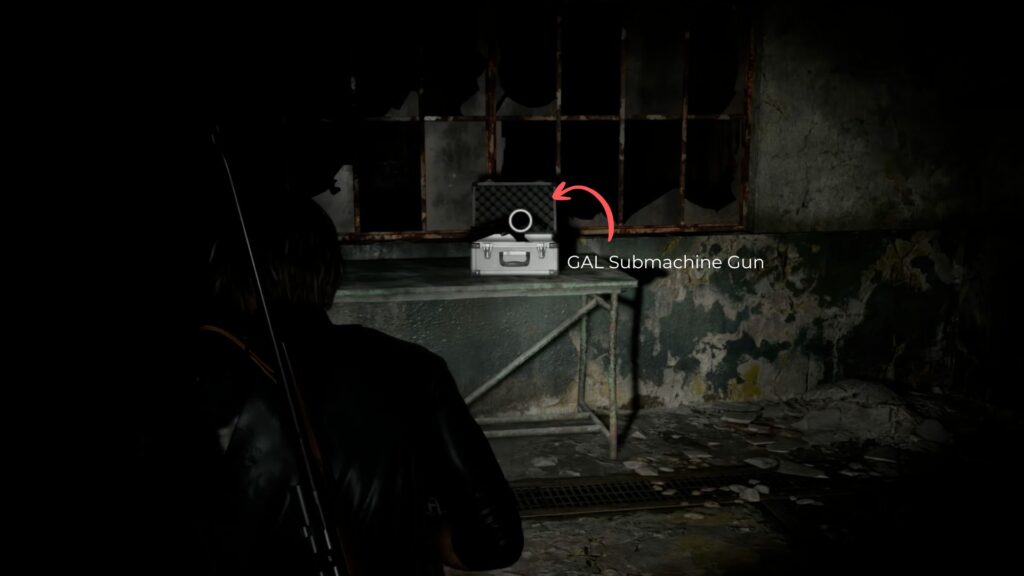
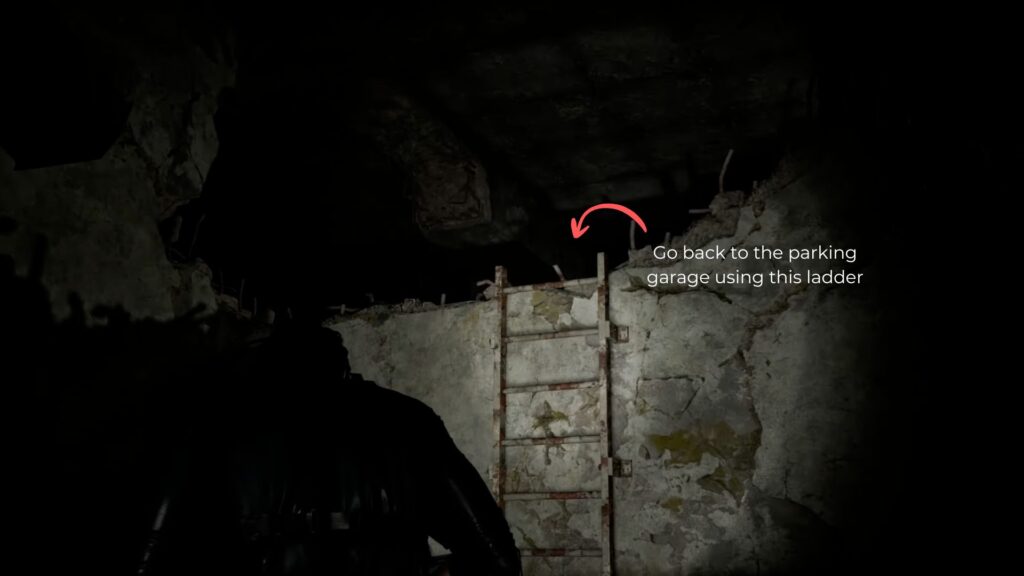
Inside the room, collect the second battery. On the side wall, there’s a case containing a GAL Submachine Gun. Climb the ladder inside the room to get back up onto the trucks and return to the battery panel easily.
The BSAA Discovery
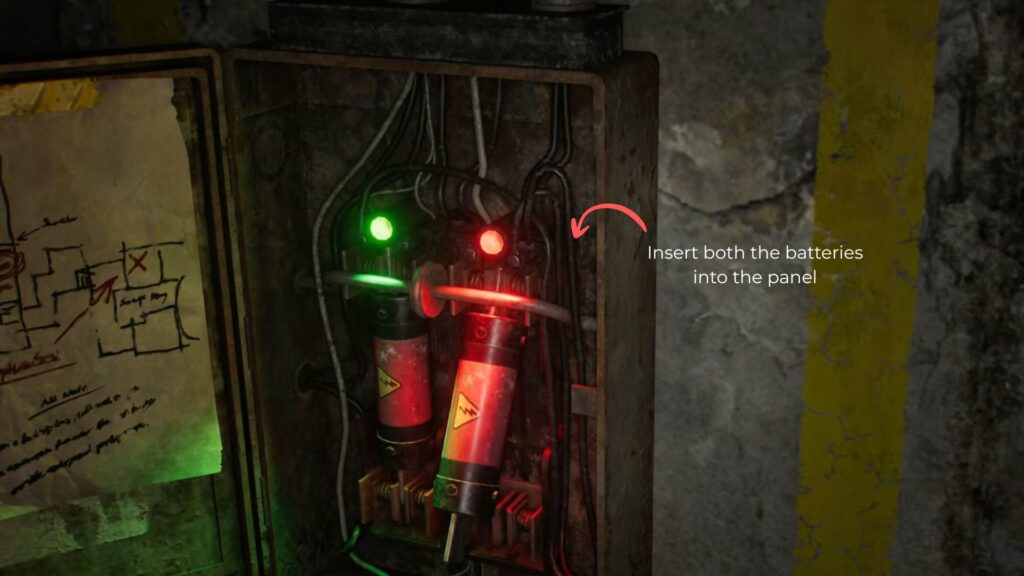
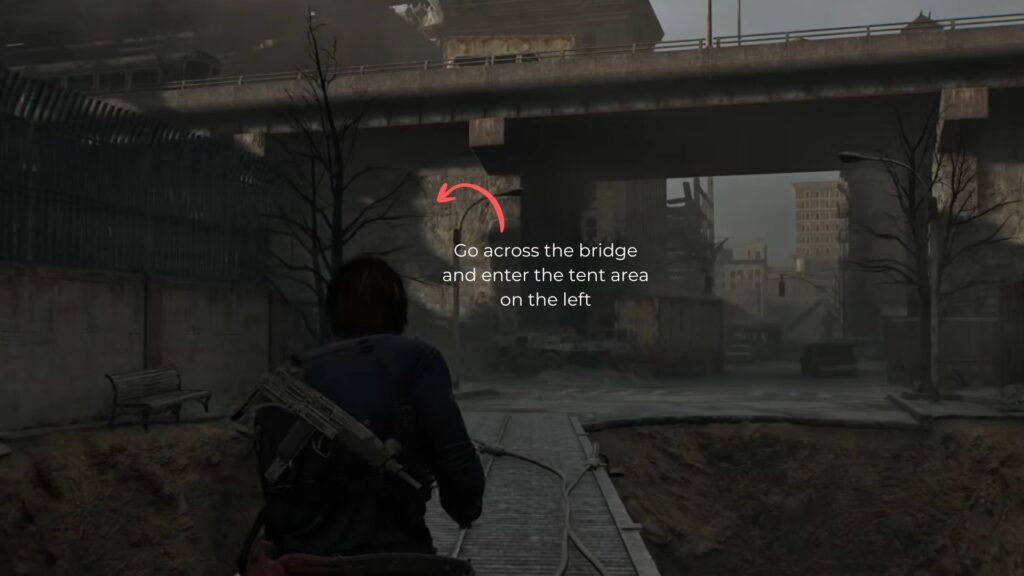
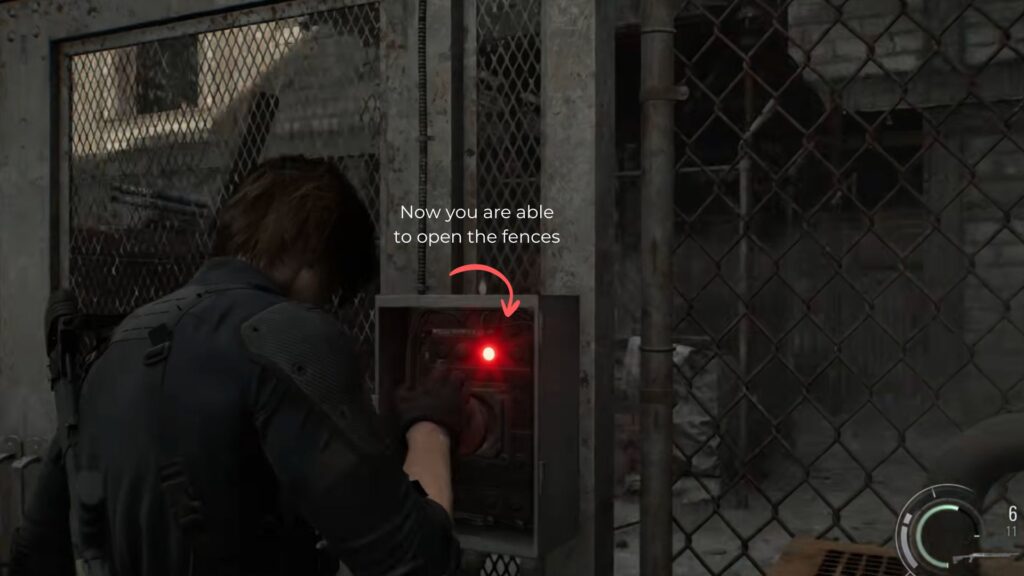
Insert both batteries into the panel. The shutter door will open and you’ll emerge on the other side of the underground area, with the gas station now visible directly ahead.

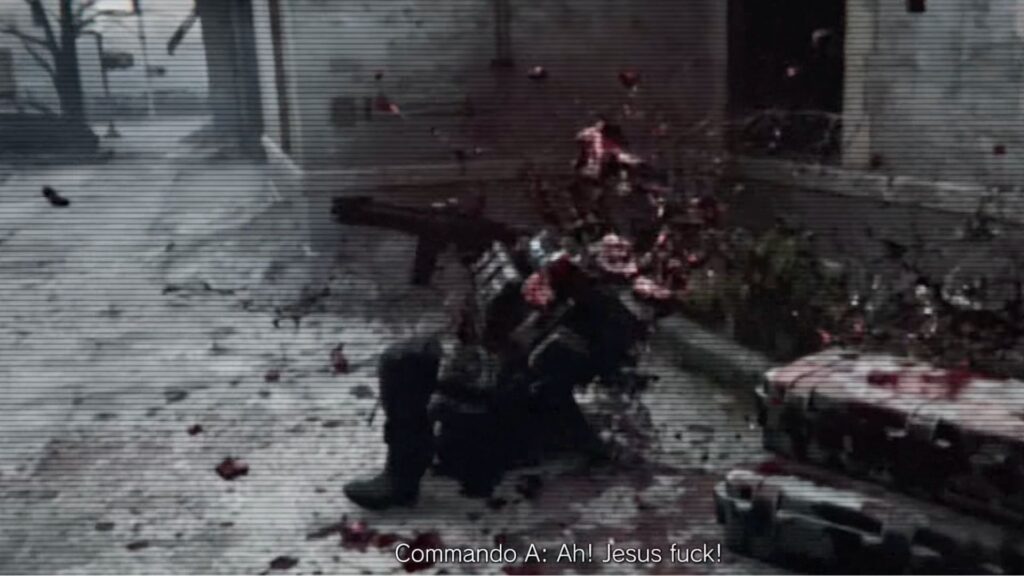
Head left and a cutscene will play. Leon discovers a large number of BSAA agents dead and blown apart across the area. He pulls the helmet camera off one of the agents and reviews the footage.
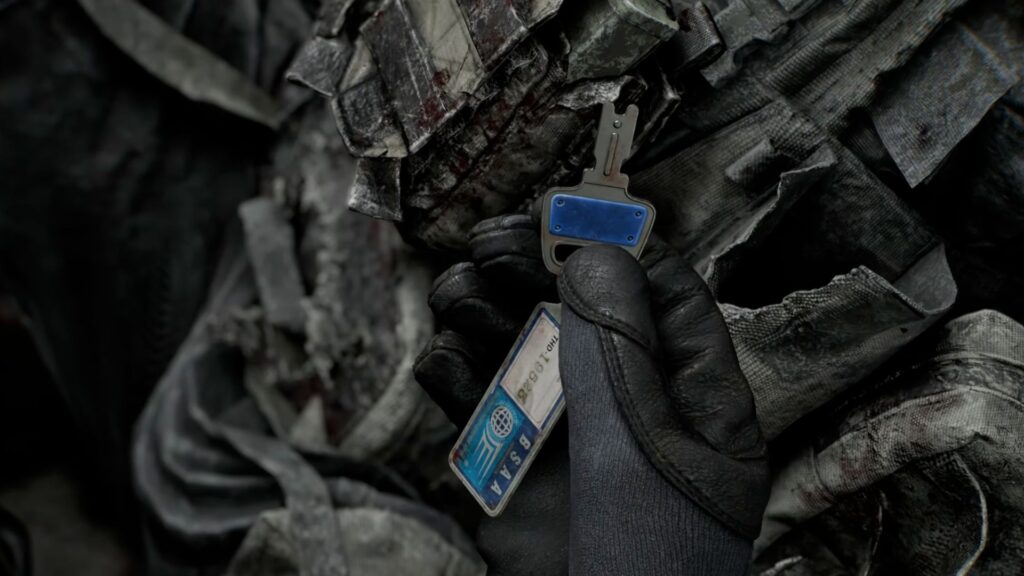
After the video ends, Leon finds a BSAA Container Key, which will unlock every BSAA storage container across the city.
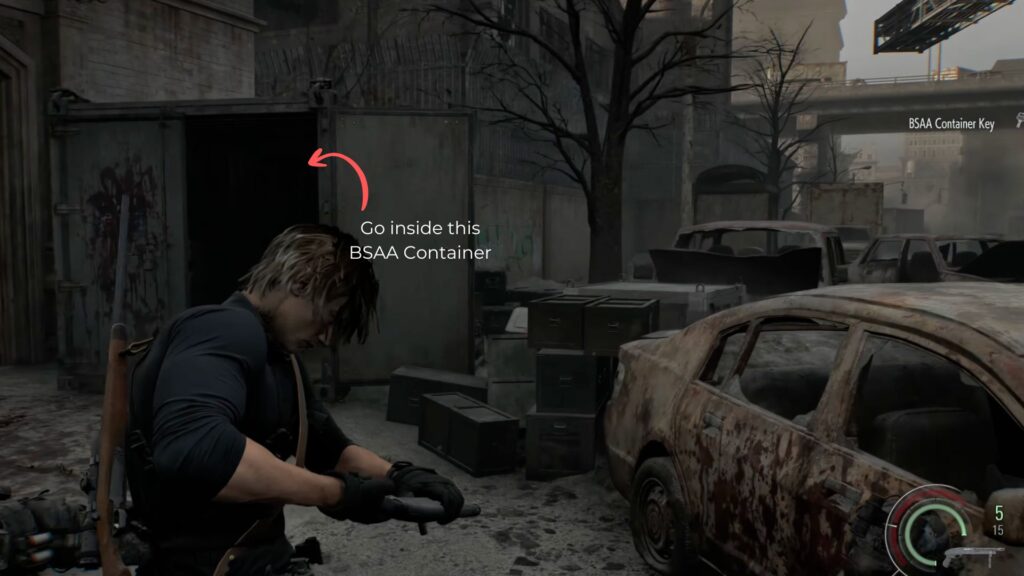
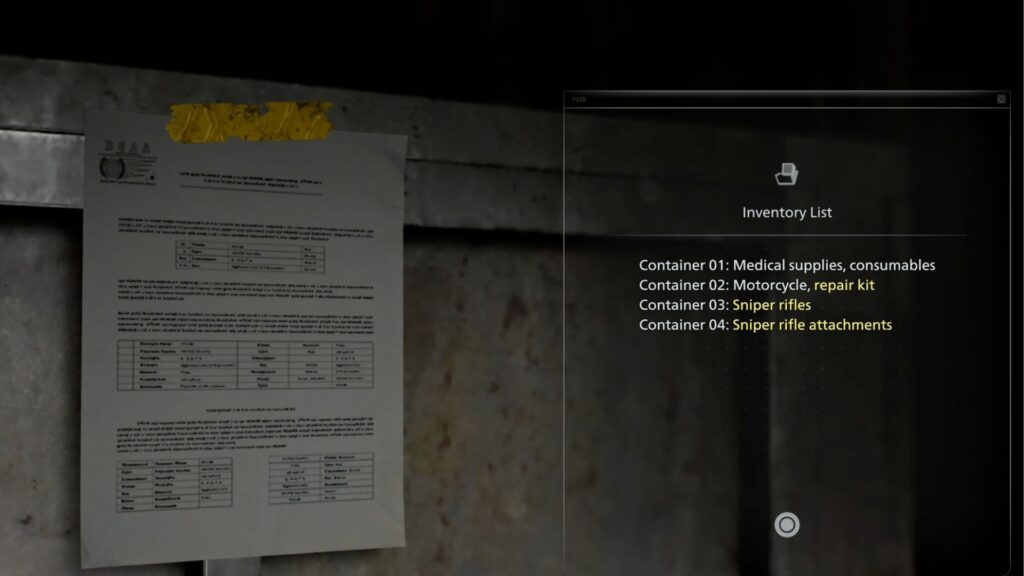
There’s one container that is already opened right here near the bodies. Go and open it to find a Med Injector and an Inventory List that details what the other containers hold:
- Container 1: Medical Supplies and Consumables
- Container 2: Motorcycle and Repair Kit
- Container 3: Sniper Rifles
- Container 4: Sniper Rifle Attachments
Getting the Gas Can
Your next objective is to find fuel for the generator. But for this, you also need to get a Gas Can first to hold the fuel. So, head out from the container and push forward through the area, fighting through the zombies you’ll encounter along the way. Pick up any Ammo and Shotgun Shells on the ground as you go.
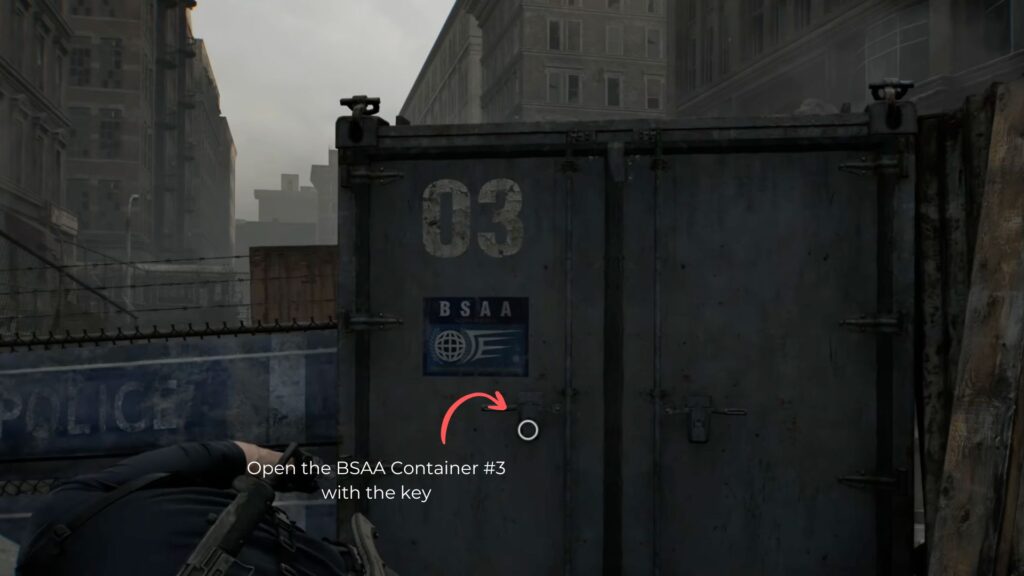
You’ll eventually spot BSAA Container 3 near a pile of cars and trucks. You can’t access it directly, though. You need to go around the orange truck beside it, which has a ladder attached to its side.
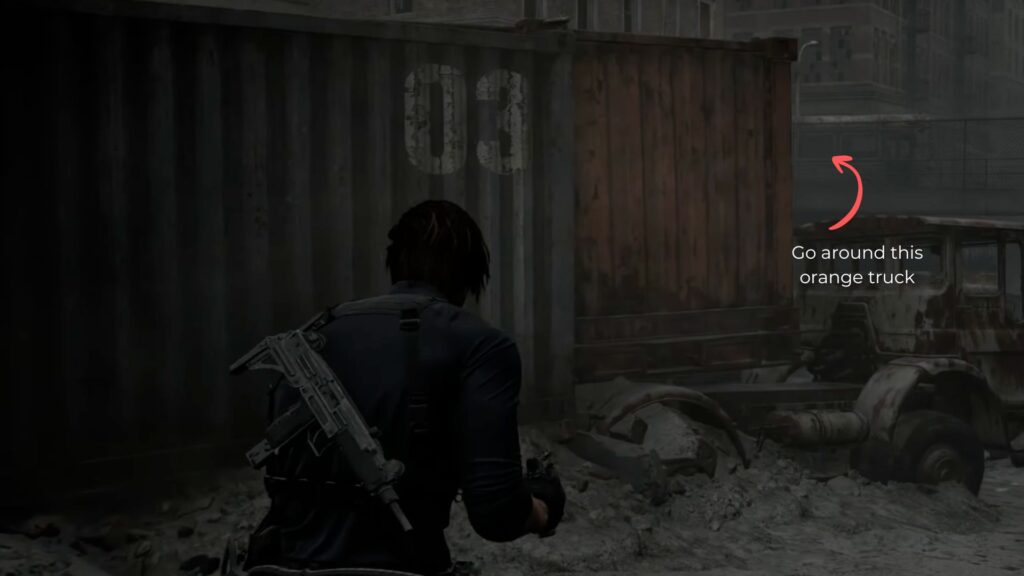
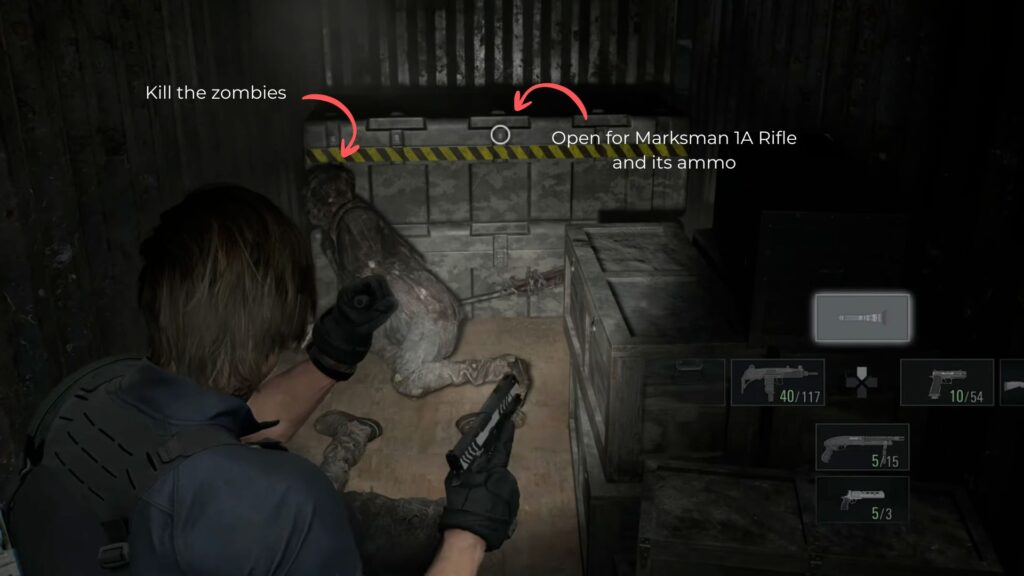
Climb up, drop down on the other side, and open the container. Zombies are inside, so clear them out first before looting. You’ll find the Marksman 1A Rifle and Rifle Ammo inside.
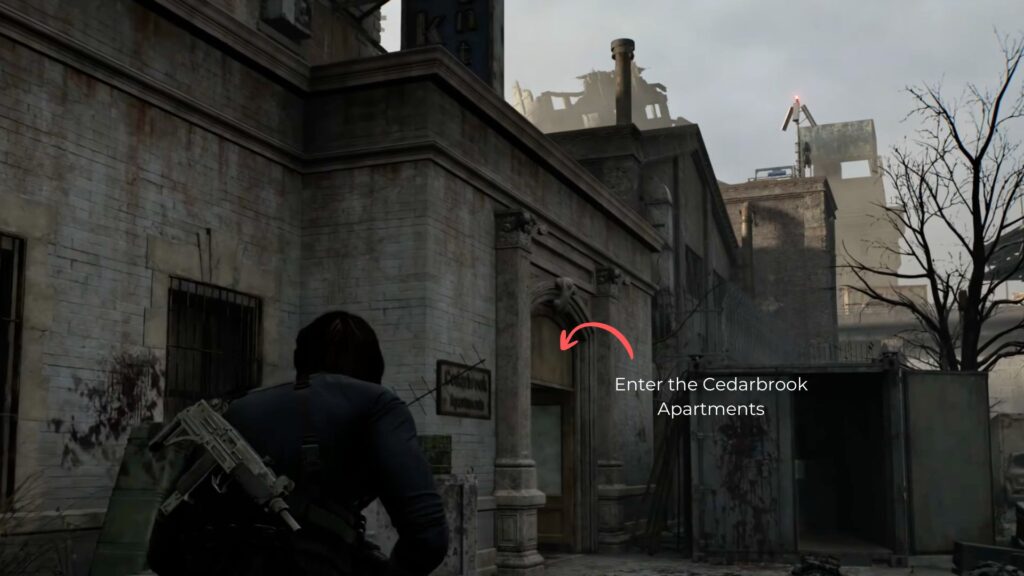
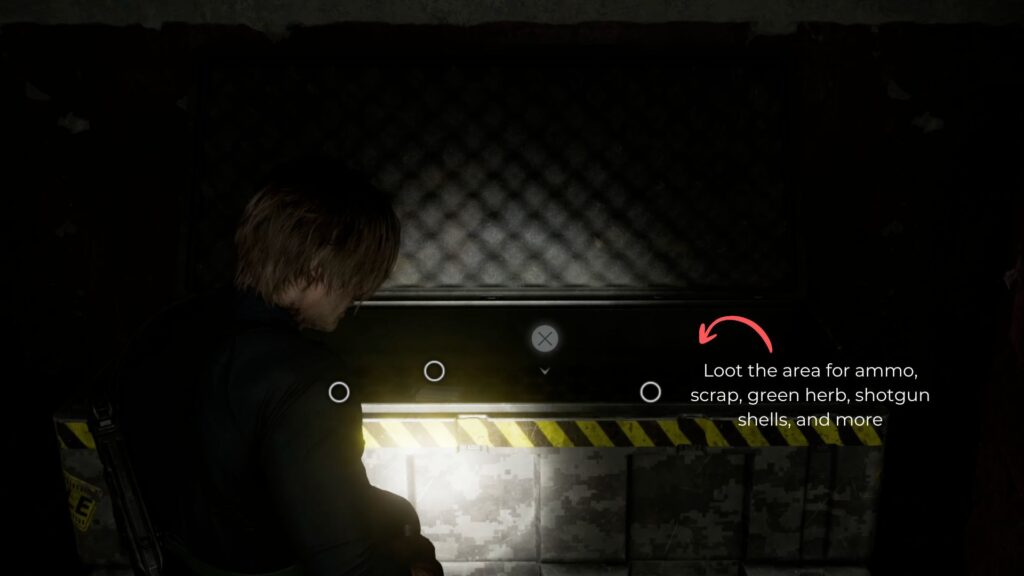
Head back toward the gas station area and enter the Cedarbrook Apartments directly across from it, right next to where the BSAA agents fell. Inside, grab the Rifle Ammo, Machine Gun Ammo, Shotgun Shells, and Green Herbs from the crate near the entrance.
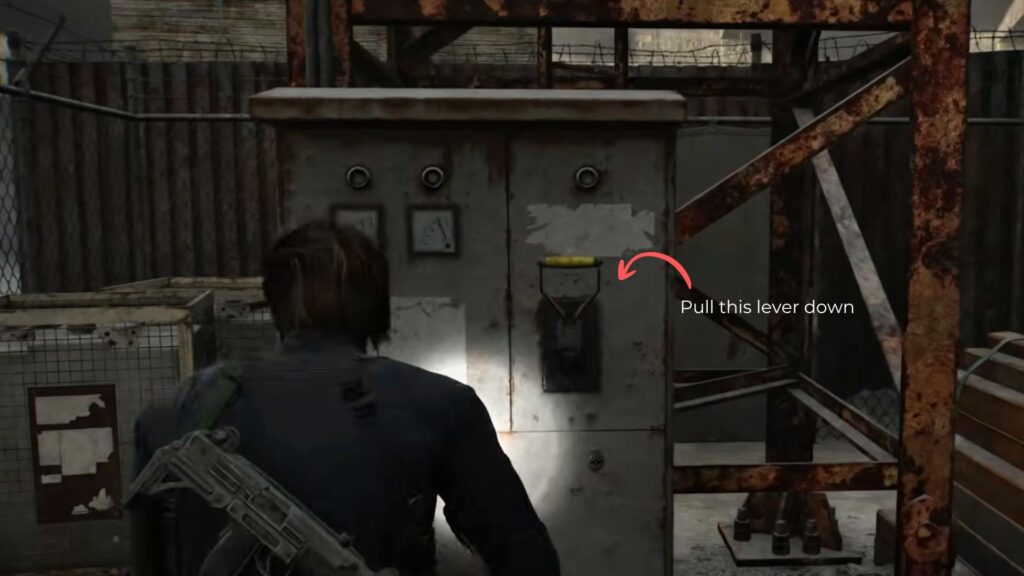
When you come back out, go left to find a panel with a lever on it. Pull it down to drop the bridge spanning the large hole in the road, connecting you back to the area with the tent.
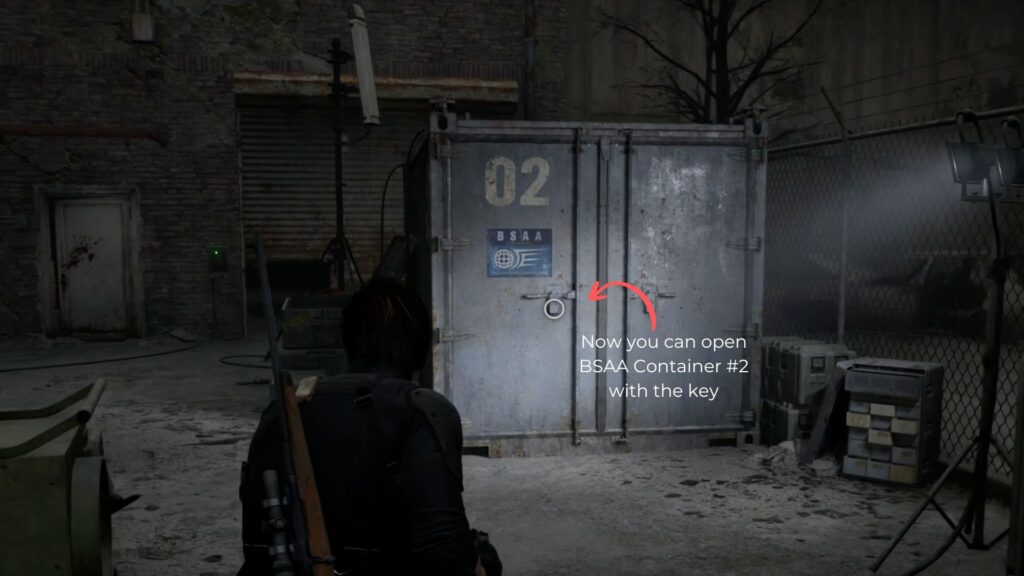
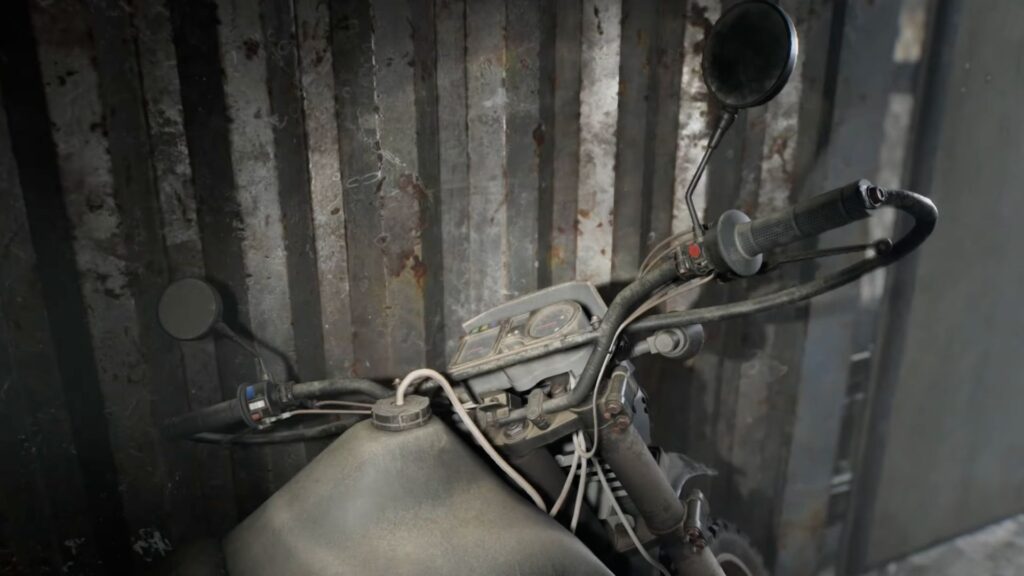
Head back and spend any credits you’ve built up on upgrades. You can also now open BSAA Container 2 in front of the tent, which holds the Motorcycle and Repair Kit.
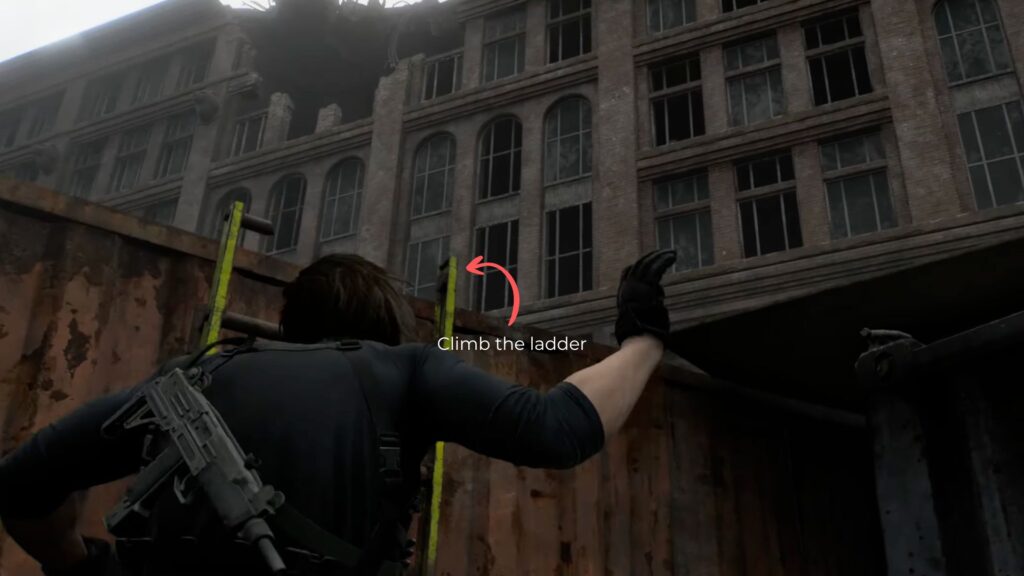
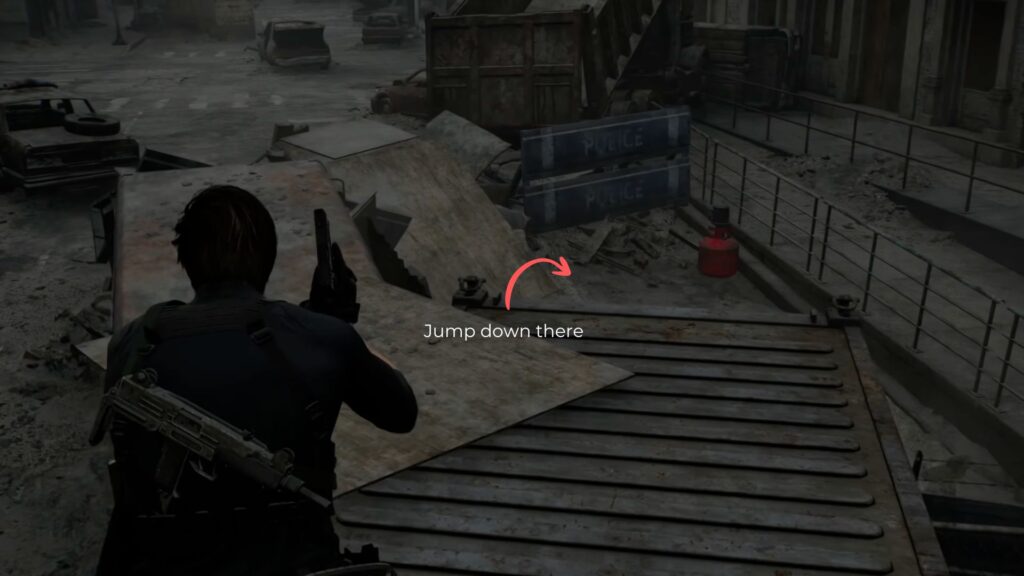
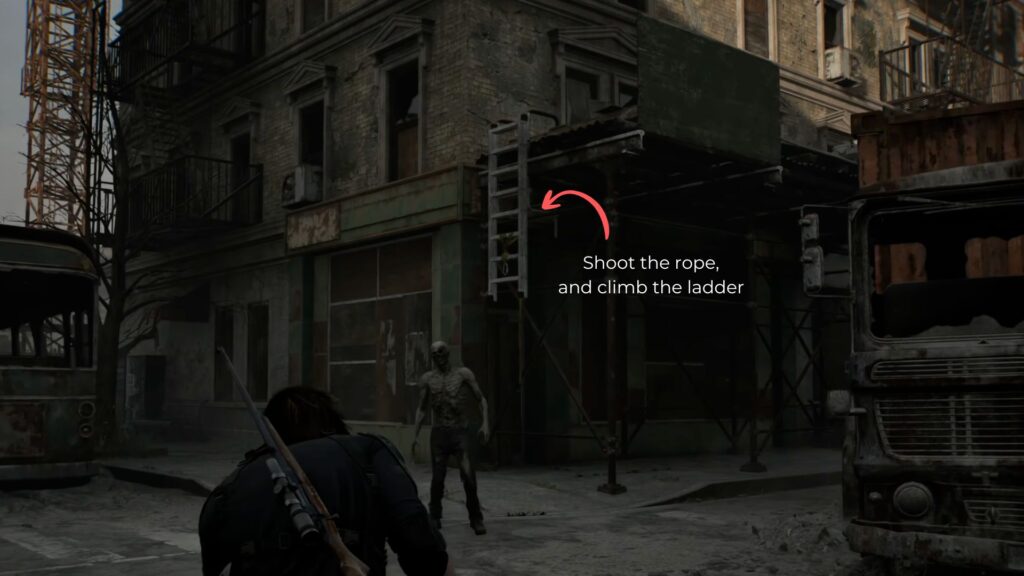
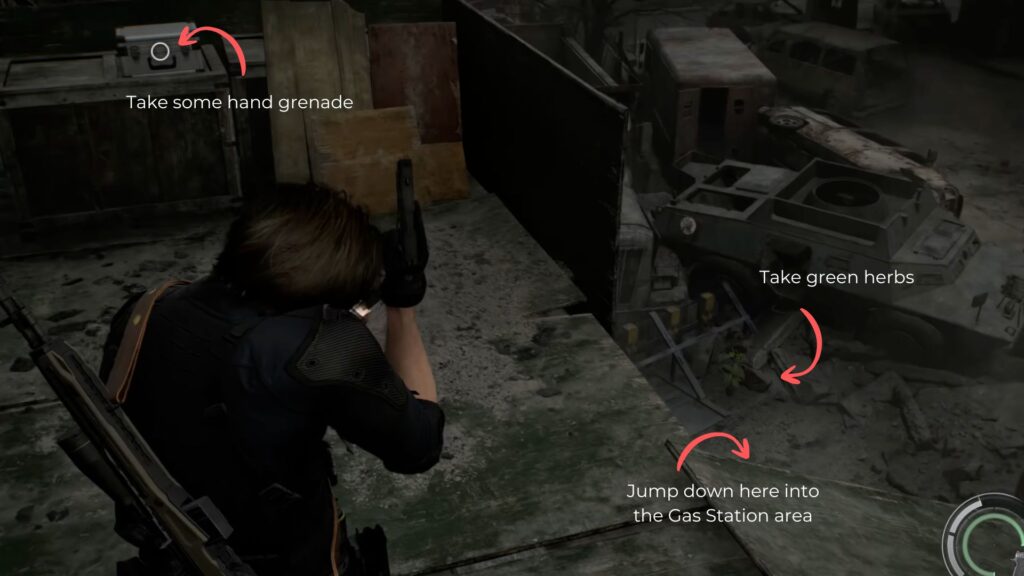
Back across from the apartment door, look for a ladder on the wall and shoot it down. Climb up and grab the Hand Grenade in the case at the top, then jump down into the gas station grounds below.
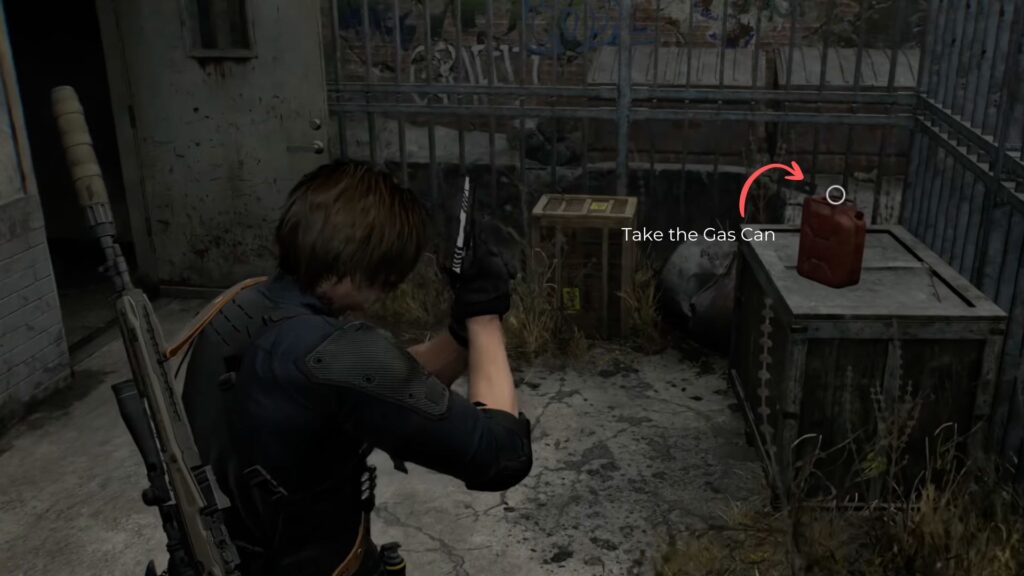
Inside the gas station shop, check the shelves to find a Mr. Raccoon collectible. Head around to the back of the building where a Gas Can is sitting on top of a crate — pick it up and collect any additional ammo in the area.

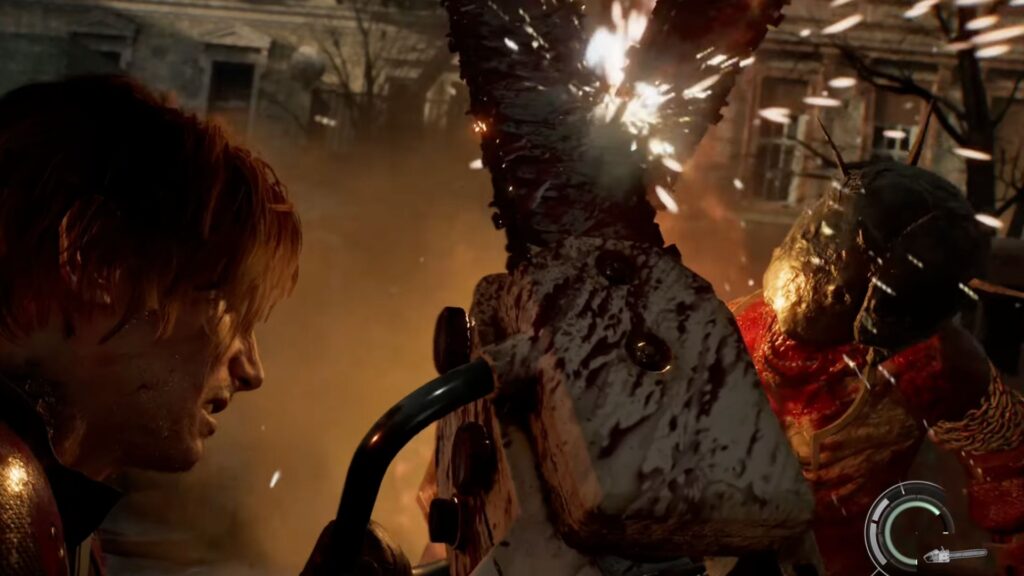
Now return to the gas station forecourt. It won’t be quiet because, of course, zombies and fire are now spread across the area. Fight your way through using whatever you have available. You need to kill all the zombies here before you can follow through. You’ll also find a Chainsaw here, which makes clearing the infected significantly easier.
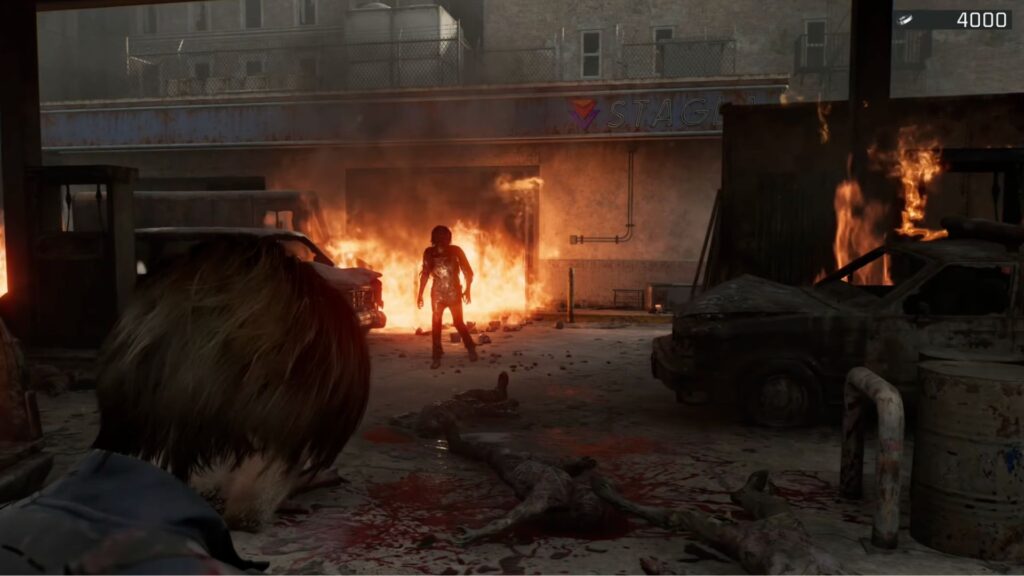
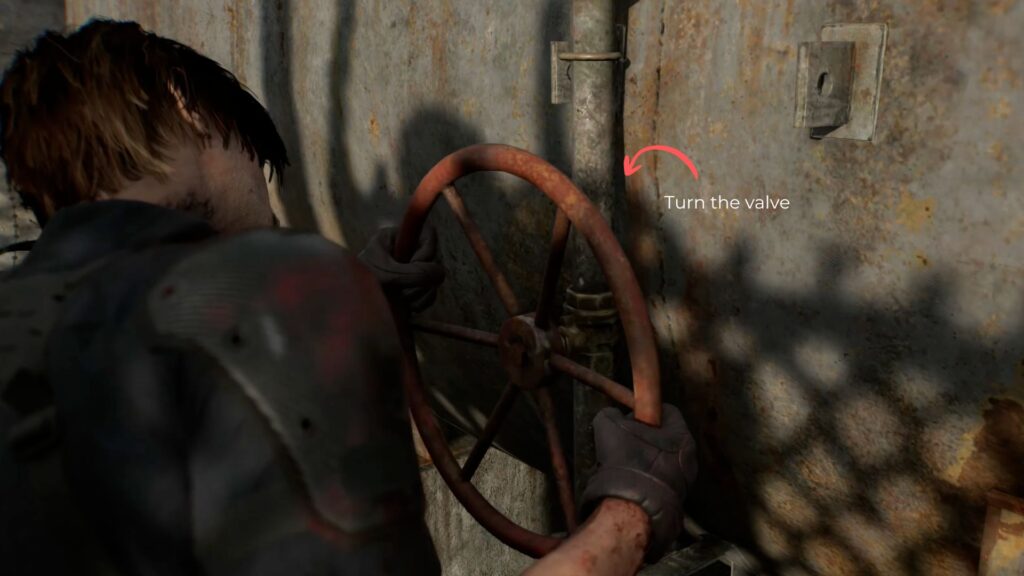
Once the area is secure, find the fenced section inside the station and turn the valve there to fill your Gas Can with fuel.

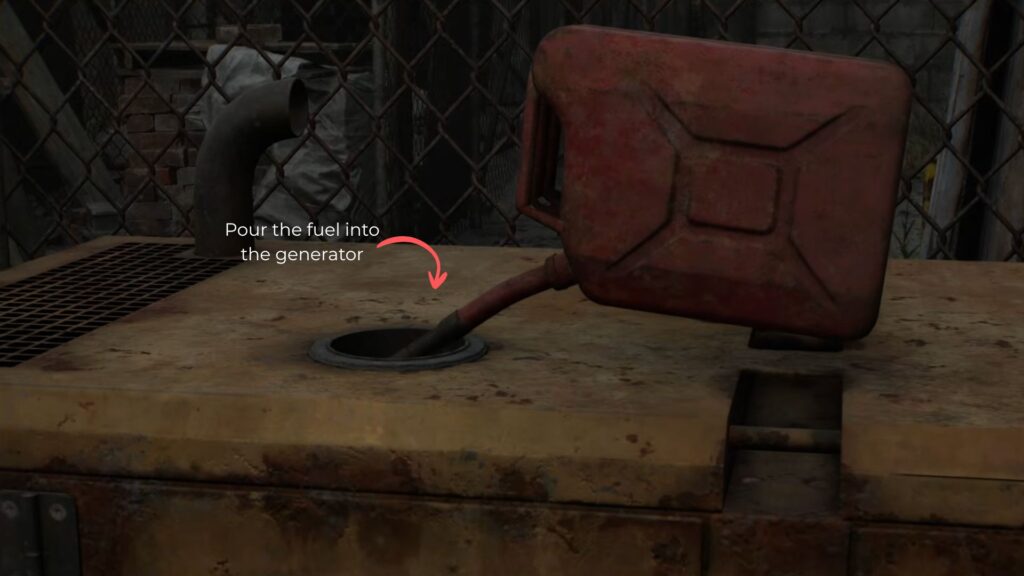
Take the filled Gas Can back to the rooftop generator, pour the fuel in, and the generator will power up. The zipline door opens, giving you access to the street on the other side.
Now you will have to continue to the third part of Leon’s journey in Raccoon City, where you have to complete all the Detonator parts.
All Collectibles
| Category | Item | Location/Notes |
|---|---|---|
| Collectible Files | Inventory List | BSAA container near the dead agents — lists all four container contents |
| Mr. Raccoon | Mr. Raccoon | On the shelves inside the gas station shop |
| Keys | Cedarbrook Apartment Key | On the wall inside the dark room in the Logistics Warehouse |
| BSAA Container Key | Found on a BSAA agent after watching the helmet camera footage | |
| Weapons | Marksman 1A Rifle | Inside BSAA Container 3 near the piled-up trucks |
| GAL Submachine Gun | Inside the case in the room where the second battery is found | |
| Chainsaw | In the gas station forecourt during the zombie clear-out | |
| Attachments | Tracking Module | Dropped by the first zombie in the underground parking lot — stealth kill to collect |
| Ammo | Requiem Ammo | Top of the hanging ladder behind the staircase near the apartment gate |
| Rifle Ammo | BSAA Container 3; inside Cedarbrook Apartments | |
| Machine Gun Ammo | Truck trunk in the flooded parking lot; inside Cedarbrook Apartments | |
| Shotgun Shells | Various — Logistics Warehouse floor, BSAA container near dead agents, along the path to the trucks | |
| Gunpowder | Lockers in the Logistics Warehouse; top of the hanging ladder near apartment gate | |
| Recovery Items | Green Herb | Top platform of the Logistics Warehouse; sewage facility hatch drop; flooded parking lot |
| Med Injector | BSAA container near the dead agents | |
| Throwables | Hand Grenade | Case in the Logistics Warehouse first room; briefcase hanging from beam near apartment gate; case on top of ladder near gas station |
| Detonator Parts | Distributor (Part 1) | Yellow crate above the Logistics Warehouse rooftop generator room |
| Crafting | Gas Can | Behind the gas station building on top of a crate — fill at the station valve |
| Locked BSAA Containers | Container 2 | In front of the tent — Motorcycle and Repair Kit |
| Container 3 | Near the piled trucks — Marksman 1A Rifle and Rifle Ammo | |
| Bosses | Blister Borne | First chamber of the sewage facility — use the central pipe as cover, shoot pus pocket from behind |
The second part of this chapter functions as a small open zone across a ruined section of Raccoon City. Managing the Tactical Tracker and spending credits wisely between objectives will make the tougher enemy encounters significantly easier, since you will have to eliminate almost all of them.
With the generator fueled and the zipline now active, the path to the remaining two detonator parts, and ultimately the city center, is finally opening up.