
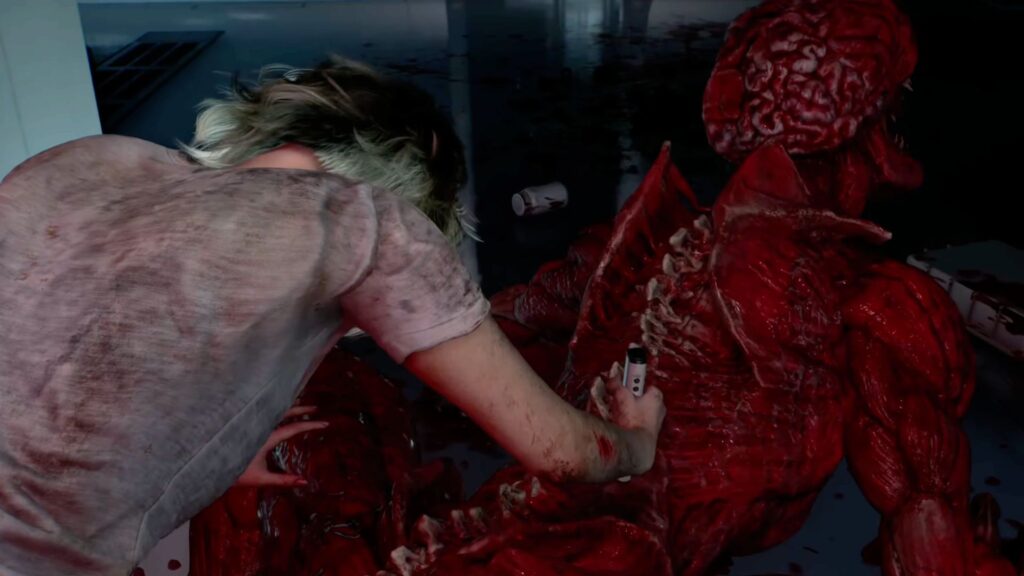
The previous chapter ended with Leon spotting Grace and Zeno inside the Pandora, a yellow chamber deep within the ARK. After Leon intervened and shot the mechanical arm holding the central sphere, both he and Grace fell into the lower levels of the facility. With Leon finally succumbing to the effects of Umbrella’s Curse — coughing blood and barely able to stand — Grace takes the lead. This chapter is played entirely as Grace, escorting Leon as she searches for a way out.
Resident Evil Requiem Lower ARK Walkthrough (Grace)
The Dump
Follow the path through the trash-filled lower area. You’ll quickly spot an exit blocked by a large crane, so keep moving until you find a duct hole high up on the wall. Leon will give Grace a leg up, so climb through and head straight until you reach an intersection lined with valve pipes. Take a left and kick open the panel covering the hatch to drop down into the room below.


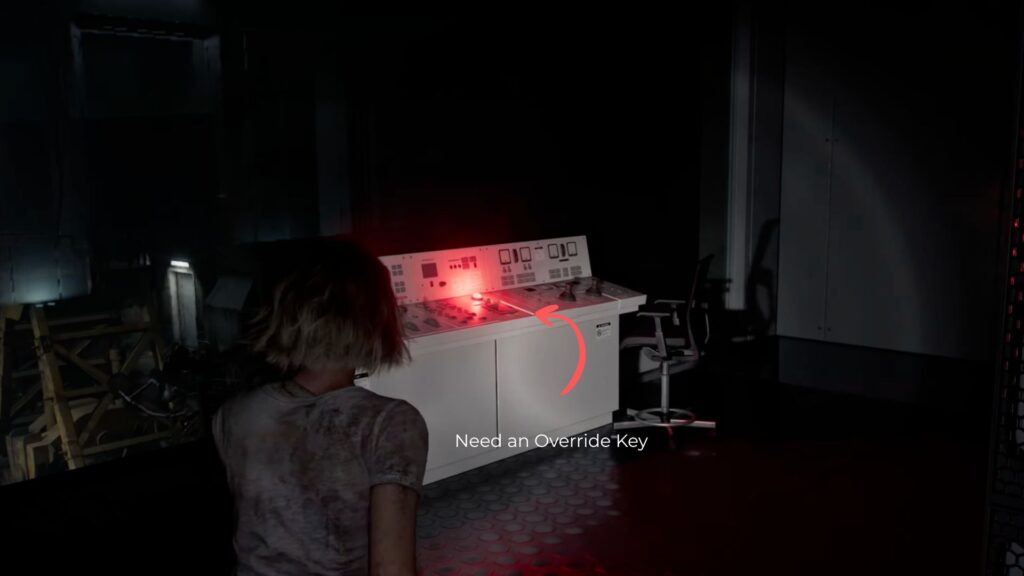
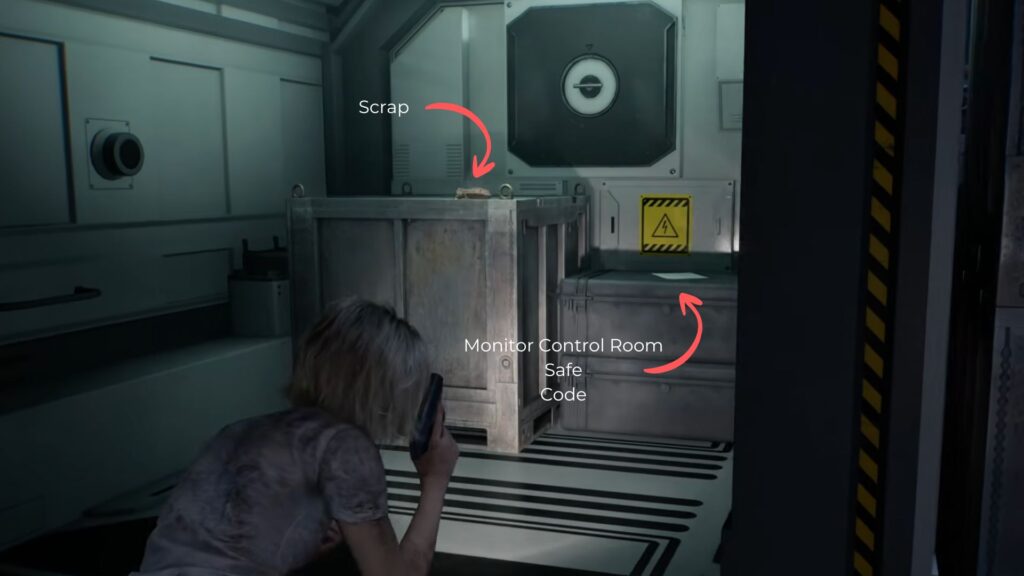
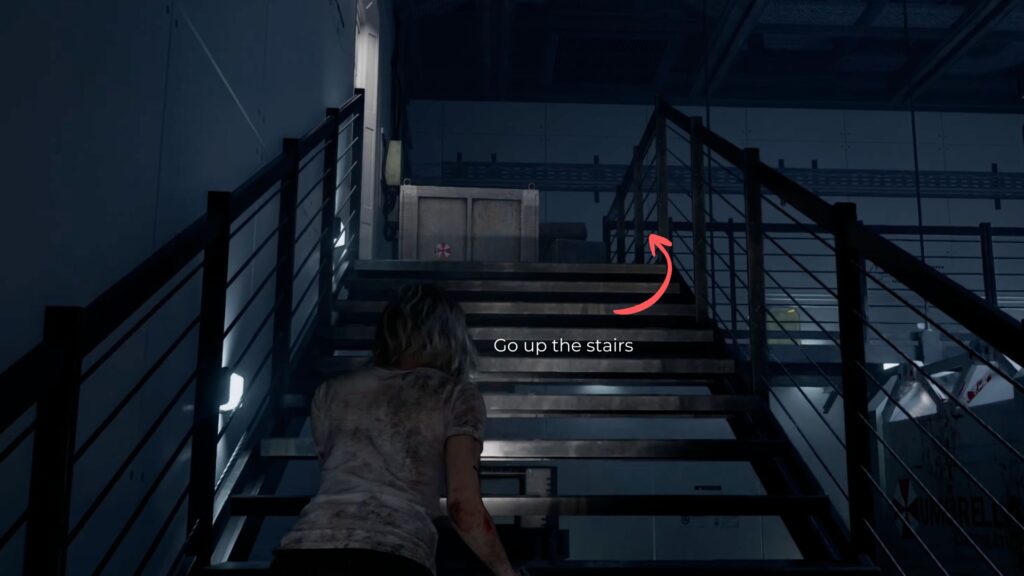
Inside, look for a staircase in the corner leading up to a Control Room. From up here you can see the dump below, but the door requires an Override Key to unlock. Go through the available door and keep climbing the stairs ahead. At the top, break the container to collect Scrap before moving into the next hallway.

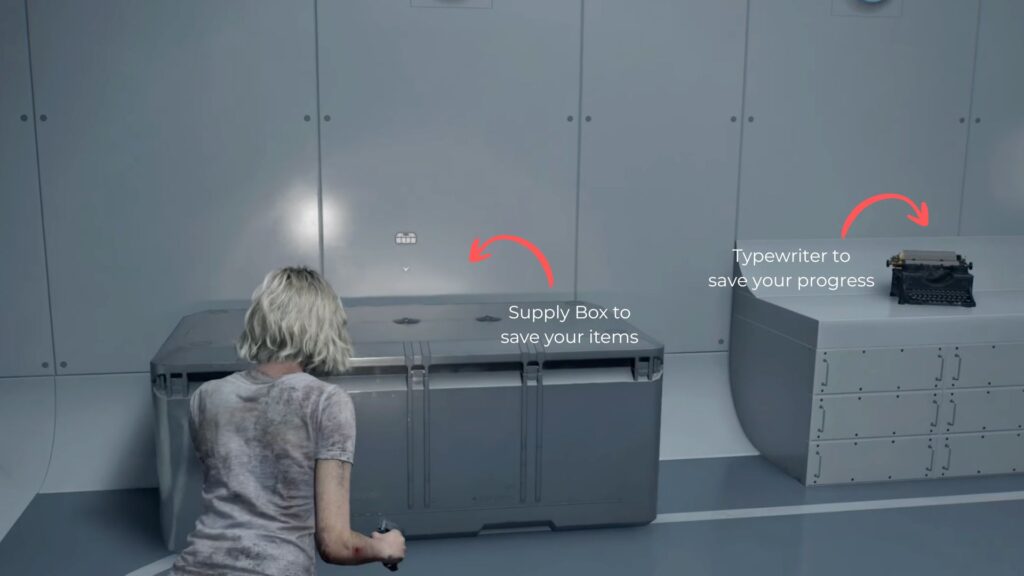
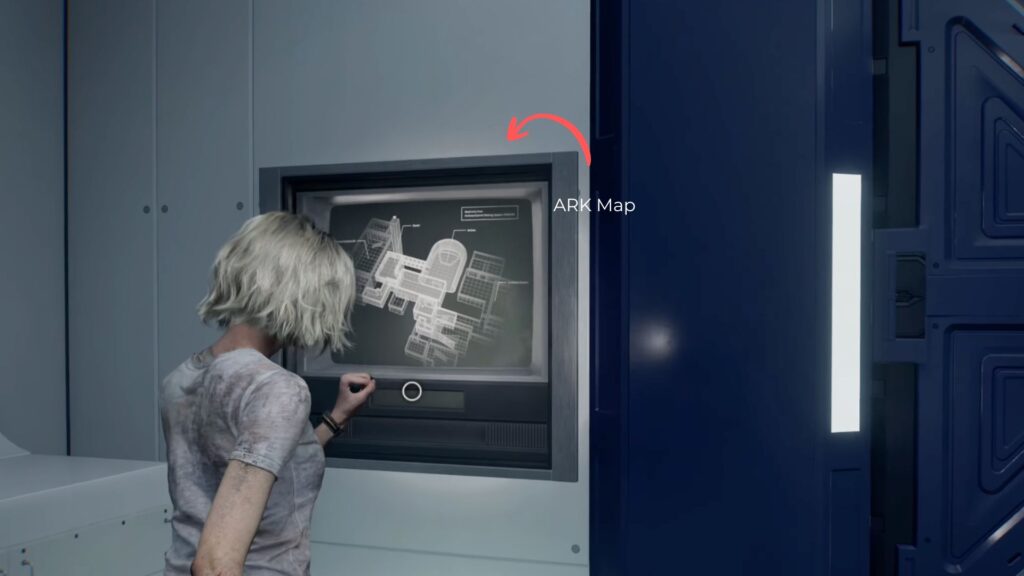
You’ll reach a room with Supply Boxes and a typewriter. So save your progress here. Check the monitor near the sealed door to view the map of the Restricted Area. According to the map, there’s an Archives Room directly across from your position, the Pandora is up and to the left but currently sealed, and the only accessible path leads right toward the Sterilization Chamber.

The Sterilization Chamber
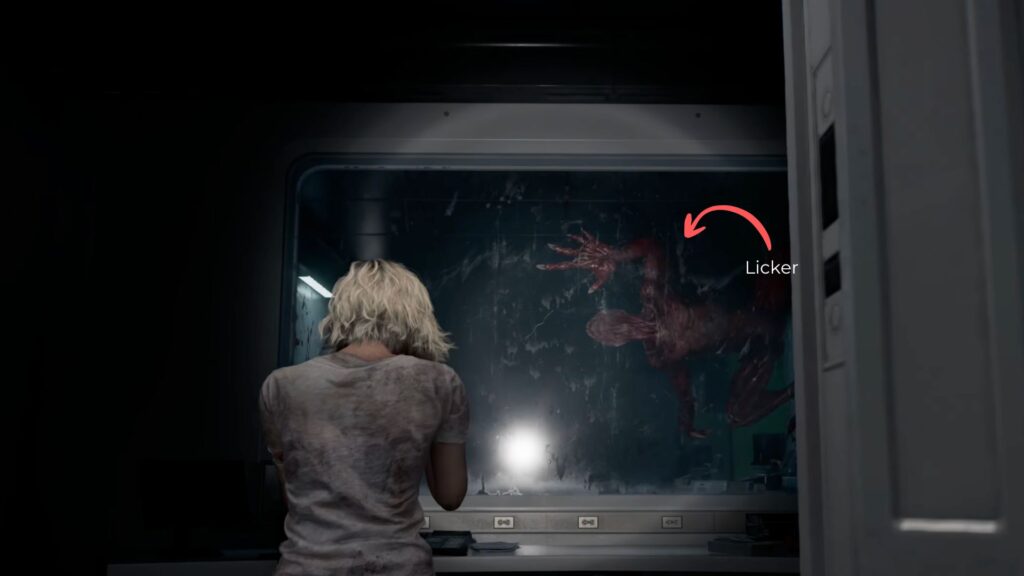
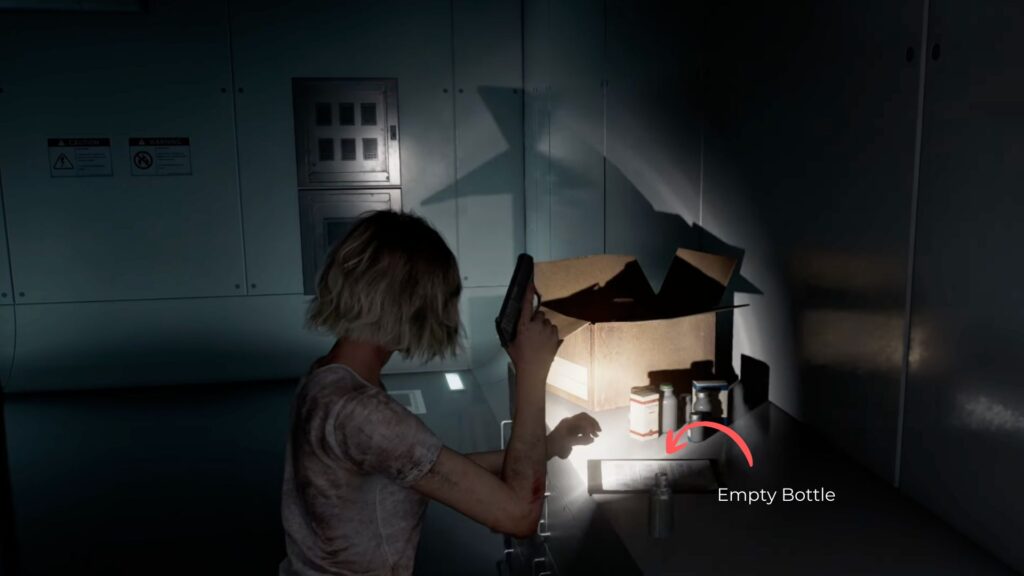
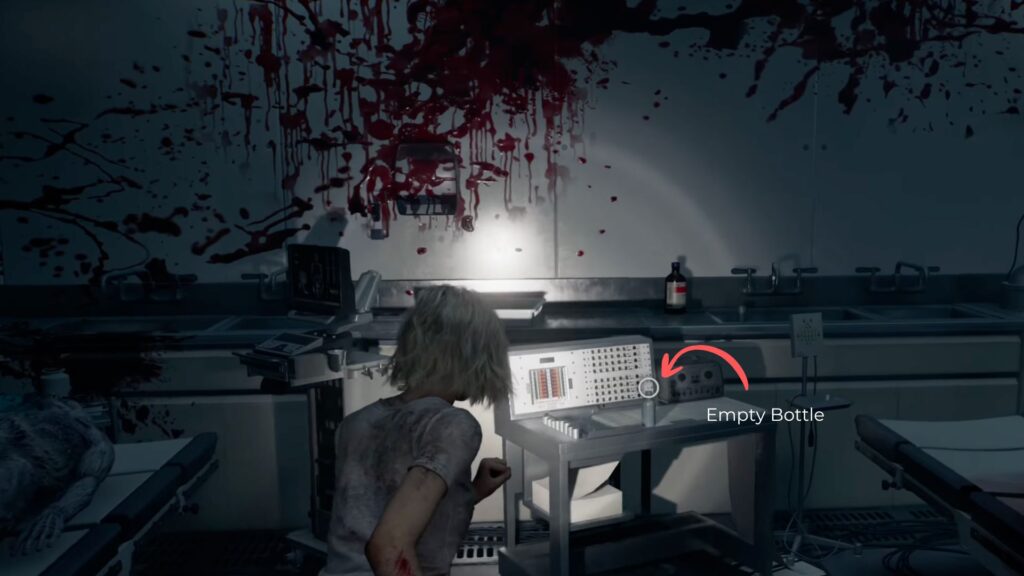
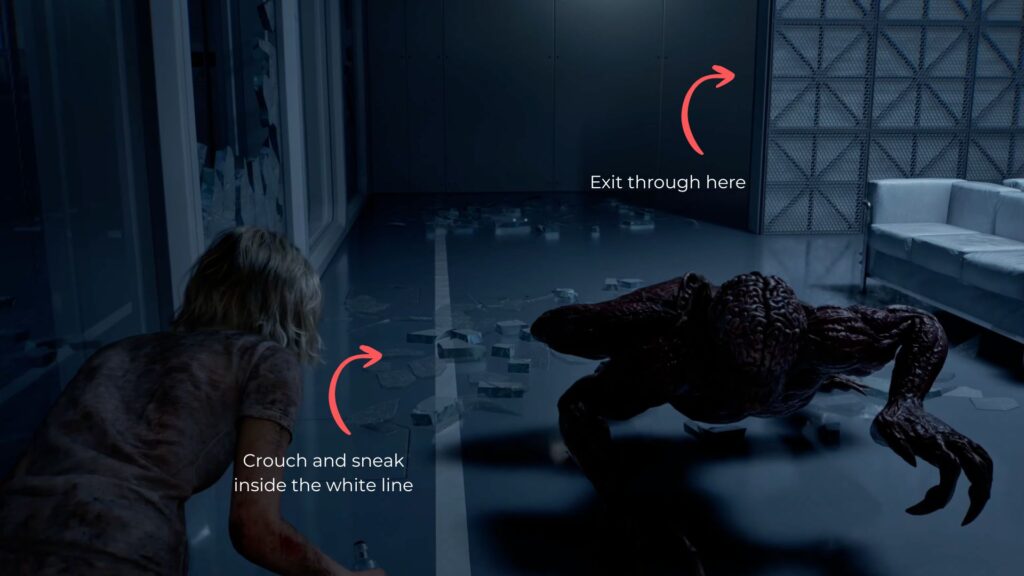
As soon as you enter the chamber, you’ll spot a Licker crawling on the glass. Move carefully and quietly. Take a right and grab the empty bottle from the desk, then slip through the tunnel on the left connecting to the Decontamination Chamber and the main room. An alarm will trigger as you do.
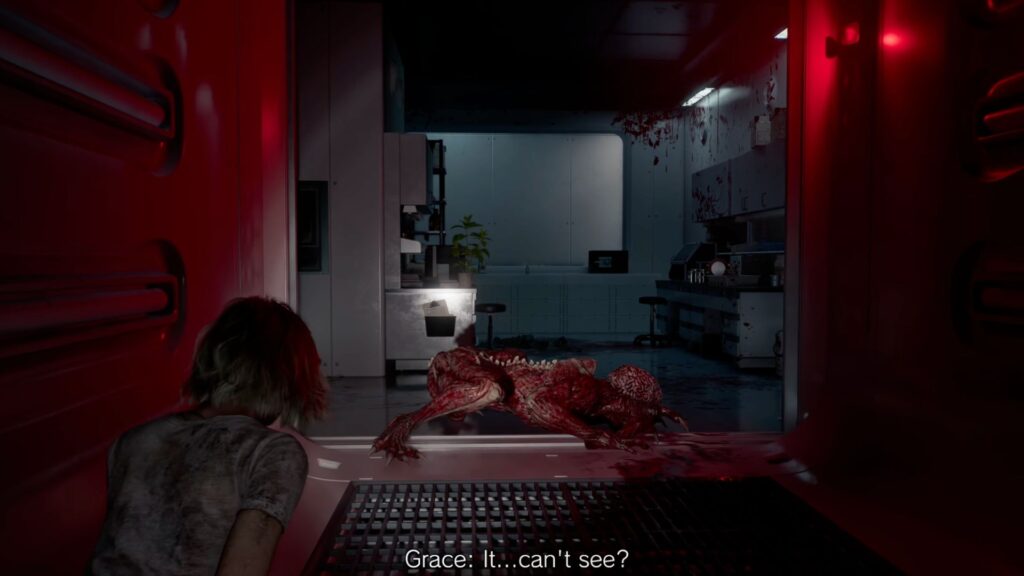
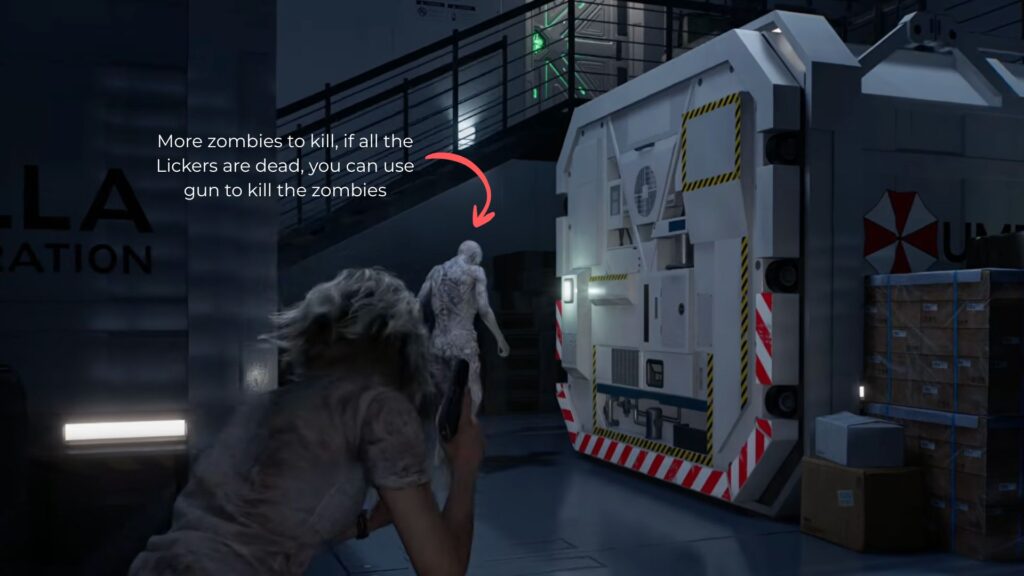
A Licker will respond to the alarm, but Grace now understands that these creatures are completely blind. They hunt entirely by sound and movement. Walk slowly and avoid stepping on any broken glass or debris on the floor, as even a single crunch will draw them to you. If you have Haemolytic Injectors, you can sneak up behind a Licker and take it out silently. If not, crouch and wait for it to move away.
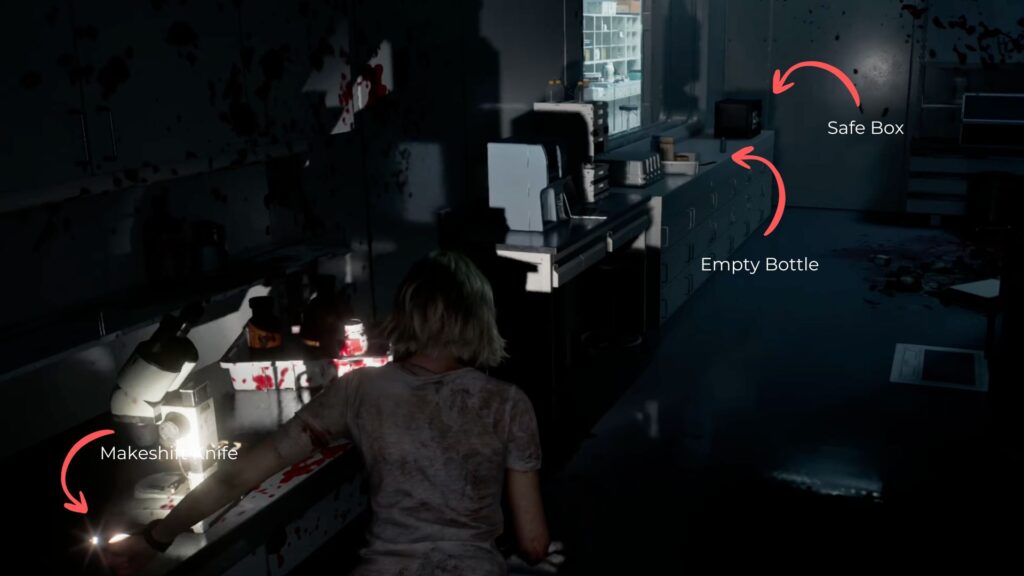
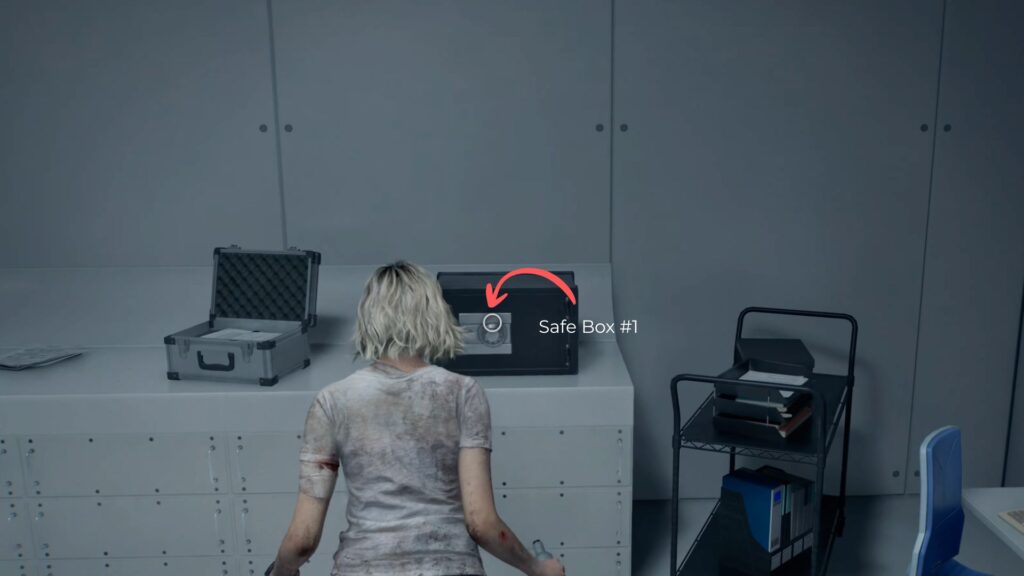
Head into the main room and grab the Green Herb from the desk. Continue to the left pathway where you’ll find another empty bottle near the examination bed with a zombie on top of it. At the lab desk across the room, collect a Makeshift Knife and a third empty bottle. There’s also a locked safe in the far corner. Note it and come back once you have the code. When you’re done, move into the next room, which is the Bioweapon Repository 02, a large space filled with glass tubes and zombies sealed inside.

Getting the Override Key
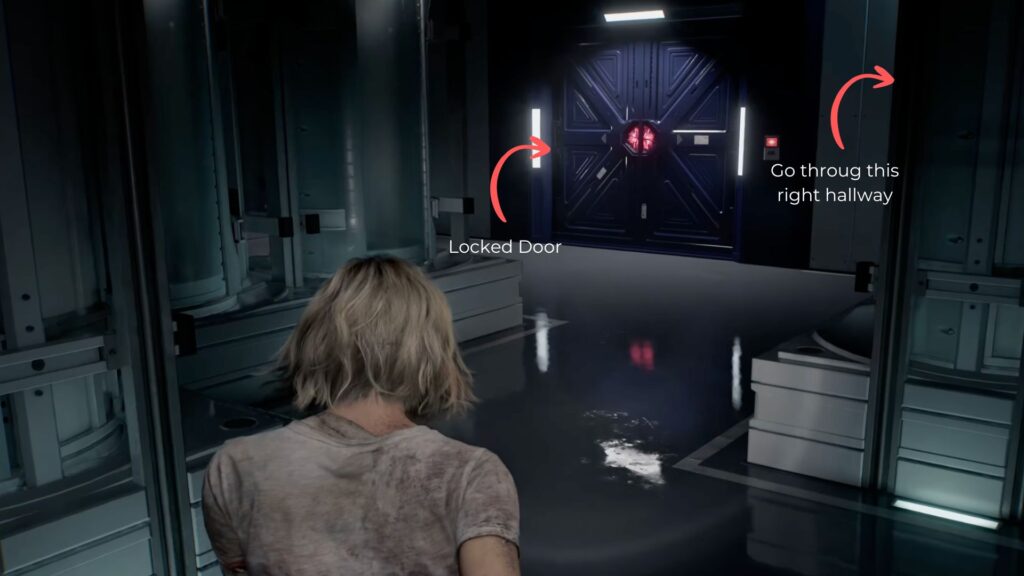
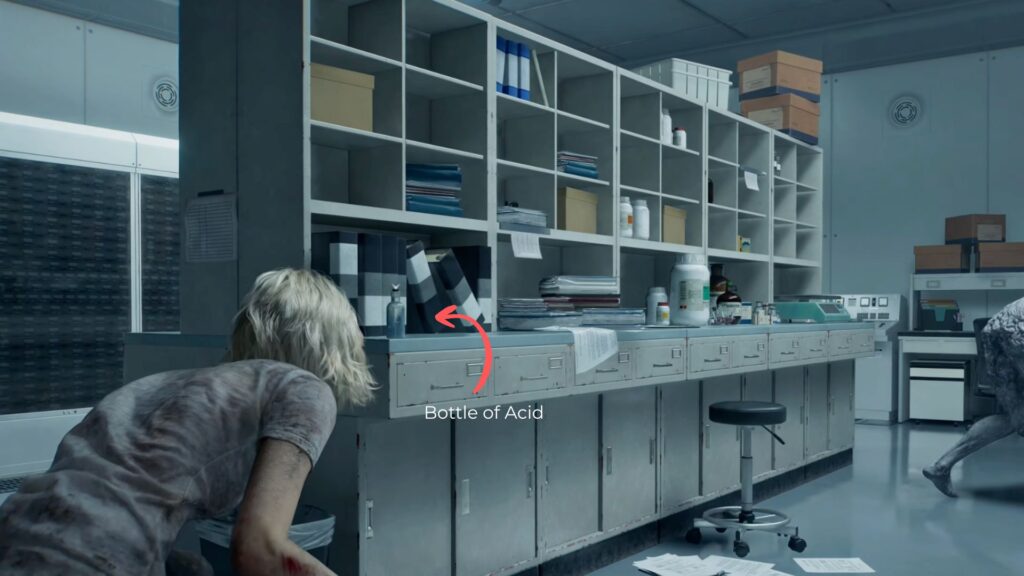
You’ll immediately notice a large blue door that’s locked. Take a right into the room with the open door, keeping low, because Lickers are patrolling this area too, even on the roof. Inside, you’ll see a zombie standing with its back to you, but don’t engage it — there’s a second one hiding in the left corner. Crouch and make your way to the table in the middle of the room to collect a bottle of acid.
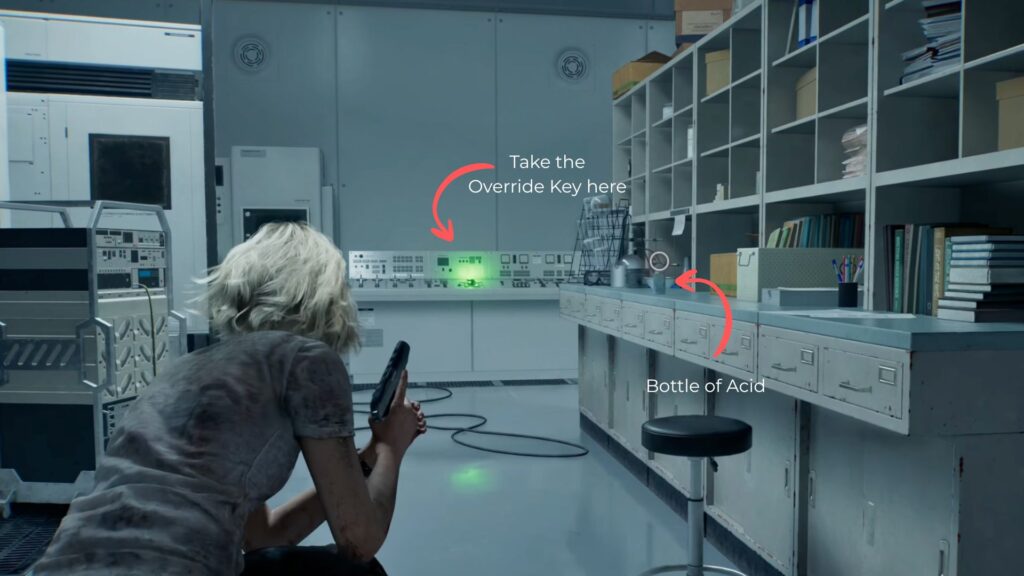
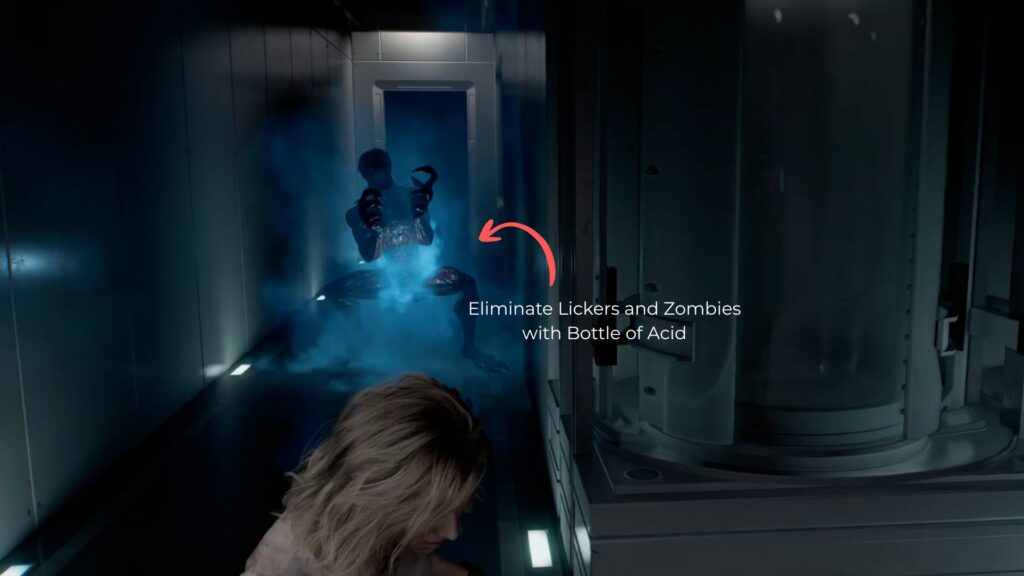
There’s a second bottle of acid on the opposite end of the same table. Sneak slowly to the left side of the room and look for the Override Key on a machine with a glowing green indicator light. The moment you take it, the power in the room cuts out. The zombie from earlier will immediately come for you along with a Licker. With both of them converging together, throw one of your acid bottles to burn them both down in a single throw.
As you make your way out of the room, one more zombie will appear in the doorway. The Licker is already gone, so you can shoot this one safely. Head back toward the first room and save your progress along the way.
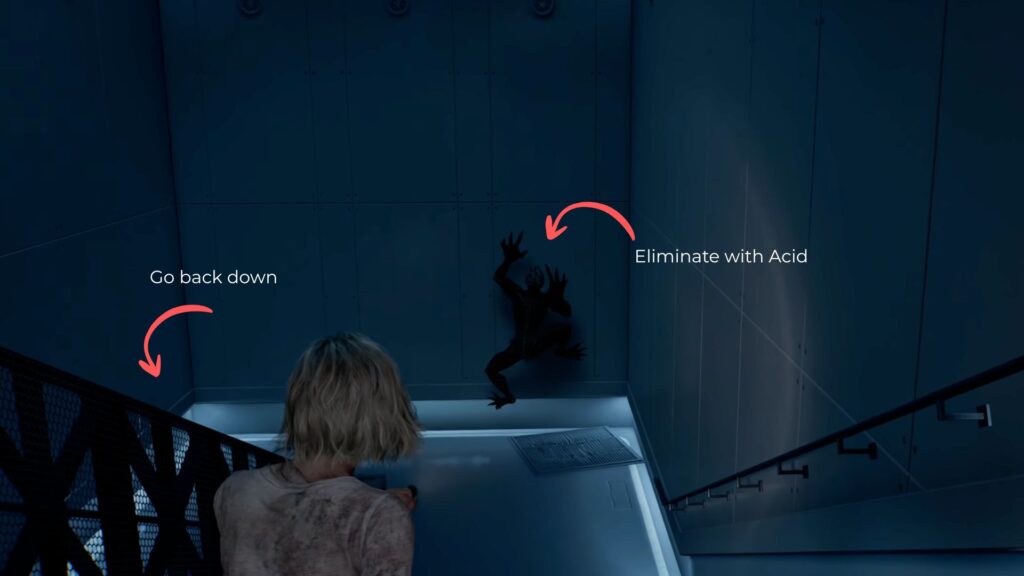
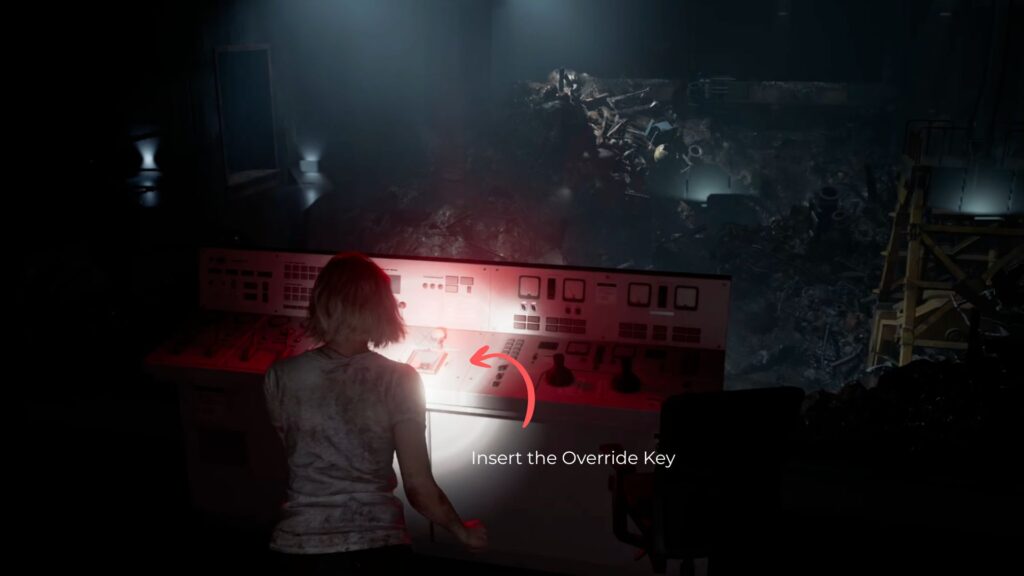
When you exit the safe room, watch out on the staircase. There’s a Licker crawling on the wall. Use your second bottle of acid to take it out cleanly. With that done, head back to the Control Room and insert the Override Key into the slot. The crane in the dump below will begin to move, and Leon will make his way on his own back to the Central Refining System.
The Magnetic Key
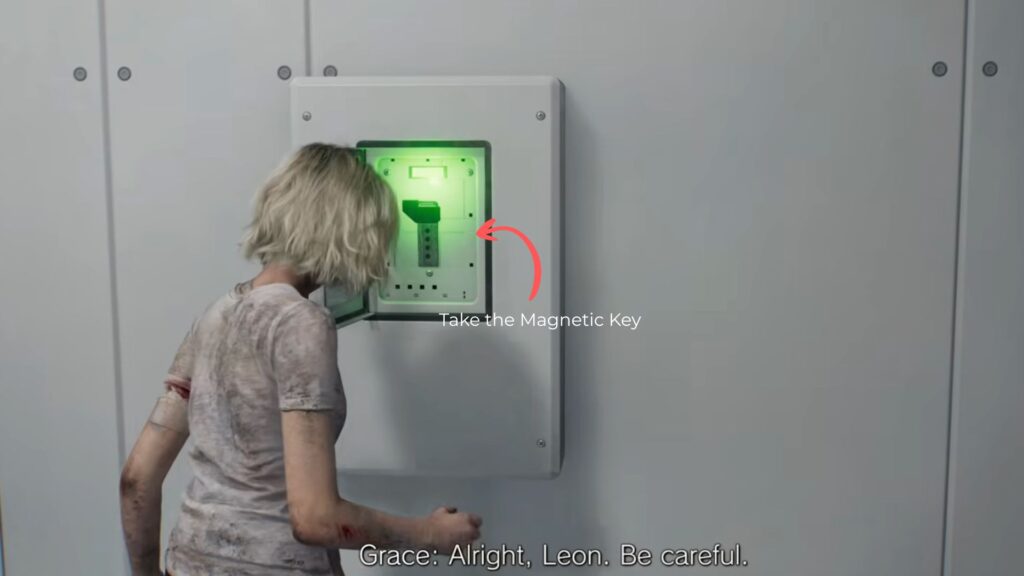
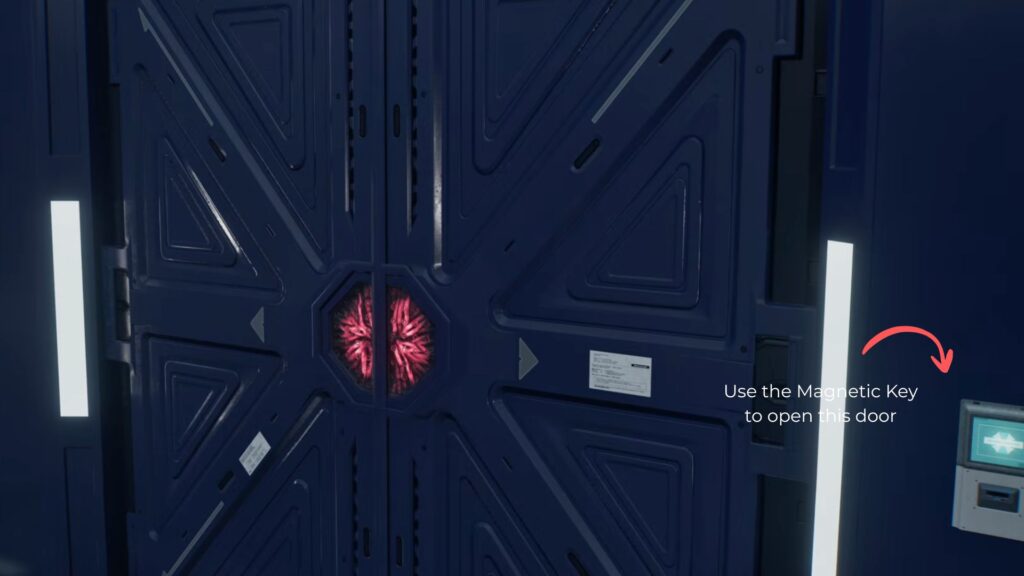
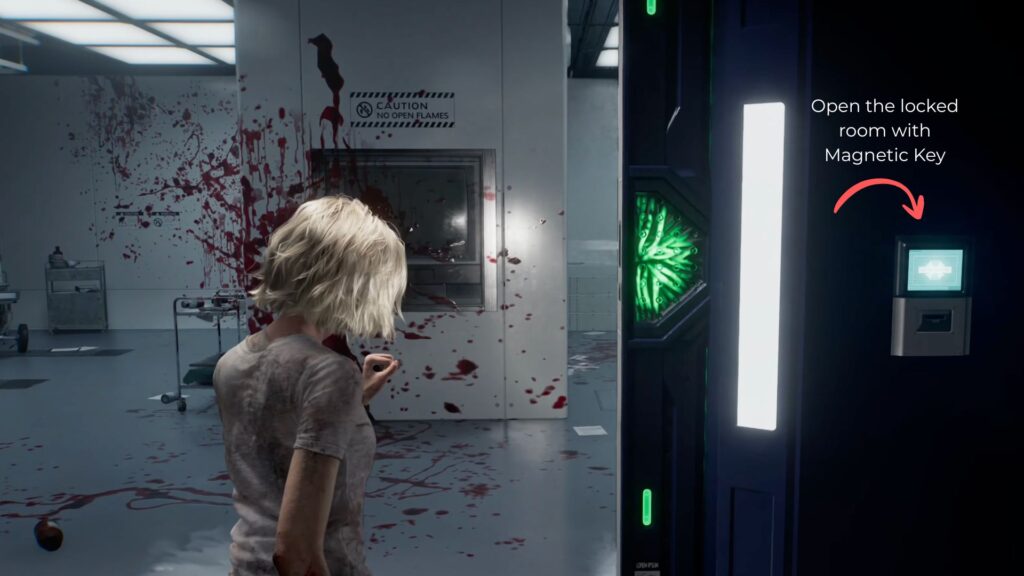
With the power restored, the panel inside the control room can now be opened. Collect the Magnetic Key from inside. Head back up the stairs, save your progress, and return to the room with the supply boxes. Use the Magnetic Key to open the locked blue door here.
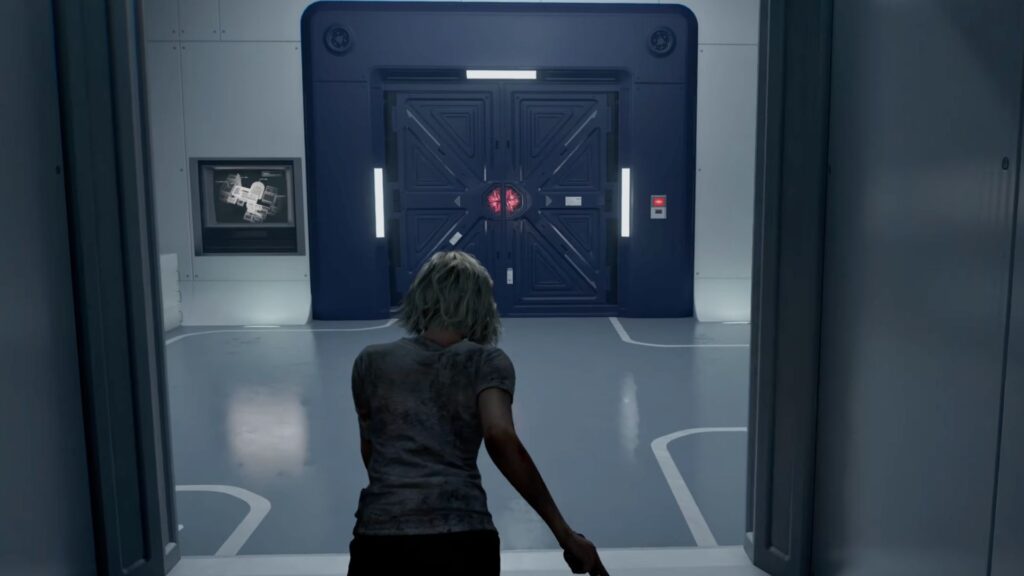
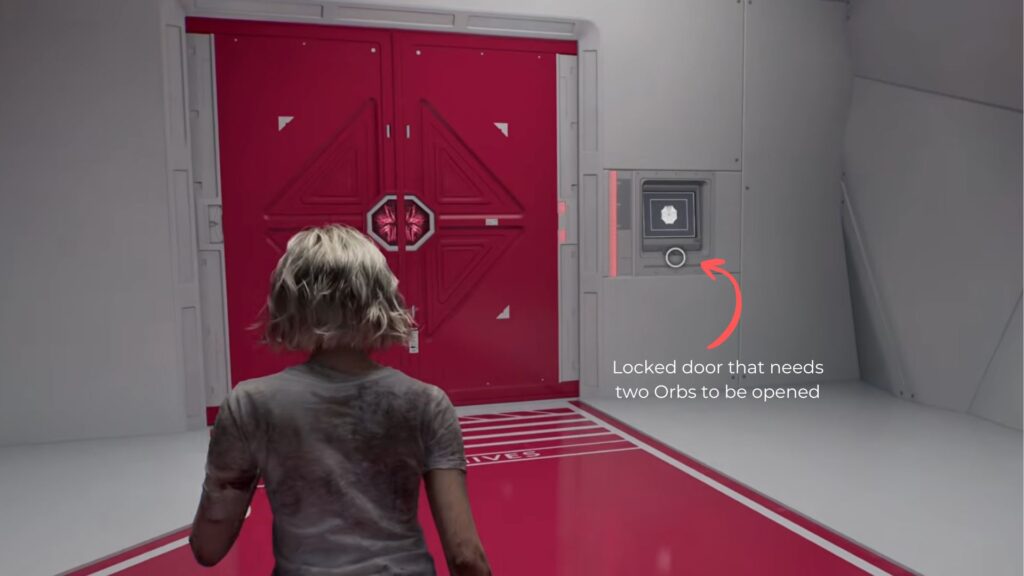
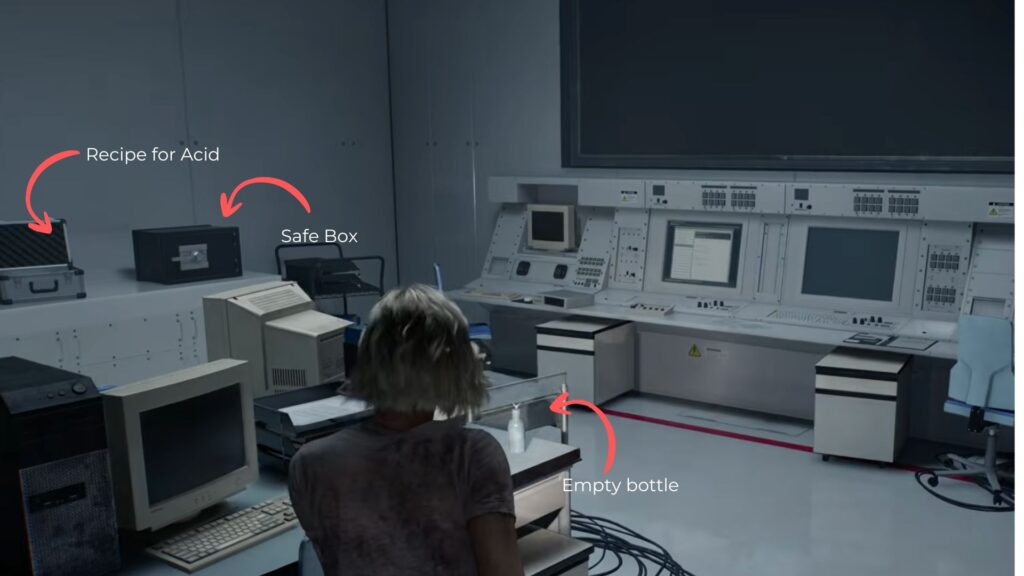
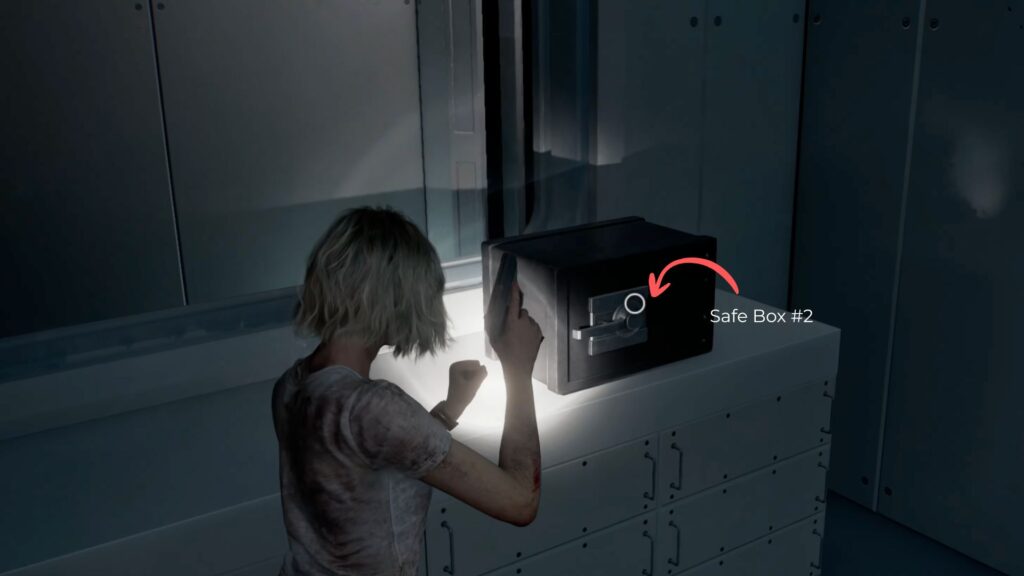
Beyond it, a large red door leads to the Archives Room, but it has two slots requiring two specific items to unlock. Follow the red-colored flooring to navigate toward them. Through the unlocked door on the left, you’ll enter a small control room where you can pick up an empty bottle from the desk, a crafting recipe for Bottles of Acid inside a case, and a safe box in the corner.

Now, continue down the hallway into another waiting room that connects to a second Bioweapon Repository.
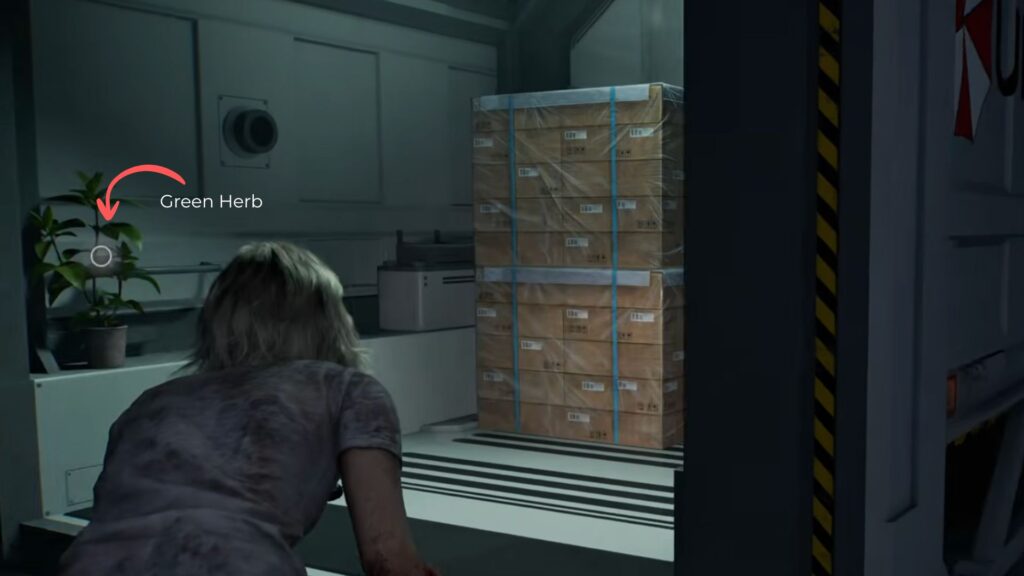
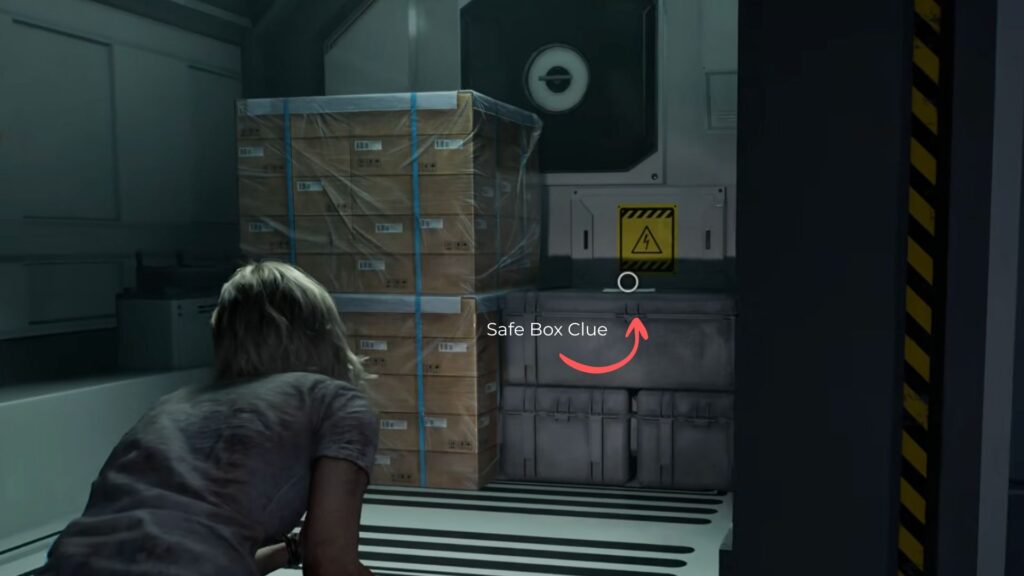
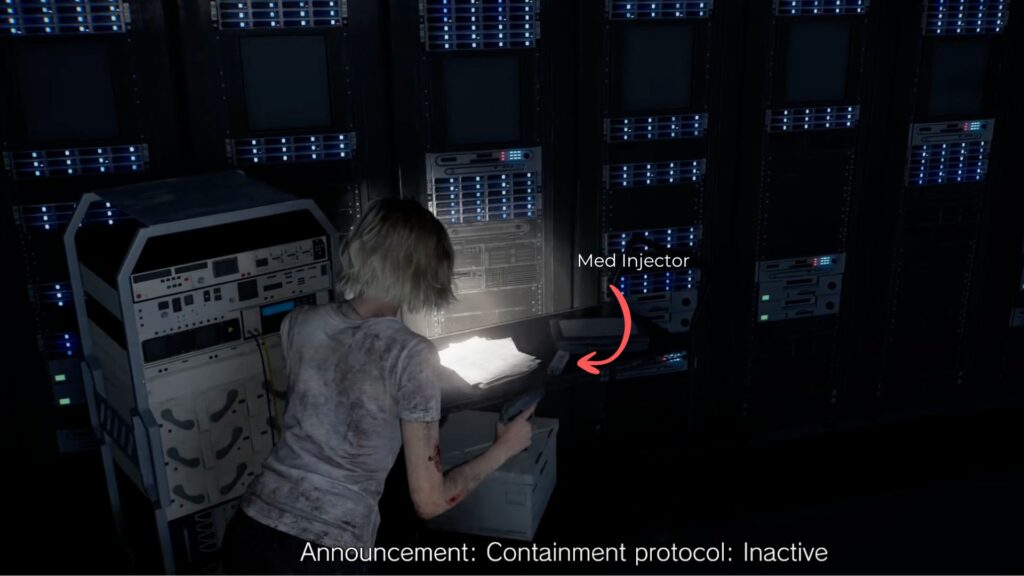
Before heading into the repository itself, check the storage pod on the right at the bottom of the stairs to collect the Sterilization Chamber Safe Code and a Green Herb.
Sterilization Chamber Safe
If you’re running low on supplies before tackling the Bioweapon Repository, now is a good time to go back and open the safe in the Sterilization Chamber using the code → 10, ← 90, → 20. The safe contains a Molotov Cocktail, Med Injector, and Handgun Ammo — all of which will be very useful in the upcoming section.
Large Bioweapon Repository Room
This is the most challenging area Grace will face in the chapter. Two large Umbrella pods sit very close to the entry the room with a Licker patrolling beside them. Throw an empty bottle to the far end of the room to draw the Licker away from the pods. A zombie is also nearby. When both creatures group together toward the sound, throw a bottle of acid to take them out simultaneously.


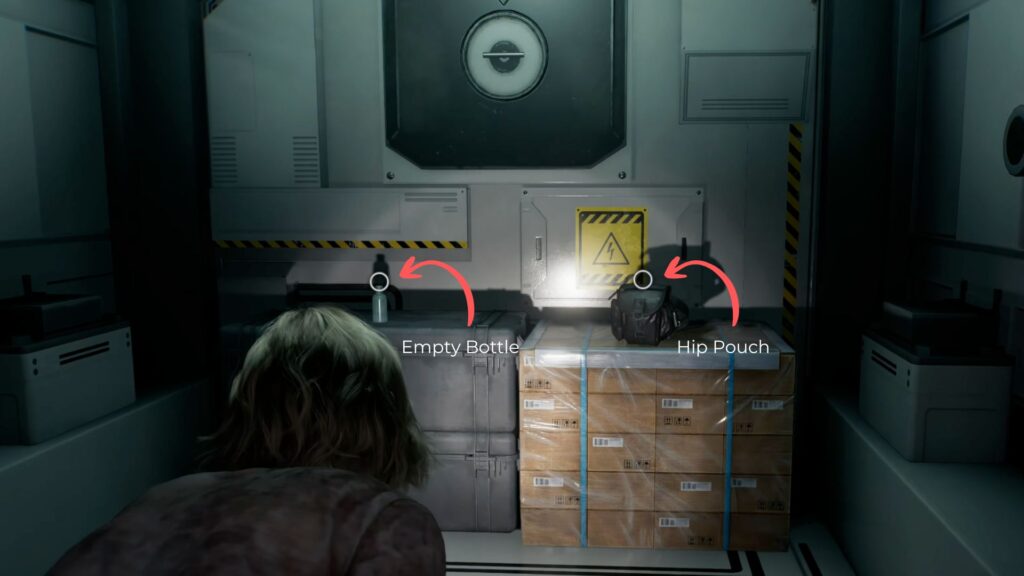
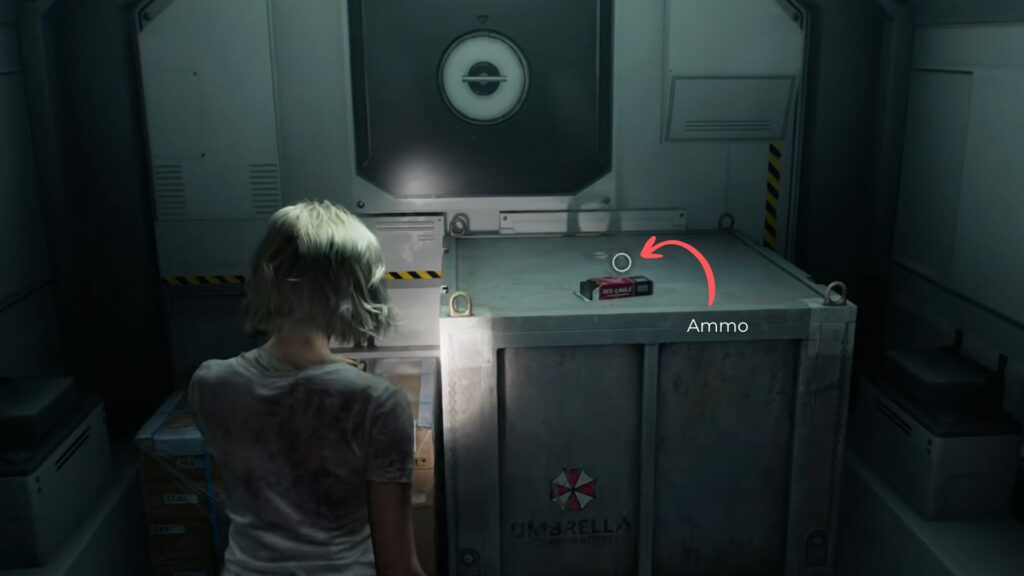
While collecting blood from the dead Lickers, two more will arrive. Use acid or a Haemolytic Injector to deal with them, then open the pods. The first contains a Hip Pouch and an empty bottle, while the second holds Handgun Ammo and Scrap.

Push deeper into the room where more zombies and Lickers are waiting. If they haven’t spotted you, crouch toward the far right open pods. If they’re alert, use Haemolytic Injectors on the Lickers first and shoot the zombies once the Lickers are gone.
The pods in this section contain a Scrap and the Monitor Control Room Safe Code (← 50, → 60, ← 80) in one, a Makeshift Knife in another, and Scrap plus a Transfusion Bag in the last.
The Operations Room
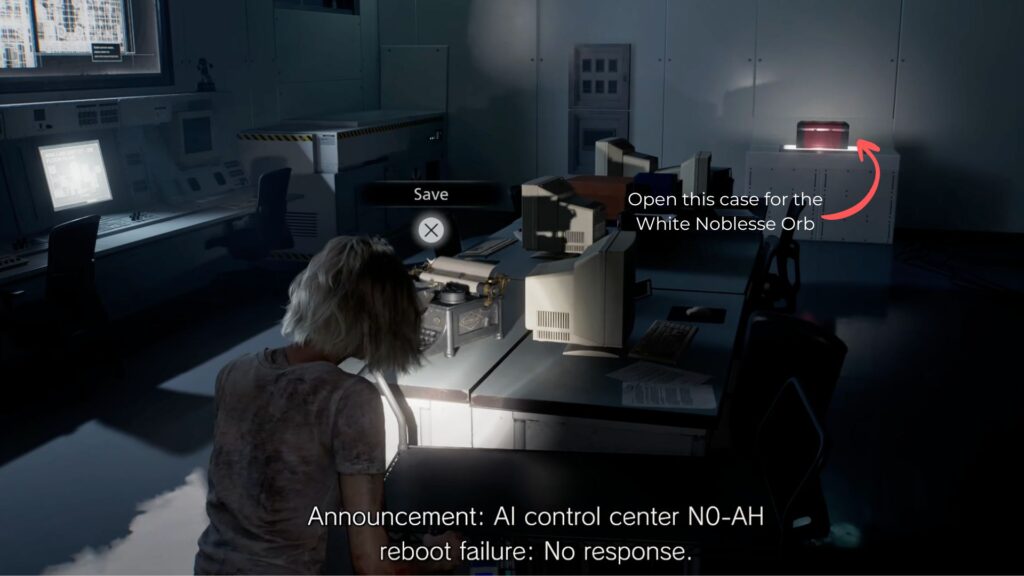
Climb the stairs at the far end of the repository to reach the Operation Room. Save your progress at the typewriter, then open the red case on the desk at the back to collect the white Noblesse Orb — one of the two items needed to open the Archives Room door.
On the small cart near a puddle of infected blood at the back wall, grab the Med Injector. Check the computer monitors for the ARK Lab Unit 01–02 Floor Plan file. There’s also a Mr. Raccoon collectible on the table on the left side of the room.
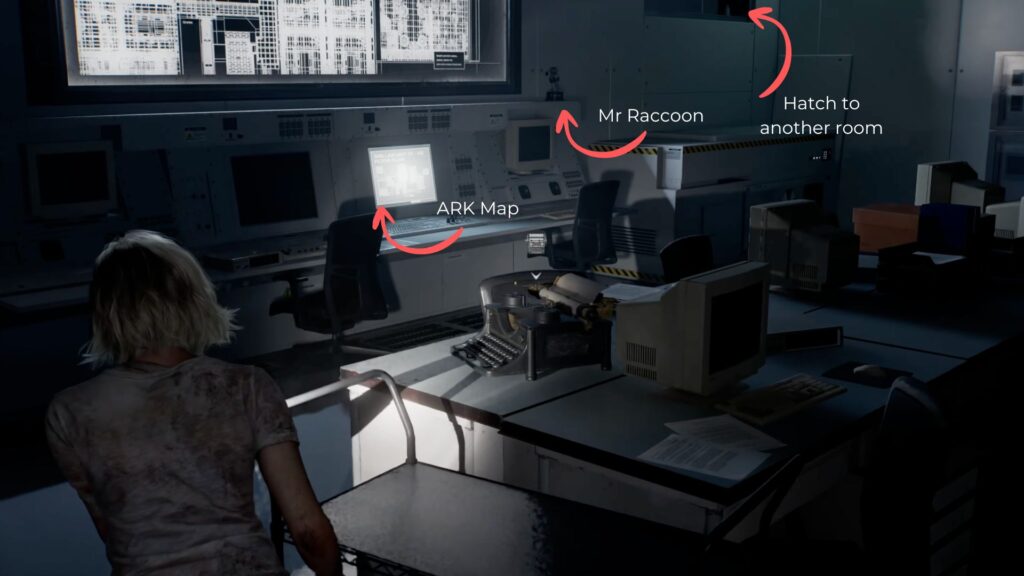
Before leaving, climb the crate next to where you found the Mr. Raccoon and enter the small hatch above it.
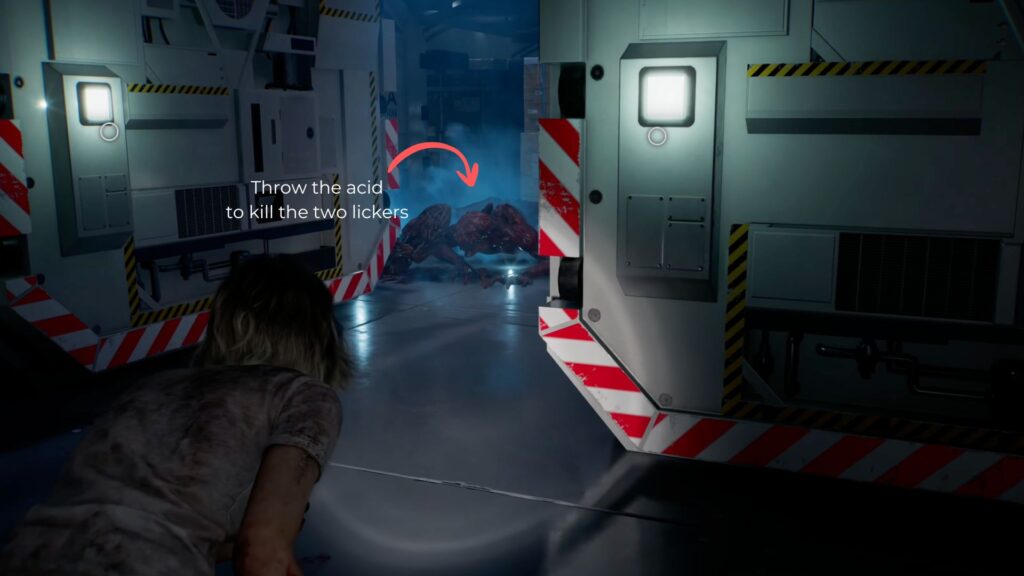
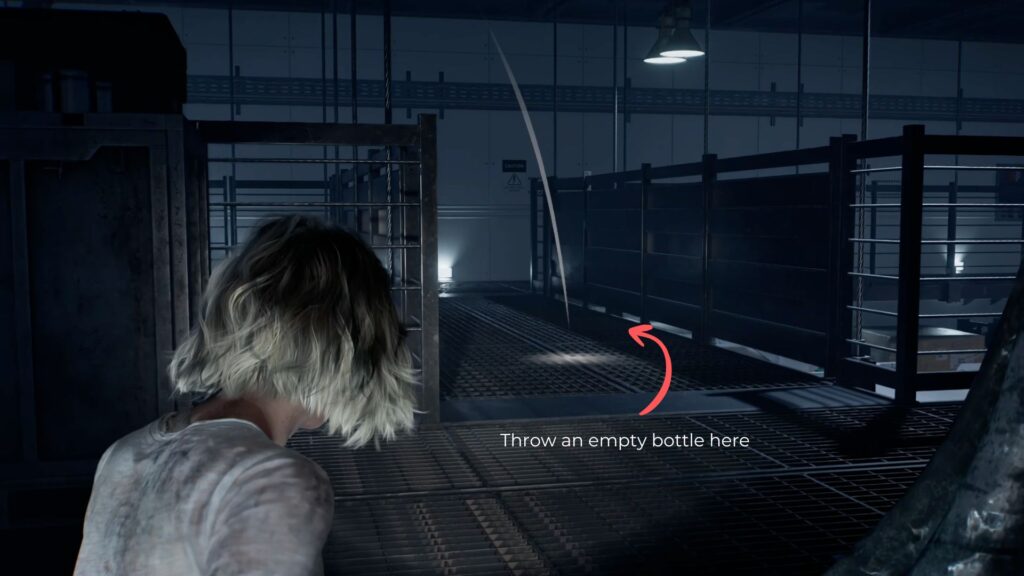
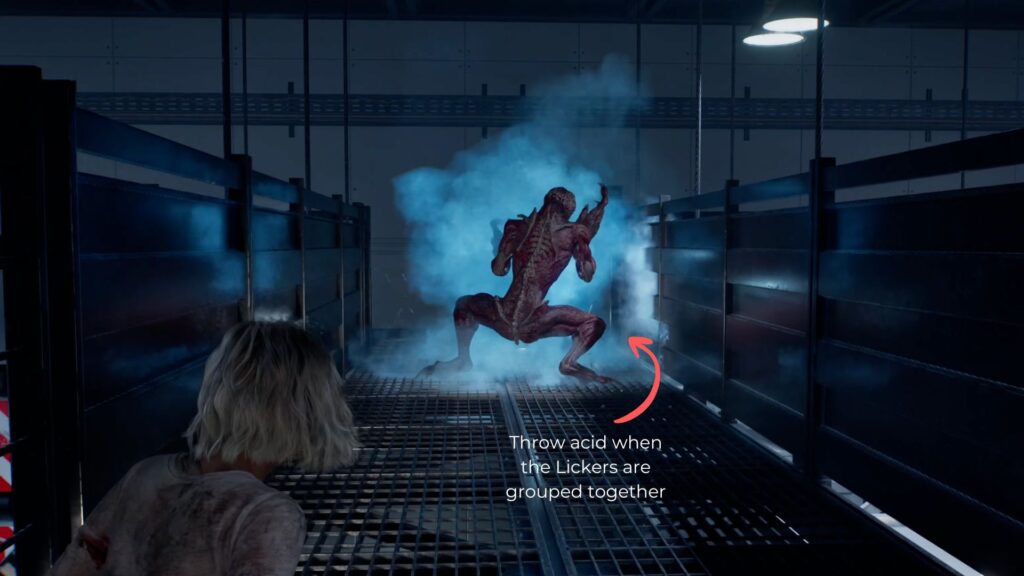
In the area beyond, throw an empty bottle toward the bridge to group the two Lickers there together, then follow up with acid to take them both out.
Break the crates inside for empty bottles, ammo, and scrap, then you will notice an opening on the handrail. You can drop down to the floor below and head back up to the waiting room above.

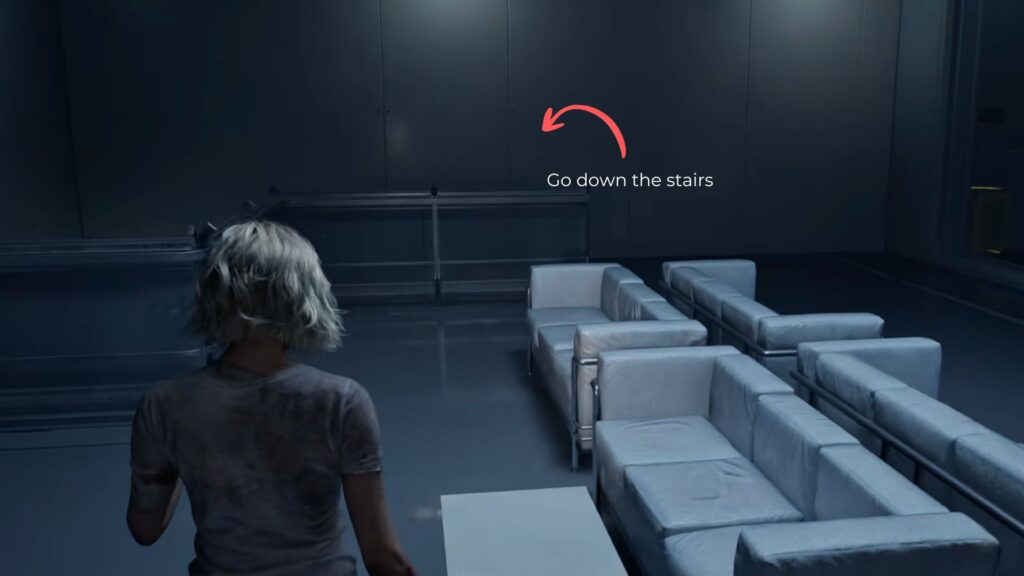
Two Lickers will be patrolling around the sofas in this area, having crashed through the side windows. If you still have acid and empty bottles, use the same grouping method to eliminate them together. If you’re out, move very slowly close to the windows to slip past them toward the exit.

The Red Animus Orb
If you haven’t already opened both safe boxes in this area, do it now. Unlocking all safes in the game counts toward a trophy.
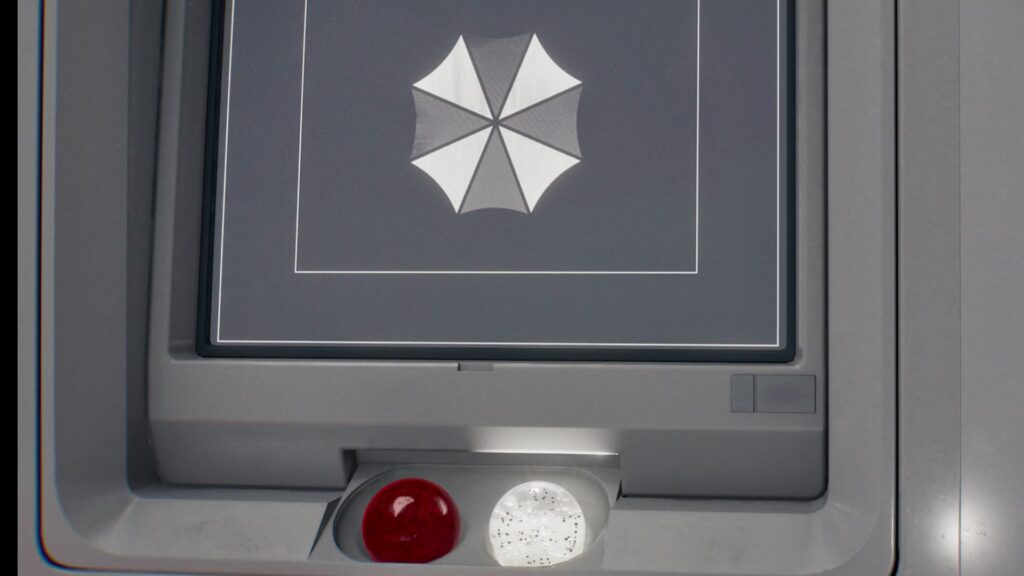
Once done, save your progress and head back to take the right path toward the Small Bioweapon Room. Open the locked blue door with the Magnetic Key to find another red case inside. You can collect the red Animus Orb.
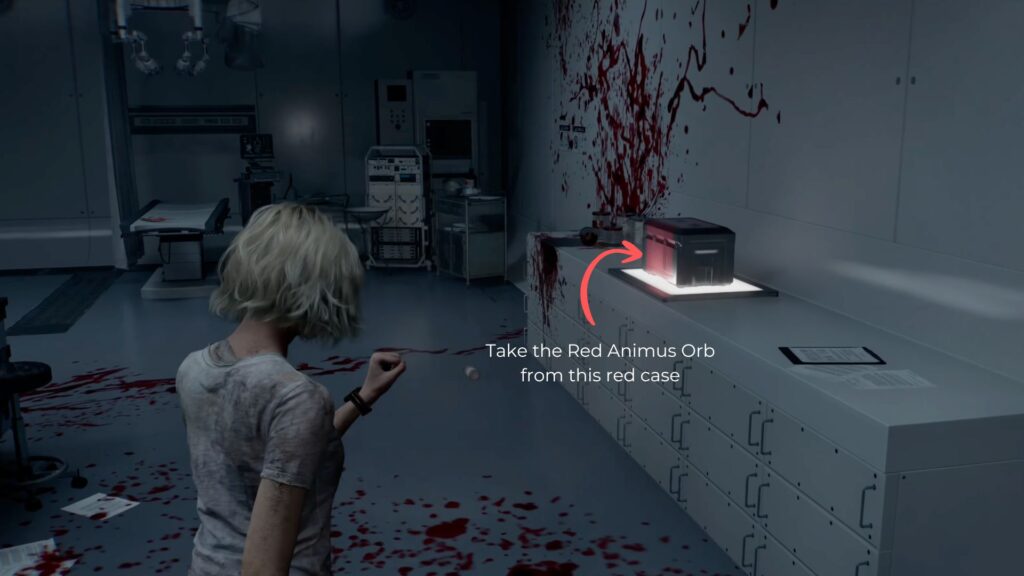
Watch out for any zombies that may come for you in this room.
The Archives Room
With both orbs in hand, insert them into the two slots beside the red door. It will swing open, granting you access to the Archives Room.
A bank of monitors lines the far end of the room, and on the right side there’s a small terminal where you’ll find the last missable file in the game — the Access Log: First Assembly Minutes.

Interact with the middle terminal beneath the monitors to release a disc. Grace finally pieces together the secret her mother had been hiding all along. A major cutscene plays, delivering one of the game’s biggest revelations.

The scene then shifts to Leon, and the next chapter will pick up with him climbing out of the lower ARK.
All Collectibles
| Category | Item | Location/Notes |
|---|---|---|
| Collectible Files | ARK Lab Unit 01–02 Floor Plan | Along the main computer monitors in the Operations Room |
| Access Log: First Assembly Minutes | Small terminal on the right side of the Archives Room | |
| Mr. Raccoon | Mr. Raccoon | Inside the Operations Room |
| Keys | Override Key | On the machine with the green light in the left side of the second Bioweapon Repository room |
| Magnetic Key | Inside the control room panel after restoring power with the Override Key | |
| Orbs | Noblesse Orb (White) | Red case on the desk in the Operations Room |
| Animus Orb (Red) | Red case inside the locked blue door past the Safe Room | |
| Safe Codes | Sterilization Chamber Safe | → 10, ← 90, → 20 — found on the storage pod at the bottom of the Bioweapon Repository stairs |
| Monitor Control Room Safe | ← 50, → 60, ← 80 — found inside a pod in the second Bioweapon Repository | |
| Safe Contents | Sterilization Chamber Safe | Molotov Cocktail, Med Injector, Handgun Ammo |
| Recovery Items | Green Herb | Main room of the Sterilization Chamber; storage pod at the top of the Bioweapon Repository stairs |
| Med Injector | Small cart in the Operations Room; Sterilization Chamber safe | |
| Transfusion Bag | Pod in the second Bioweapon Repository | |
| Weapons | Makeshift Knife | Lab desk in the Sterilization Chamber; pod in the second Bioweapon Repository |
| Throwables | Bottles of Acid | Two on the center table in the second Bioweapon Repository room; crafting recipe found in the small control room |
| Empty Bottles | Multiple locations — desks and crates throughout the chapter | |
| Ammo | Handgun Ammo | Sterilization Chamber safe; pod in the Bioweapon Repository; hatch area above the Operations Room |
| Crafting | Scrap | Container at the top of the dump stairs; pods throughout both Bioweapon Repositories; hatch area above Operations Room |
| Upgrades | Hip Pouch | First pod in the second Bioweapon Repository |
| Recipes | Bottle of Acid Recipe | Inside a case in the small control room off the red floor hallway |
Grace really needs careful resource management and constant awareness of both Lickers and zombies across a series of interconnected rooms in this chapter. Try to use the acid bottle whenever you see the enemies grouped, because throwing makes every bottle count. The Archives Room revelation at the end ties together the central mystery of the game, setting the stage for the final chapters as control returns to Leon for the climb out of the lower ARK.