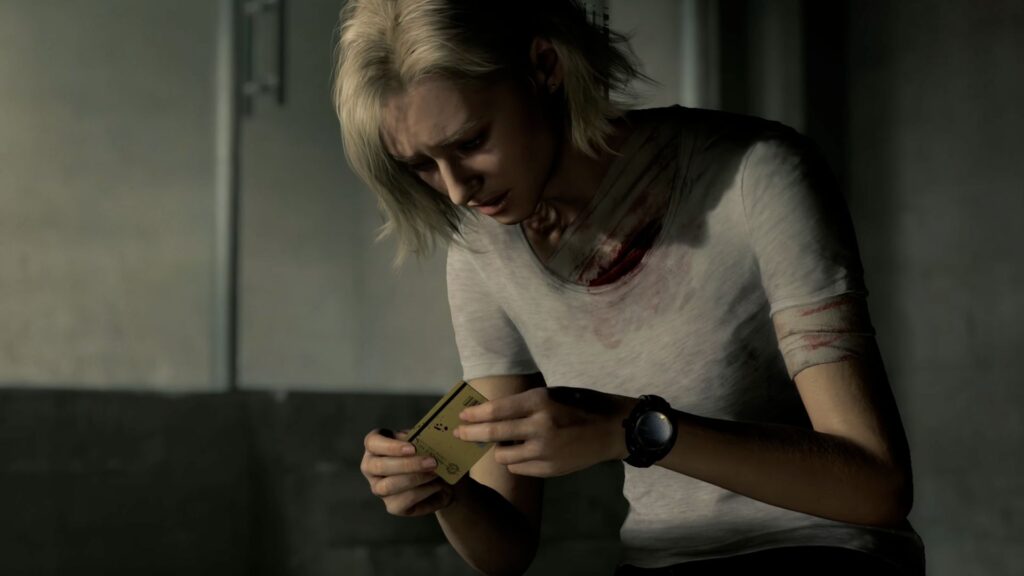
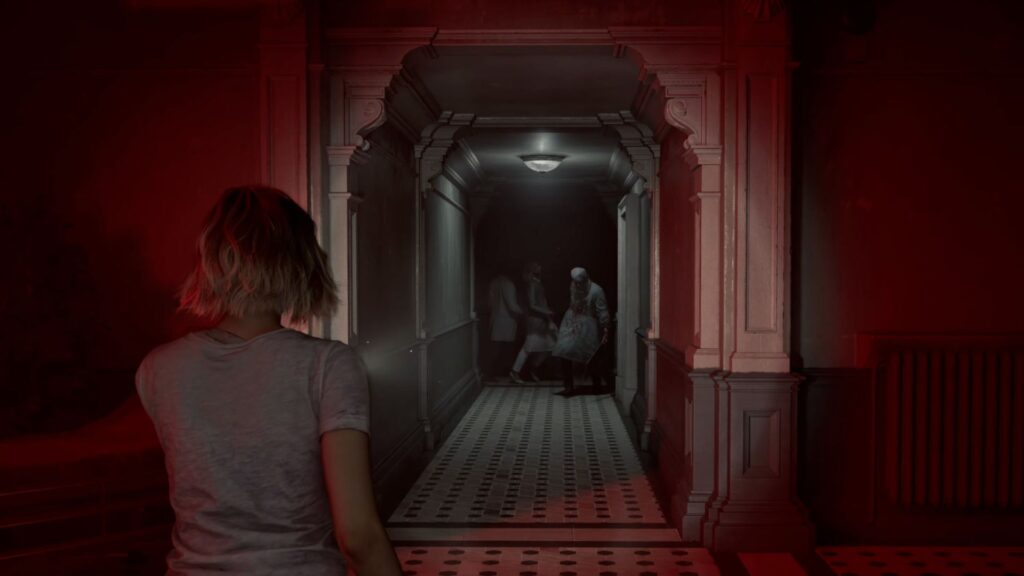
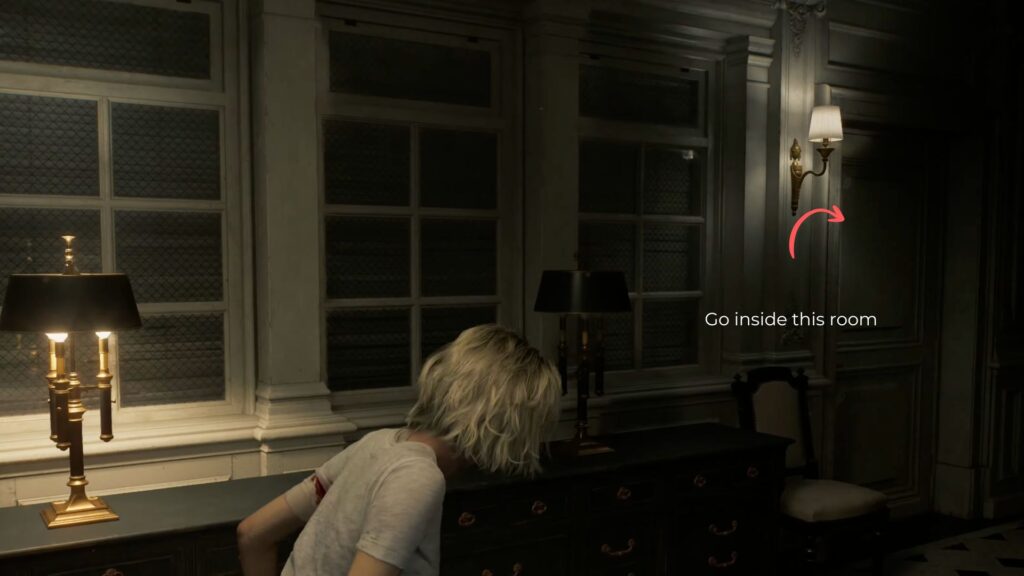
After Grace and Leon separate, a cutscene plays where Victor Gideon corners Leon from behind, warning that Grace won’t get away. Victor chokes Leon and discovers he’s also showing symptoms of Umbrella’s curse. The cutscene ends and you’re back in control of Grace Ashcroft, alone and trying to escape the Rhodes Hill Chronic Care Center.
Grace still has the Requiem Revolver, but regardless of how many bullets you used as Leon, you’ll only have one round left in the chamber. Ammo for this weapon is extremely scarce throughout the chapter — only use it when absolutely necessary. Hiding and running will almost always be the better option.
Resident Evil Requiem Care Center Quartz Walkthrough (Grace)
The Central Hall
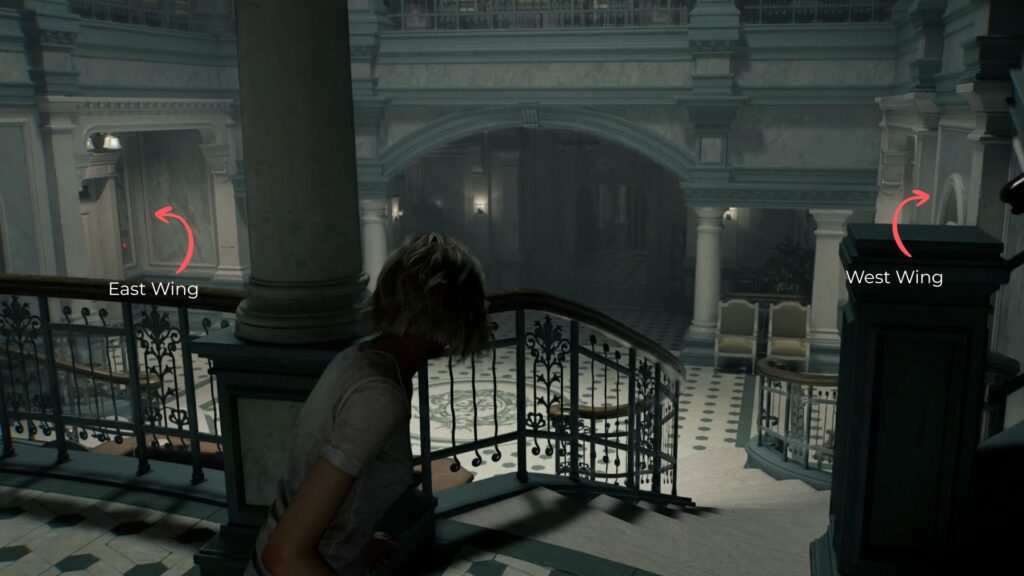
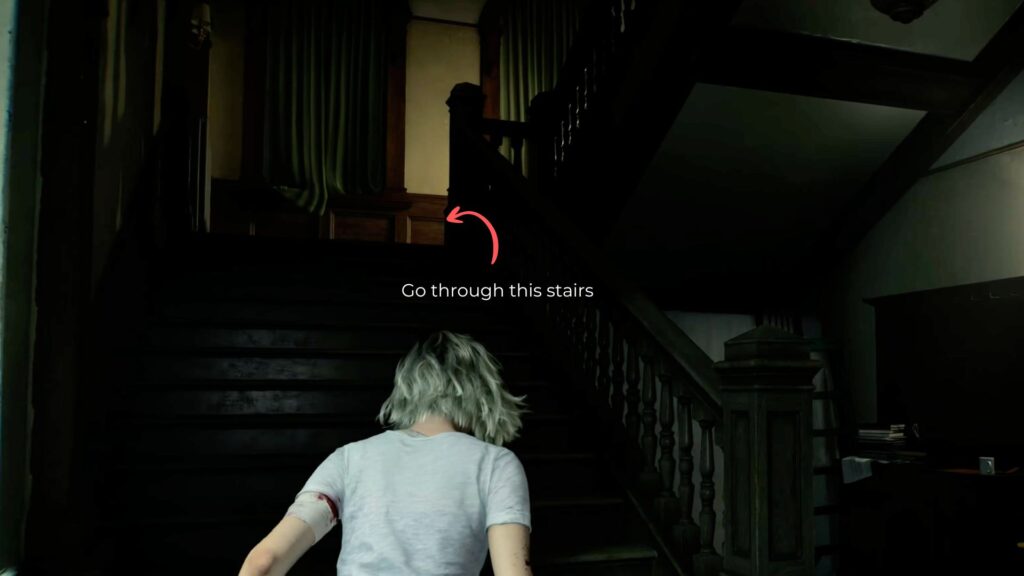
Head downstairs from your starting position. Go straight across and turn left to find a statue on the wall with a Green Herb beside it. Continue down to the first floor where you’ll find the reception desk. Doors on both the left and right lead to the west and east wing administration offices respectively, but both require keycards, so leave them for now.
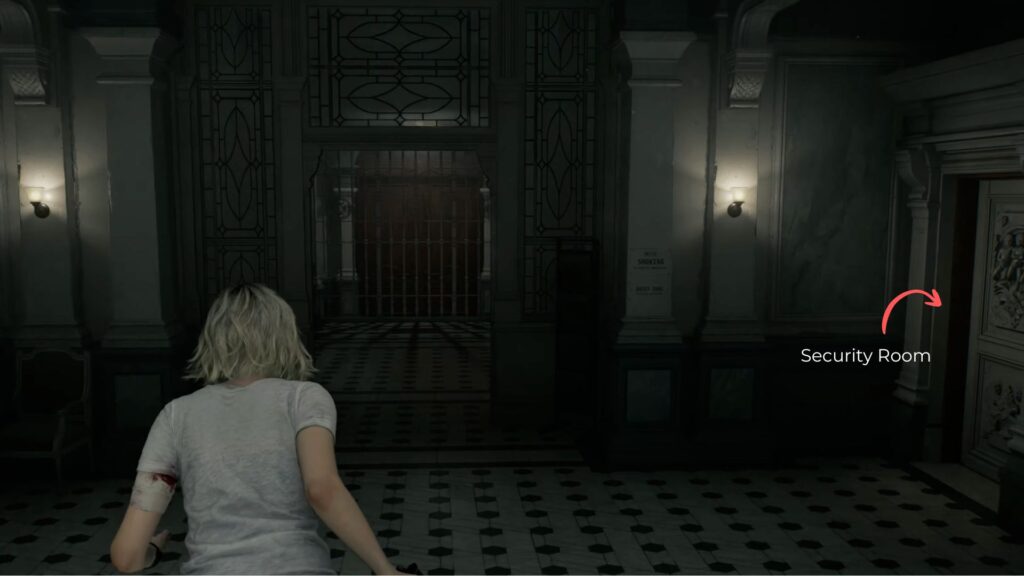
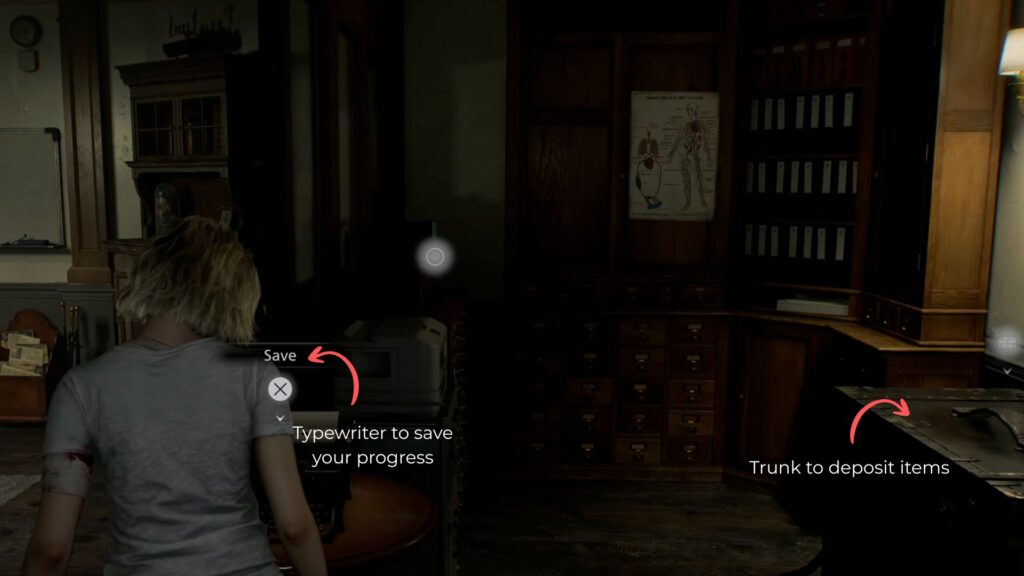
Head toward the main entrance and find the door on your right — this is the security room where you can save your progress. Inside, check the desk near the typewriter to find an Antique Coin and a large trunk where you can store items. Make a habit of depositing any extra items into the trunk whenever you visit, as you won’t need them until you find the Parlor room.
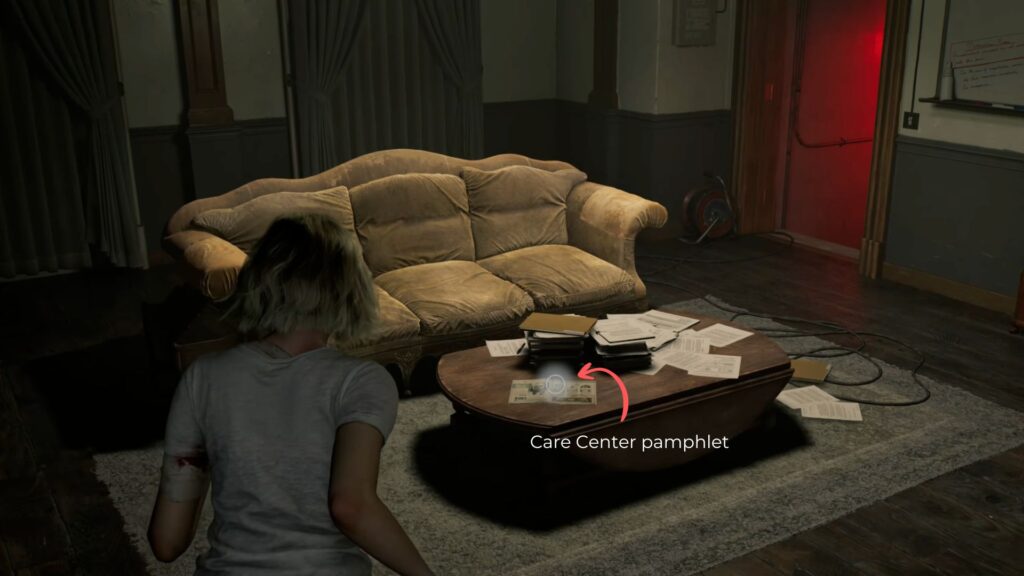
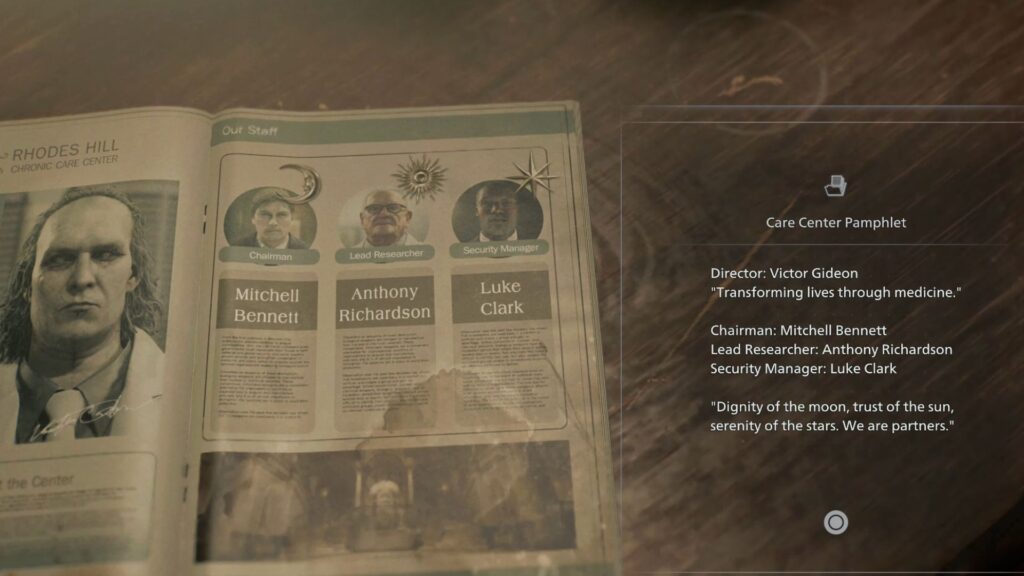
On the coffee table in the middle of the room, you’ll find a Care Center Pamphlet listing the facility’s staff:
- Dr. Victor Gideon
- Chairman Mitchell Bennett
- Lead Researcher Anthony Richardson
- Security Manager Luke Clark
Each portrait is decorated with a sun, moon, or star symbol. Keep this in mind, as it connects directly to the three-indentation door you’ll find on the stairwell, which is the only way out of the care center.
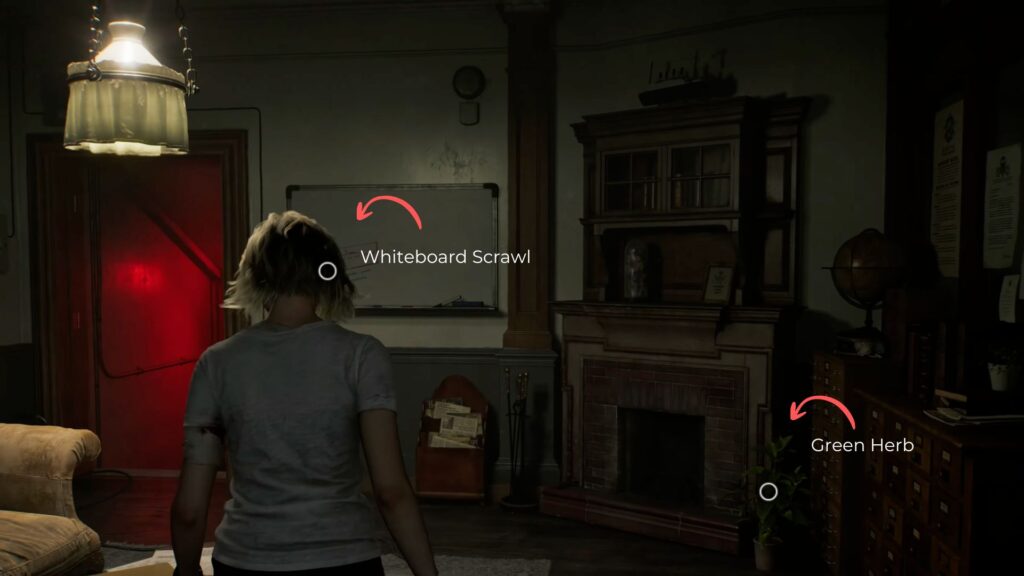
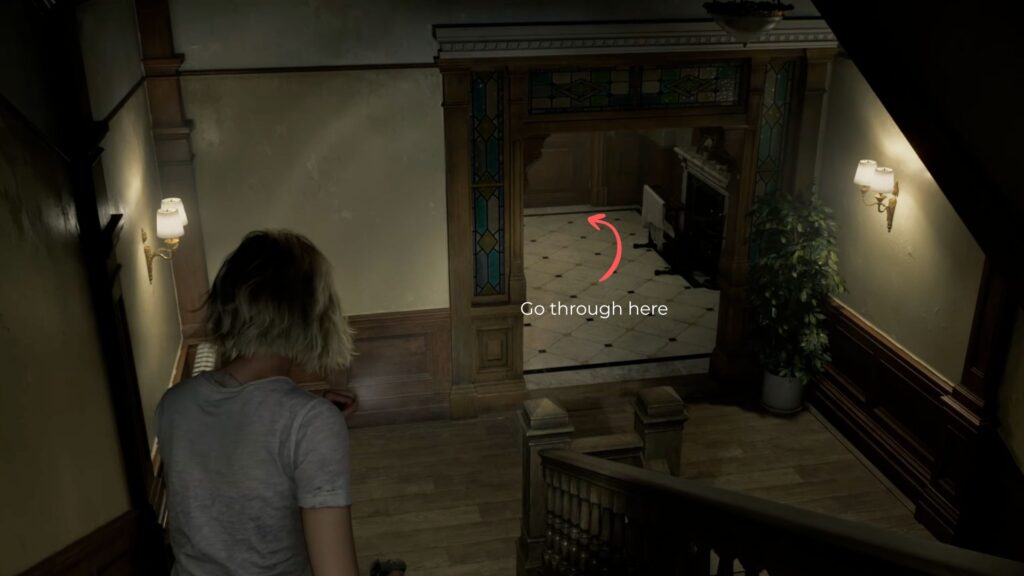
On the wall, read the Whiteboard Scrawl, and pick up the Green Herb next to the fireplace on the right before heading out.
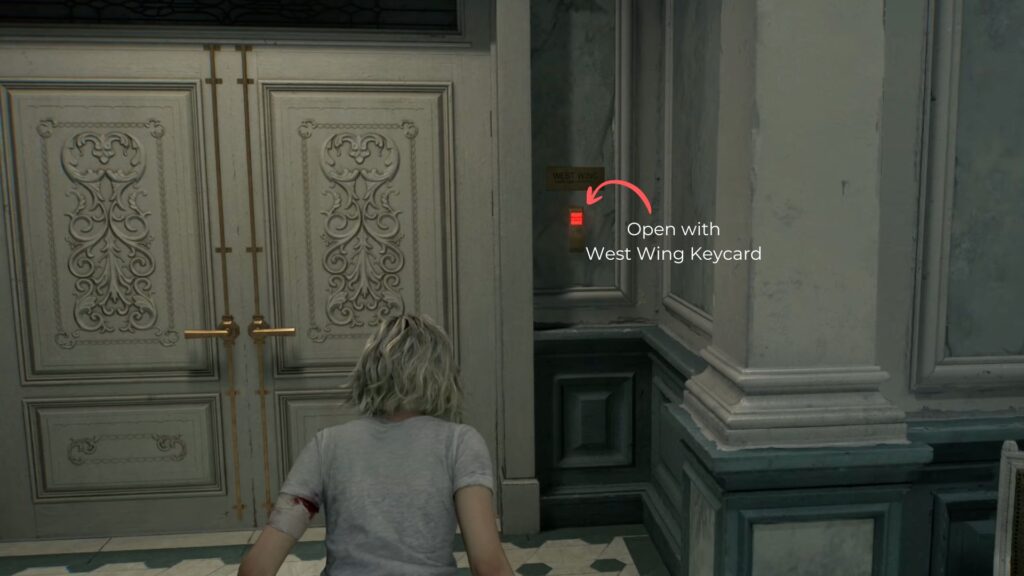
The West Wing Keycard
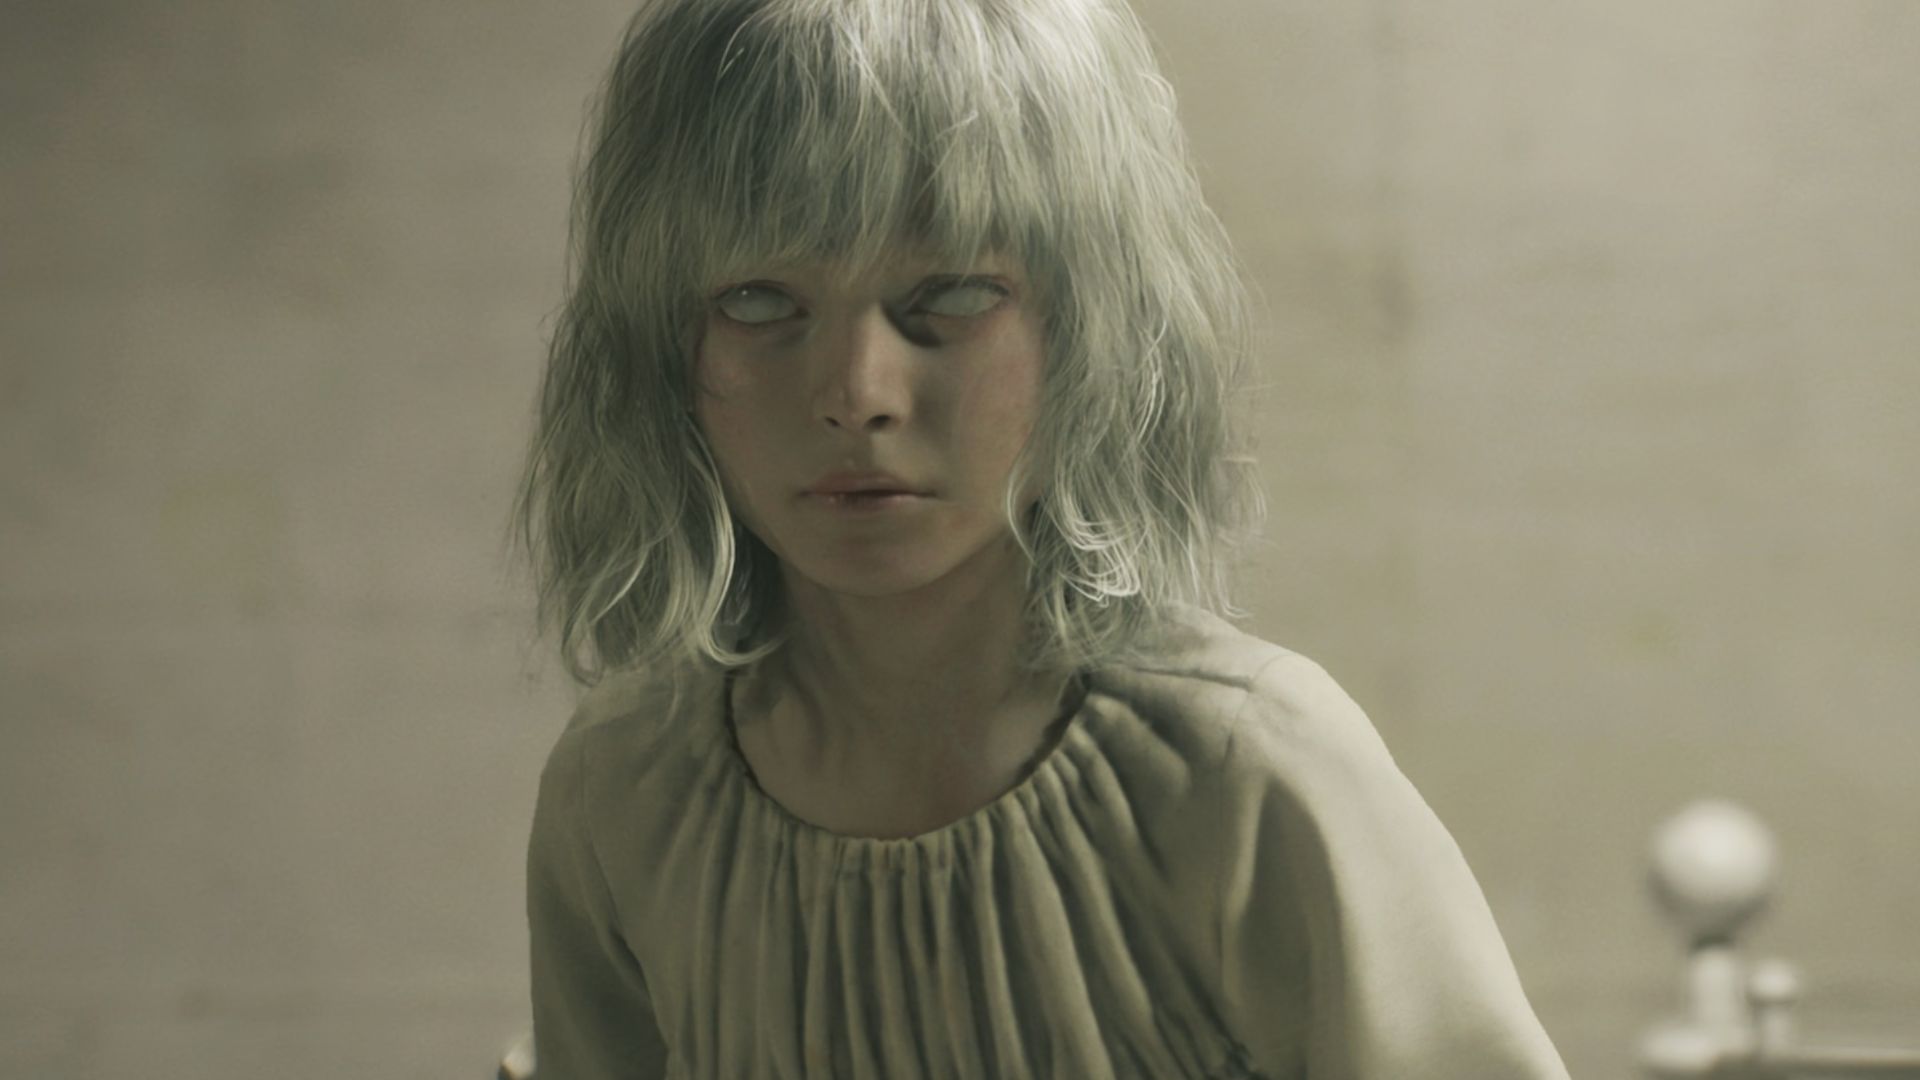
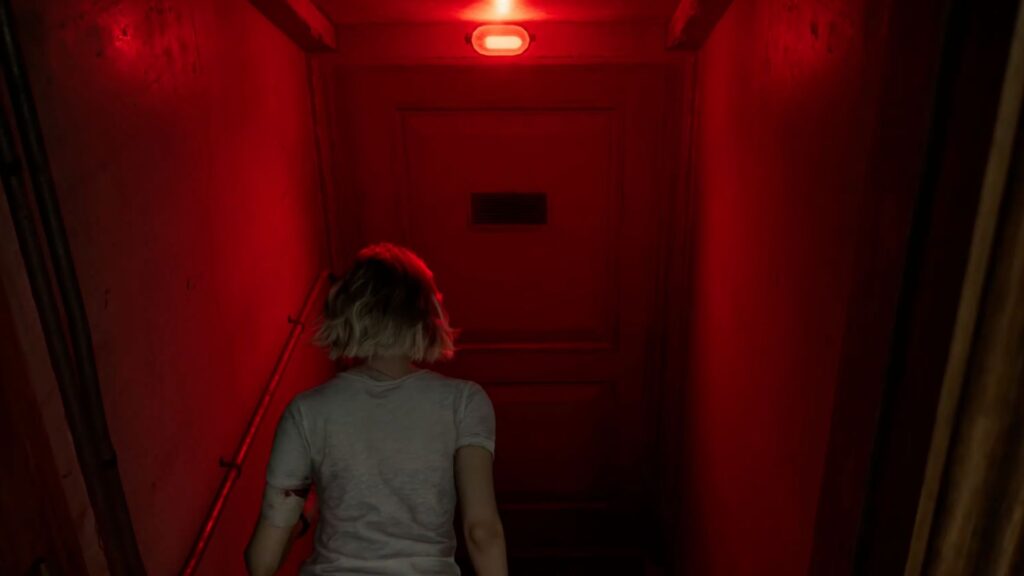
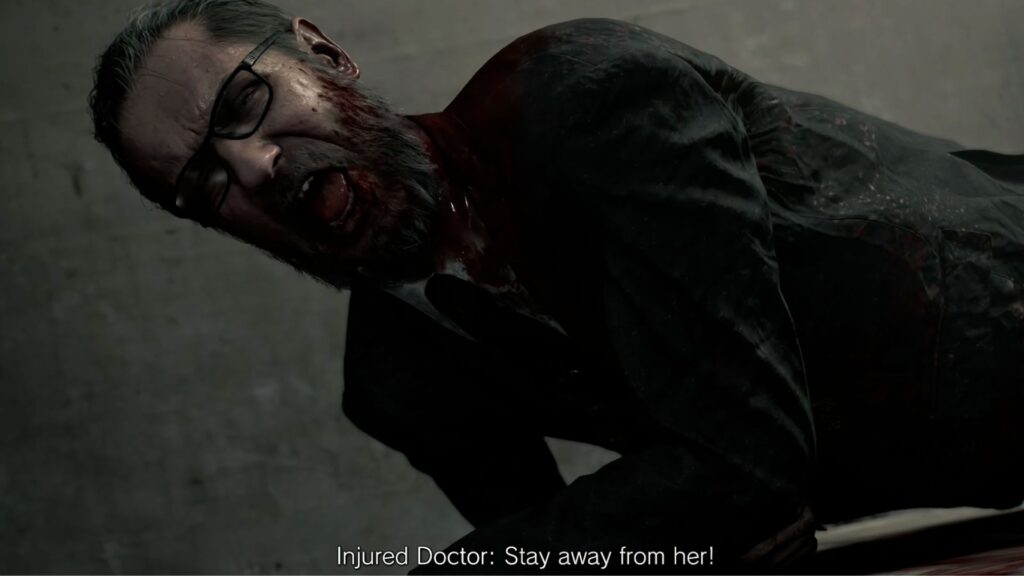
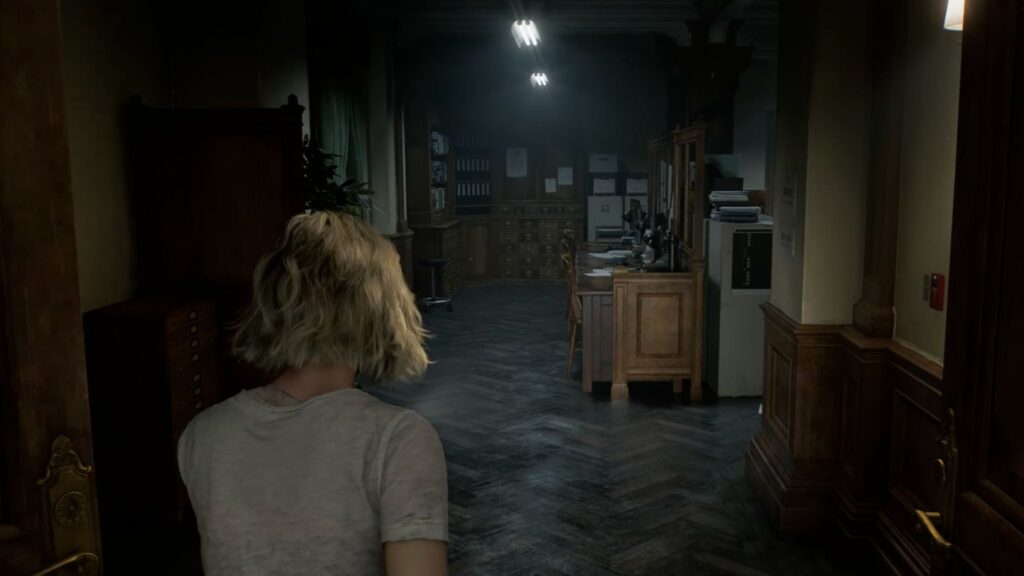
Go through the door with the red light above it. A cutscene plays inside the Medication Room — Grace discovers a dead body on the floor and a young grey-haired girl dressed in white, sitting inside a glass cell and reading a book.
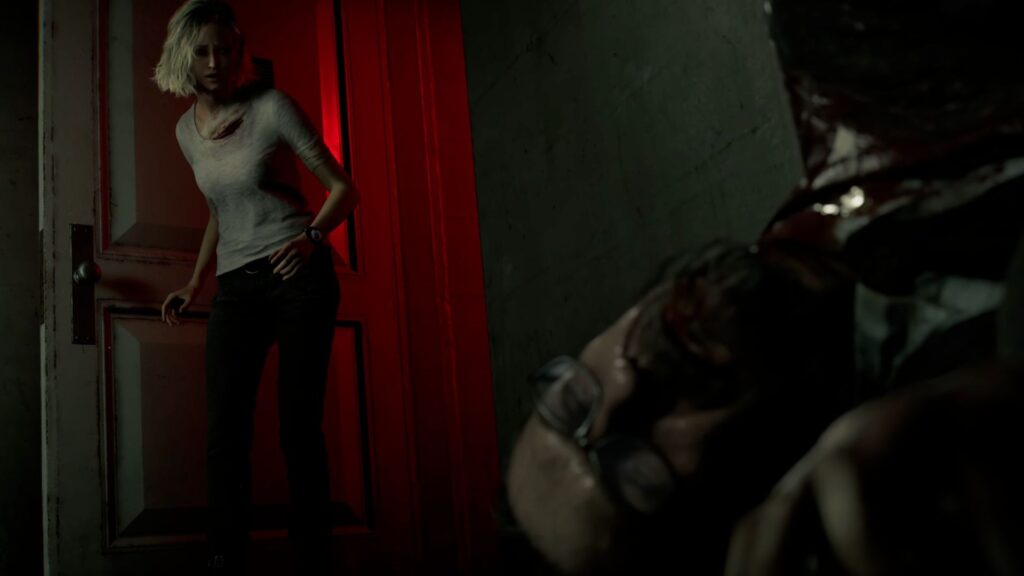
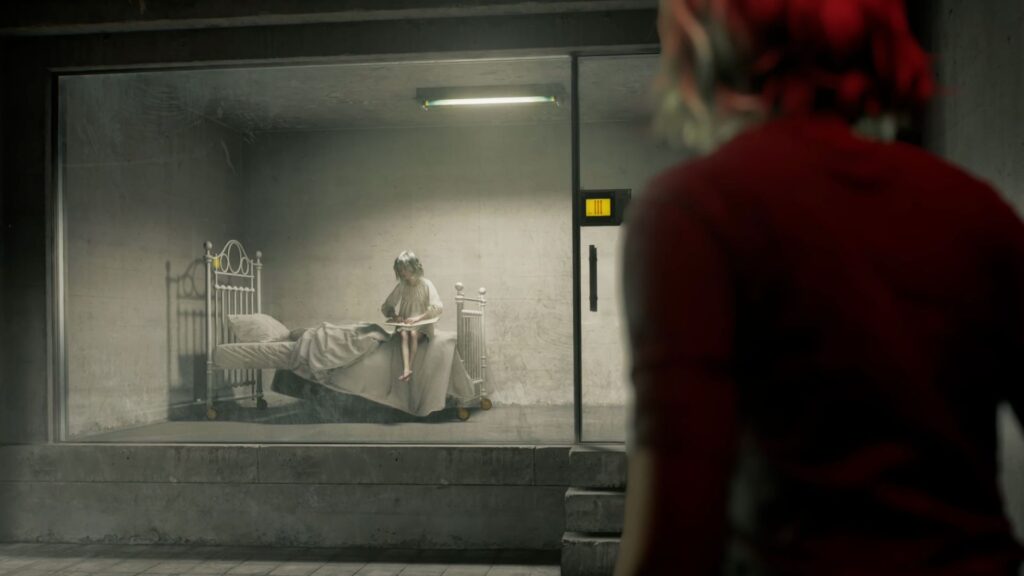
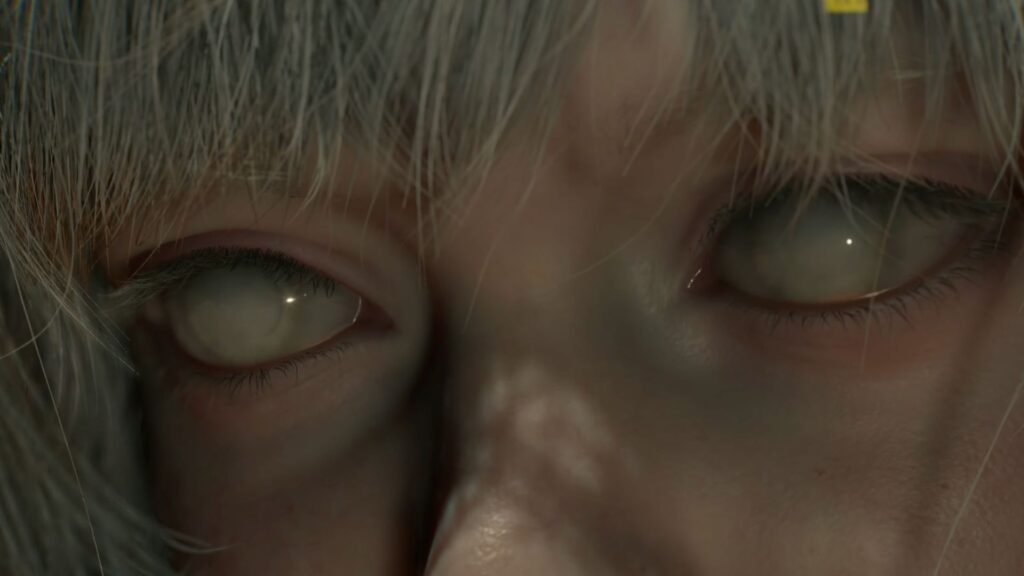
As Grace gets closer, it becomes clear the girl is blind. A second glass cell in the room is empty. Suddenly, the body on the floor moves — it’s an injured doctor who screams at Grace to stay away from the girl before dying. Grace takes the West Wing Keycard and a Flashlight from his hands.
The Kitchen
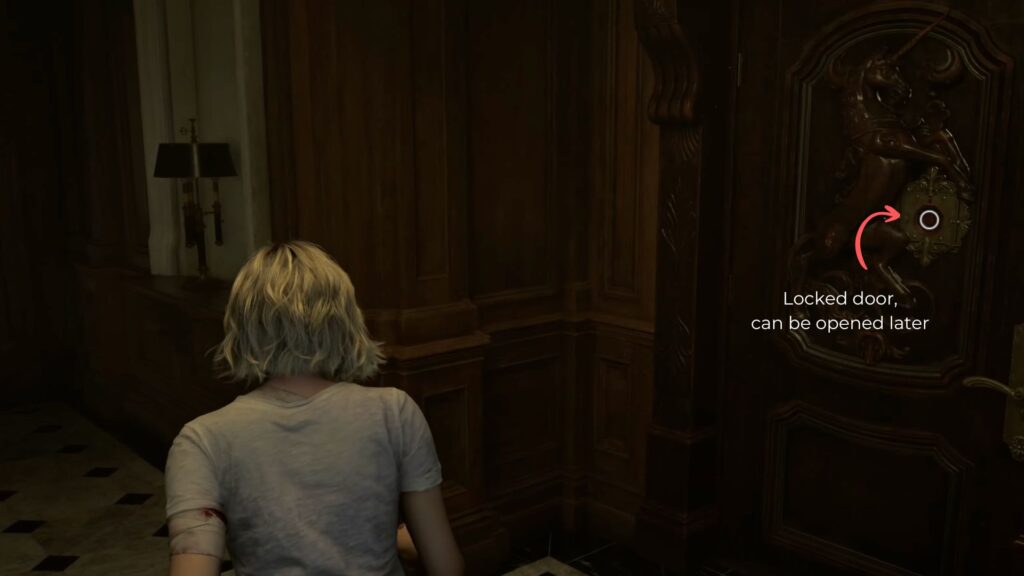
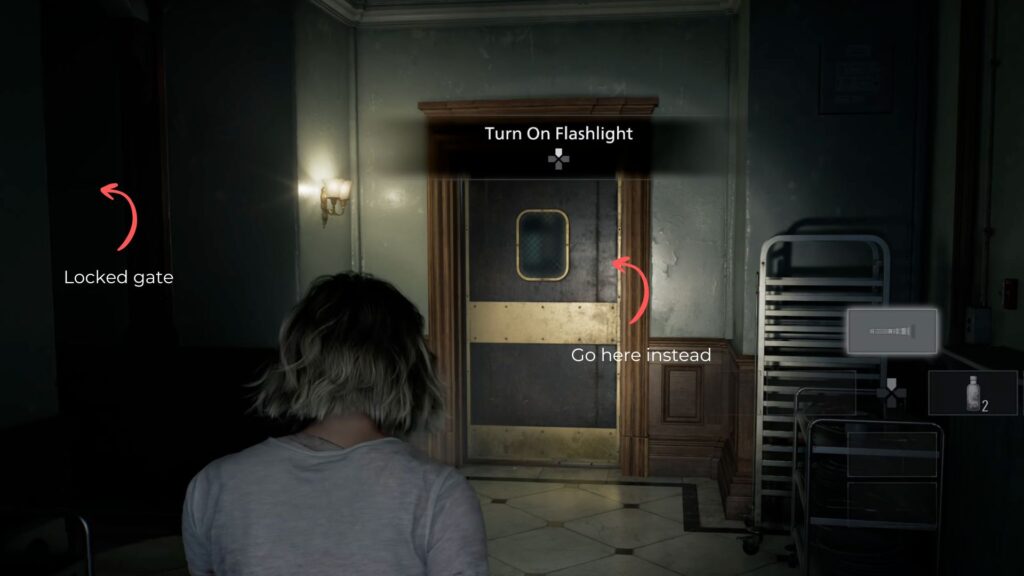
Head to the west wing door and unlock it with the keycard. Follow the path left, where you will notice a locked door on the right. Keep going until you reach a dark room with a banging sound coming from somewhere ahead. Take another left toward the white gate door — it’s locked, so go back and push through the swinging door instead.
You’re now in the back kitchen. Move slowly and crouch. The banging is coming from the Infected Chef, who is cutting meat at the preparation boards. Watch his movements carefully and only advance when he shifts position.
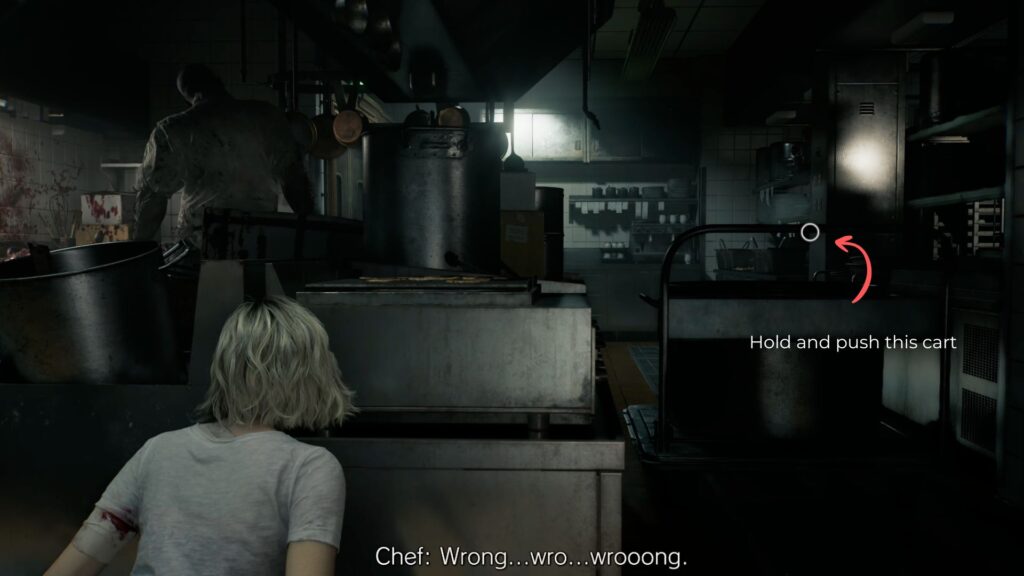
There’s a kitchen cart you’ll need to hold and move slowly across the room. Whenever the Chef says “Next… Wrong!” — let go of the cart immediately and hide behind the counter. Stay hidden each time he speaks, and only move again when he’s quiet. Keep this up until you can slip through the swinging door on your left.

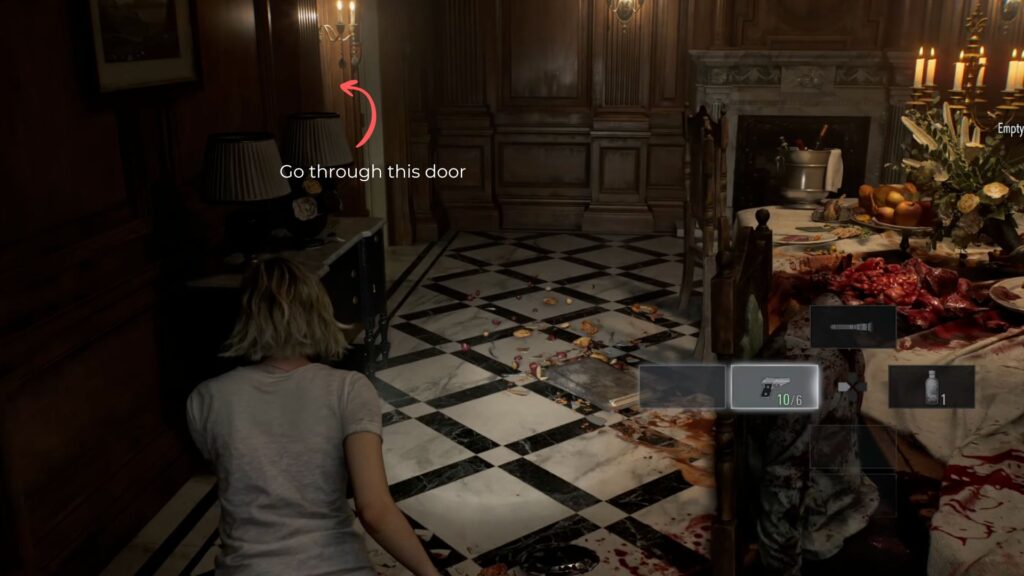
The Dining Room
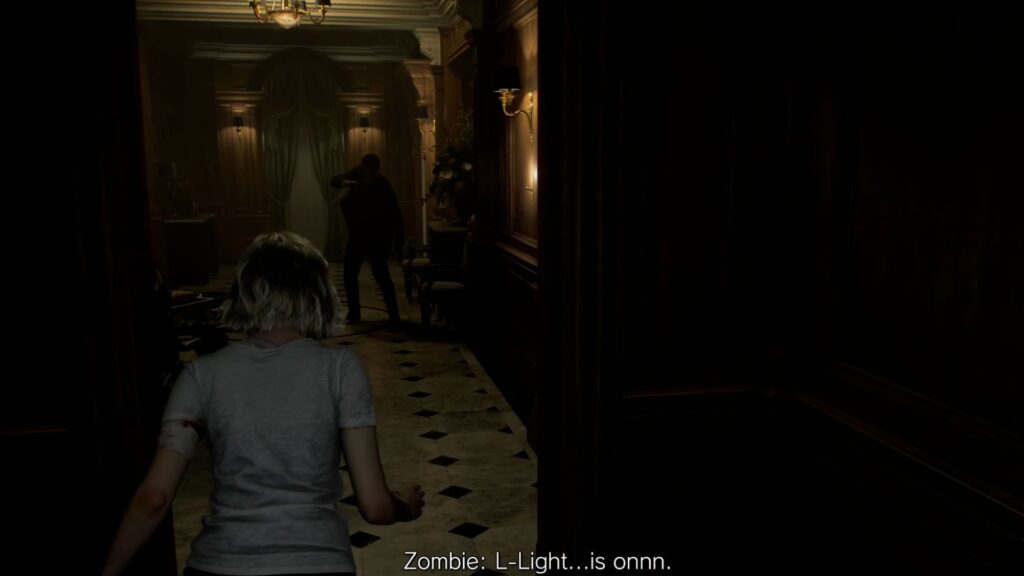
You’ll enter a hallway with an opening to the right and a path straight ahead leading left. Another infected person is lurking here — this one is sensitive to light, so keep your flashlight off and don’t run. Stay still for a moment, then take a left into the massive dining room.
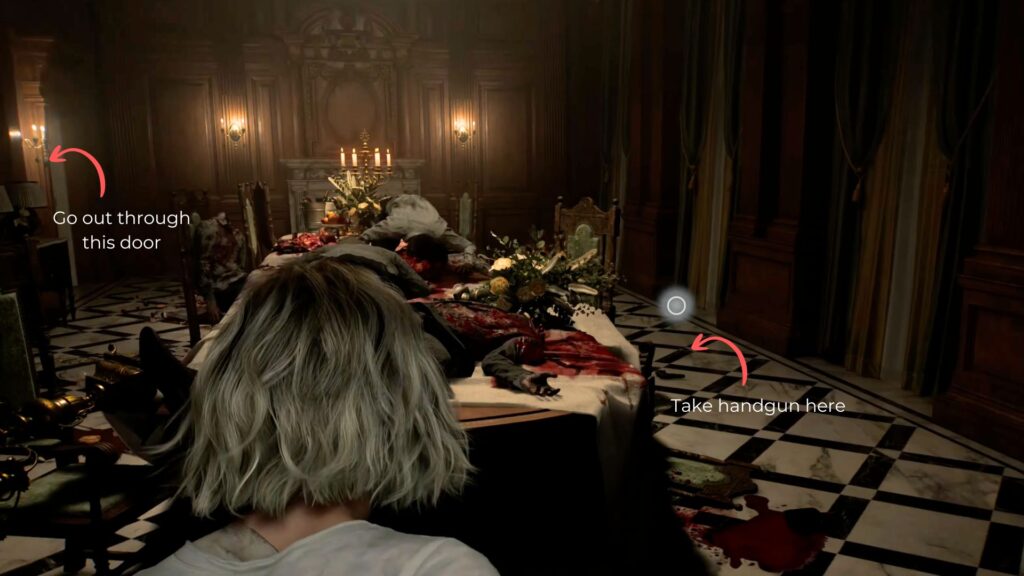
Dead bodies are scattered across the tables and blood covers the floor. Crouch and sneak along the right side of the room. On the ground, you’ll find a B934 Handgun — pick it up, but remember that ammo is extremely limited. Find the exit on the opposite side of the room and head into the storage room beyond it.
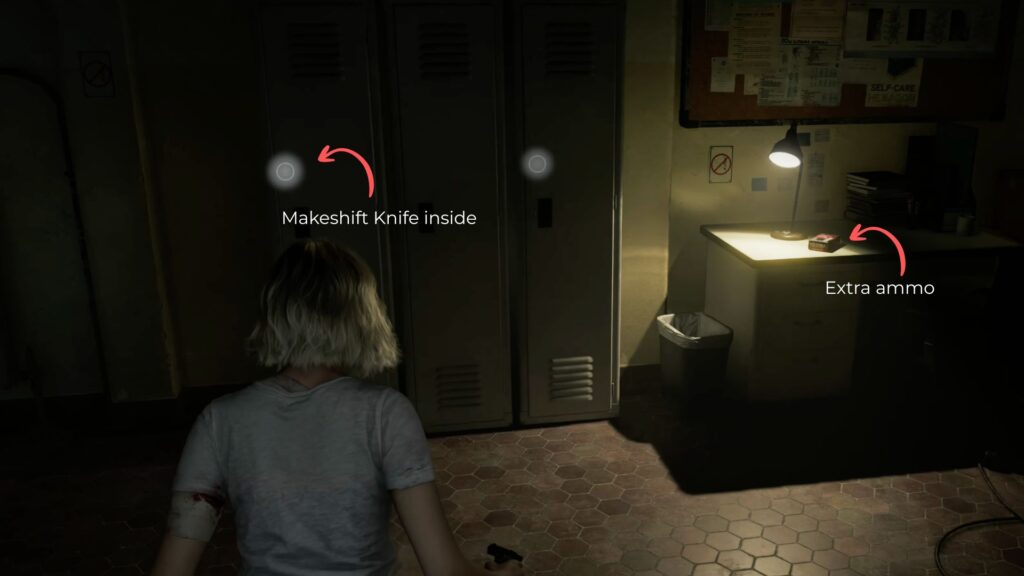
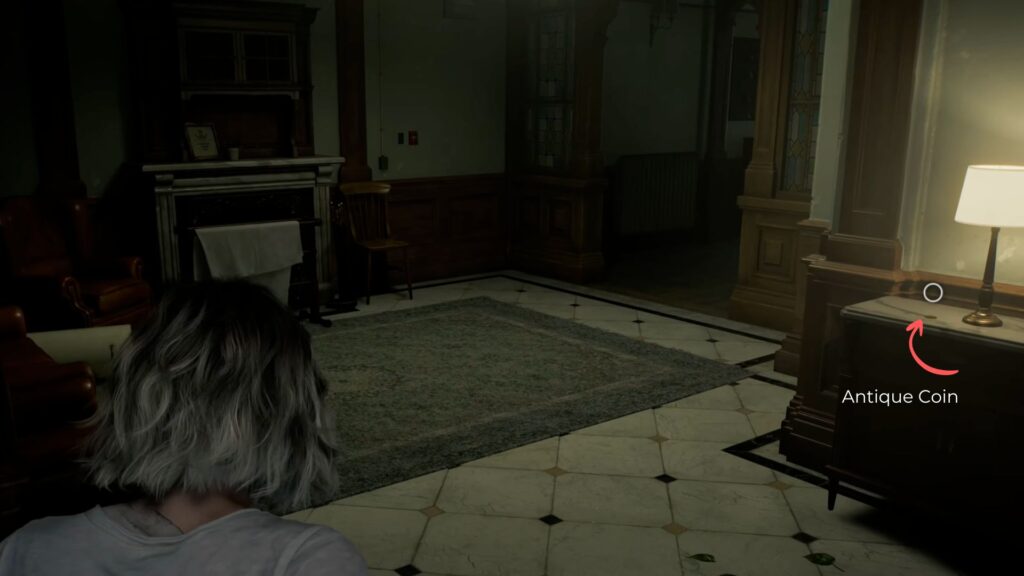
Inside the storage room, open the three-door locker to find a Makeshift Knife and some ammo on the desk. There’s a broken window in here — climb through it and go left. There will be a small room where you can collect the Antique Coin on the small console table with the lamp.
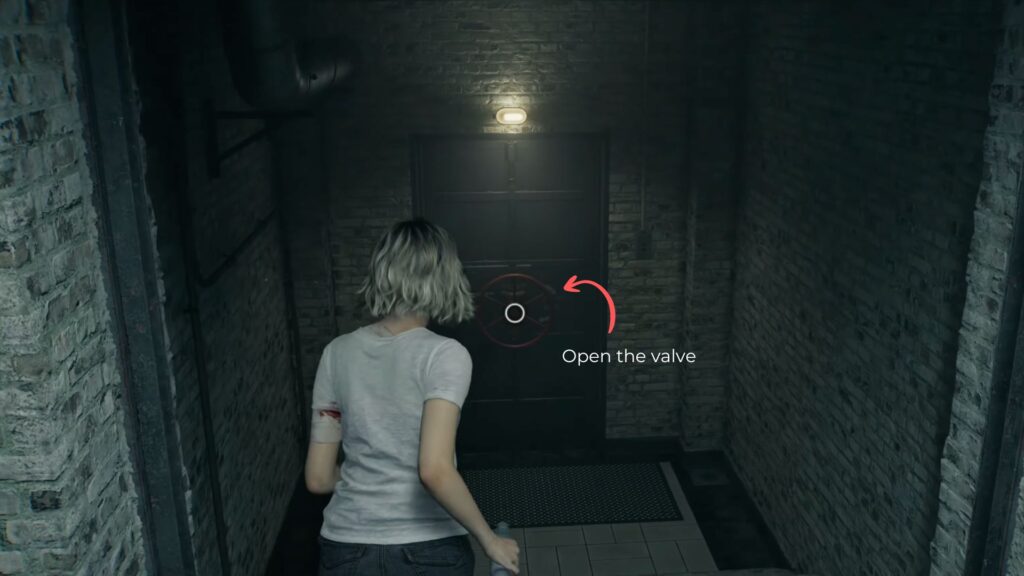
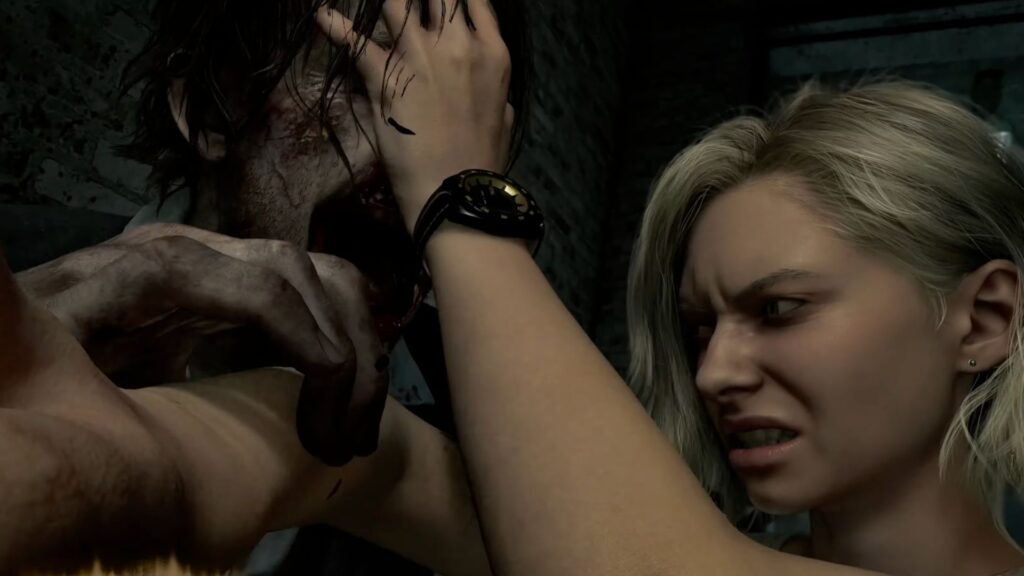
On the left side of the table, there’s another room with a wooden box containing more ammo. Further along, you’ll reach a door with a valve — when you try to open it, the valve breaks. You’ll need a specific tool to get through here later. A cutscene triggers as an infected grabs your arm. Use your handgun to deal with him if necessary, then continue.
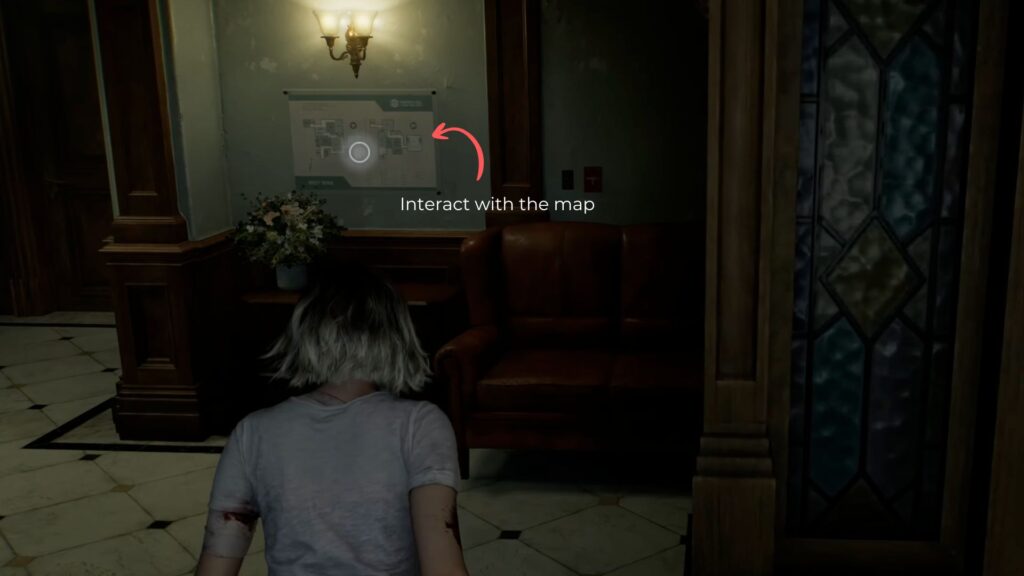
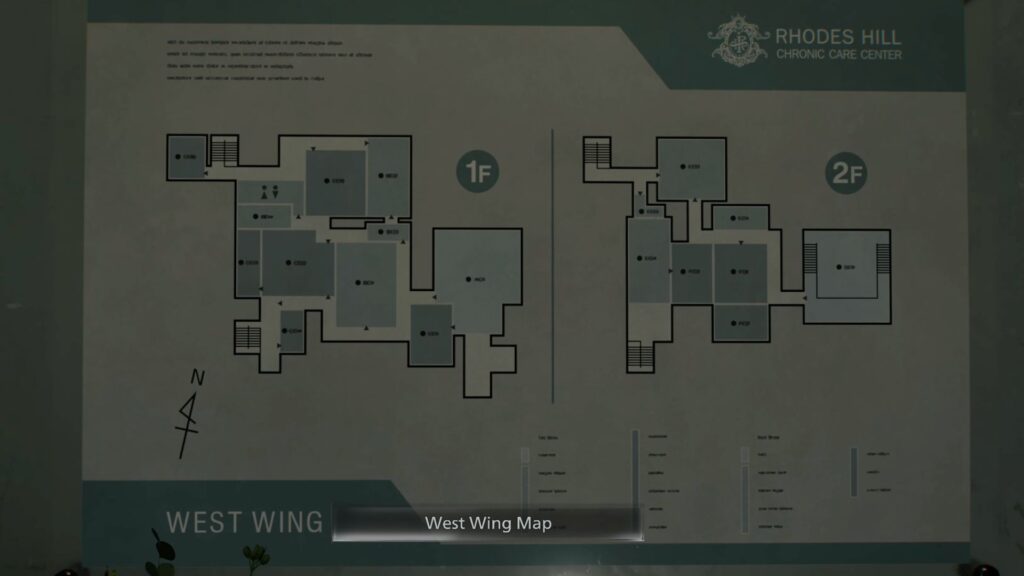
Head left and climb to the second floor. Keep moving until you spot a bucket of blood on the ground. Enter the room beside it to find the Rhodes Hill Chronic Care Center West Wing Map on the wall. Go through the door on your left into the .
The Bar and Lounge
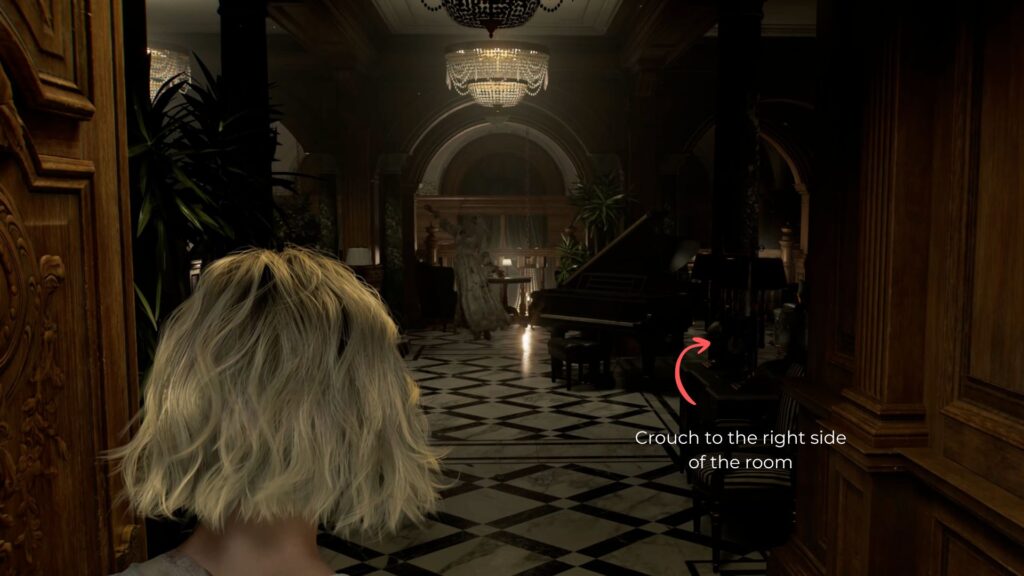
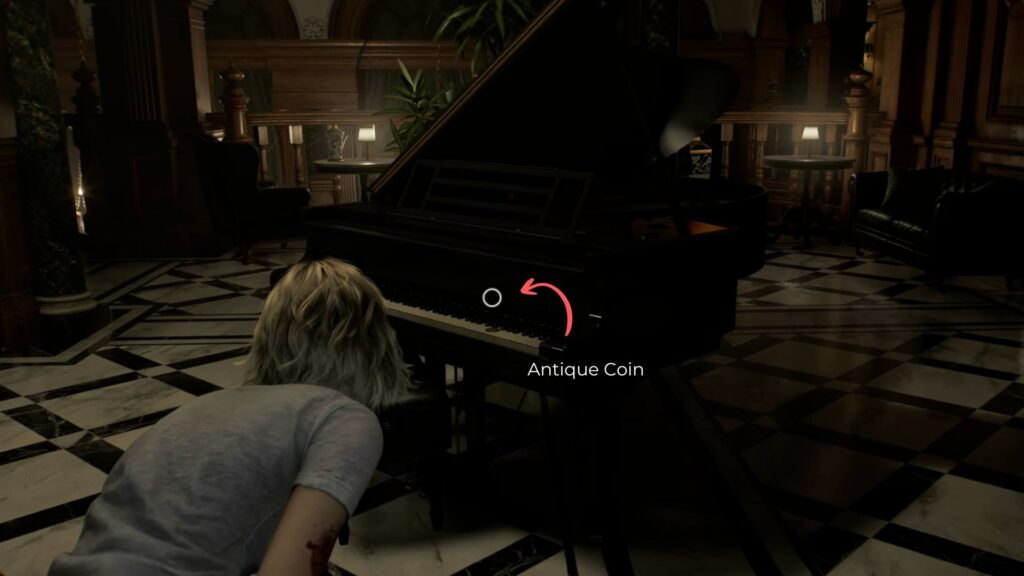
An infected singer is performing for a small crowd of infected men. Crouch and move slowly to avoid detection. Grab the Antique Coin on top of the piano as you pass, then continue right into the next aisle.
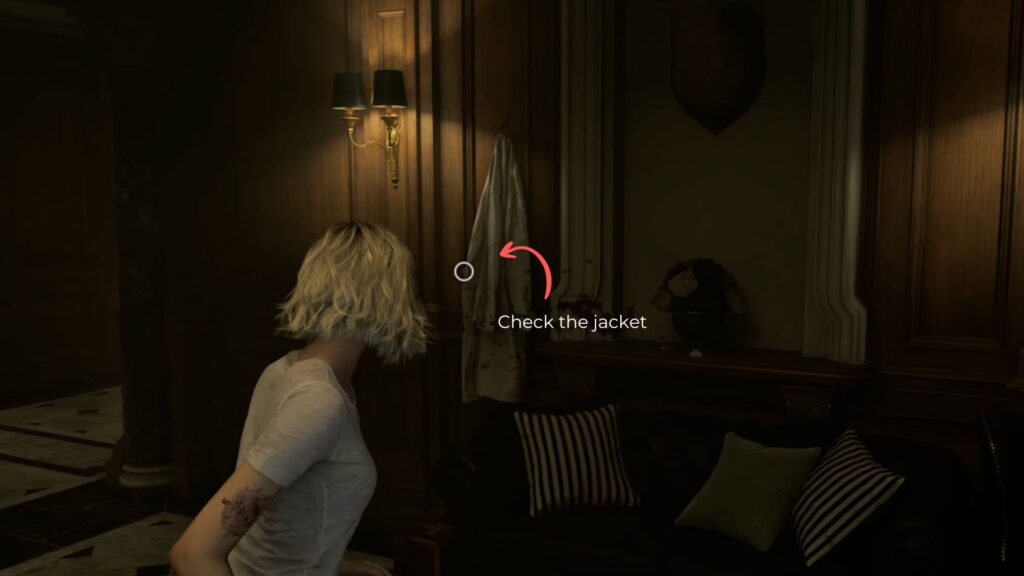
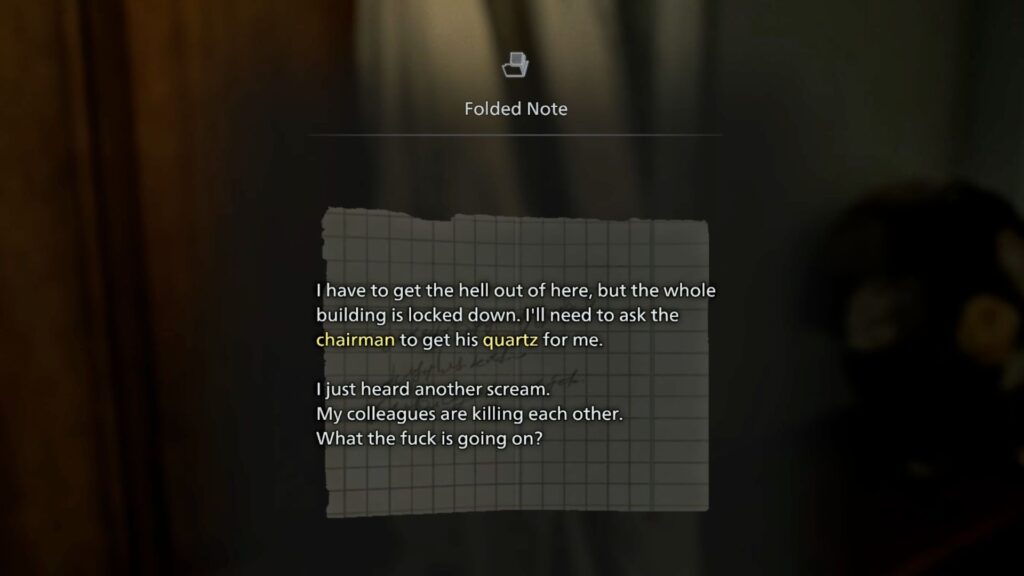
The door ahead is locked, so take a left out to the balcony overlooking the dining hall. On the tables here, you’ll find Handgun Ammo and a Green Herb. Also check the doctor’s jacket hanging on the wall — inside is a folded note from a staff member describing the lockdown and requesting the Chairman’s quartz.
Head to the back side of the balcony where you’ll find the care center scale model on the back of a wall divider. Across from it is the door to the Chairman’s Office — head inside.
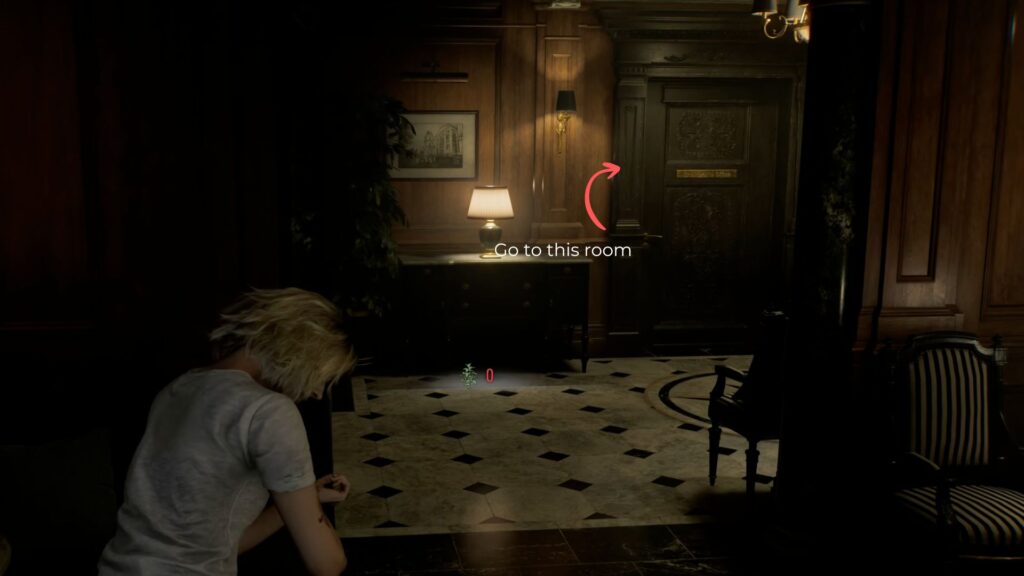
The Chairman’s Office
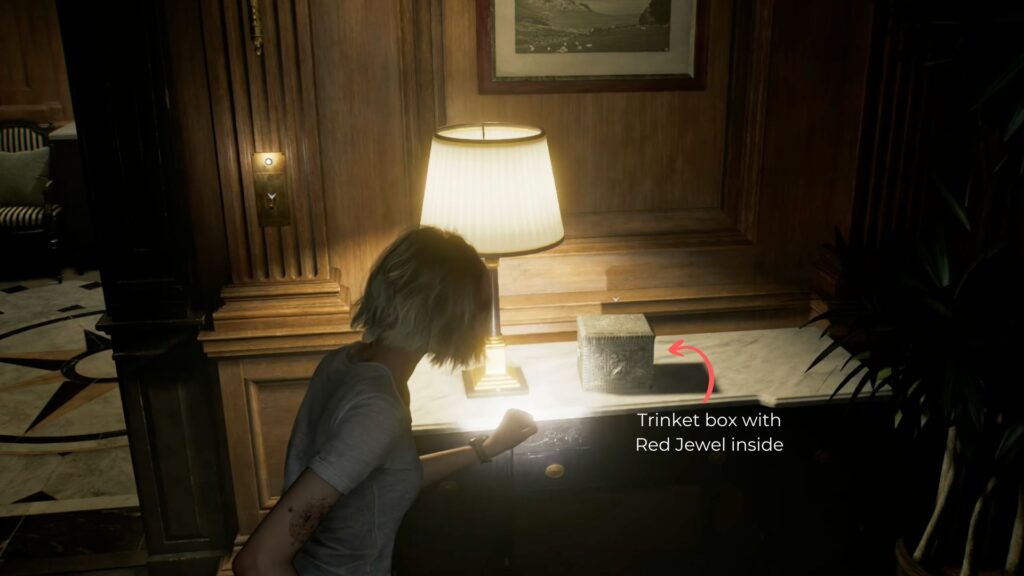
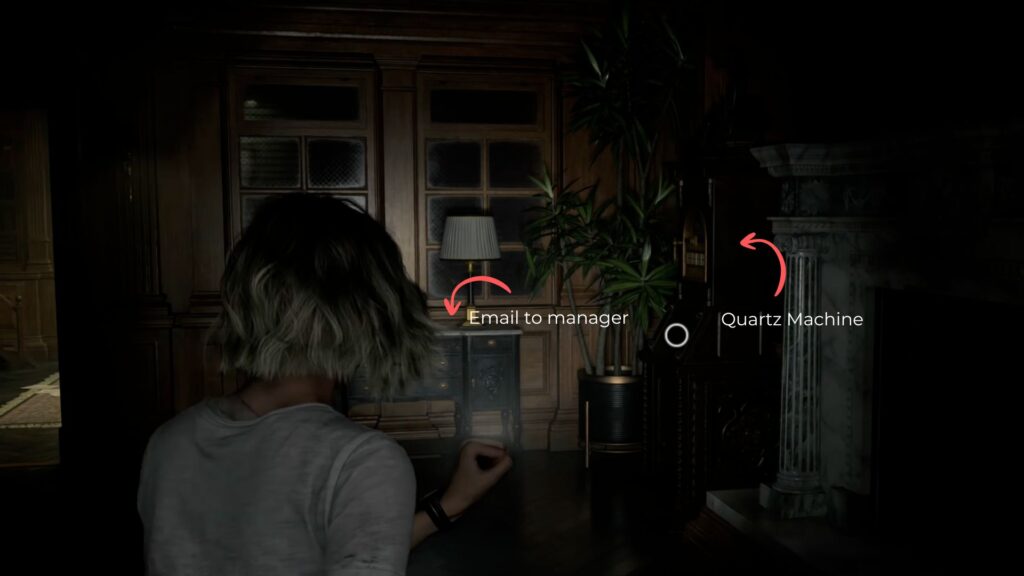
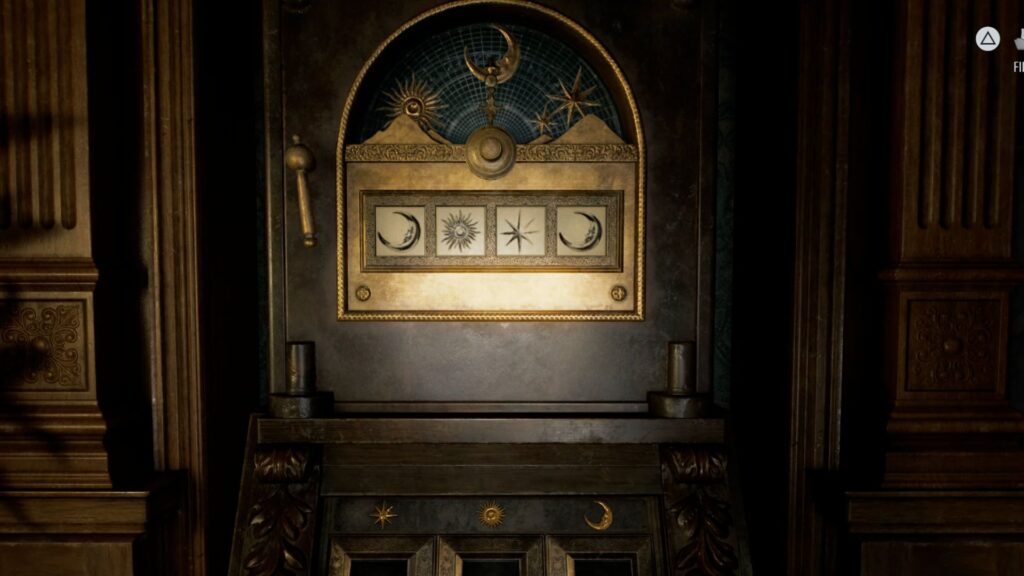
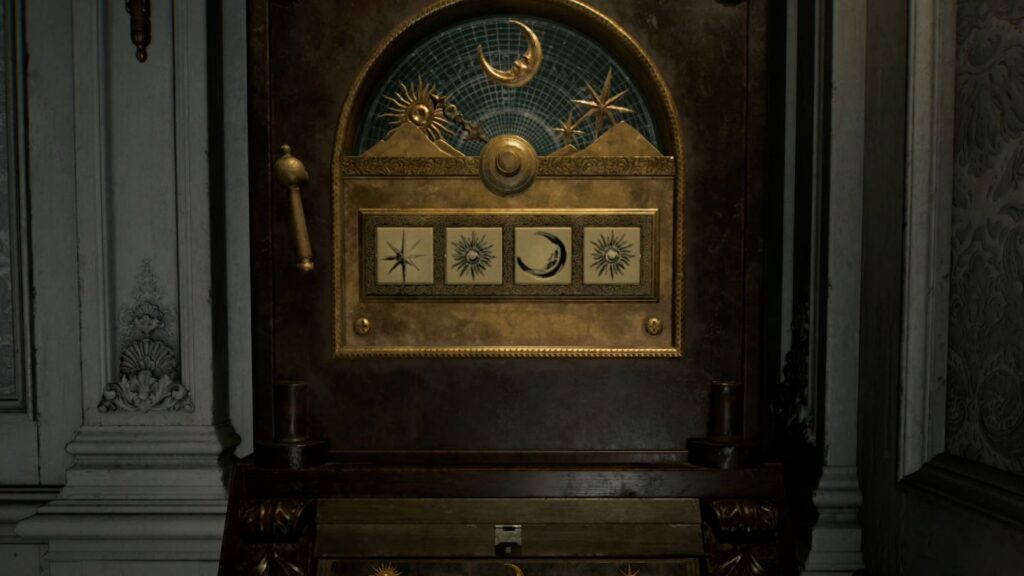
You’ll need your flashlight in here. On the left side just inside the door, you’ll find a Unicorn Trinket Box containing a Red Jewel. On the coffee table, you will find a notebook. On the right wall, there’s a black quartz machine next to the fireplace with four slots and three panel symbols — star, moon, and sun. Next to it on a table is a copy of an Email to Manager file.
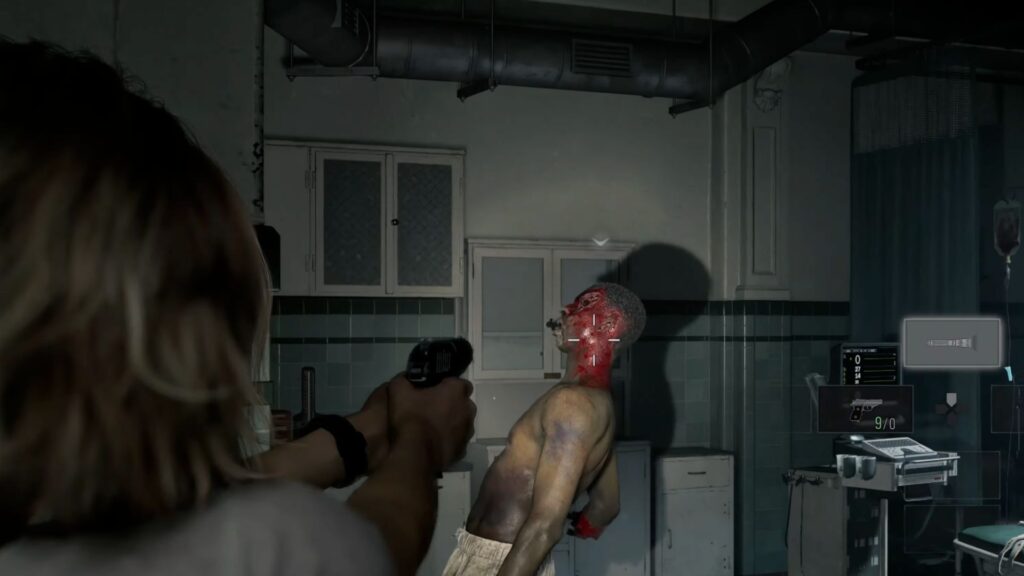
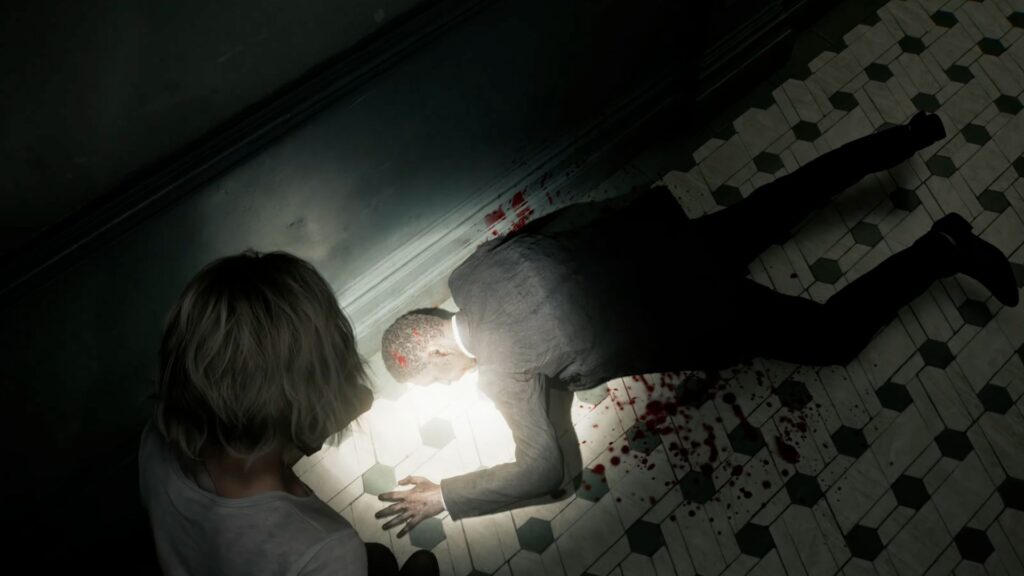
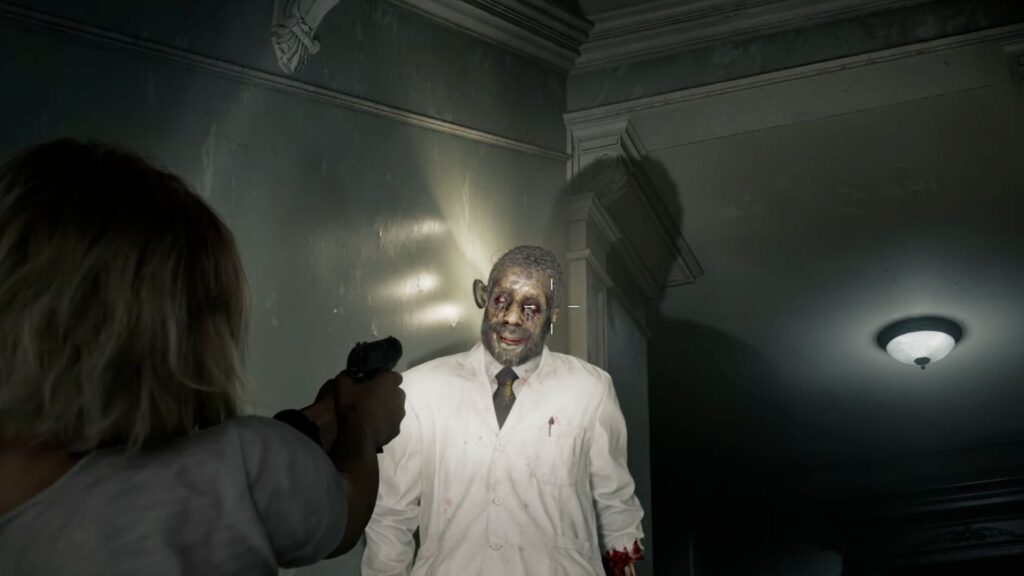
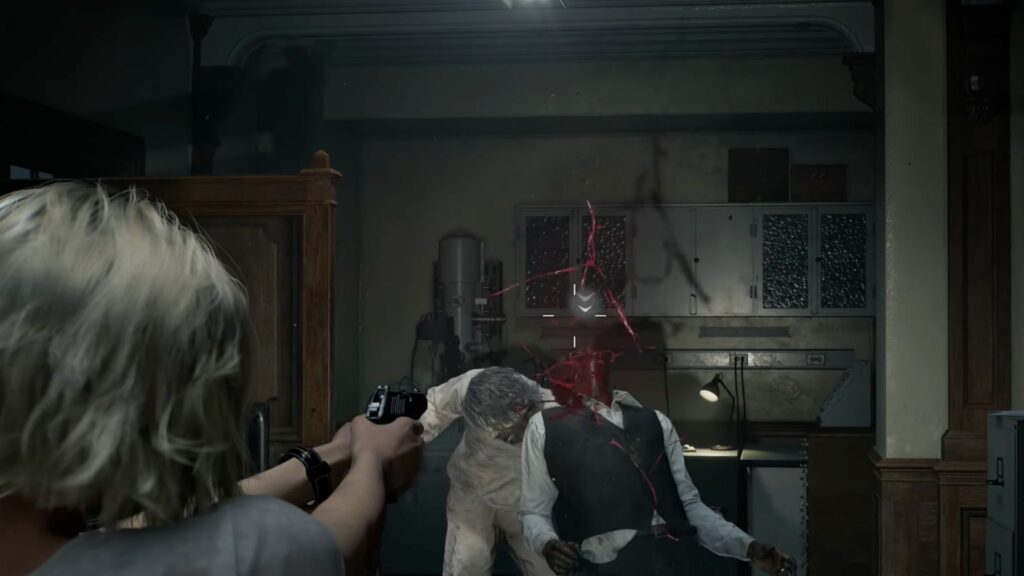
Go through to the back office carefully — the manager inside is infected and is choking his secretary on the floor. If you can land a clean headshot, do it. Otherwise, knock him down first and finish him off with your Makeshift Knife to save ammo.
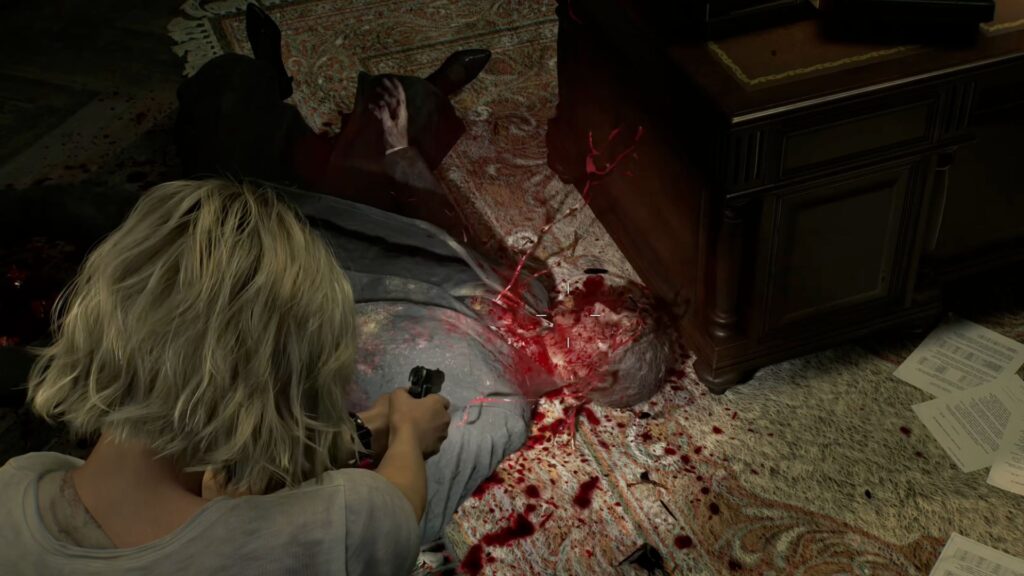
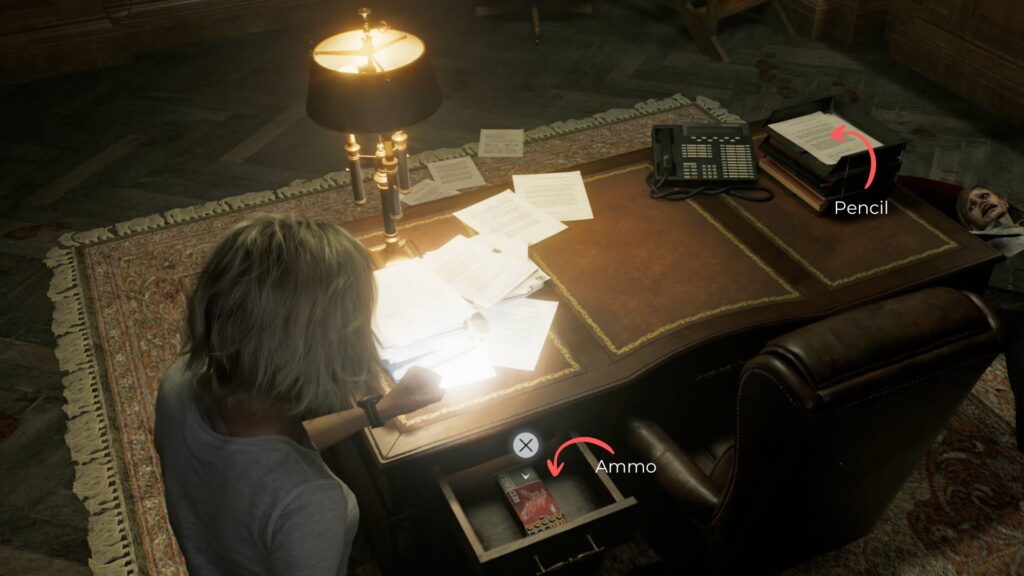
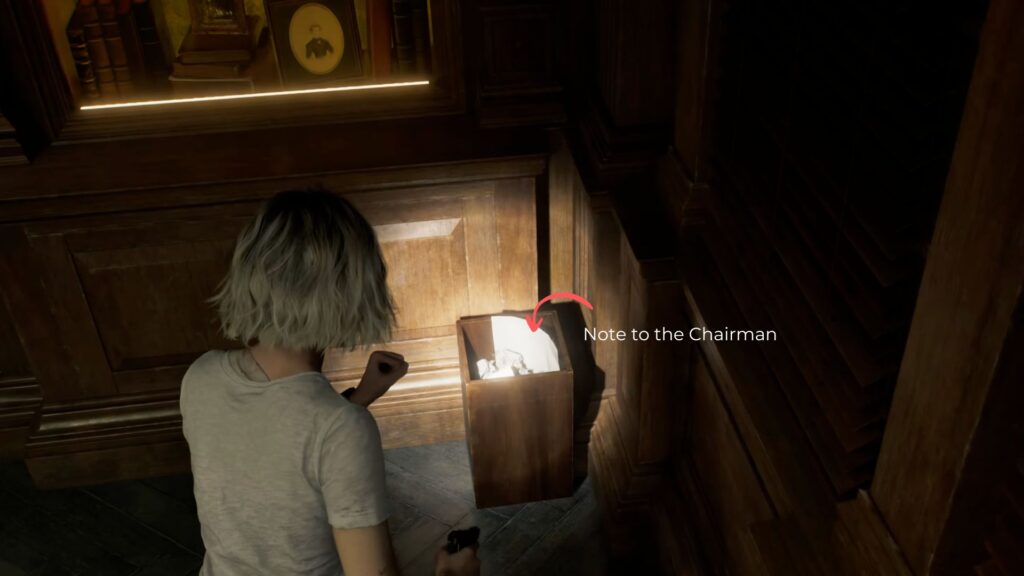
Pull extra ammo from the drawer on his desk, pick up the pencil from the desk surface, and check the dustbin in the corner for a page containing the Note to the Chairman file.
Return to the front room and use the pencil on the notebook on the desk. Keep going until you complete the Chairman’s Note, which reveals the code: Moon – Sun – Star – Moon. Enter this sequence into the black machine on the wall. It will open to reveal the first quartz you need for the main door — the Moon Quartz.
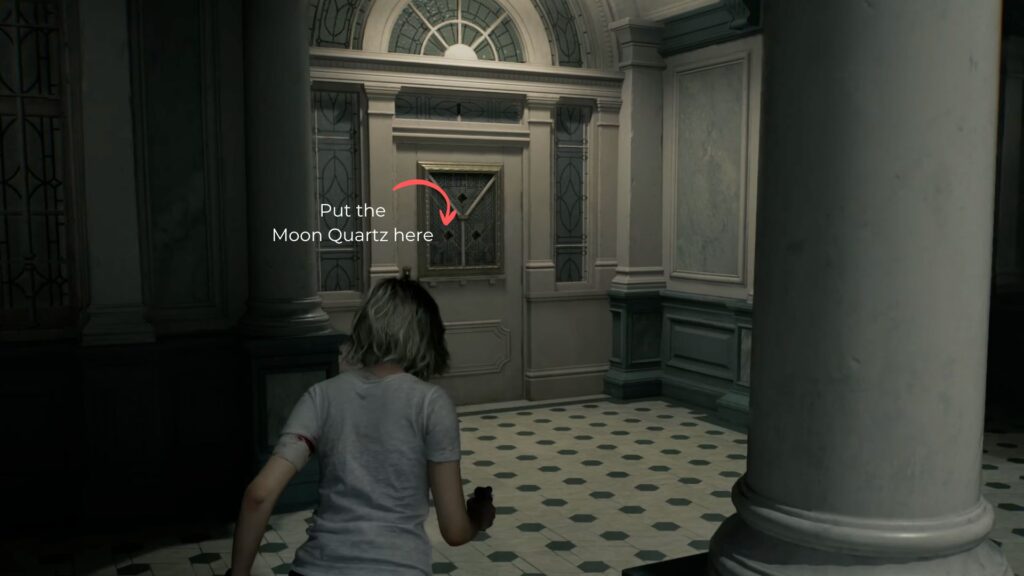
Head back to the central hall and place the Moon Quartz into its slot on the three-indentation door. With that done, stop by the security room if you need to offload items into the trunk before continuing.
The Parlor
Return to the west wing and follow the left path to the locked door you found earlier. Insert the Red Jewel into the indent to unlock access to the Parlor. Close the door behind you once inside — the Chef has left the kitchen and is now roaming the hall.

Inside the parlor, collect three Antique Coins — one on top of the roulette table, one on the bar countertop, and one hidden inside a small green urn behind the bar. Break the larger blue urn behind the bar as well for additional items.
On the left wall beside the roulette table, there’s a glass cabinet with four cases you can open using your coins:
- Hip Pouch (3 coins) — expands your inventory
- Steroids (4 coins) — increases max health
- Stabiliser (4 coins) — increases firepower
- Override Manual (6 coins) — increases blood collector capacity by 50%

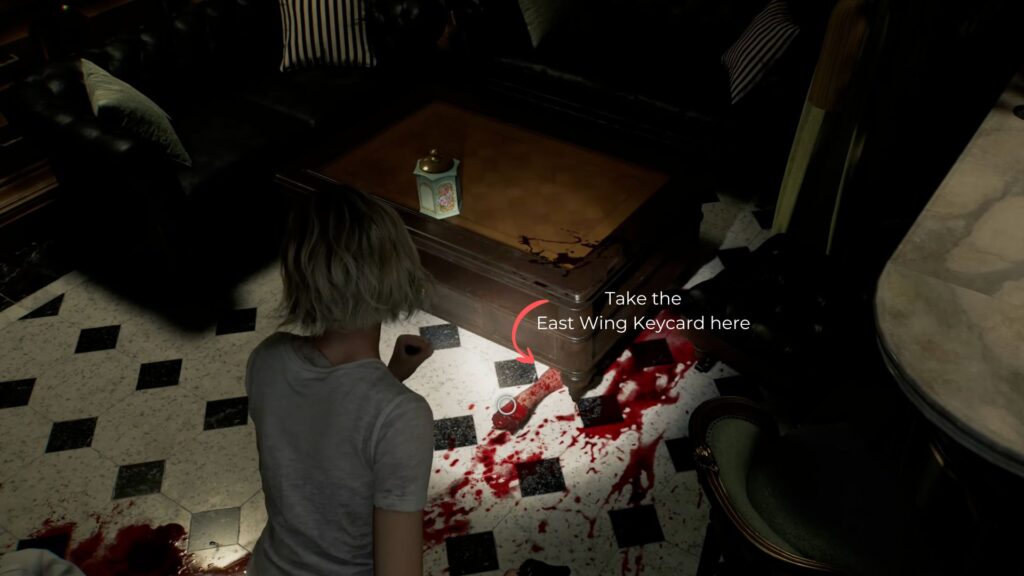
The Hip Pouch should be your first priority for the extra inventory space. After purchasing this item, look for a dead, armless infected person on the other side of the room. Check its arm on the floor to collect the East Wing Keycard. Save your progress and clear out your trunk before heading to the east wing.
The East Wing
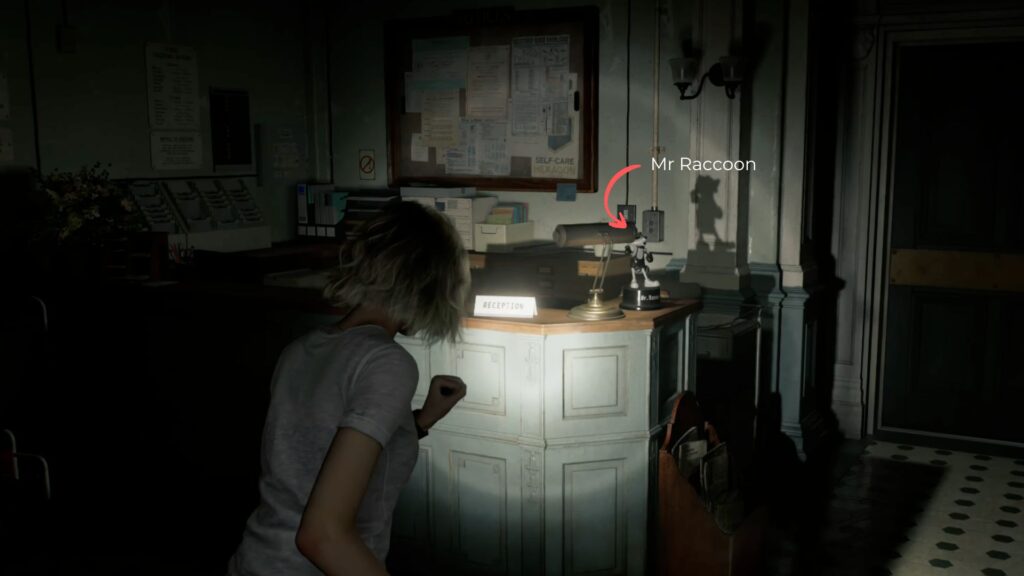
Unlock the East Wing door and head inside. At the reception desk, you’ll find the first Mr. Raccoon collectible for this chapter. Follow the single path forward and collect the Green Herb in the corner of the aisle.
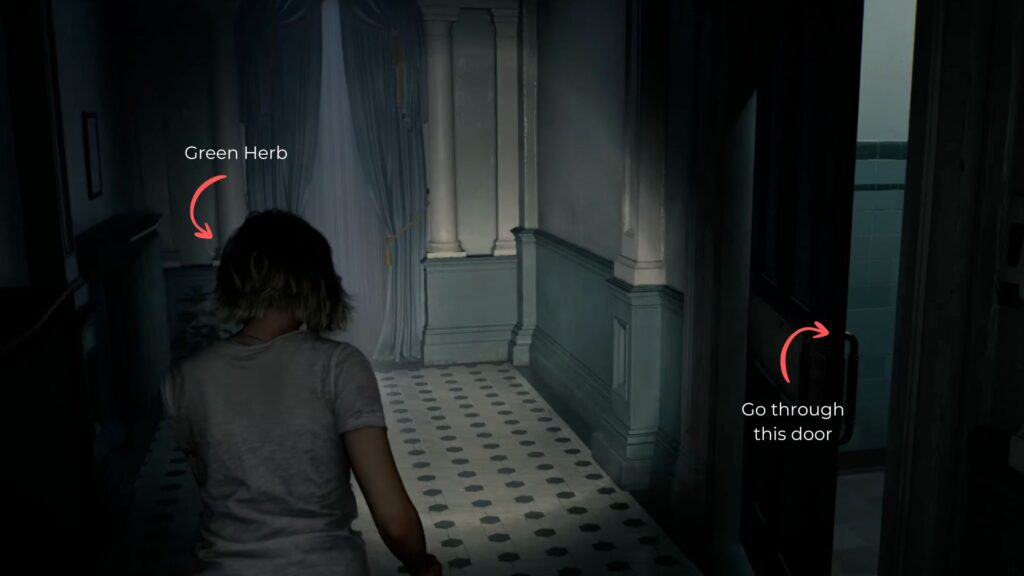
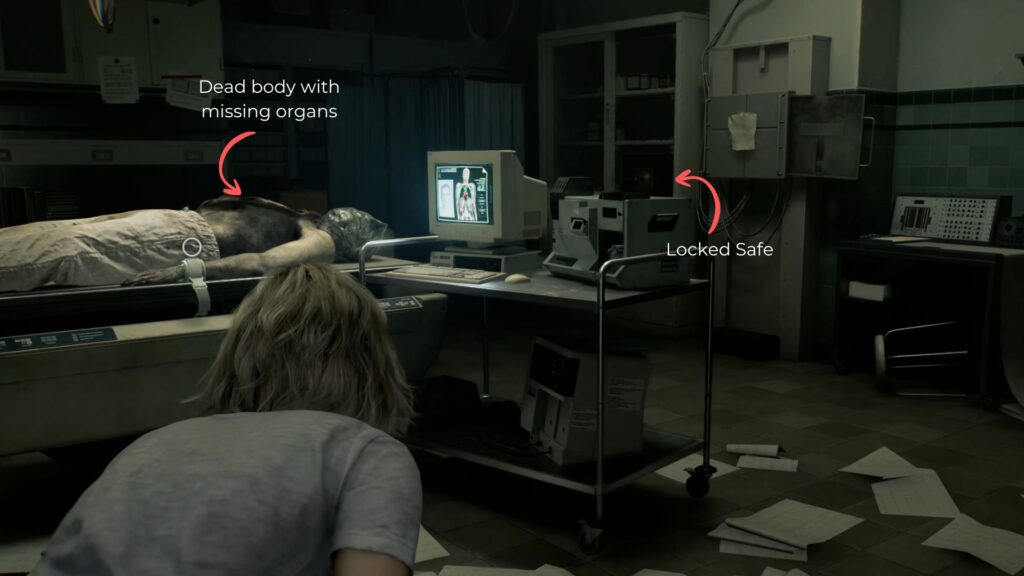
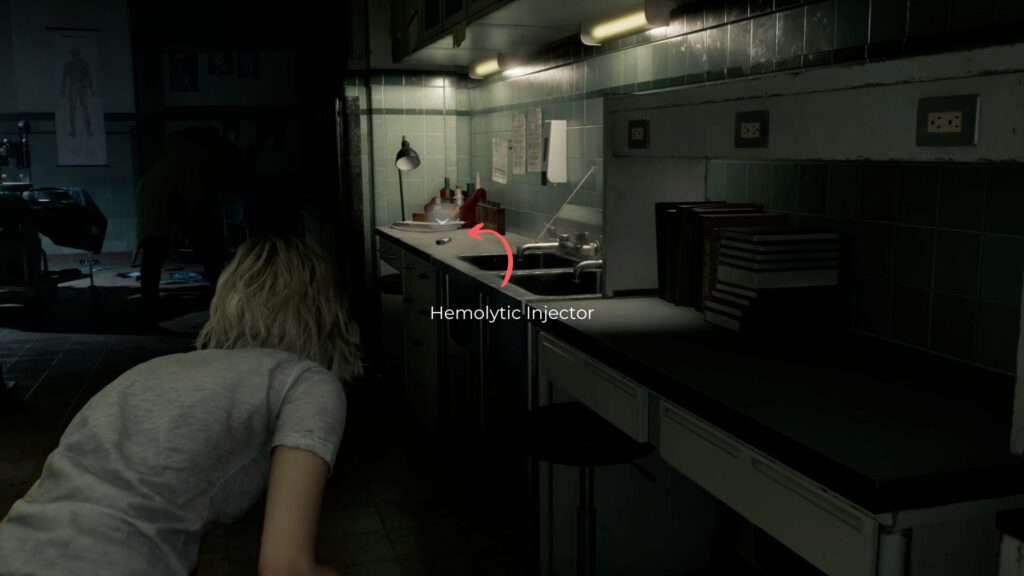
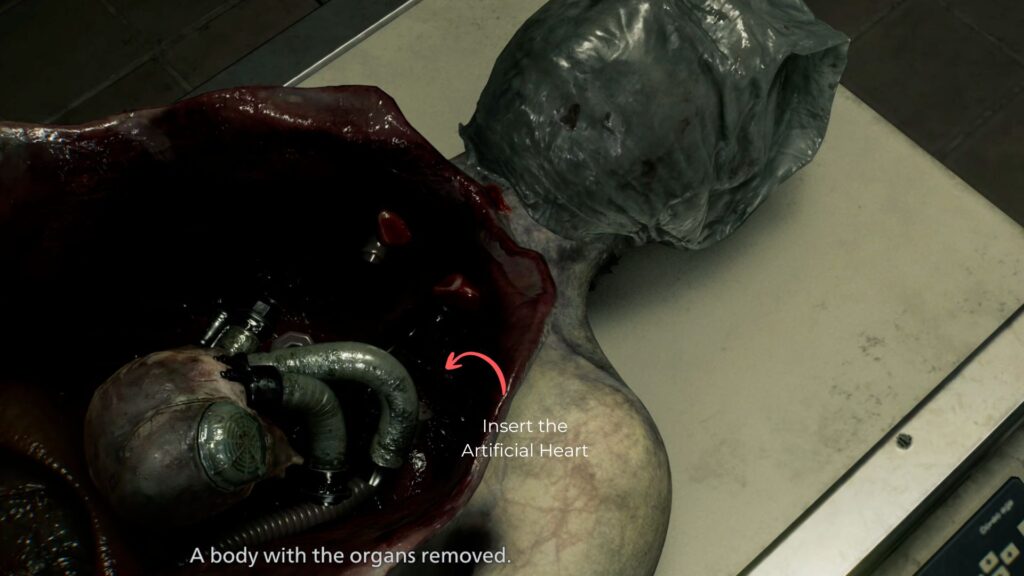
Go through the unlocked door on your right into the examination room, where you’ll find a dead body on the bed with missing organs and strange sounds coming from the side of the room. Note the locked safe in the far corner for later.
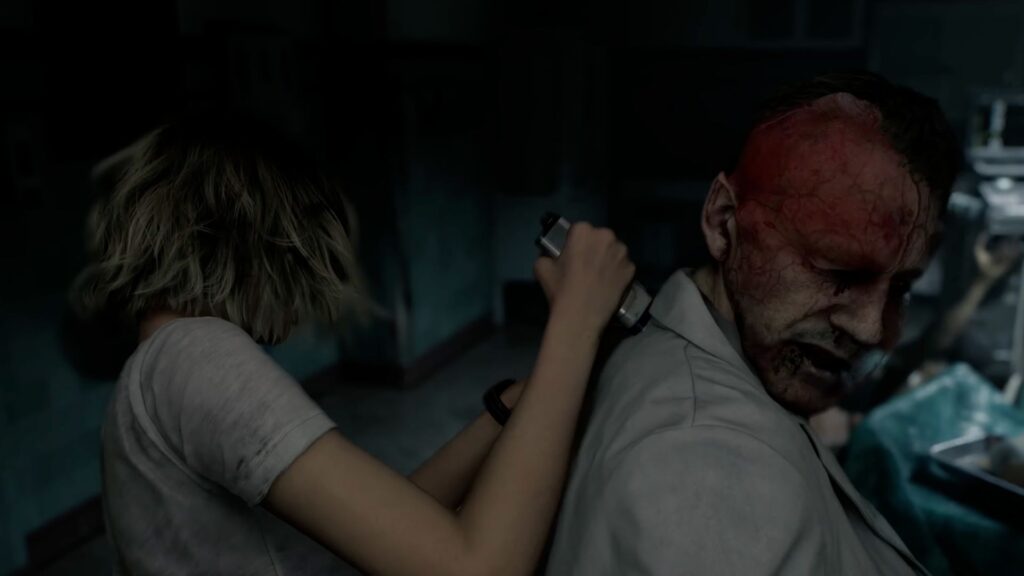
Pick up the Hemolytic Injector beside the sink, then sneak up behind the inf ected doctor near the examination bed and use it to take him out instantly. Dodge or kill the other infected patient in the room and move quickly to the next hallway.
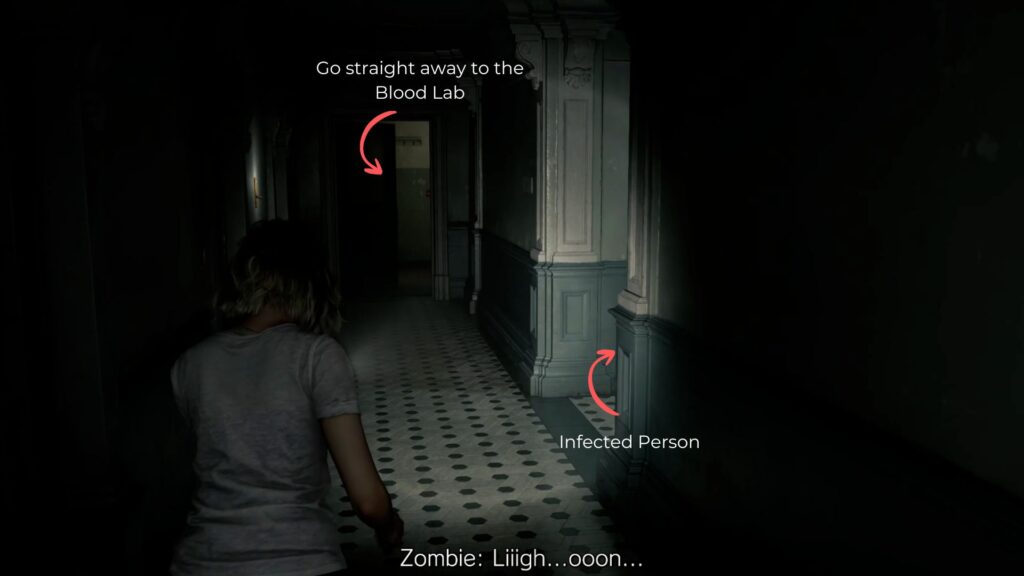
In the dark hallway ahead, you’ll hit an intersection where an infected person is obsessed with flicking the light switch. Turn off your flashlight and walk straight into the Blood Lab ahead.
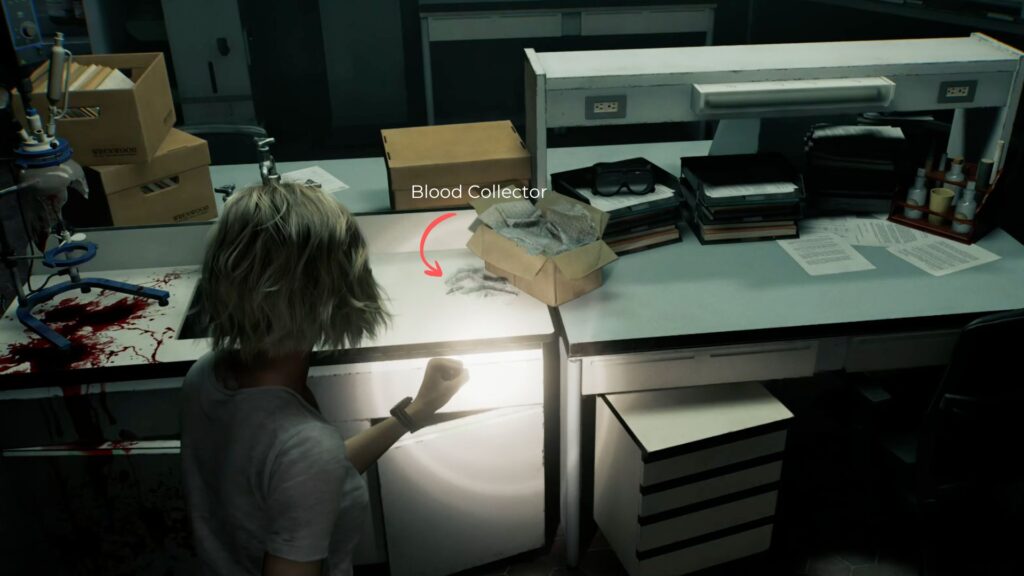
The Blood Lab has a lot to take in. Open the lockers for Scrap and then pick up the Blood Collector from the table in the middle — this lets you collect blood from buckets and bodies throughout the care center, which you’ll need for crafting. On the table against the wall, collect the purple Blood Specimen (Denatured), a sample of mutated blood that can be analyzed to unlock crafting recipes.

Use the laser microscope machine next to the table. A mini-game will appear on the computer where you need to activate all the atoms on screen. Here is how to do it:
- The red spheres are already active.
- Clicking a grey (inactive) square will turn it red and turn any atoms connected to it red.
- You must finish the puzzle in the fewest clicks possible.
- For this puzzle, simply click the middle square once. This will activate the last two connected atoms.
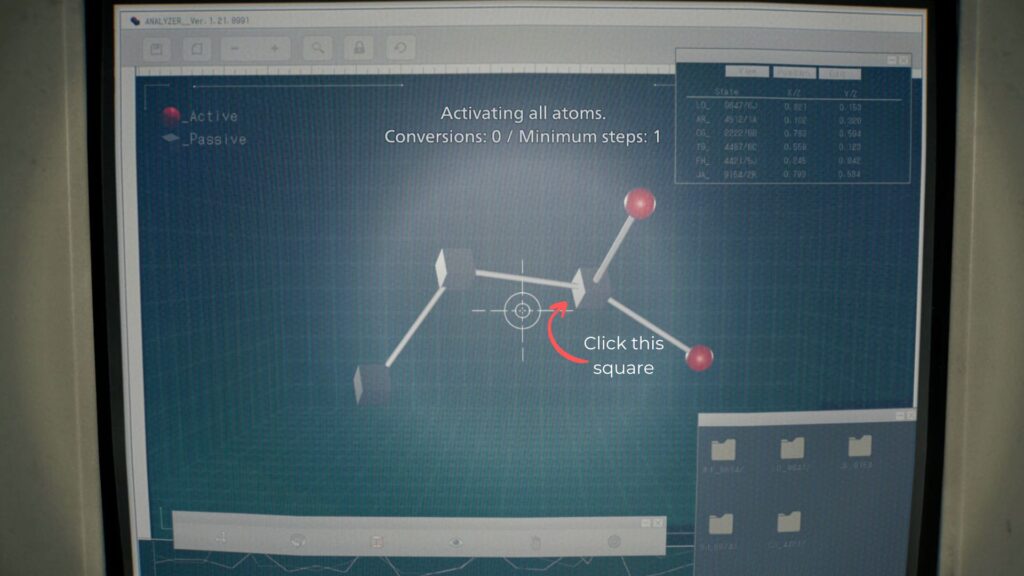
When the puzzle is complete, it will unlock recipes for Handgun Ammo and Hemolytic Injectors. Before leaving, grab the Blood Compound Synthesis file from the center desk. The locked door on the right requires a level 1 keycard, so leave it for now.
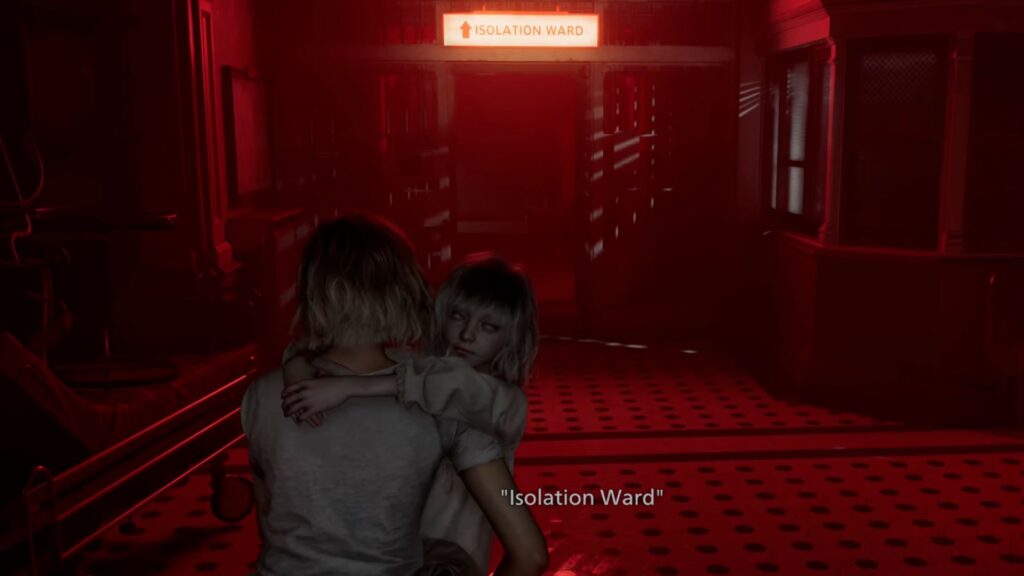
Head back to the light-switch infected in the hallway and take him out with your knife. Continue past him to the large hall, where you’ll find a locked Isolation Ward requiring a level 2 keycard — leave this for now as well.
Three infected nurses will appear from the far end of the hall. Don’t engage them — stay low and let them disperse. The large infected surgeon will head toward the examination room while the nurses retreat to the back hall.
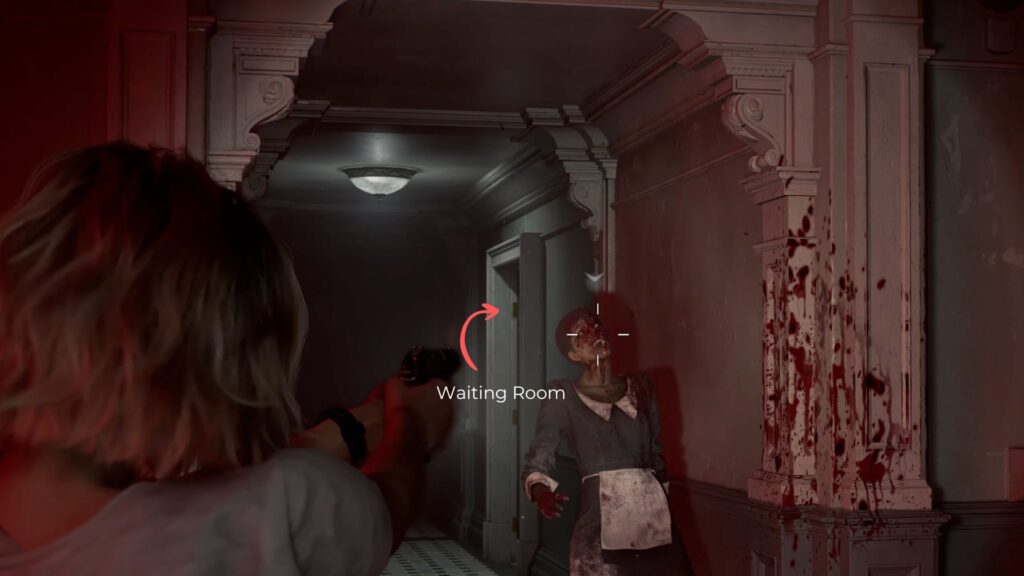
Once it’s clear, head through the door the infected came from into the waiting room. Grab the Antique Coin on the console table and get out before a nurse returns. Continue through the hall to the next open area, where you’ll find the second Mr. Raccoon on a table in the corner and another Antique Coin on the coffee table.
The Lead Researcher’s Office
Climb the stairs, dealing with the infected doctor waiting there if needed.
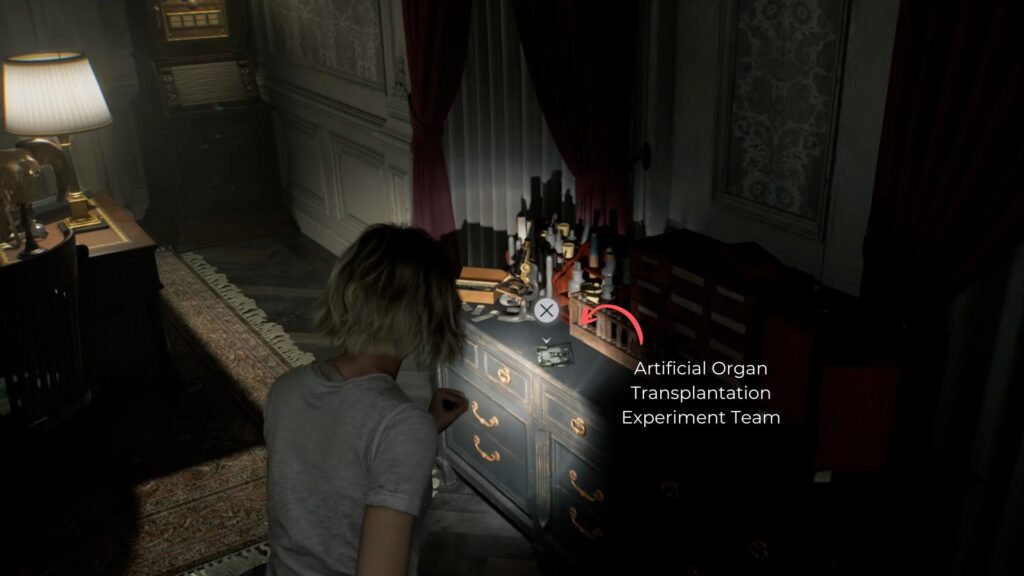
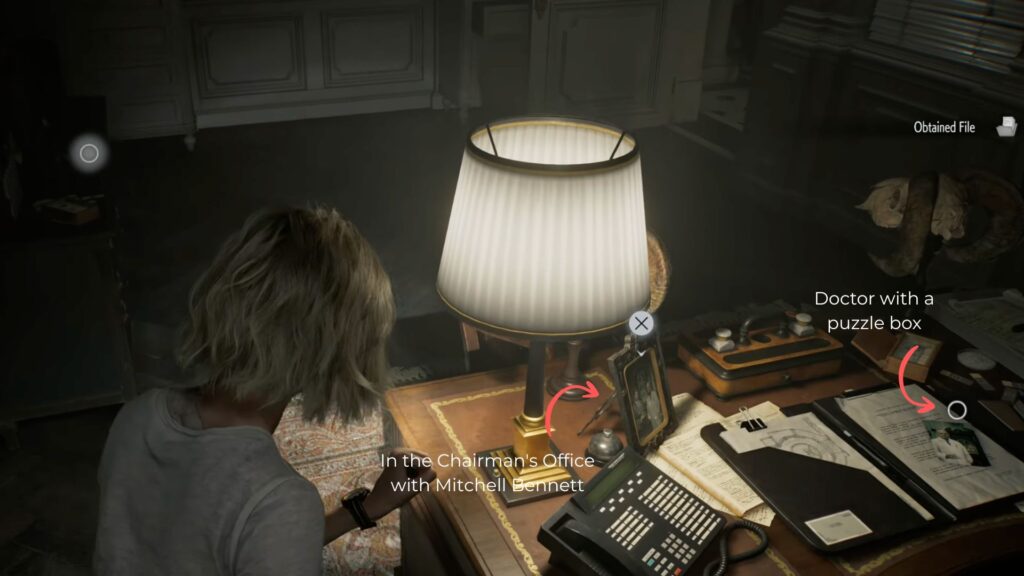
At the top, enter the Lead Researcher’s Office and head through to the back room. You’ll find several important items here:
- A photo titled “Artificial Organ Transplantation Experiment Team” on top of the drawers.
- A framed photo of two men on the office desk labeled “In the Chairman’s Office with Mitchell Bennett.”
- A photo of a doctor with a puzzle box visible in the background sitting on an open book.
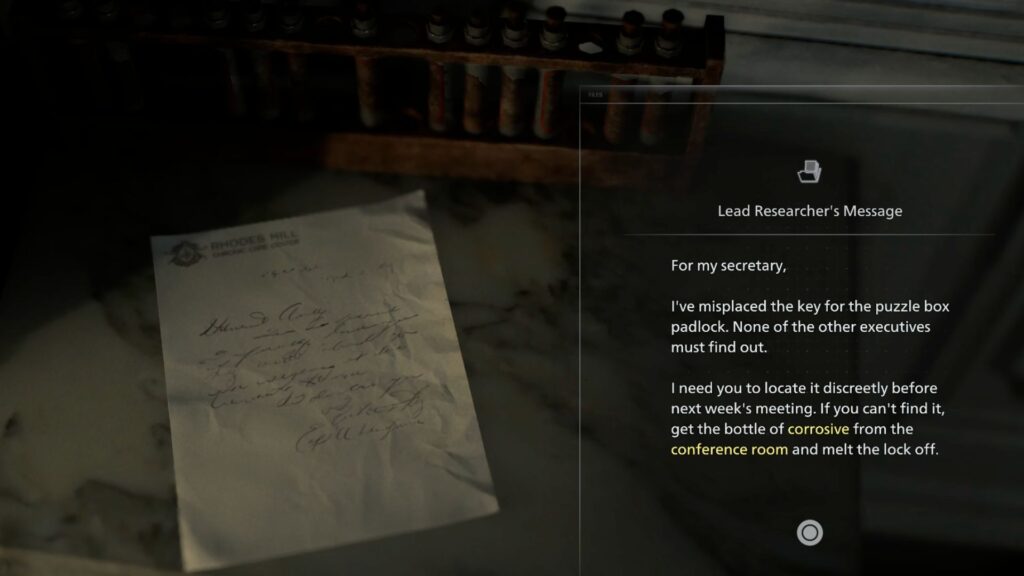
- On the table in the corner, you’ll find the Lead Researcher’s Message, which mentions a misplaced key for a puzzle box padlock and instructs his secretary to find a bottle of corrosive from the Conference Room if the key can’t be located.
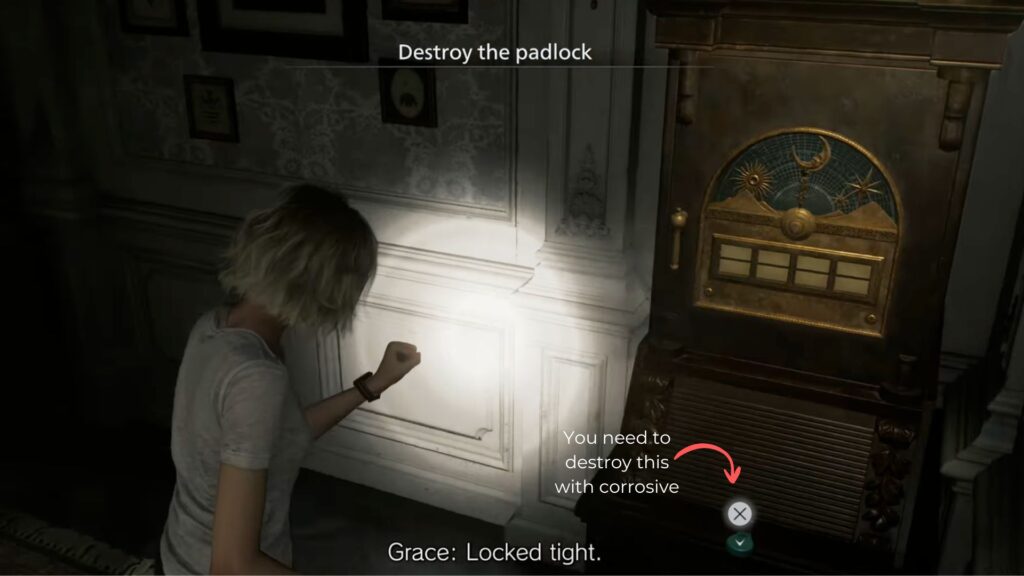
- There’s also a large quartz machine with four slots locked behind a padlock — you’ll need to destroy that padlock.
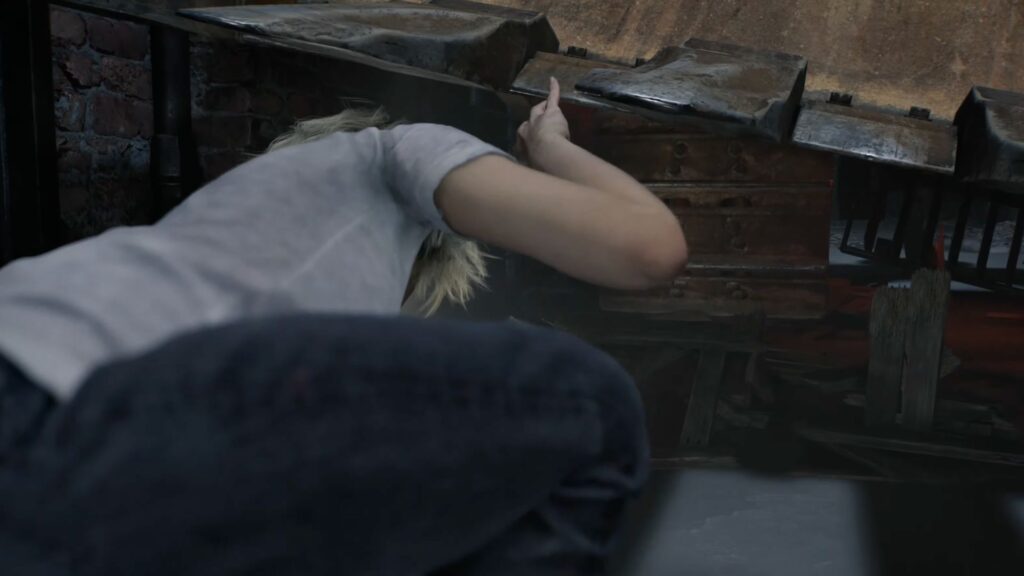
- Also collect the Lockpick from one of the drawers — it can open any locked drawer but can only be used once.
- Break the vase behind the room’s door to find Scrap inside.
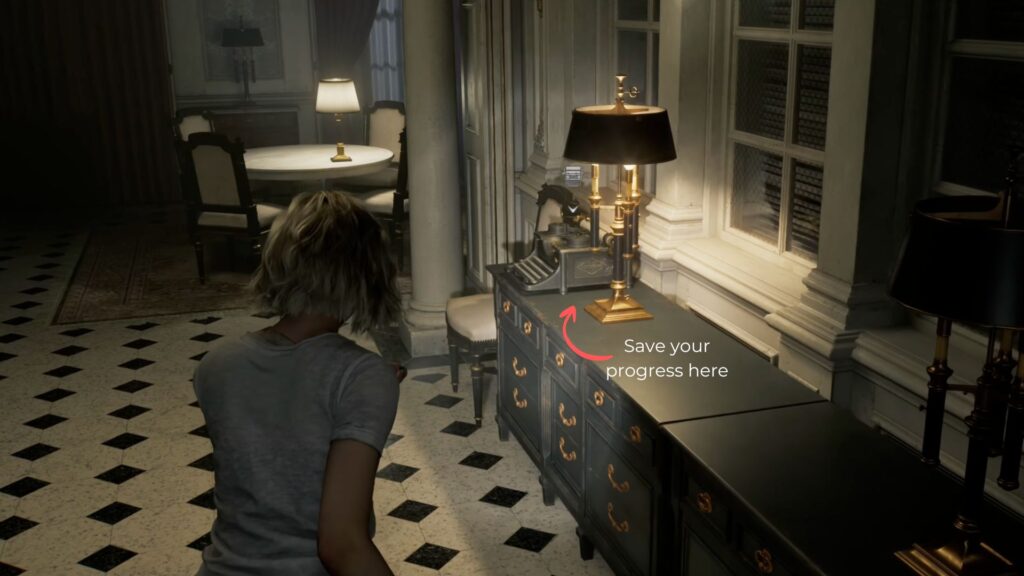
- A typewriter to save your progress.
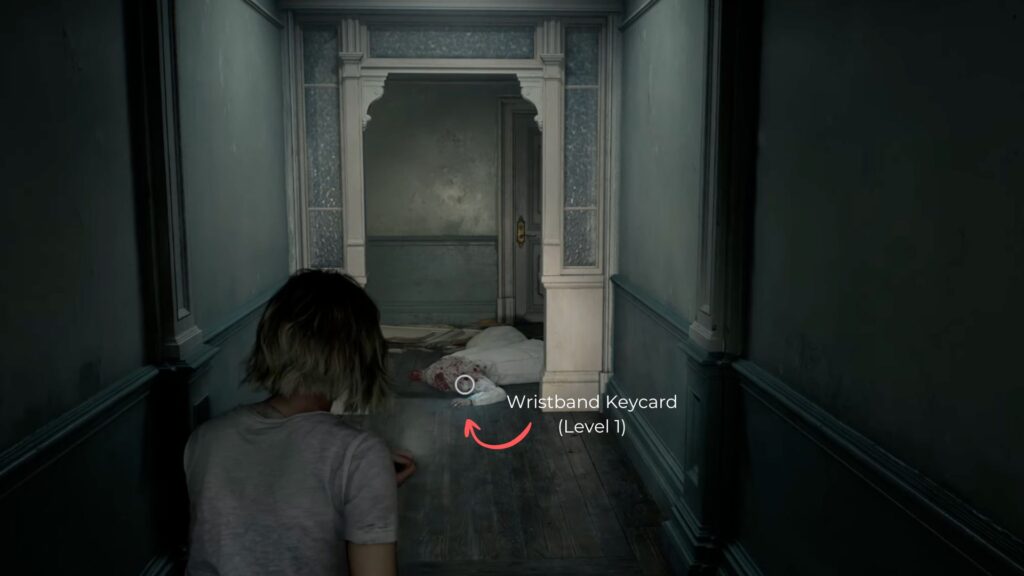
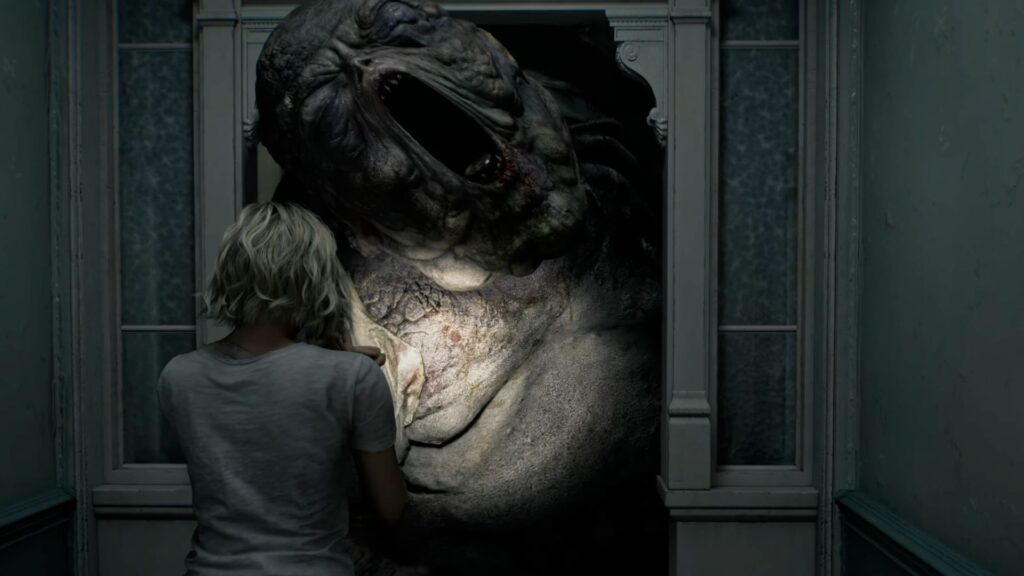
Before heading back downstairs, check the path to the left at the top of the stairs. An infected doctor is lying on the floor there with a glowing wristband — the ID Wristband Level 1. As you reach for it, a massive infected zombie called Chunk will lunge at you. Grab the wristband and run straight back downstairs.
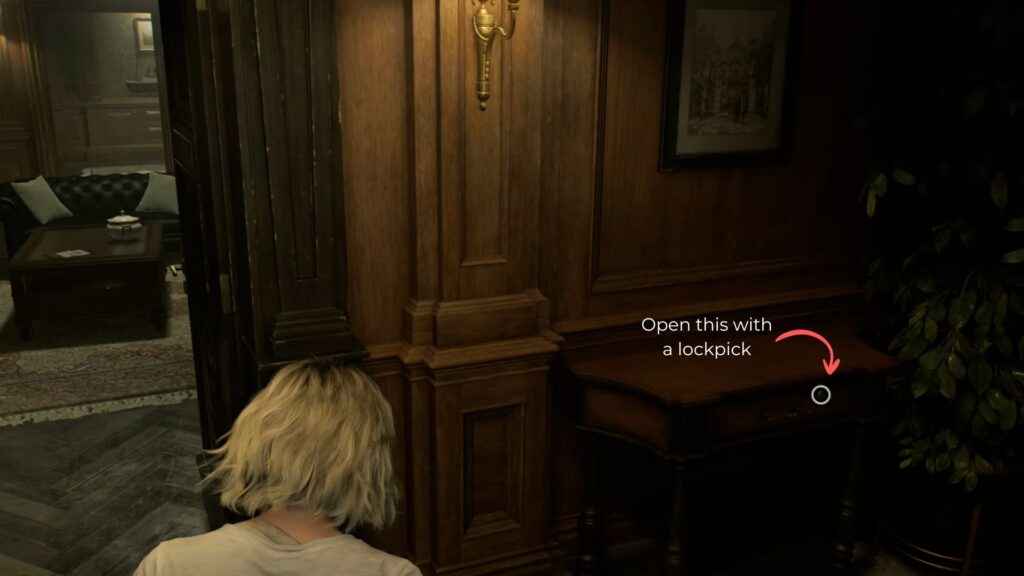
At the east wing entrance, find the small locked drawer next to the door and open it with your Lockpick to collect a Rare Metal. Stop by the security room to deposit unnecessary items and save before continuing.

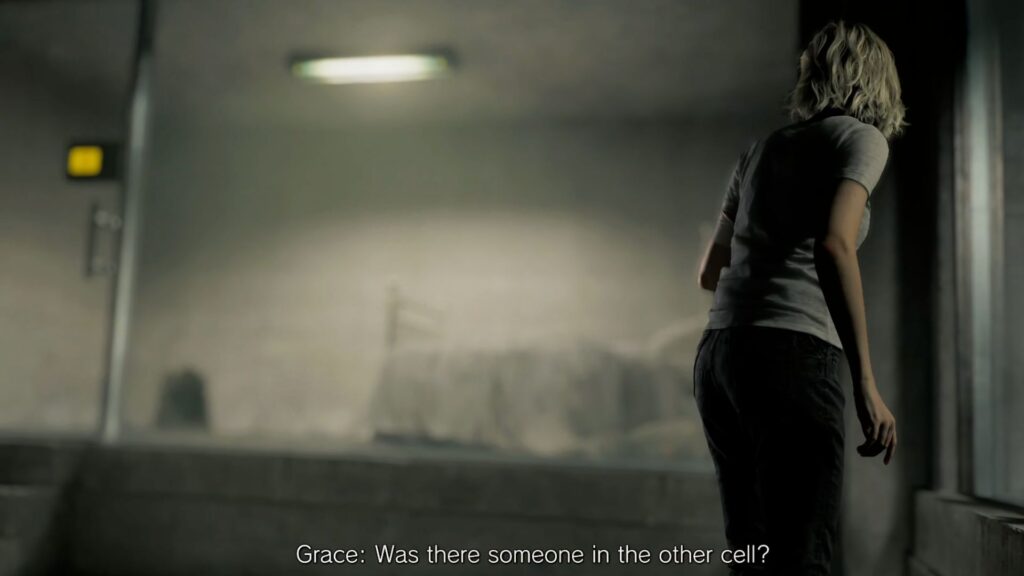
Back to the Blind Girl
Return to the glass cell room where you first found the blind girl. A cutscene plays — Grace learns the medicine the doctors administered caused the girls to lose their sight, and that a second girl named Marie just disappeared one day without explanation. Remember you can collect blood from buckets and dead bodies at any time — do it whenever you can.

The West Wing Level 1 Door
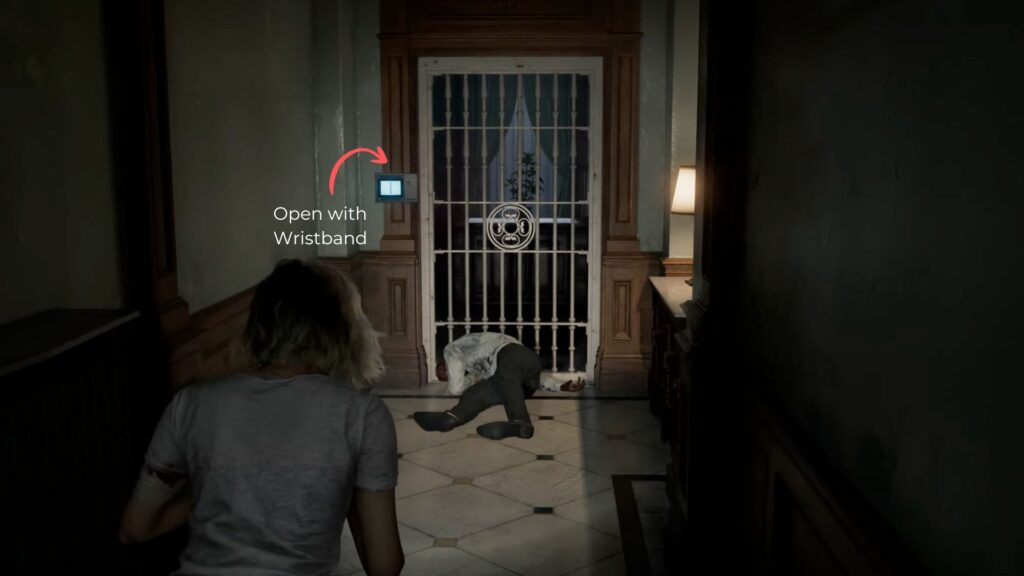
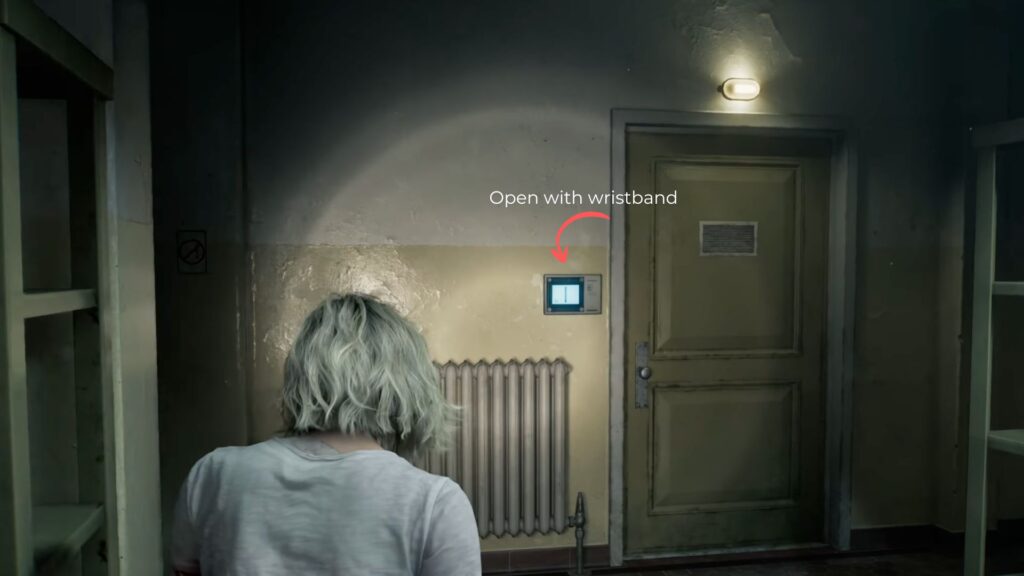
Head back to the west wing and use your Level 1 Wristband to open the locked gate at the end of the hall. Grab the Green Herb directly ahead, and check the path on the right for more ammo in a wooden box.
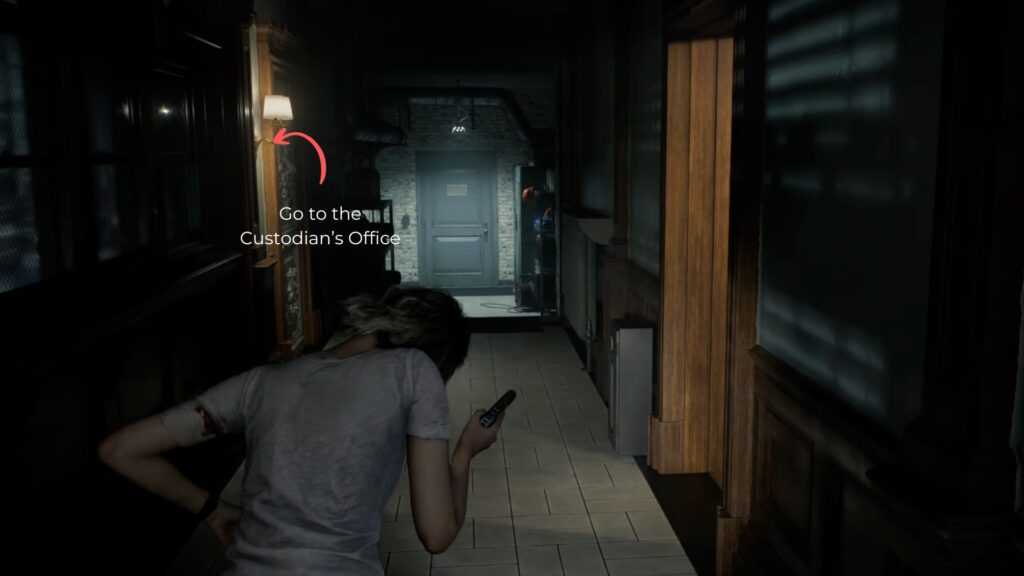
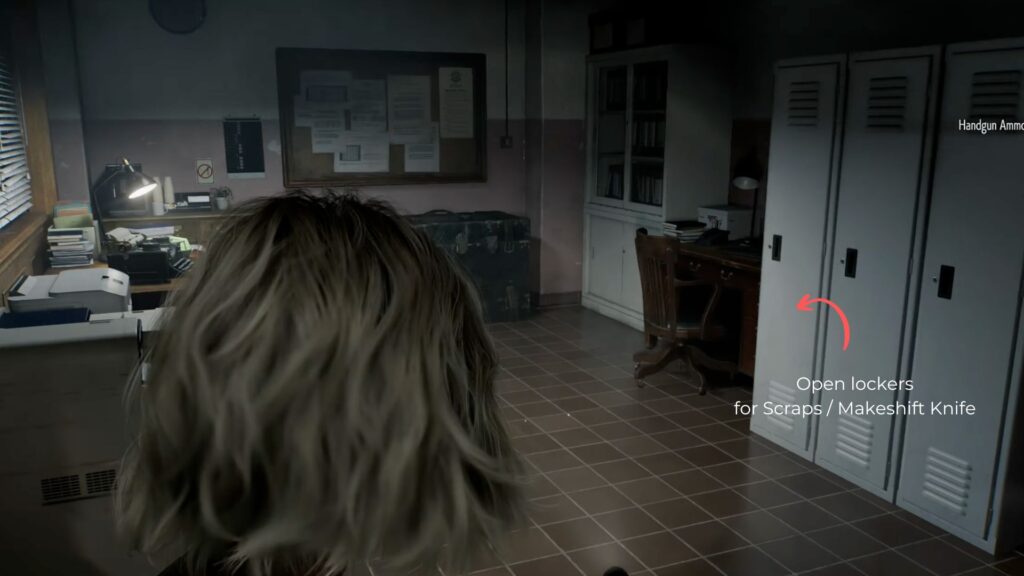
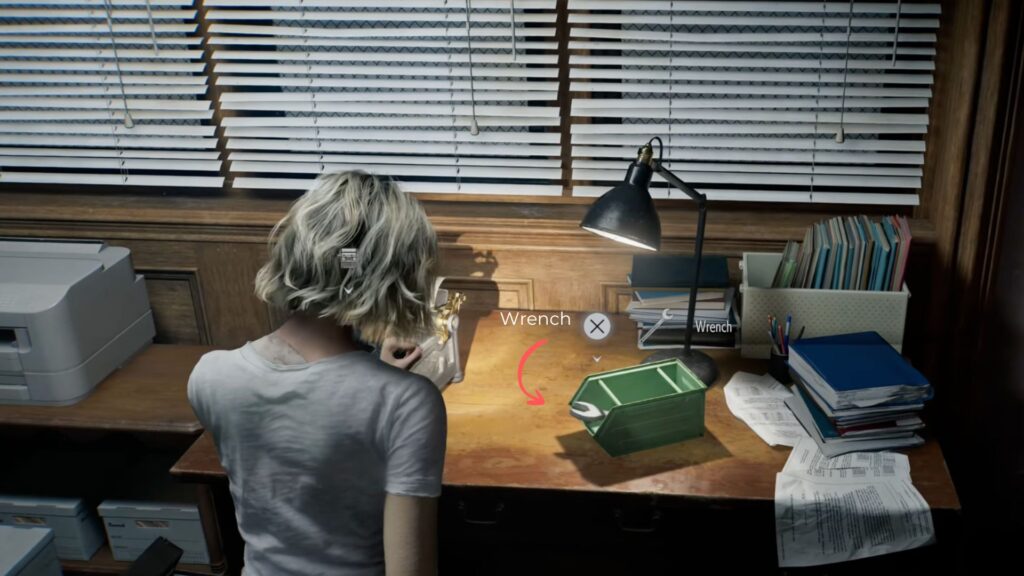
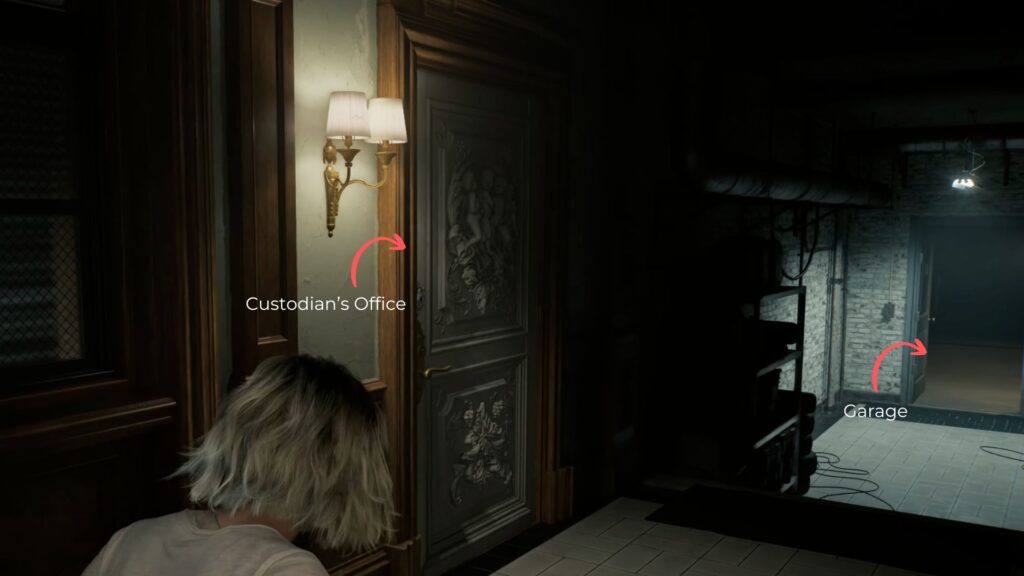
Them, you can enter the Custodian’s Office on the left. Check the lockers to find a second Lockpick and collect the Scrap on the right side as you enter. There’s also a safety trunk here if you need to store anything. Most importantly, pick up the Wrench from the desk — this will open the broken valve door near the dining room. Before you leave, read the Construction Notice on the opposite wall, which confirms there’s a garage accessible through the west wing.
Follow the hall back through the kitchen area, collecting blood from the buckets along the way. Continue into the dining area and go through the left door into the room with the broken window. Use your Level 1 wristband to open the locked door there, which contains Handgun Ammo and a Hip Pouch.
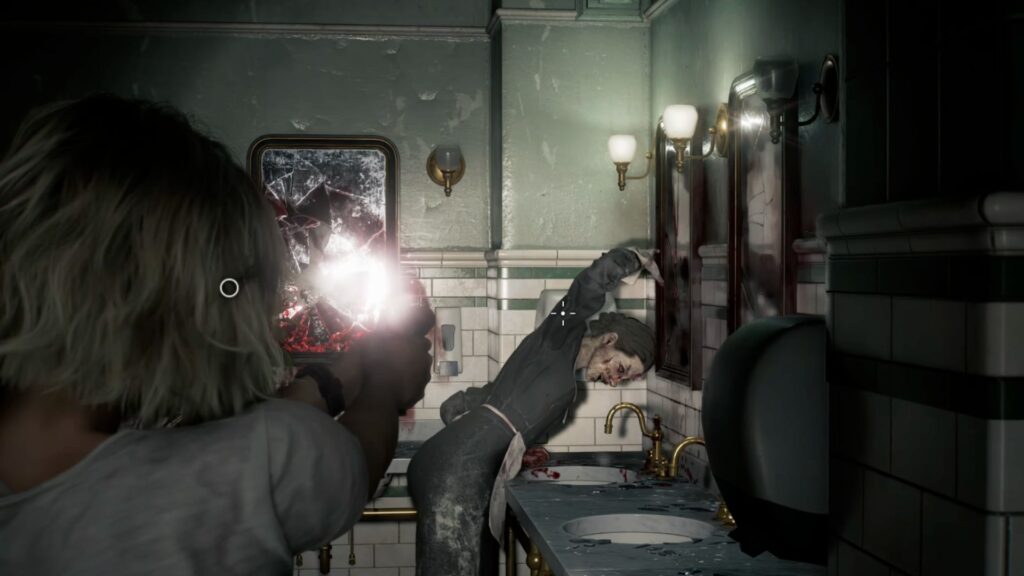
Return to the west wing center area. Only enter the restroom if you need to fill your Blood Collector — there’s an infected maid cleaning the mirror inside, and it’s not worth the risk otherwise.
Continue into the dark hall to find another Makeshift Knife on a console table. Across from it, open the small drawer with your second Lockpick for another Rare Metal.
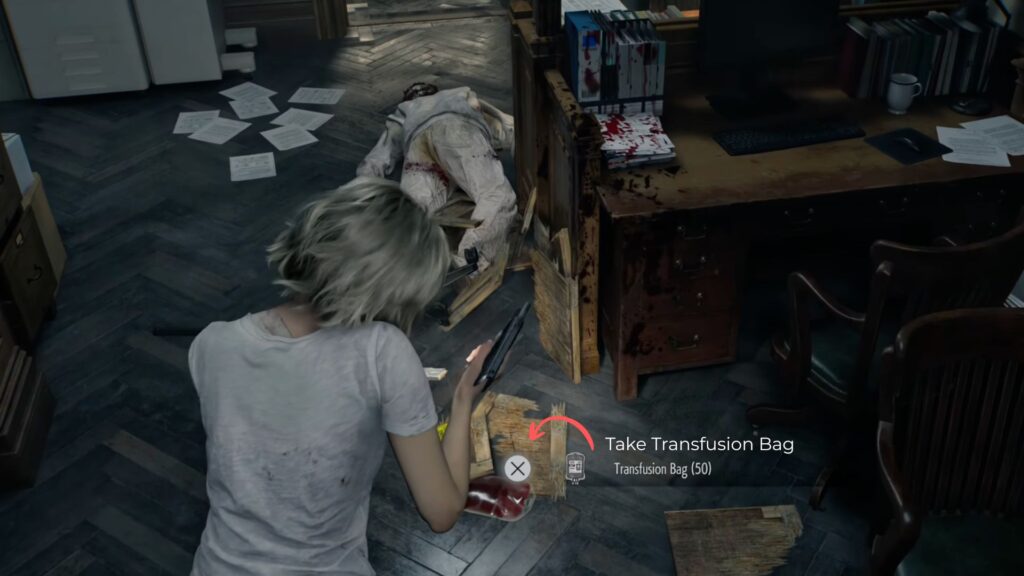
Head up to the third floor from the room across from the Custodian’s Office to collect more Ammo and Scrap. On the second floor, go through the door into the large office. Two infected will appear as you roam around the room — deal with them. One drops a Transfusion Bag you can use to refill your Blood Collector.
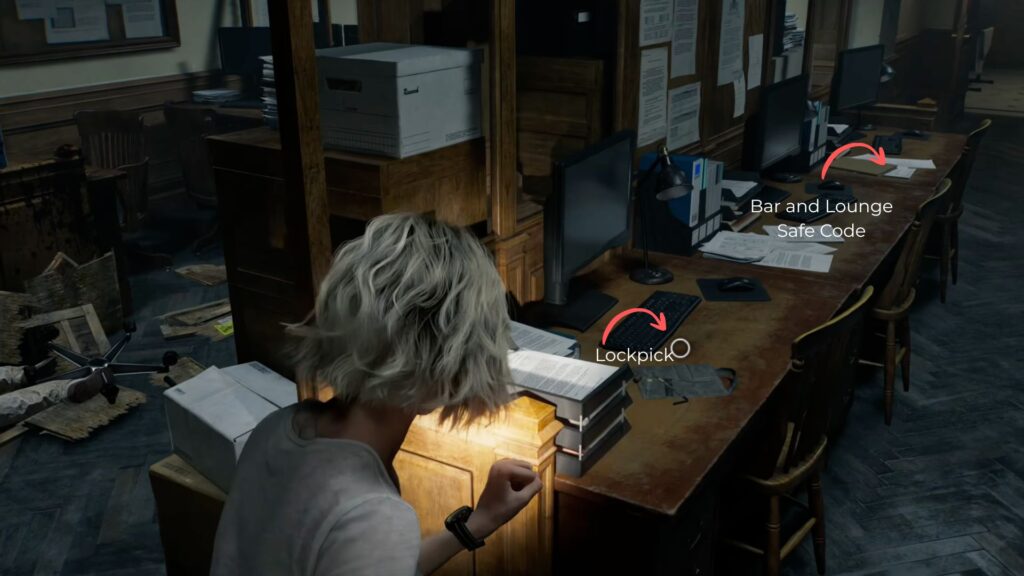
Along the back row of desks, you’ll find:
- A Lockpick and the Bar and Lounge Safe Code.
- Also pick up the Background Check on Grace Ashcroft from one of the tables.
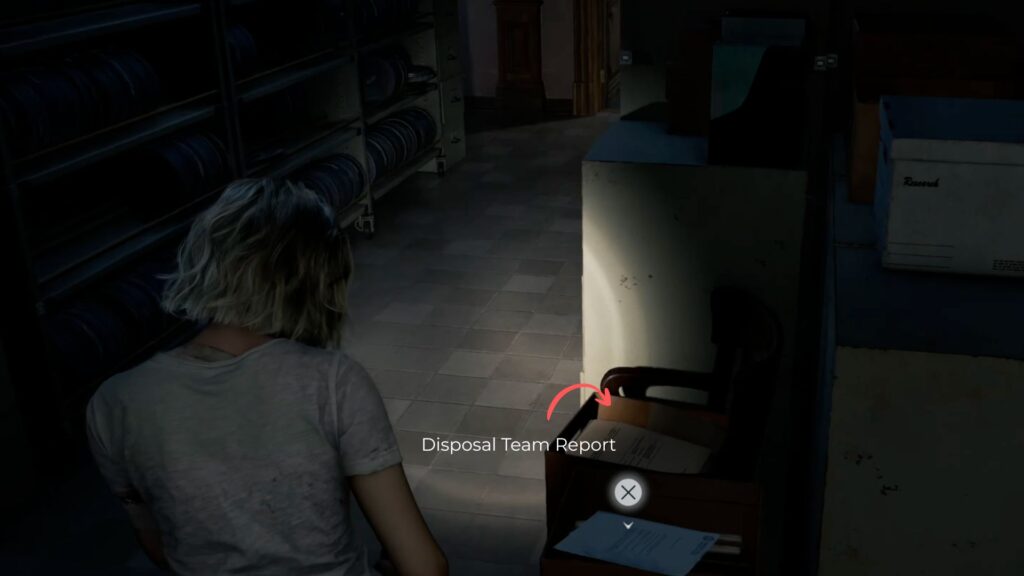
In the file room attached to this office, collect:
- The Makeshift Knife from one of the lockers
- An Empty Injector from the file shelves
- The Disposal Team Report from the top of the cardboard boxes, and more Ammo in the corner.
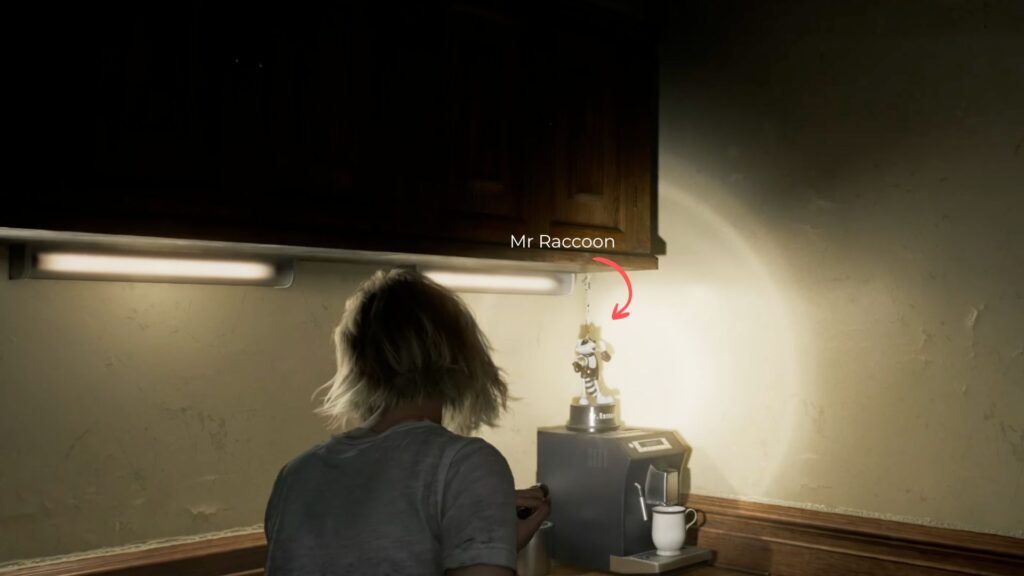
- Check the pantry at the back of the office for the third Mr. Raccoon of the chapter.

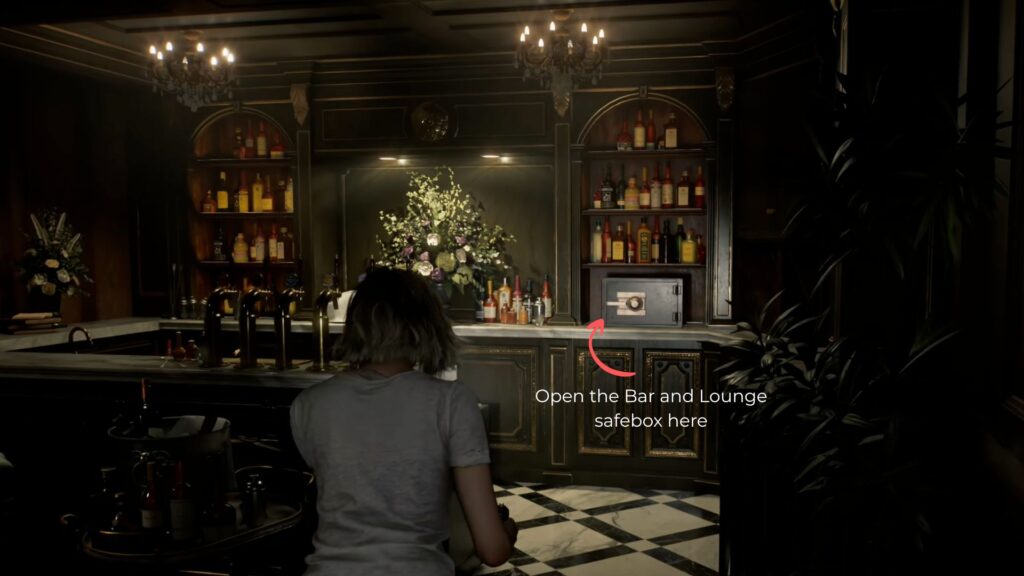
Exit through the pantry door and head right to the Bar and Lounge. Use the safe code to open the bar safe: ← 10, → 80, ← 30. Inside you’ll find three Antique Coins.
Head back through to the Chairman’s Office on the second floor balcony overlooking the dining area. Open the small drawer in front of the room with your Lockpick for another Rare Metal. Then return to the Parlor in the west wing and spend 4 coins on the Steroids to increase your max health.
The Garage
Now, what you need to do is access the garage through the west wing area. This area is directly next to the Custodian’s Office. So if you can, stop by at the Custodian’s Office first to store items and save your progress.
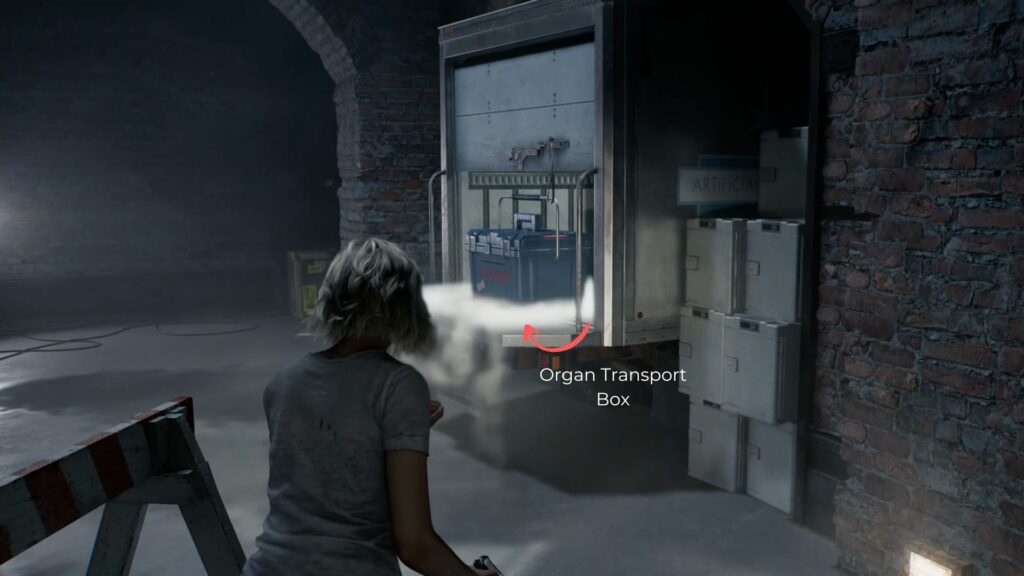
Follow the garage path until you find a chiller lorry with its back open — inside is an Organ Transport Box. Equip it, and collect the Ammo in the corner of the garage.
Without warning, a tractor crashes through the garage wall from behind. Take out the infected driver, then crouch under the tractor to find a newly opened path into the car garages beyond. Head inside and collect extra Ammo from the wooden boxes.

The Broken Valve Door
Return to the broken valve door near the dining room — the Chef is still roaming the west wing, so stay alert. Use the Wrench to finally get the door open. Inside you’ll find an Artificial Heart, Scrap, a Transfusion Bag, and extra Ammo.


Your next objective is to place the heart into the body lying on the operating bed in the east wing. So, head there and insert it.

An infected doctor and a second creature will attack as you do — eliminate them both. Also be aware that the massive monster, Chunk, patrols the second floor of the east wing. Watch his movements and only advance when he’s distracted.
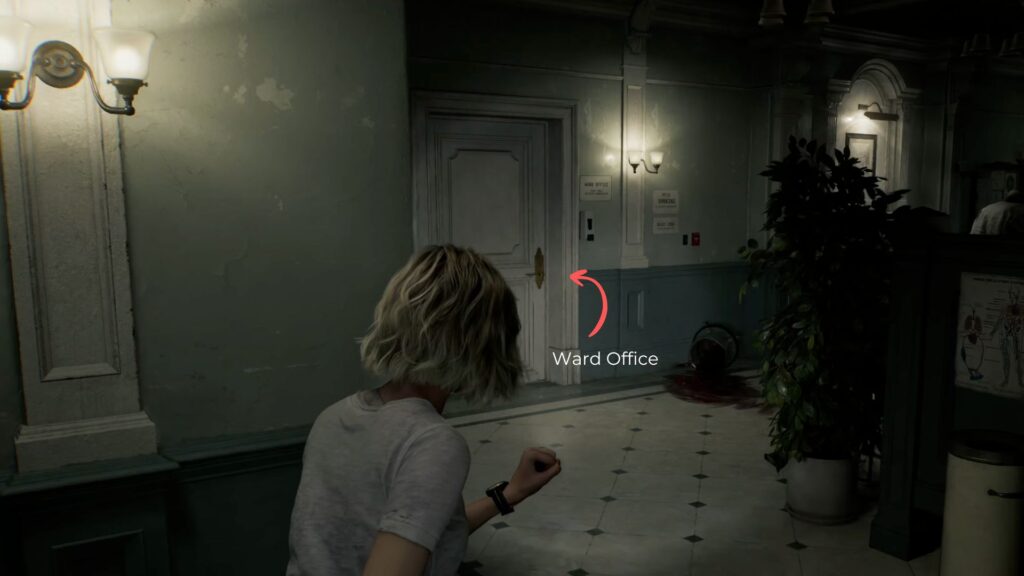
The Ward Office and the Waiting Room Safe
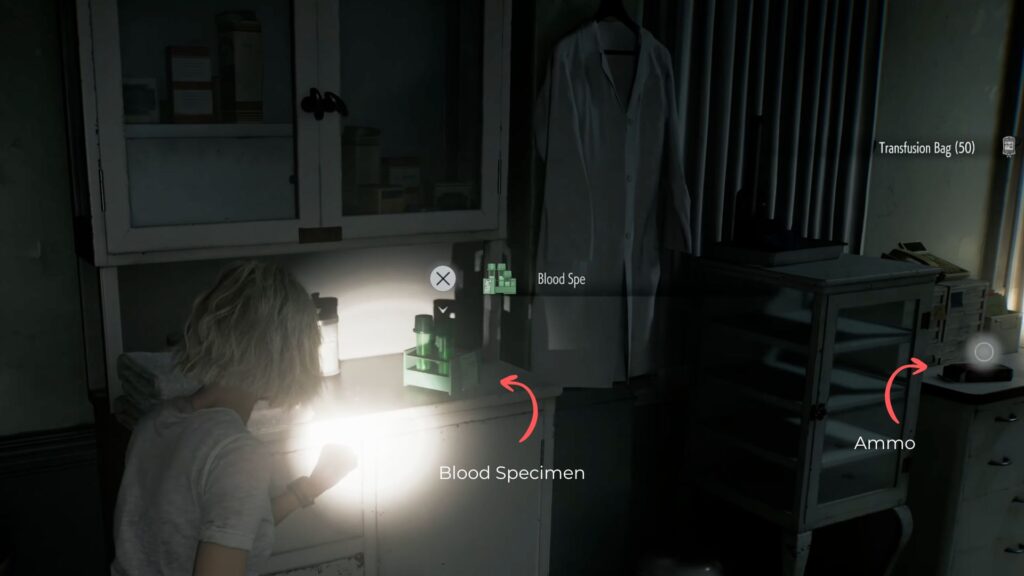
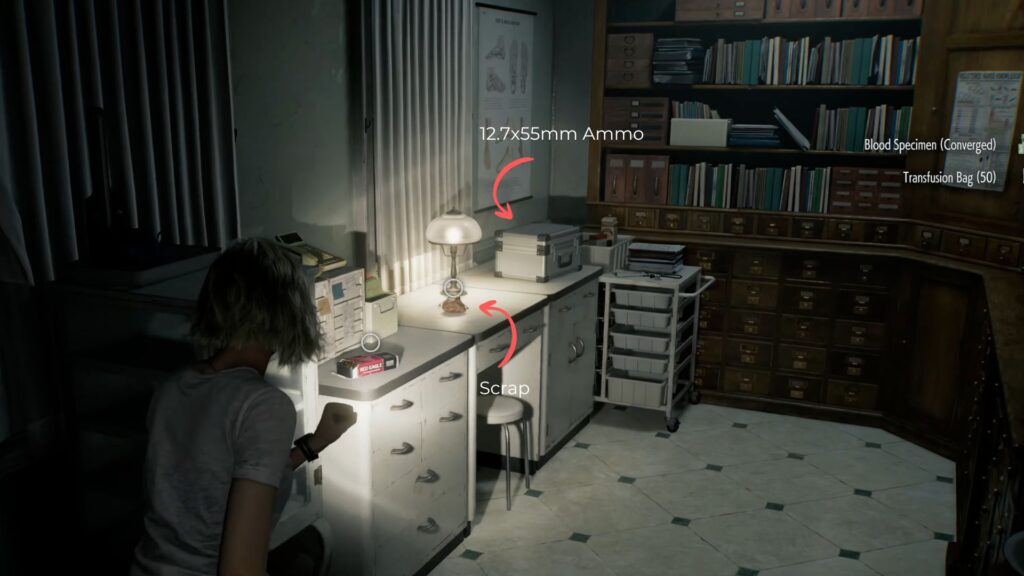
Now, since you’re already in the east wing, go to the Waiting Room (located on the right side of the hallway close to Isolation Ward). Then, enter the Ward Office on the left side. On the desk, collect the Green Blood Specimen (Converged). Also grab the Ammo, Scrap, 12.7x55mm Ammo from the steel luggage, and an Empty Injector inside.
Back in the waiting room itself, find the Safe Replacement Letter on the stacked files. It lists three safe locations:
- East Wing 1F Waiting Room
- West Wing 2F Bar and Lounge
- East Wing 1F (third entry blurred and illegible)
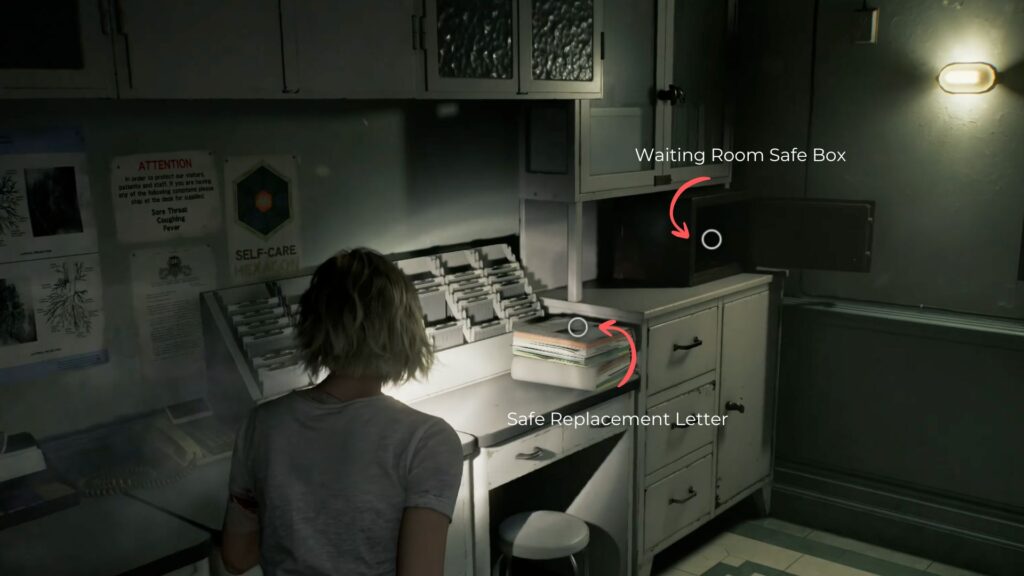
The waiting room safe is right next to the letter — open it with this code: ← 10, → 80, ← 30 to collect more Antique Coins.
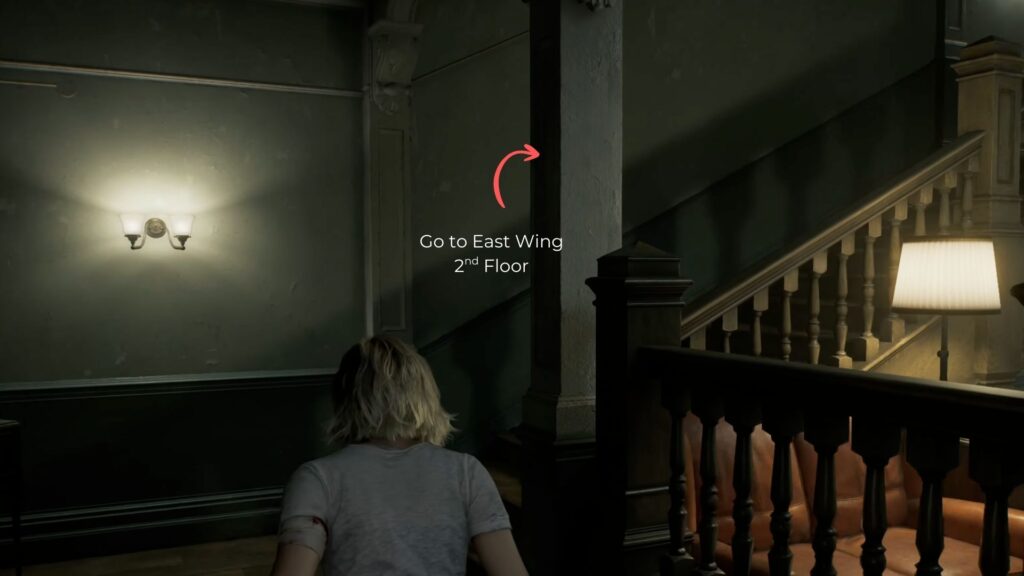
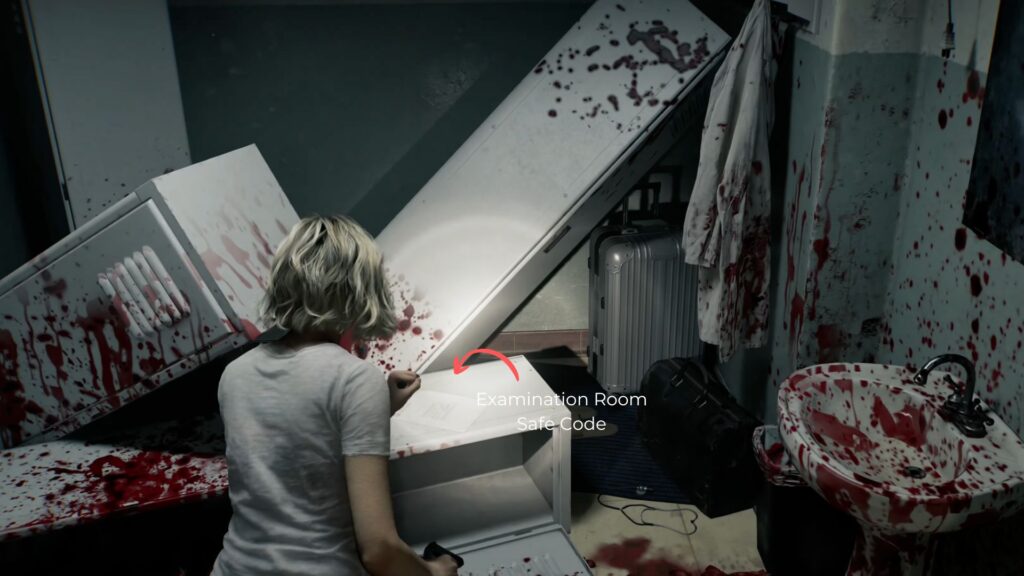
Head to the second floor of the east wing. Enter the area where you first encountered Chunk — he’s moved on, so it’s safe now. Collect the Scrap, Coins, and the Examination Room Safe Code inside.
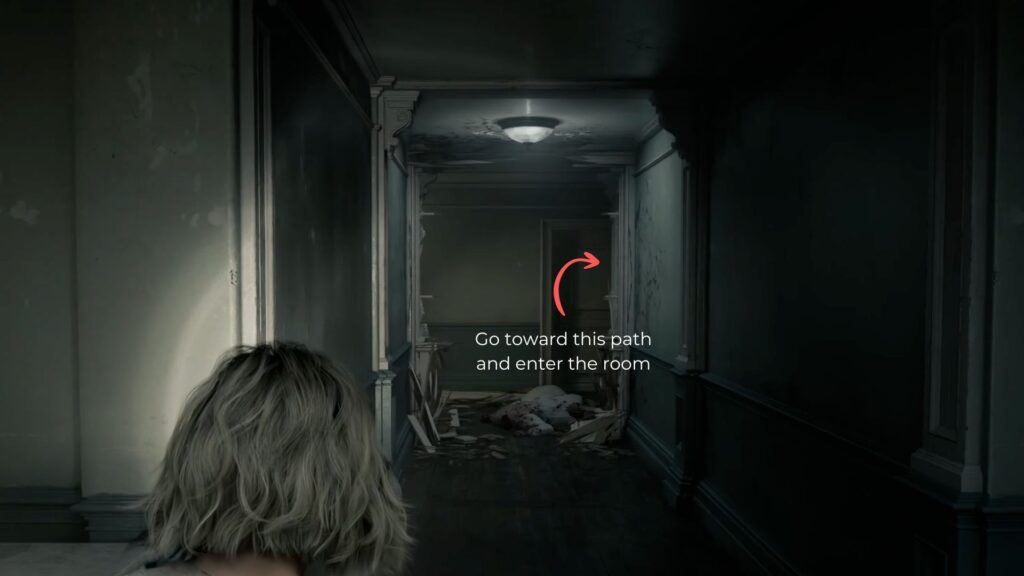
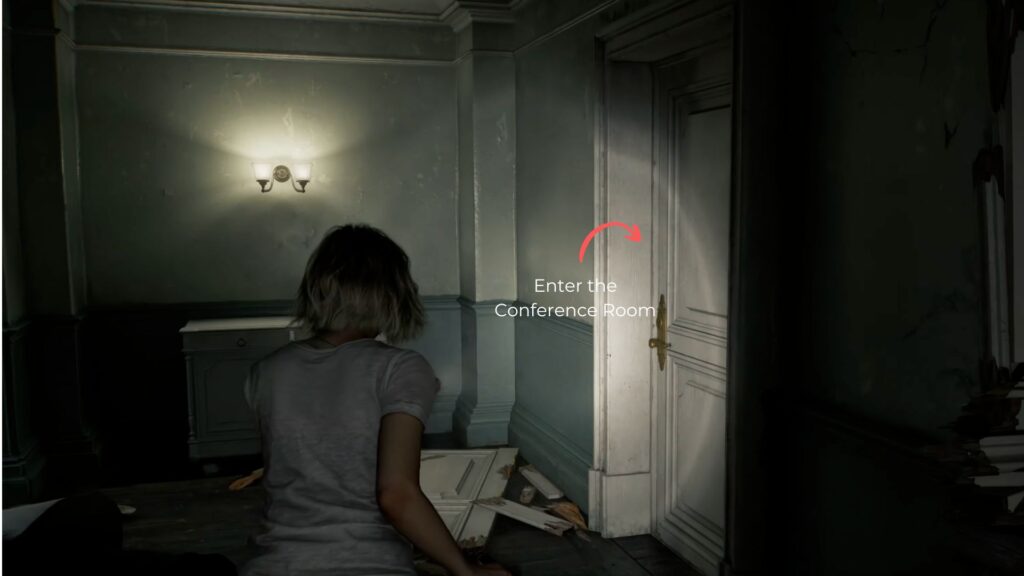
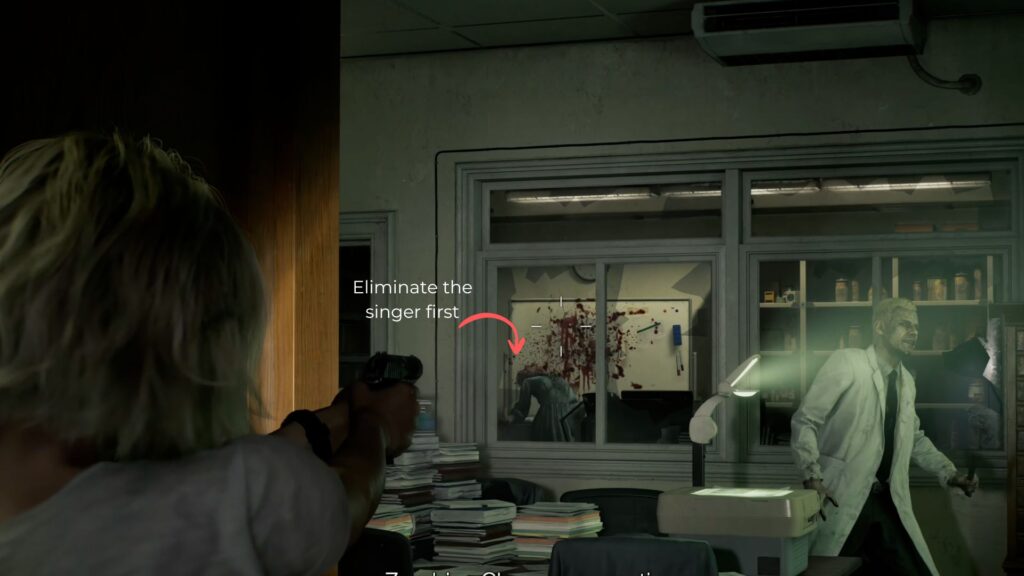
Then enter the Conference Room on the right. where you can hear someone singing. The room is full of infected nurses and doctors, including an infected singer who can disorient you with her screaming — take her out first before dealing with the rest.
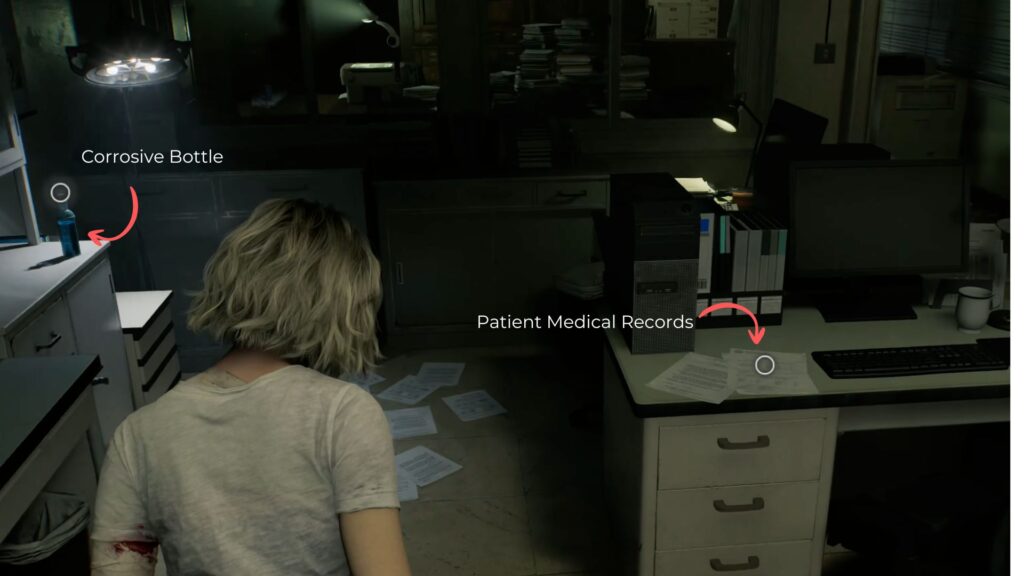
Once the room is clear, head to the back office to find Patient Medical Records documenting unusual behavior across several patients. On the left side cabinet, you’ll finally find the Corrosive Bottle.
The Sun Quartz
Head back to the Lead Researcher’s Office and save your progress. Then, go through the door next to the typewriter table — a cutscene plays.
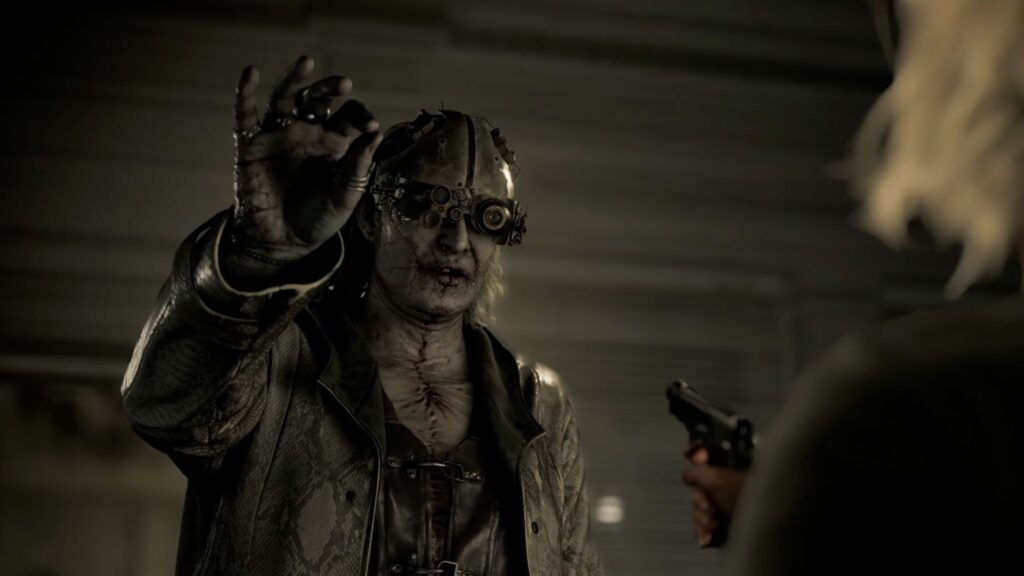
Grace finally comes face to face with Victor Gideon. He tells her that through Grace, something named Elpis can finally be set free, claiming his master made Grace who she is. He then announces that Phase Two is about to begin. The cutscene cuts to the isolation ward, where a patient is bleeding, before ending with Grace hiding from Victor.
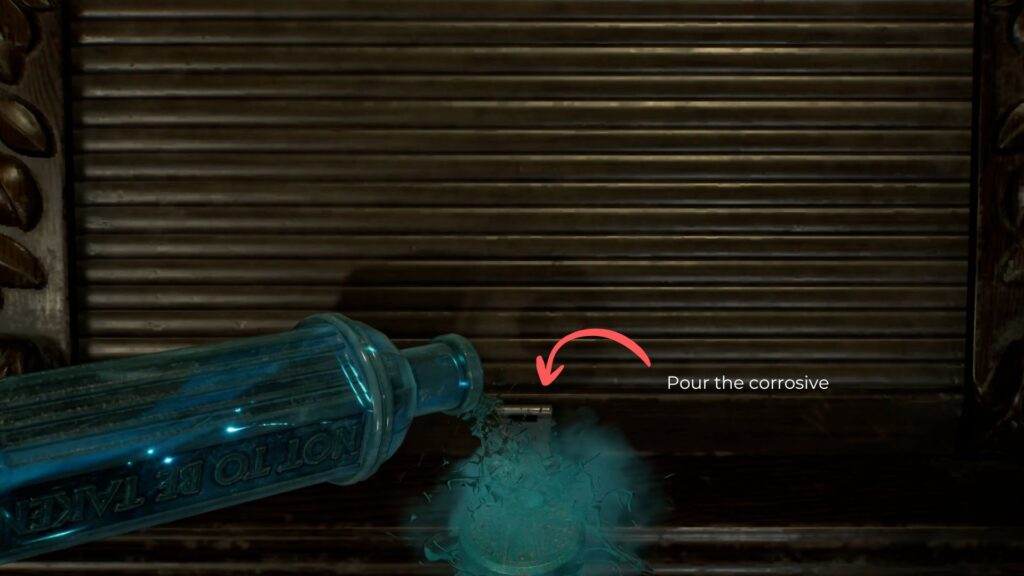
Return to the room once Victor is gone. Use the Corrosive Bottle on the padlock securing the large black machine. Enter the code Star – Sun – Moon – Sun, which you can confirm from one of the Lead Researcher’s photos. The machine opens to reveal the Sun Quartz.
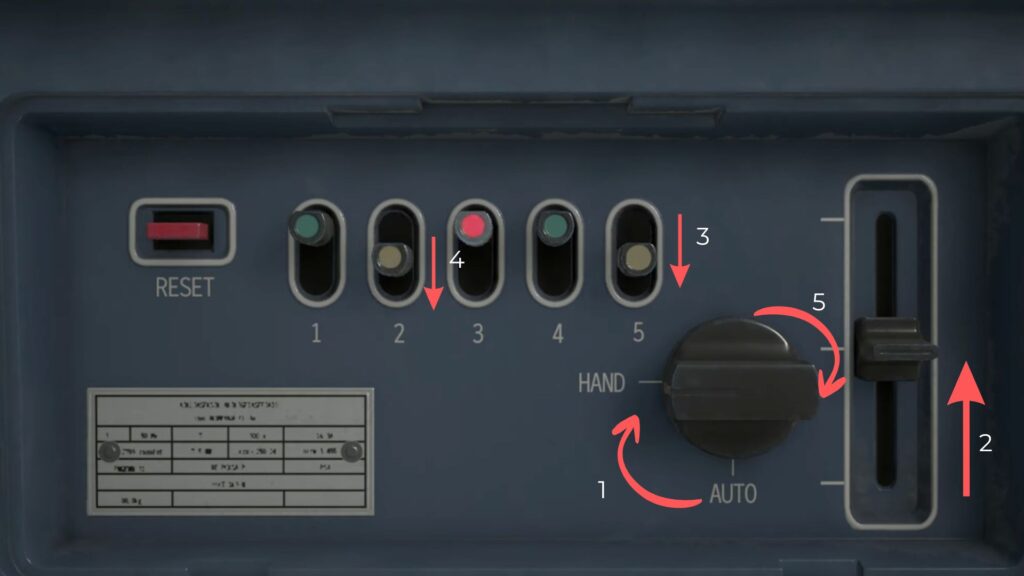
You’ll also find a Leather-Bound Notebook here that reveals the code to open the Organ Transport Box in the garage. So open your inventory, select the box, and follow these steps exactly:
- Turn the dial from Auto to Hand
- Raise the slide switch on the right halfway up
- Flip the last yellow switch down
- Flip the second yellow switch down
- Turn the dial back to Auto
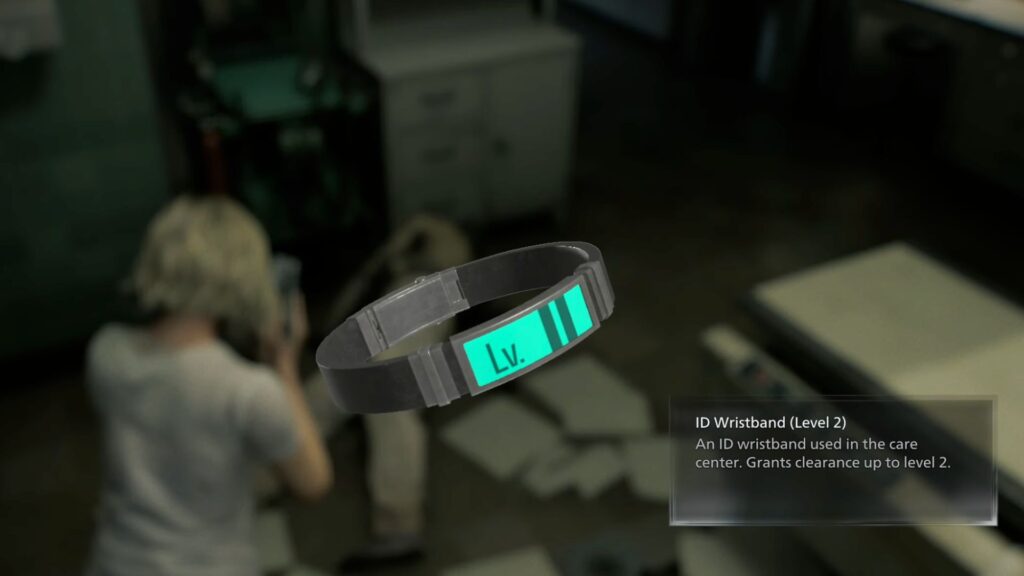
The box opens to reveal Artificial Lungs. Save your progress before heading back to the east wing examination room. Place the lungs inside the body on the operating bed. The dead body will immediately attack you once they’re in — eliminate it and take the Level 2 Wristband from its ankle.

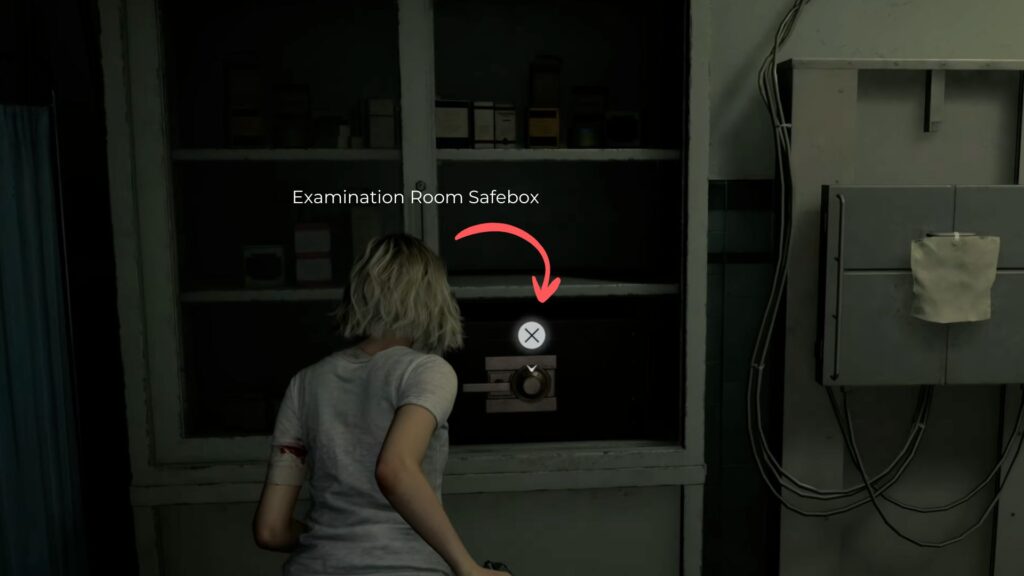
Also open the Examination Room Safebox inside the cabinet, using the code → 30, ← 10, → 50 to collect three more Antique Coins.
The Second Blood Analysis
Return to the west wing second floor office and use the second blood analysis machine if you haven’t already done so. Insert the Converged Blood Specimen into the analyzer.
This puzzle requires a minimum of two steps. Follow these steps:
- Look for a V-shape of passive atoms and click the middle one.
- Then find the next cluster of passive atoms and click the middle one there to activate them all.
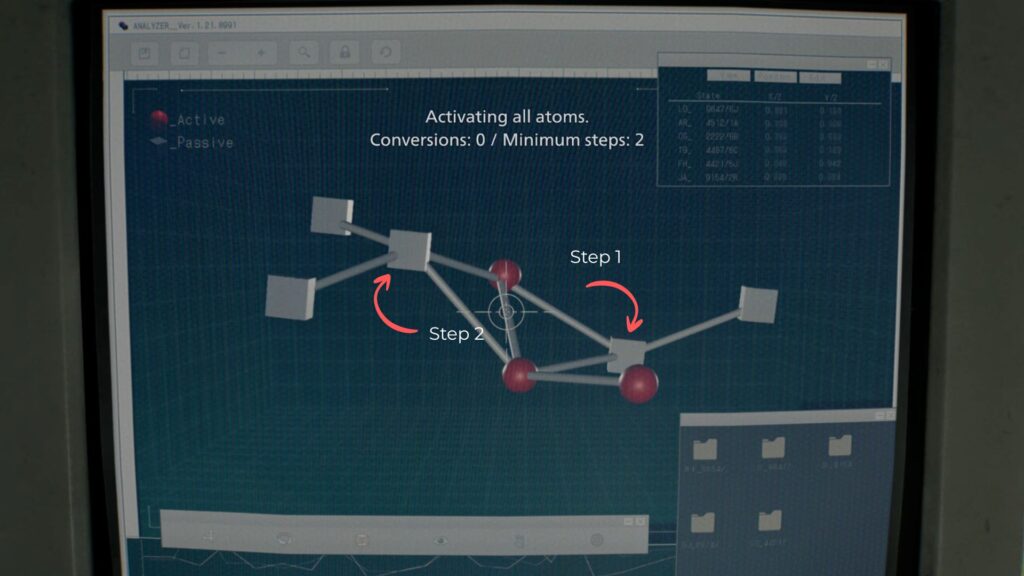
Completing this unlocks recipes for Med Injectors and Magnum Ammo using the Rare Metals you’ve been collecting from locked drawers.
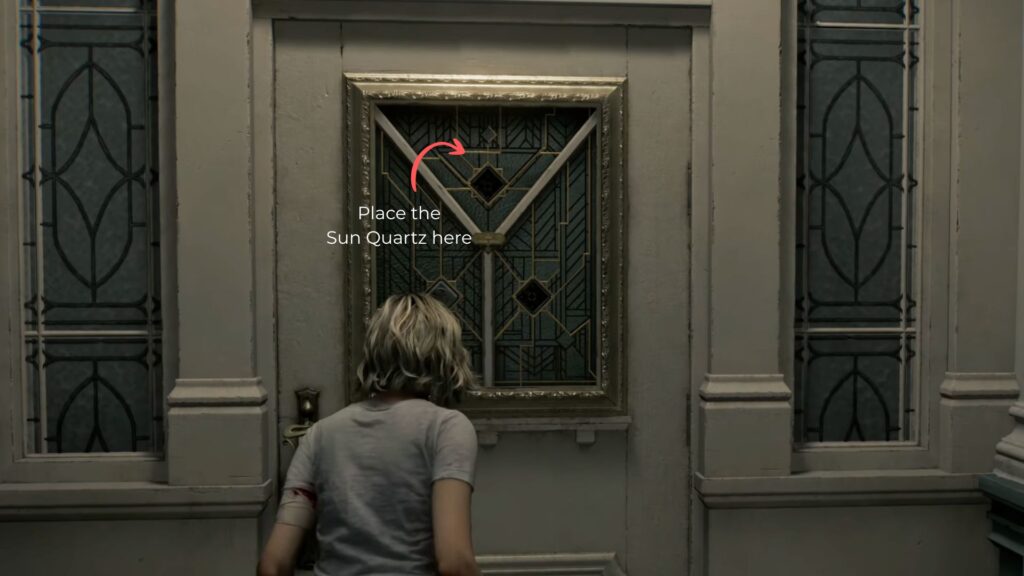
Head back to the central hall and place the Sun Quartz into its slot on the main door. Two down, one to go.
The Star Quartz
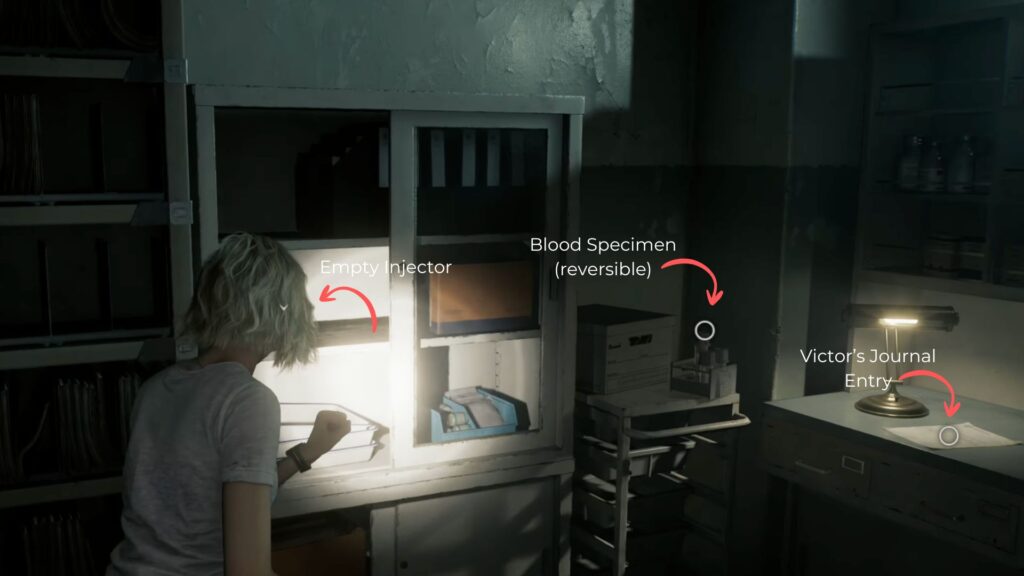
Go to the east wing and follow the path to the back lab. The door on the left can now be opened with your Level 2 Wristband. Inside, collect the Blood Specimen (Reversible), Victor’s Journal Entry from the table, and an Empty Injector from the file cabinet.
The last analysis machine in the adjoining room uses this specimen. Complete the puzzle by following these steps:
- Convert the atom in the center linking all four diamonds.
- Click the middle atom in the left cluster to activate three passive atoms on the left .
- Click one of the furthest points on the bottom left to create three passive atoms along the opposite point
- Click the middle atom in the top left to complete the conversion.
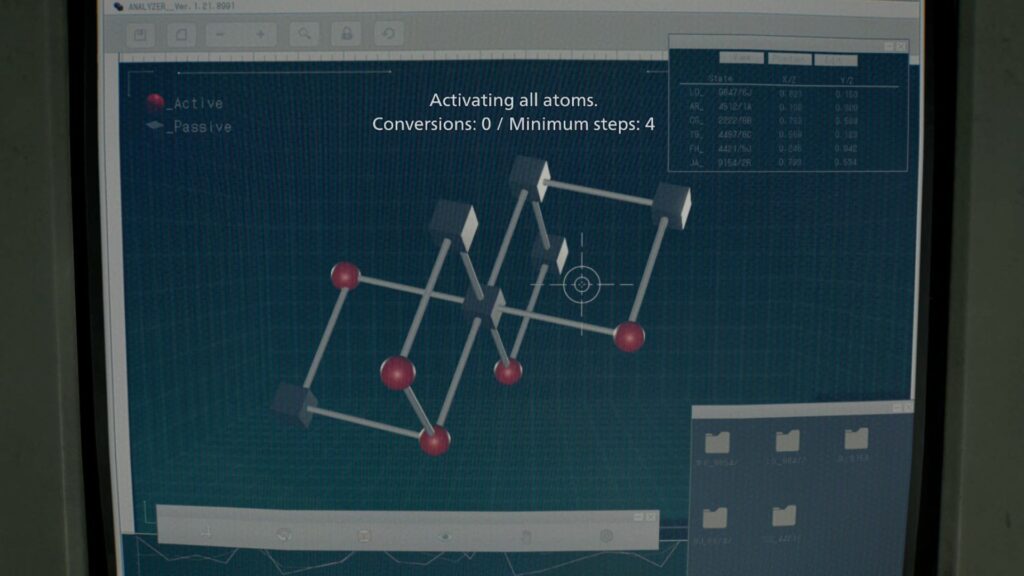
This unlocks recipes for Steroids and Stabilisers. Save your progress and spend any remaining coins at the Parlor before entering the isolation ward.
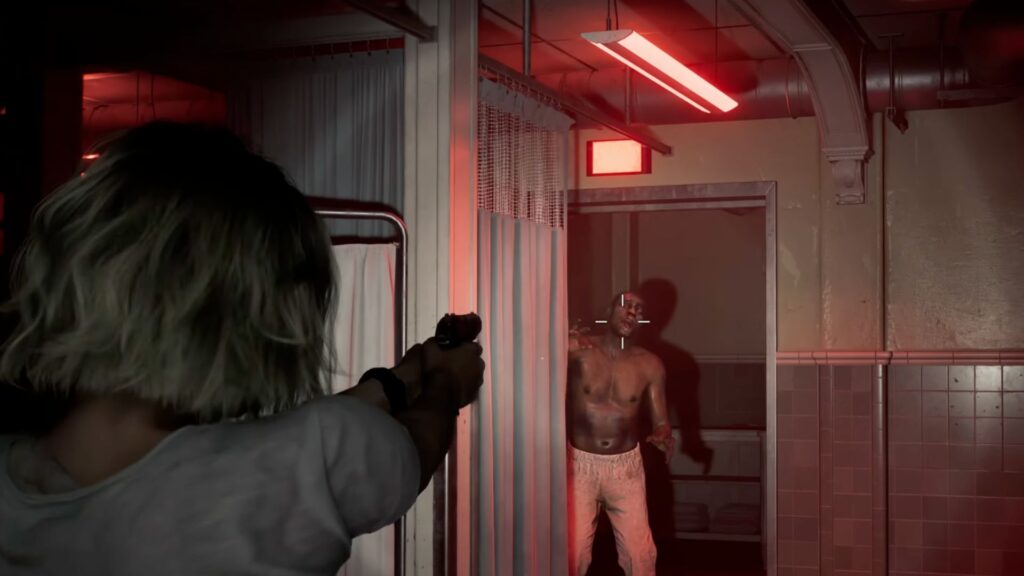
The Isolation Ward is a red-lit maze of curtained spaces and hospital beds. Explore carefully to collect Ammo, Scrap, Green Herbs, and files including Patient Mutation notes and a Nurses Log.
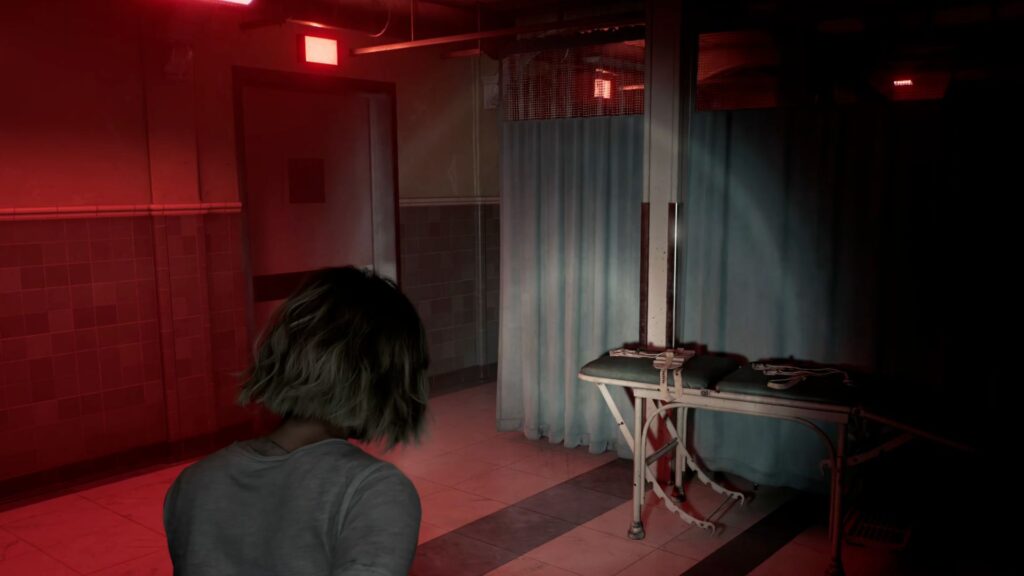
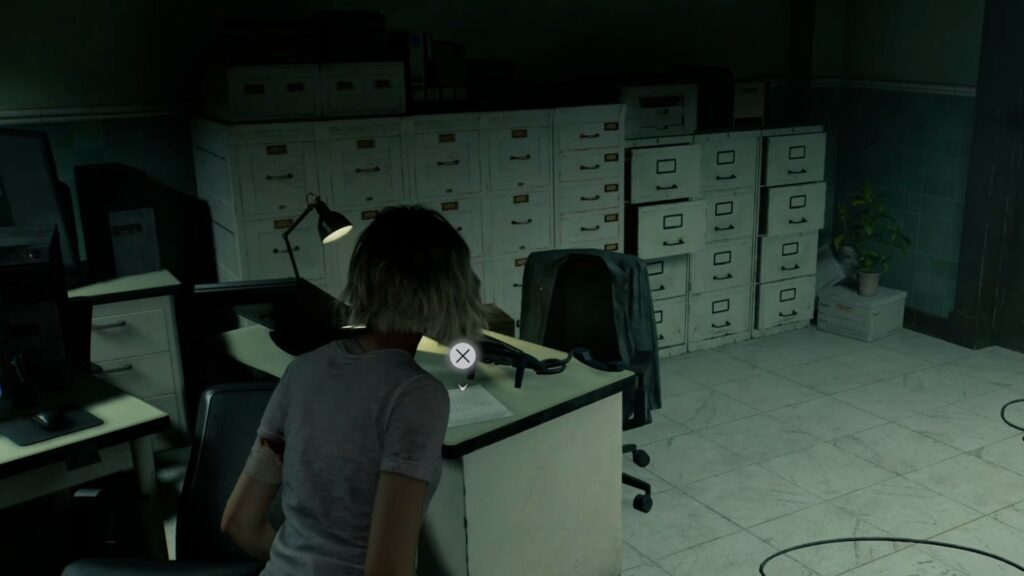
At the far end of the ward, enter the Security Manager’s Office. He’s dead at his desk. On it, you’ll find a photo of both blind girls hugging each other, and a notebook with a Star – Star – Moon – Sun drawing on one of the pages.
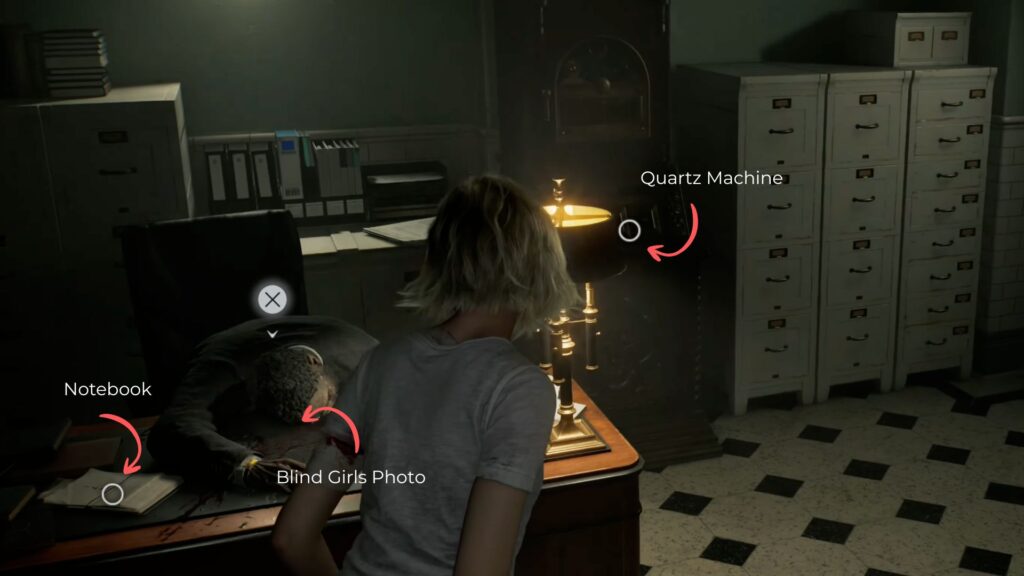
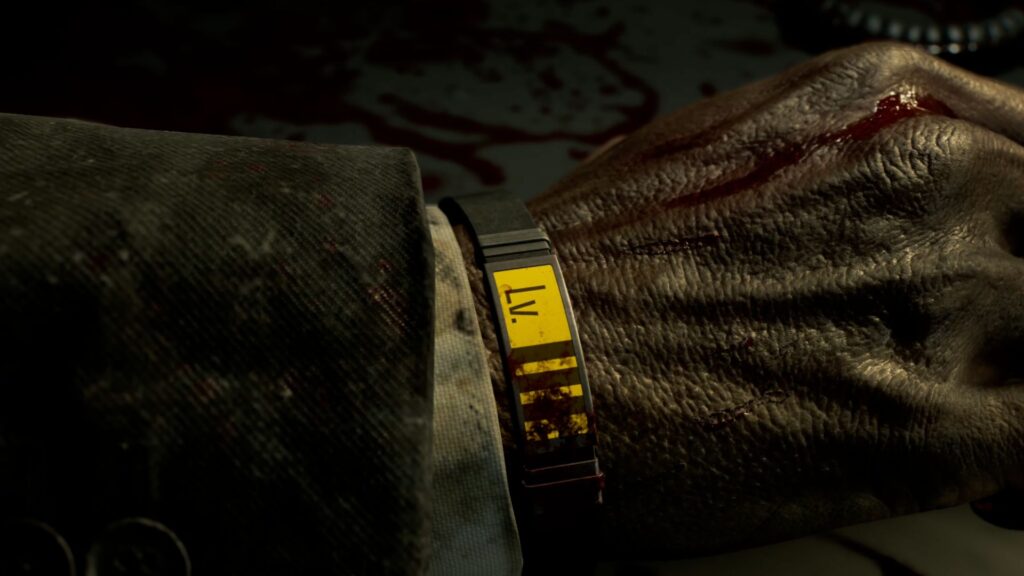
The quartz machine behind his desk uses braille codes — you’ll need the blind girl’s help to operate it. Take the Level 3 Wristband from the manager’s arm before leaving.
Emily
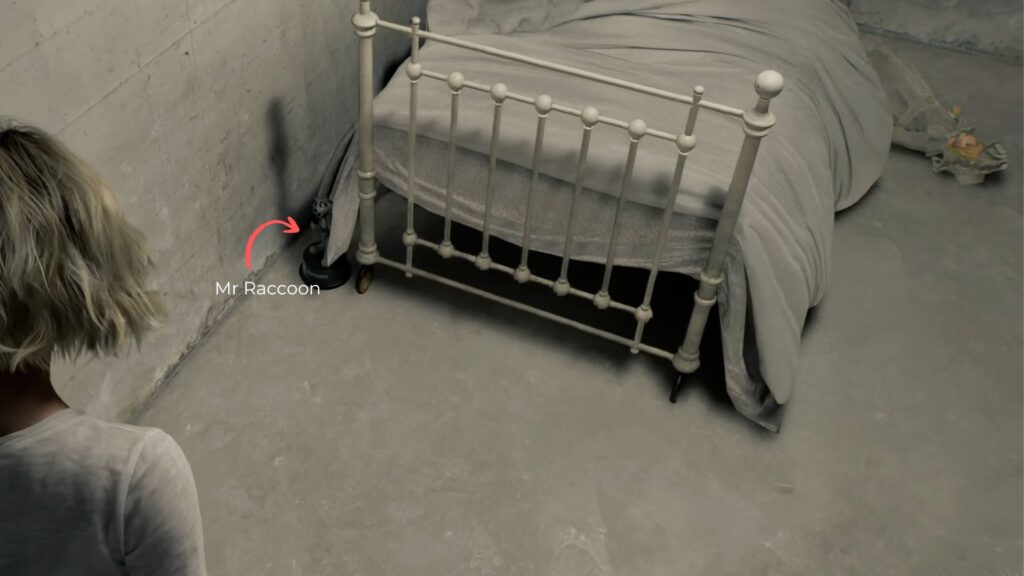
Return to the security room, save your progress, and head to the hidden glass cell. Use your Level 3 Wristband to open the empty cell first and check under the bed to find a Mr. Raccoon.
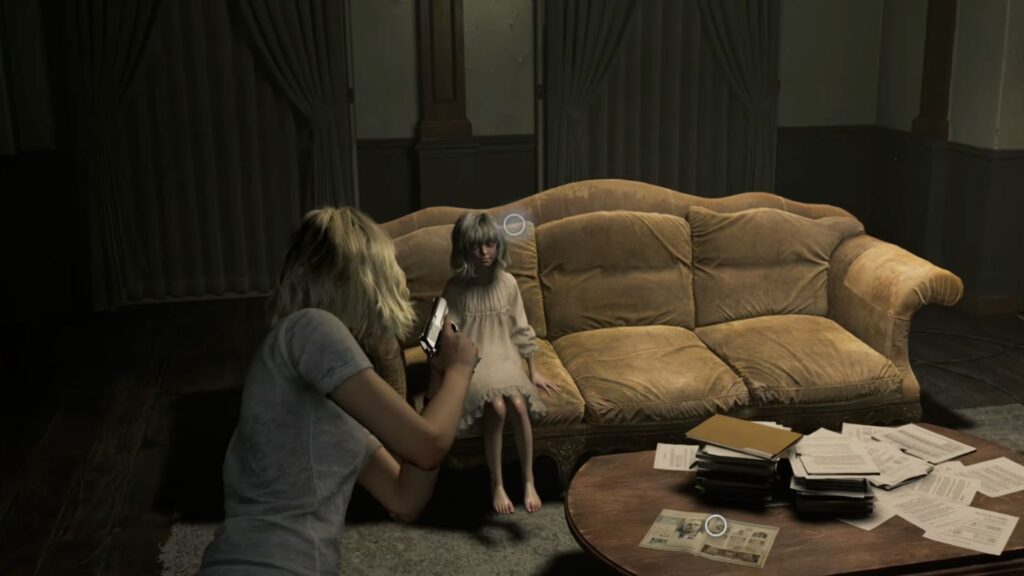
Then open the second cell door. A cutscene plays. Grace learns the blind girl’s name is Emily. Grace asks for her help to solve the braile puzzle. At first, she hesitantly agrees to help Grace read the inscriptions, but then she agrees. Grace will need to carry her given that she’s blind.

While carrying Emily, you cannot fight, crouch, or move quickly. You can set her down on the sofa in the guard office first, so you are able to clear any infected from the hallway first before carrying her through if needed. Chunk is still somewhere in the ward, so stay extremely cautious.
Carry Emily back to the Security Manager’s Office and close the door. Defend against any infected that come through while Emily works on the machine. Craft Med Injectors whenever you can — you’ll need them to keep the infected at bay.

When Emily finishes, she’ll call out to Grace, and she’ll already be holding the Star Quartz. But before you can take it, a mutated patient bursts in, grabs Emily and the quartz, and drags them both down into a darkened pit in the floor. This chapter ends here. Now you’ll need to follow them into the Care Center’s basement.


All Collectibles
| Category | Item | Location/Notes |
|---|---|---|
| Collectible Files | Care Center Pamphlet | Coffee table in the security room |
| Whiteboard Scrawl | On the wall in the security room | |
| Folded Note | Inside doctor’s jacket on the bar and lounge balcony | |
| Email to Manager | On the table beside the black machine in Chairman’s Office | |
| Note to the Chairman | In the dustbin in the Chairman’s back office | |
| Chairman’s Note | Use the pencil on the notebook in Chairman’s Office front room | |
| Blood Compound Synthesis | Center desk in the Blood Lab | |
| Lead Researcher’s Message | Corner table in the Lead Researcher’s back room | |
| Background Check on Grace Ashcroft | Back row of desks in the large west wing office | |
| Disposal Team Report | On cardboard boxes in the file room off the large office | |
| Patient Medical Records | Back office of the conference room, east wing second floor | |
| Victor’s Journal Entry | Table in the back lab, unlocked with Level 2 Wristband | |
| Patient Mutation Notes | Inside the isolation ward | |
| Nurses Log | Inside the isolation ward | |
| Safe Replacement Letter | Stacked files in the east wing waiting room | |
| Leather-Bound Notebook | In the Lead Researcher’s Office after using the corrosive — reveals organ transport box code | |
| Mr. Raccoon | Mr. Raccoon #1 | East wing reception desk |
| Mr. Raccoon #2 | Table in the open area before the east wing stairs | |
| Mr. Raccoon #3 | Pantry at the back of the large west wing second floor office | |
| Mr. Raccoon #4 | Under the bed in the empty glass cell — use Level 3 Wristband | |
| Antique Coins | Various | Bar and lounge piano, roulette table in parlor, bar countertop in parlor, inside green urn in parlor, desk near security room typewriter, waiting room console table, coffee table before east wing stairs, bar safe (3 coins), waiting room safe (3 coins), east wing second floor locked area, examination room cabinet safe (3 coins) |
| Quartz | Moon Quartz | Black machine in Chairman’s Office — code: Moon, Sun, Star, Moon |
| Sun Quartz | Black machine in Lead Researcher’s Office — code: Star, Sun, Moon, Sun | |
| Star Quartz | Emily retrieves it from the Security Manager’s braille machine — taken by mutated patient at chapter’s end | |
| Wristbands | Level 1 Wristband | Dropped by the infected doctor on the floor near the Lead Researcher’s Office stairs |
| Level 2 Wristband | Taken from the body’s ankle in the east wing examination room after inserting the lungs | |
| Level 3 Wristband | Taken from the Security Manager’s arm in the isolation ward | |
| Weapons & Tools | Handgun | On the floor in the dining room |
| Makeshift Knife | Three-door locker in the storage room off the dining room | |
| Second Makeshift Knife | Console table in the dark hall, west wing | |
| Wrench | Custodian’s Office desk — used to open the broken valve door | |
| Blood Collector | Center table in the Blood Lab | |
| Keycards | West Wing Keycard | Taken from the dead doctor in the glass cell room |
| East Wing Keycard | Taken from the armless infected in the parlor | |
| Crafting Items | Blood Specimen (Denatured) | Wall table in the Blood Lab |
| Blood Specimen (Converged) | Ward office desk, east wing waiting room | |
| Blood Specimen (Reversible) | Back lab, east wing — unlocked with Level 2 Wristband | |
| Corrosive Bottle | Left side cabinet in the conference room, east wing second floor | |
| Rare Metals | Various locked drawers throughout the care center | |
| Artificial Heart | Behind the broken valve door near the dining room | |
| Artificial Lungs | Inside the Organ Transport Box in the garage | |
| Upgrades | Hip Pouch | Parlor cabinet — 3 coins (also available in west wing Level 1 locked room) |
| Steroids | Parlor cabinet — 4 coins | |
| Stabiliser | Parlor cabinet — 4 coins | |
| Override Manual | Parlor cabinet — 6 coins | |
| Safe Codes | Bar and Lounge Safe | ← 10, → 80, ← 30 — found in the large west wing second floor office |
| Examination Room Safe | → 30, ← 10, → 50 — found in the east wing second floor locked area | |
| Waiting Room Safe | Same code as Bar and Lounge Safe | |
| Organ Transport Box | Code | Hand → Raise right switch halfway → Last yellow switch down → Second yellow switch down → Auto |
| Other | Red Jewel | Inside Unicorn Trinket Box, Chairman’s Office |
| Haemolytic Injector | Beside the sinks in the east wing examination room | |
| Transfusion Bag | Dropped by infected in large west wing office; also behind valve door |
This chapter is one of the largest and most open chapters in Resident Evil Requiem so far, functioning almost like a full survival horror sandbox across the entire care center. Managing inventory space, rationing ammo, and tracking down the three quartz pieces while avoiding Chunk and the Chef are the central challenges throughout. The chapter ends with Emily and the Star Quartz dragged underground, sending Grace into the basement in the following chapter.