
The chapter opens with Leon captured by Victor Gideon and tied to a chair. After a brief exchange, Leon secretly cuts through the rope binding his hands with a hidden knife and gets into a scuffle with Gideon. Leon manages to grab a gun, but Victor retreats down through the attic door, locking it behind him and warning Leon that he’s a dead man walking. Now, your mission is to find another way out of the attic and locate Victor’s office in the Care Center.
Resident Evil Requiem Care Center Attic Walkthrough (Leon)
Escaping the Attic
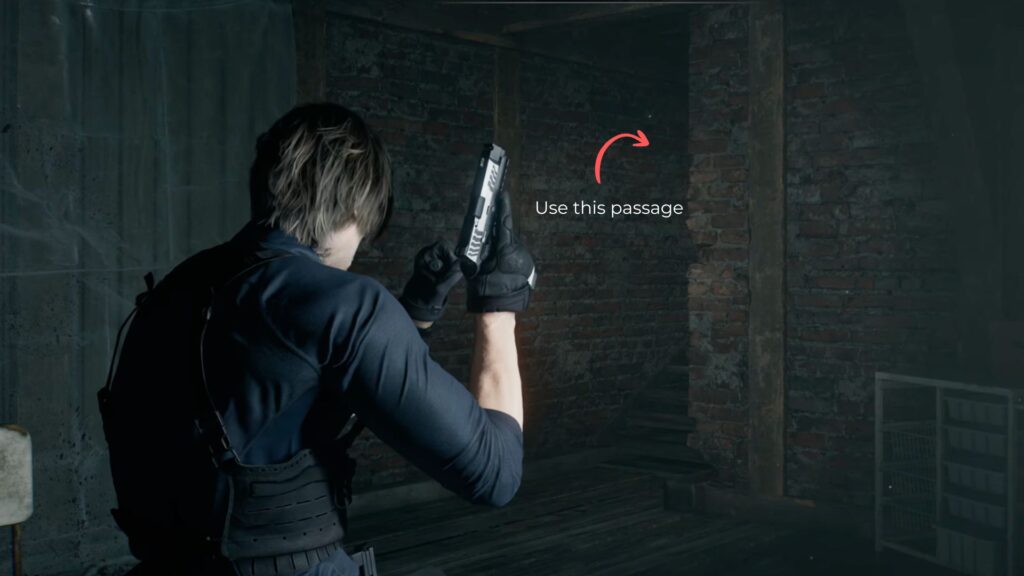
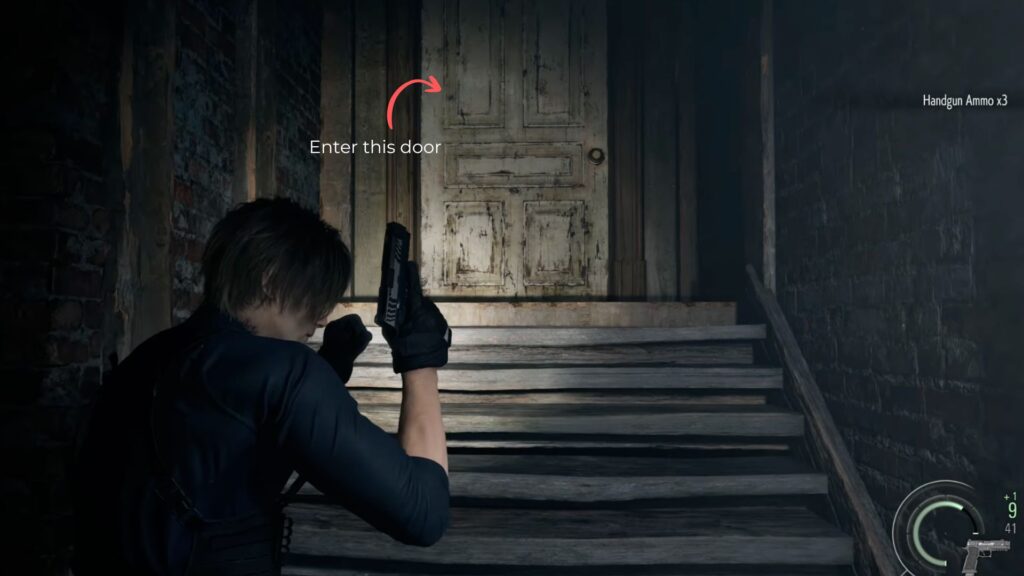
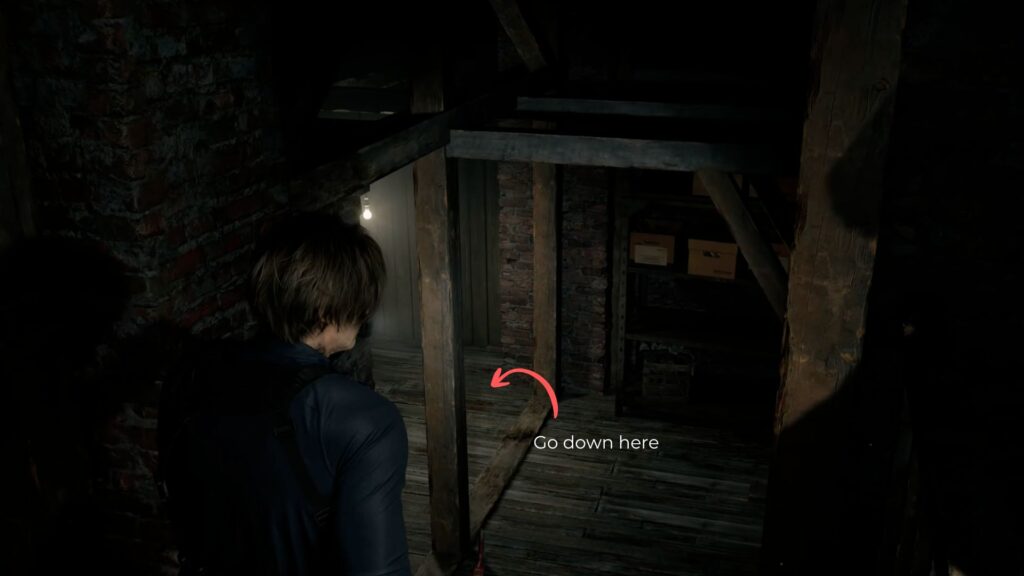
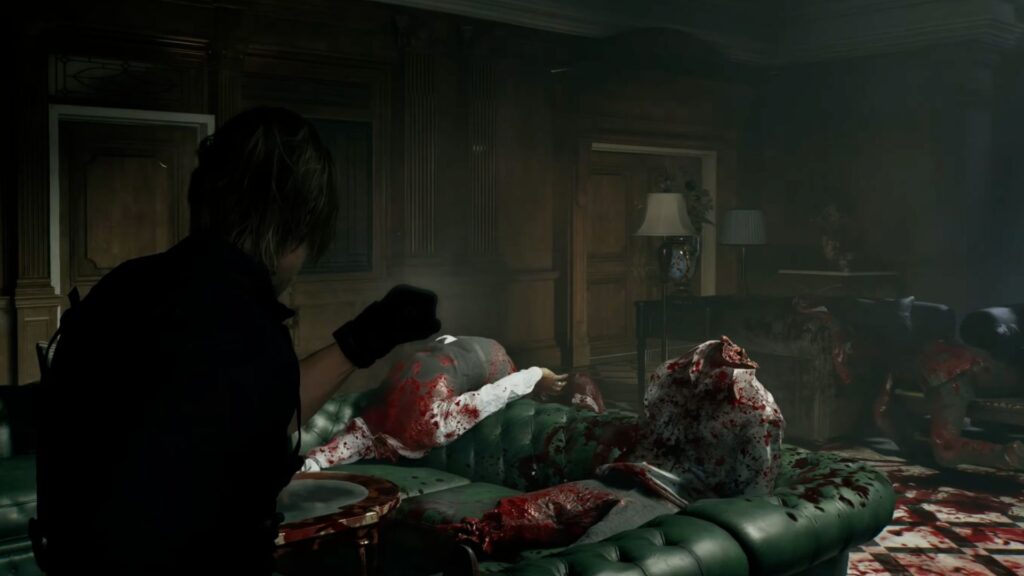
With the attic door locked, you’ll need to find another route out. Look for a small staircase passage in the corner of the attic and follow it forward, picking up any ammo you find along the way. At the end of the passage, you’ll reach a white wooden door — go through it into a room with a Green Herb sitting on top of a desk.

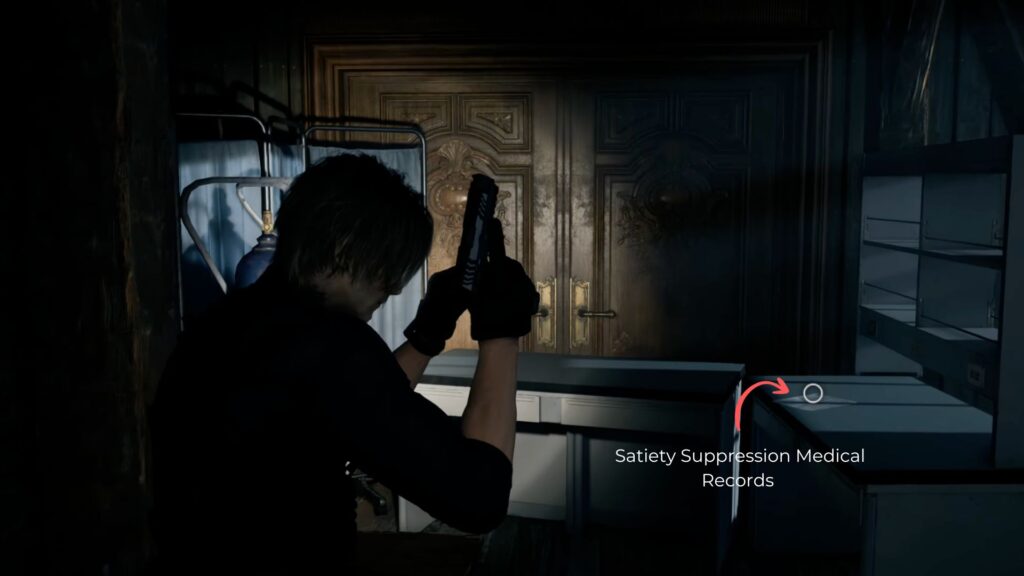
Head deeper into the attic room and check one of the cabinets to find the Satiety Suppression Medical Records file, detailing two infected with highly irregular eating patterns and weight gain.
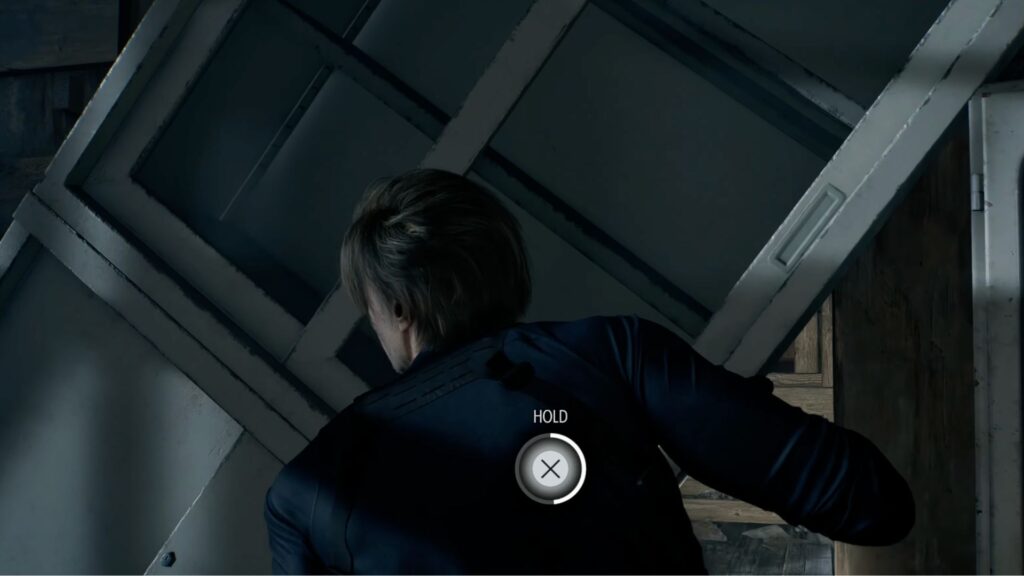
On the right side of the room, you’ll come across a falling cabinet blocking your way. You need to hold it up and push it aside to get through to the next room.
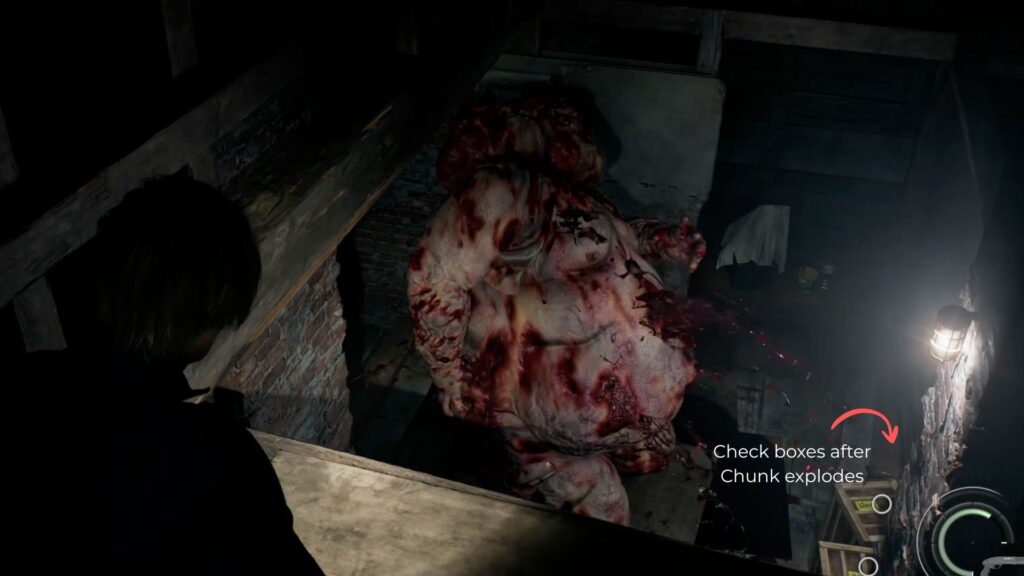
Boss Fight: Chunk
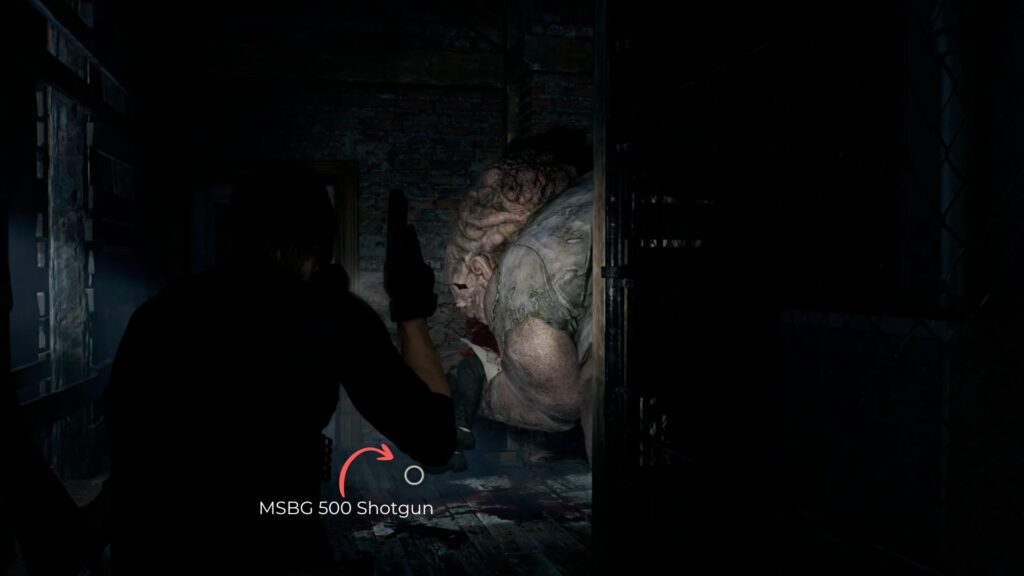
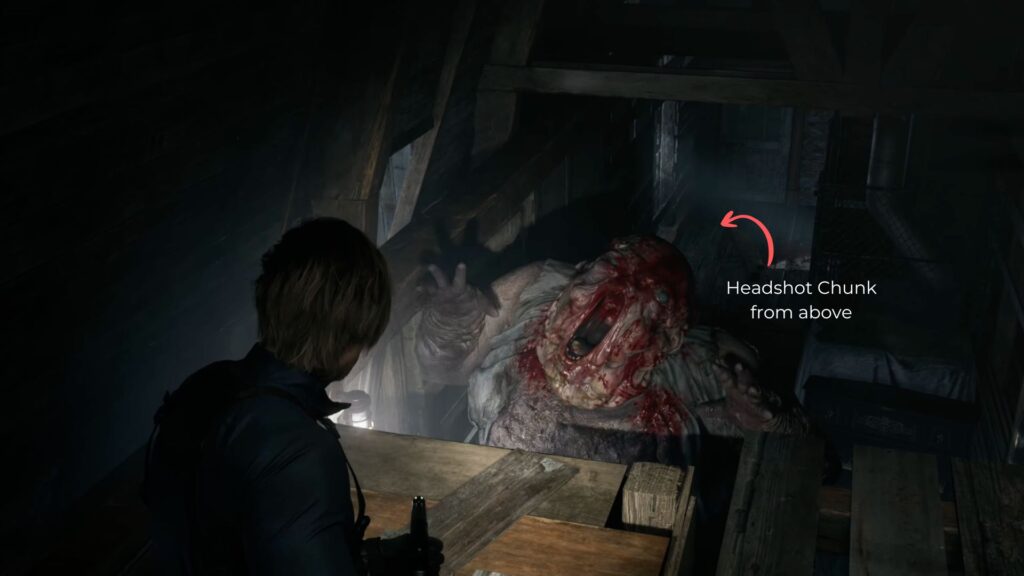
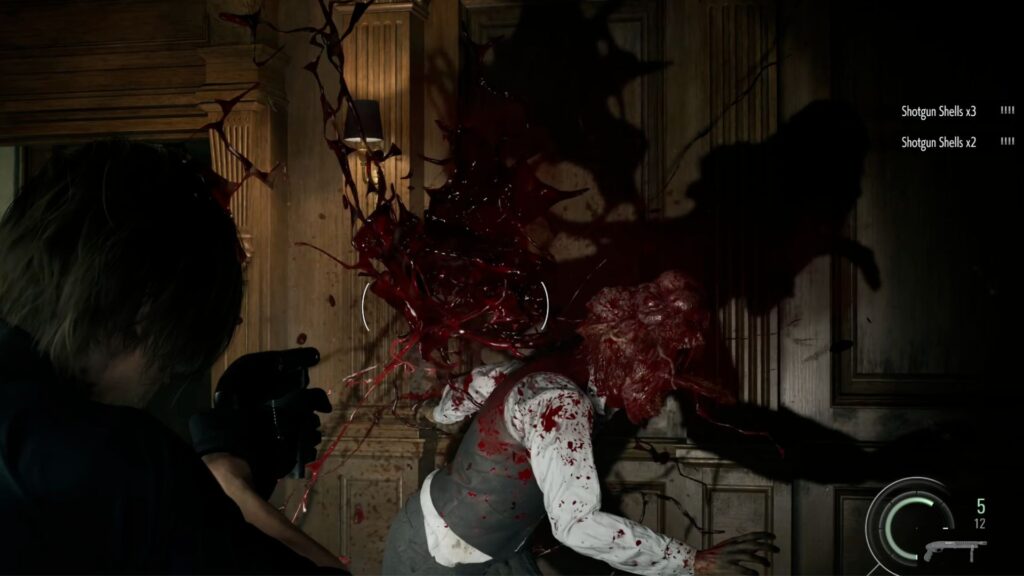
Follow the dark passage beyond until you find another Chunk — the massive infected monster, this time in the middle of eating someone. Before the fight starts, grab the MSBG 500 Shotgun lying on the floor nearby. Don’t miss it because you’ll need it for what comes next.
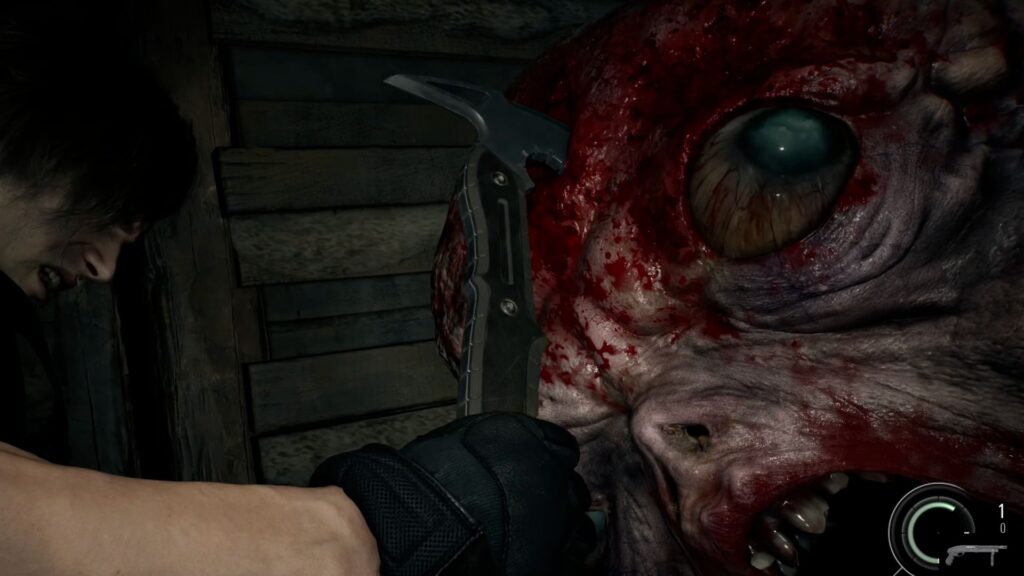
Chunk will immediately set its sights on you. The core strategy here is to keep landing headshots until it staggers and drops, then close in for melee attacks to save your limited shotgun shells. When it gets back up, back away along the passageway you came through and keep picking up any ammo scattered around as you go.
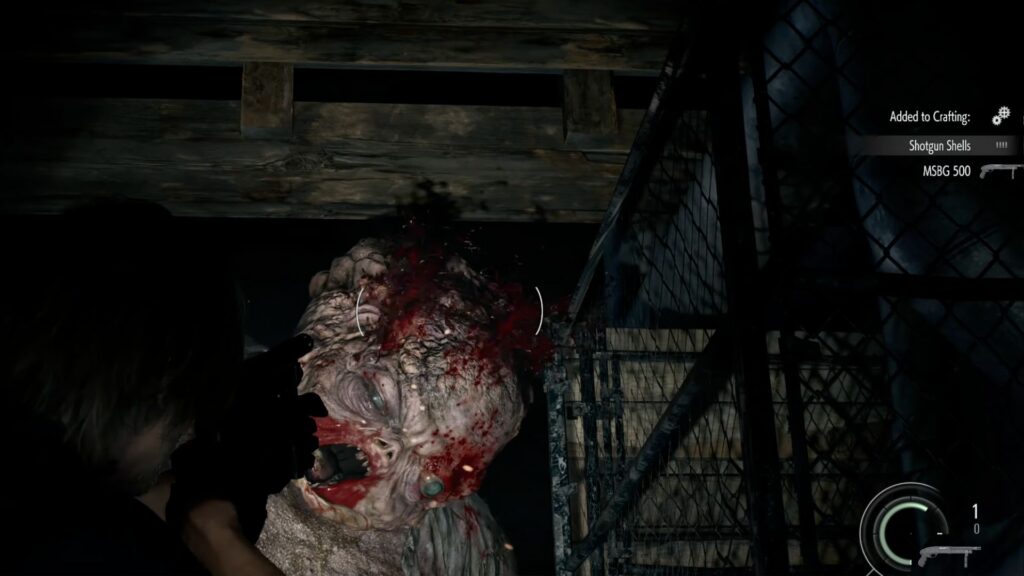
Keep moving around until you’ll find a broken ladder in the area. Climb up onto it to grab more Shotgun Shells on the upper rafter. Shoot Chunk again from the high ground, and when it falls, jump down on top of it and perform a melee attack from above.

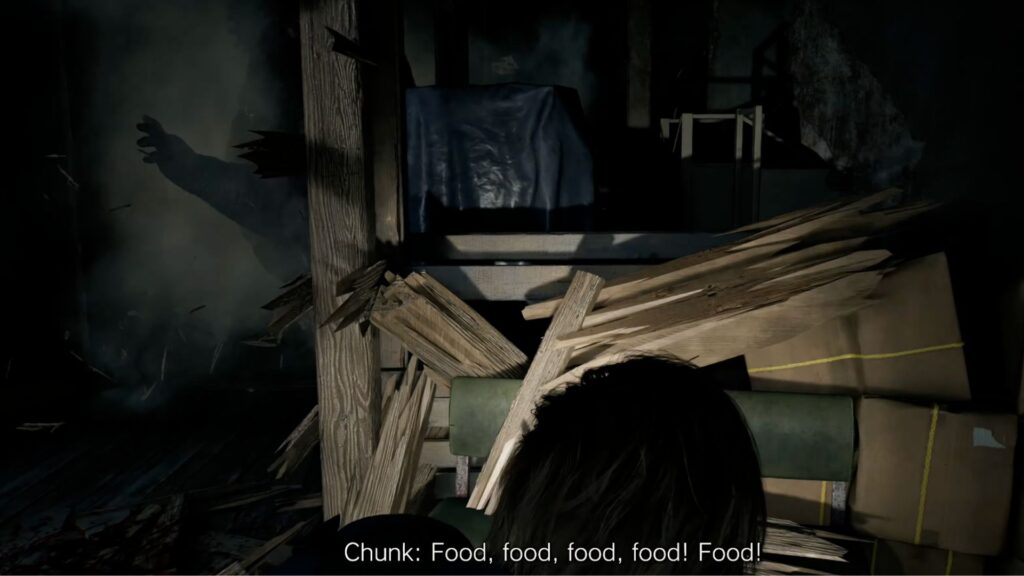
As the fight goes on, Chunk will become more aggressive. Keep circling the area. His charges will actually break through some of the walls, revealing a Med Injector and more Shotgun Shells hidden inside them.
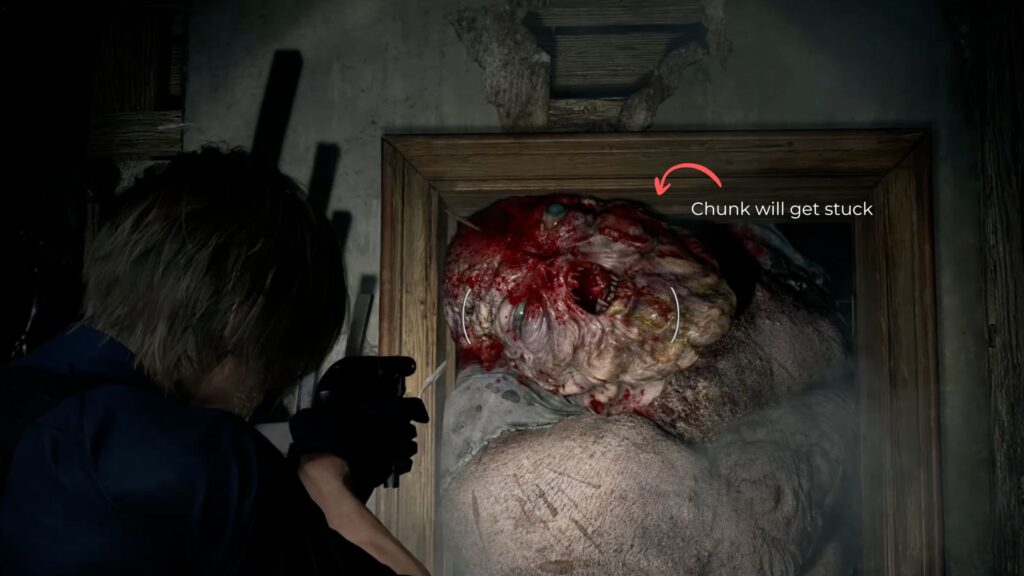
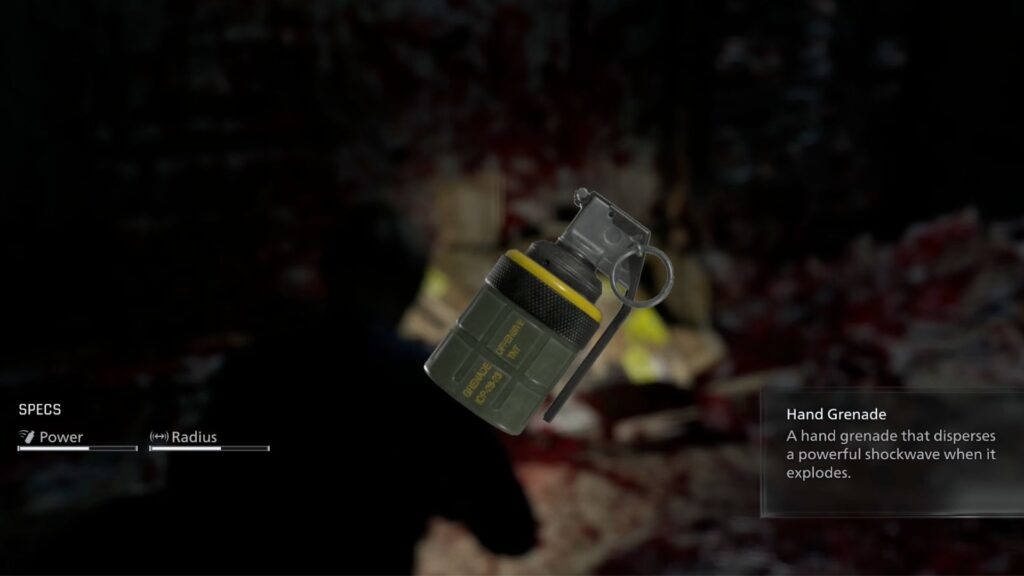
Eventually, lead Chunk toward a door passage at the end of the area where he’ll get wedged in the door frame. Keep shooting until he finally bursts. When he goes down, he’ll break apart some wooden boxes nearby. Check them to find Hand Grenades inside.
After the Fight
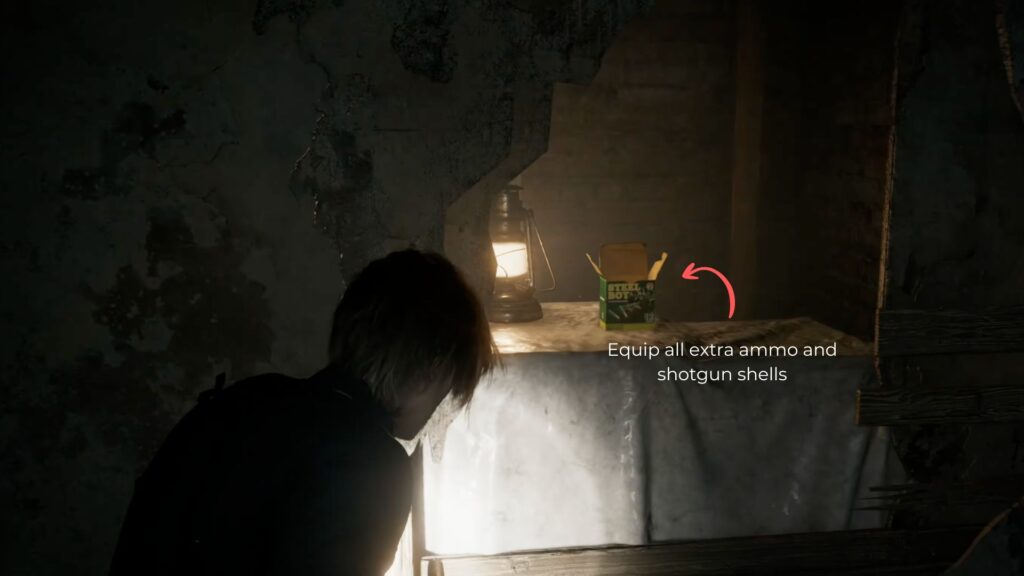
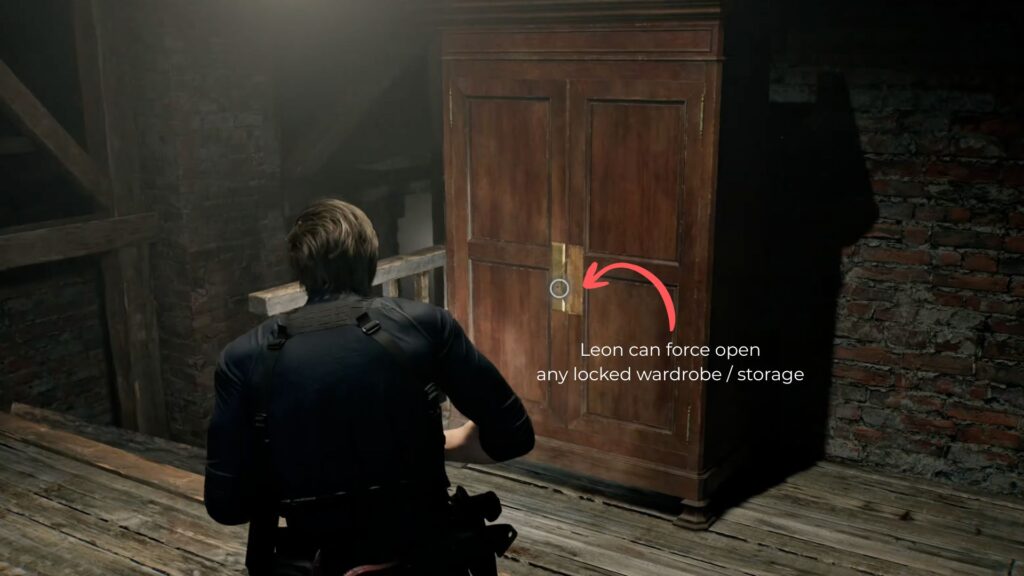
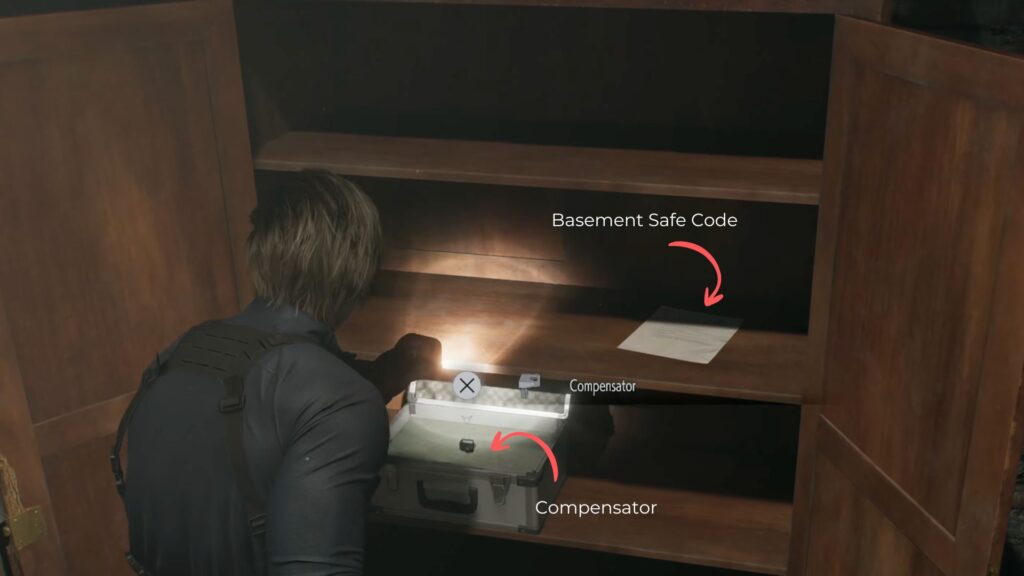
With Chunk down, continue through the white wooden door with glass panels in it. Follow the path and look for a wooden storage unit on the right side of the wall. Force it open to collect a Compensator, an attachment that reduces muzzle rise. Make sure to equip it to your gun right away. You’ll also find the Basement Safe Code here: → 60, ← 40, → 80.

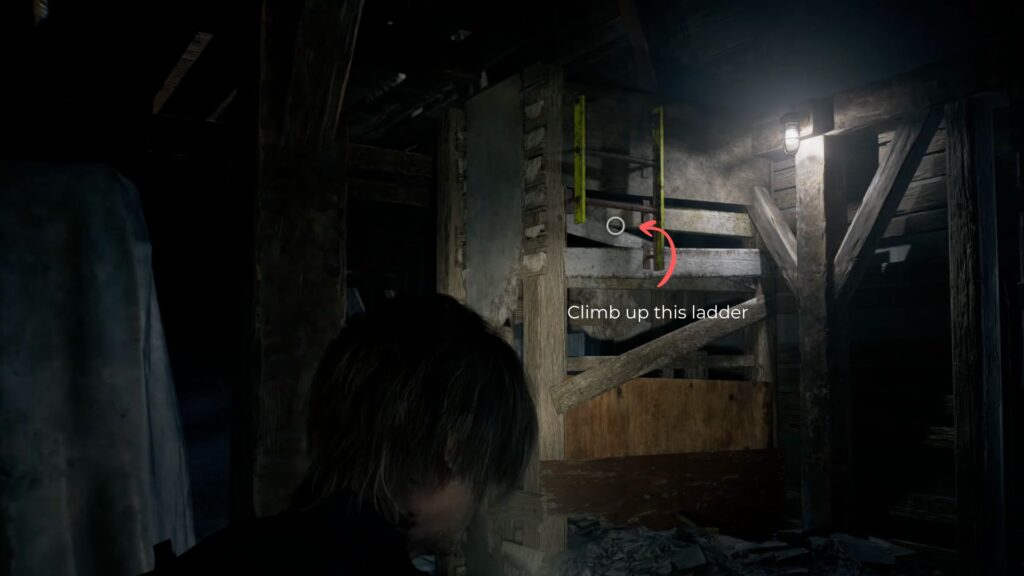
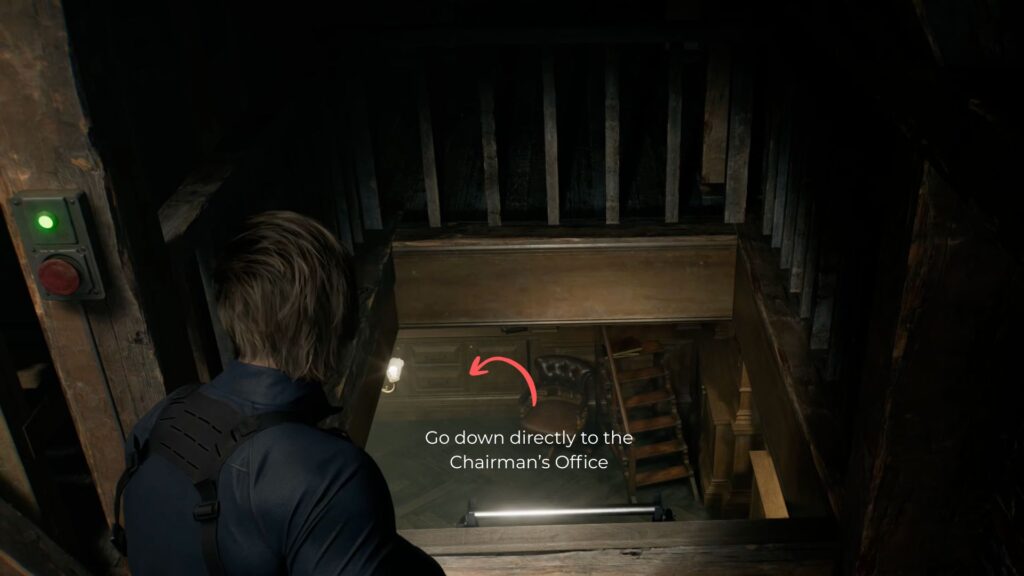
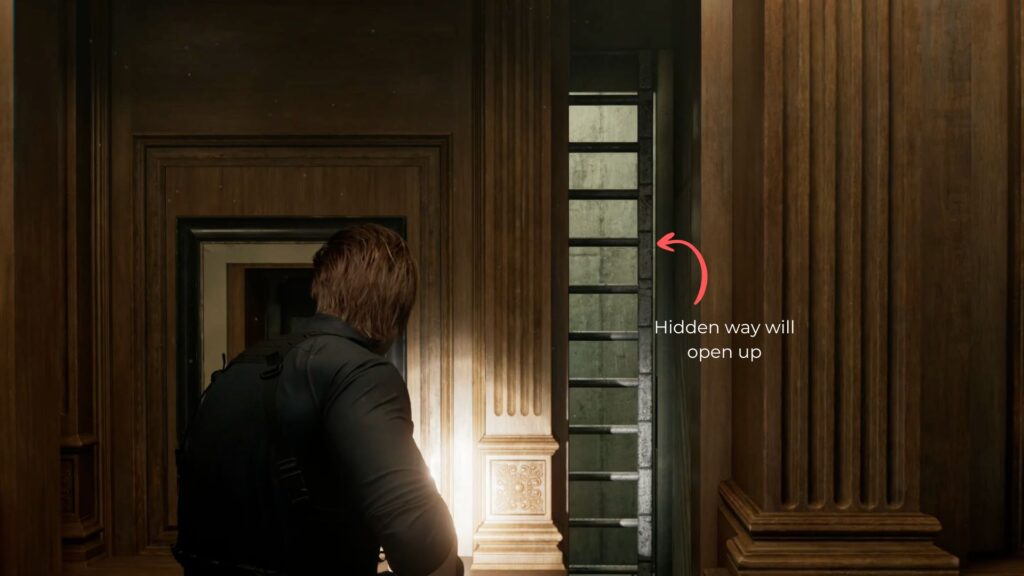
Head down the stairs to reach the Attic Storage. There’s a box of Ammo here. At the far end of the storage area, look for a small opening with a button nearby. Press it to lower a ladder that drops you straight down into the Chairman’s Office.

The Pantry Key
A useful note before continuing: if Grace left any items on the ground during her playthrough — Green Herbs, Ammo, and similar supplies — Leon can pick them up, and vice versa.
However, Leon cannot interact with puzzles, collect Antique Coins, or collect infected blood. Leon can also help make areas safer for Grace’s return by clearing out infected in advance, since Grace will need to come back to open the quartz door.
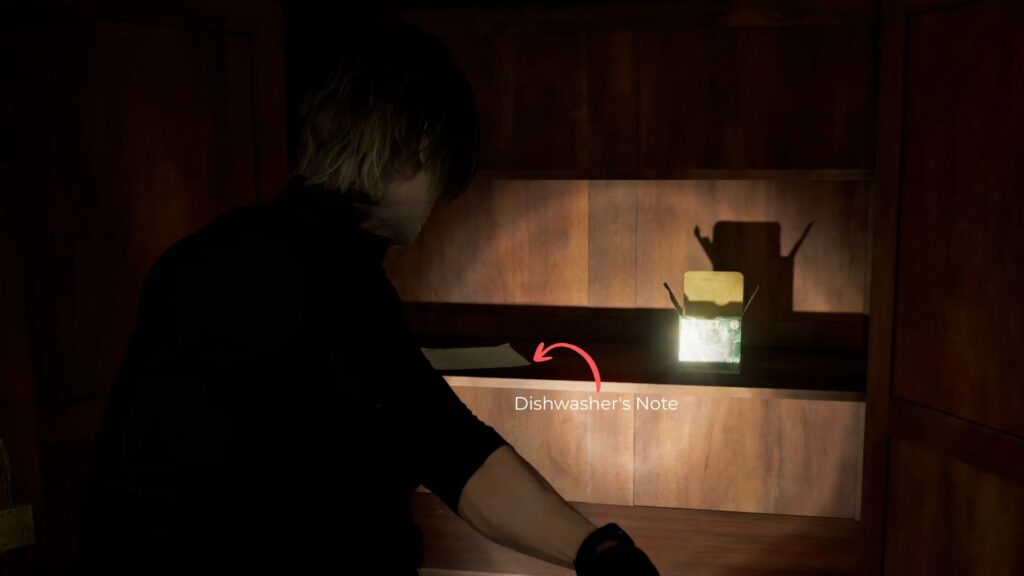
Right as you leave the Chairman’s Office, check the cabinet on the wall to find Shotgun Shells and a Dishwasher’s Note containing a clue about the Pantry Key.
Then, head straight through to the Bar and Lounge, take the exit on the left, then take another left to find a locked cabinet inside the office area. Clear out the infected first, then open the cabinet to find a Mr. Raccoon, Ammo, and Mixed Herbs. If you’re already well stocked on supplies, consider leaving these for Grace.
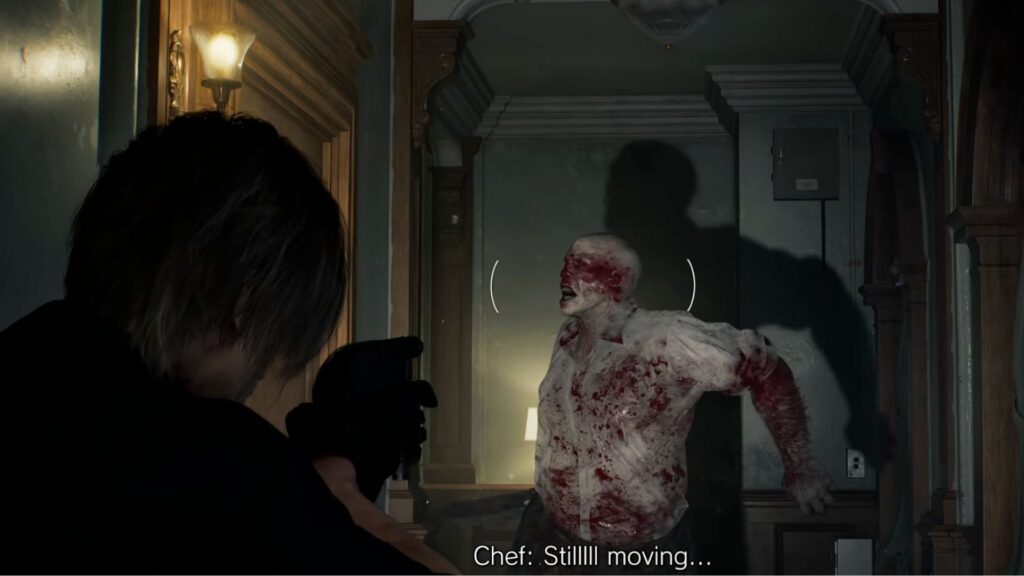
The Chef is still roaming the west wing. Track him down and deal with him. He’s very dangerous up close, so dodge and parry his knife strikes before going in for the kill. Once he’s down, collect the Pantry Key from him.
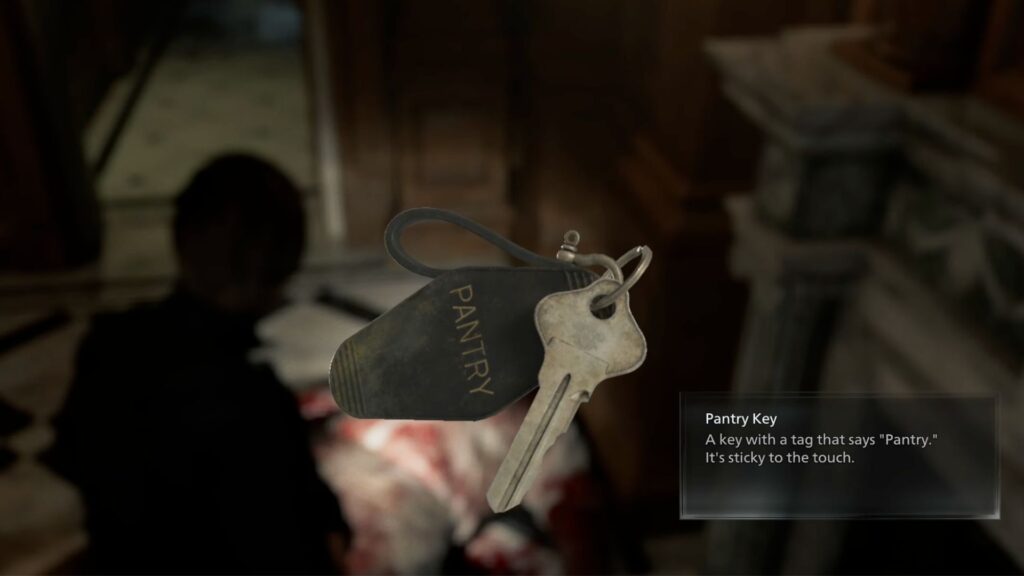
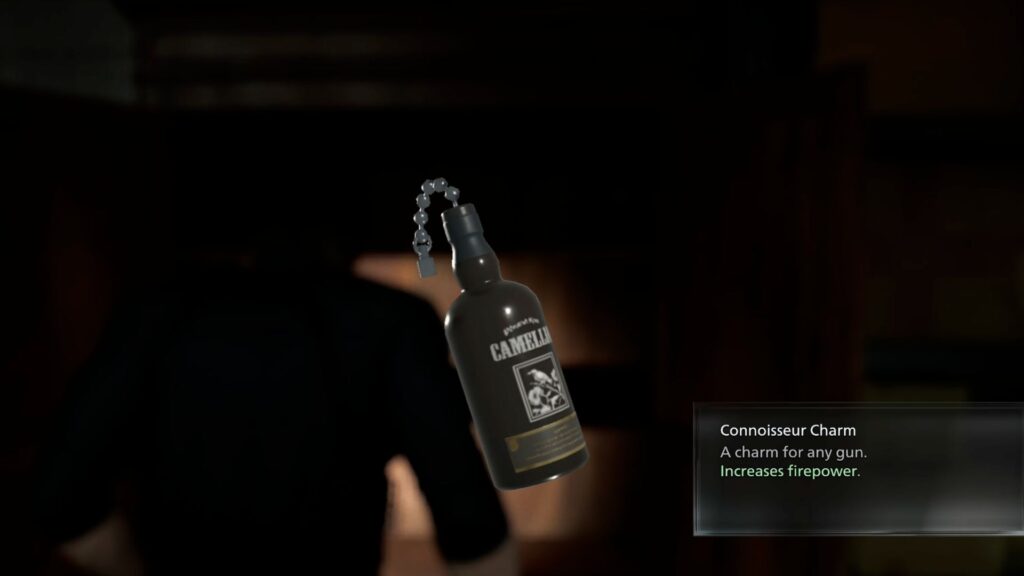
With the key in hand, head to the kitchen where Grace first encountered the Chef earlier in the game. There’s a door on the left side which you can now unlock it with the Pantry Key.

Inside you’ll find a locked wardrobe. Force it open to collect the Connoisseur Charm, which increases firepower for any equipped gun. Grab the extra Ammo in here as well.
Victor’s Office
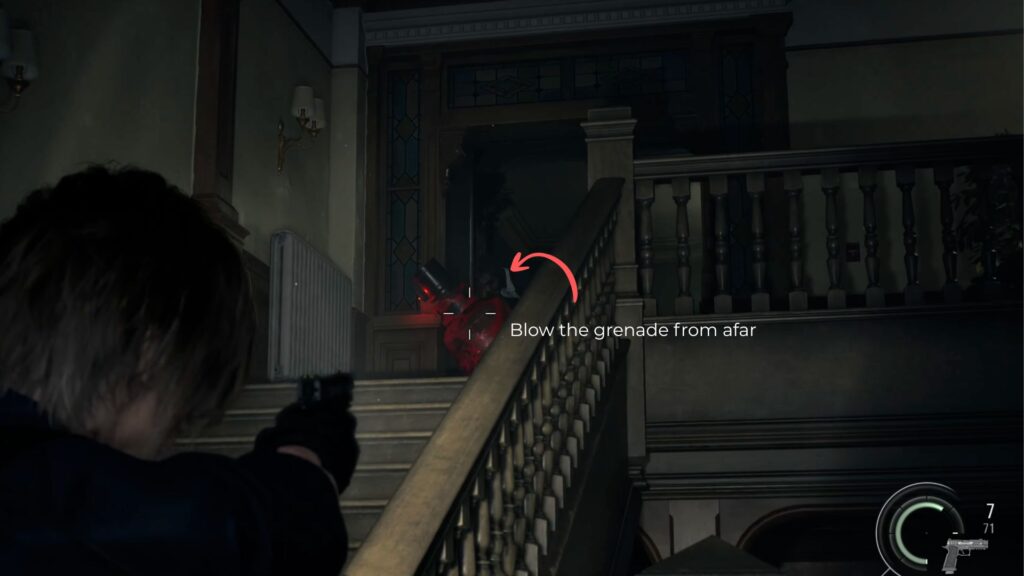
Your next destination is the third floor of the west wing. At the top of the stairs, you’ll find an infected holding a red gas canister that’s beeping. Shoot it from a distance to trigger the explosion safely. Once it’s clear, head up and force open the locked door at the end of the hallway.
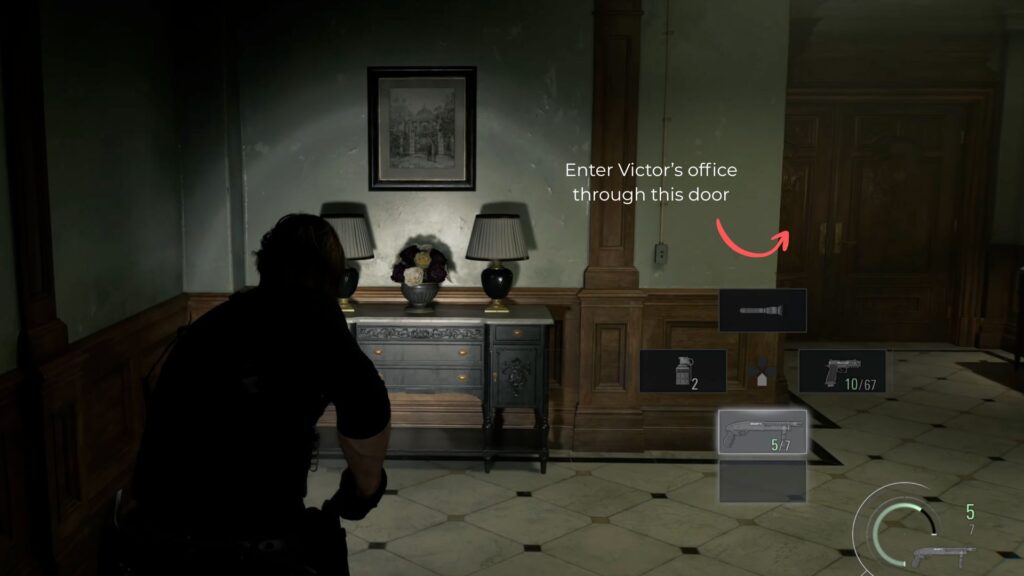
You’ll first enter Victor’s Office Lounge, filled with dead bodies. Many of which have reanimated as Blister Heads. Take them out by blowing their heads off and follow up with melee attacks if needed. More are waiting inside the Meeting Room beyond, so keep pushing through and clear them out.
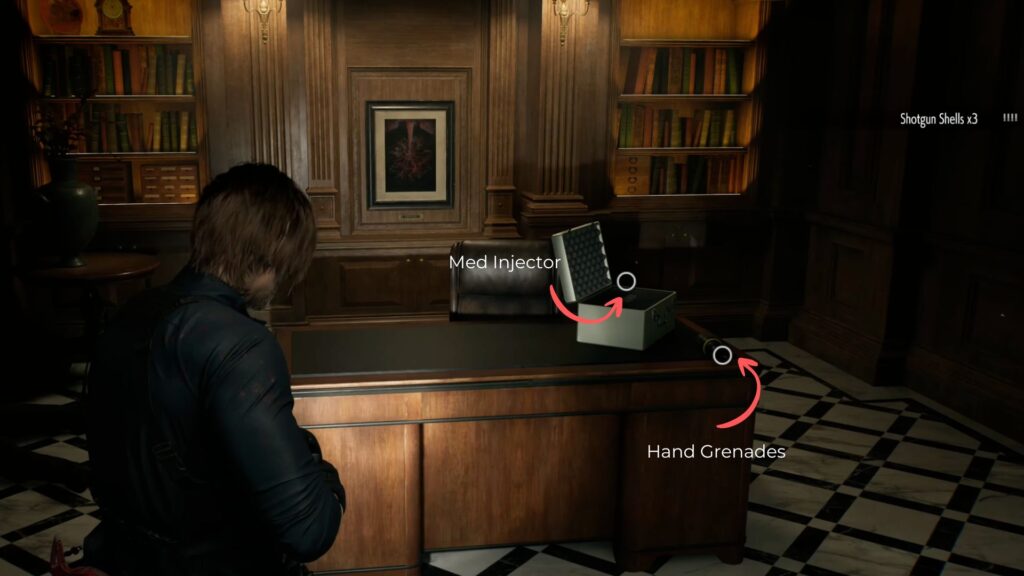
Once the area looks clear, head deeper through the Meeting Room into the Director’s Office. On the table, you’ll find Hand Grenades and a Med Injector, stock up here.
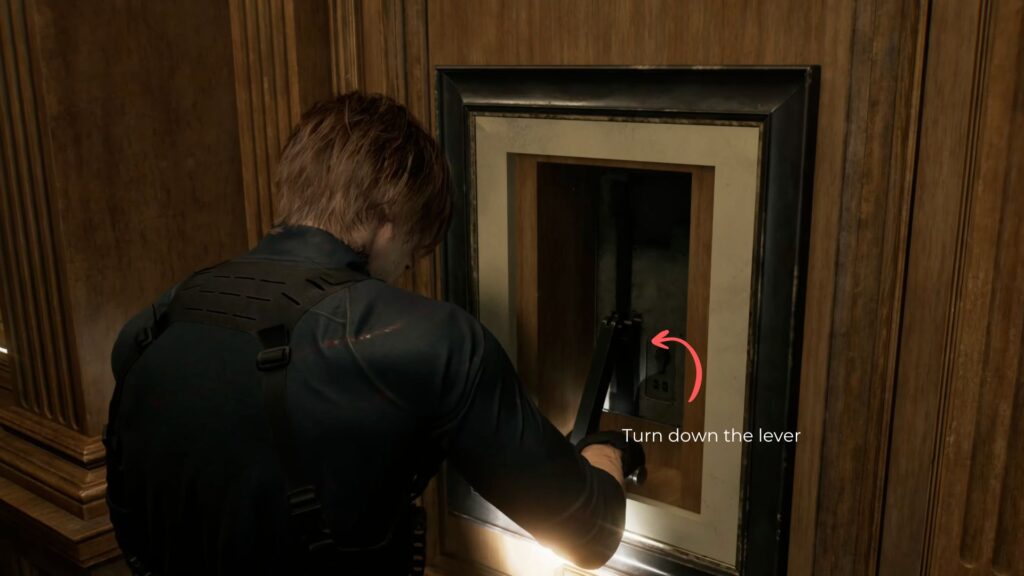
Next, look at the framed picture on the back wall and interact with it to reveal a hidden elevator behind it. Pull the lever down to open the wall panel. While you wait for it to slide open, more Blister Heads will pour in from behind. You need to deal with them before proceeding.
Once everything is clear and the door is fully open, go through and follow the pathway to the lift at the end. Ride it up to Victor’s Private Office.

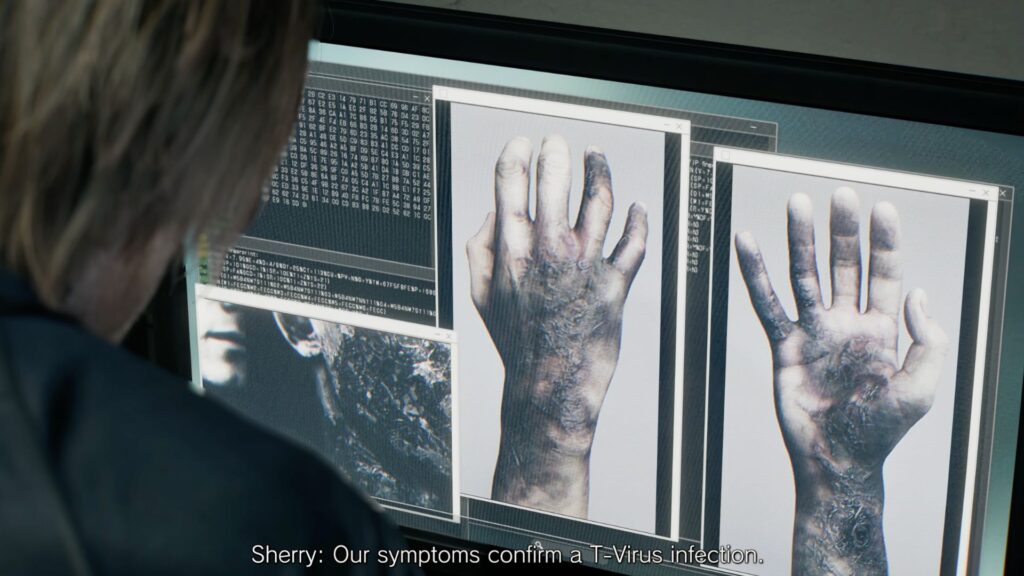
A cutscene plays. Leon uncovers more about the T-Virus and the illness that has been developing inside him throughout the game. A screen displaying his symptoms confirms a full T-Virus infection. He also finds a note ending with the phrase “for the sake of Elpis” — the same word Victor used when he first encountered Grace.
The chapter ends here, leaving the mystery of Elpis unanswered as the story shifts back to Grace, who has her own unfinished business in the basement of the care center.
All Collectibles
| Category | Item | Location/Notes |
|---|---|---|
| Collectible Files | Satiety Suppression Medical Records | Inside a cabinet in the small attic room past the white wooden door |
| Dishwasher’s Note | Cabinet just outside the Chairman’s Office — contains clue about the Pantry Key | |
| Weapons | MSBG 500 Shotgun | On the floor in the dark passage just before the Chunk boss fight |
| Attachments | Compensator | Forced open wooden storage unit after the Chunk fight — reduces muzzle rise |
| Connoisseur Charm | Locked wardrobe in the kitchen pantry — increases firepower for all guns | |
| Keys | Pantry Key | Dropped by the Chef after defeating him in the west wing |
| Ammo | Shotgun Shells | On the broken ladder during the Chunk fight; cabinet outside Chairman’s Office; kitchen pantry |
| Hand Grenades | Wooden boxes broken by Chunk at the end of the fight; table in Director’s Office | |
| Recovery Items | Med Injector | Revealed when Chunk breaks through walls during the fight; table in Director’s Office |
| Green Herb | On the desk in the first attic room past the staircase passage | |
| Safe Codes | Basement Safe Code | Found after the Chunk fight near the Compensator: → 60, ← 40, → 80 |
| Mr. Raccoon | Mr. Raccoon | Locked cabinet in the office area off the Bar and Lounge — clear infected first |
| Bosses | Chunk | Dark passage in the attic — use headshots to stagger, melee when down, use walls and upper rafter to your advantage |
| Blister Heads | Victor’s Office Lounge and Meeting Room — shoot their heads off to eliminate them |
Chapter 7 is Leon’s most combat-heavy chapter in the game, opening with a tense boss fight against Chunk before giving you free rein across much of the Care Center. It’s worth spending time clearing infected and opening any storage units Grace may have left behind, as the supplies here will benefit both characters. The chapter closes on a significant story revelation that Leon’s T-Virus infection is now confirmed, and the mysterious word Elpis ties both his story and Grace’s together heading into the final chapters.