
Al Haitham is a Dendro main DPS who deals a decent amount of Dendro damage. Updated for version Luna V.
Table of Contents
Should I pull for Al Haitham?
| Pros | Cons |
| Best on-field Dendro driver Good AOE damage and application Good F2P weapon options | Relatively mediocre DPS levels Complicated gameplay and rotations High ER requirements Extremely burst-reliant for good gameplay |
Base Stats
Non-crit stats that are not 0 are rounded to the nearest integer. Any stat not listed can be assumed to be 0.
| | 80/90 | 90/90 |
| HP | 12410 | 13348 |
| ATK | 291 | 313 |
| DEF | 727 | 782 |
| CRIT Rate | 5.0 | 5.0 |
| CRIT DMG | 50.0 | 50.0 |
| Dendro DMG Bonus | 28.8 | 28.8 |
Talent Overview
Normal Attack
Normal Attack
Performs up to 5 rapid strikes.
Charged Attack
Consumes a certain amount of Stamina to unleash 2 rapid sword strikes.
Plunging Attack
Plunges from mid-air to strike the ground below, damaging opponents along the path and dealing AoE DMG upon impact.
These are a decent source of Al Haitham’s damage, as he is on-field and normal or charged attacking a good portion of the time.
Multipliers
| Lvl 1 | Lvl 6 | Lvl 9 | Lvl 10 | |
| N1 | 49.53 | 71.98 | 90.99 | 97.9 |
| N2 | 50.75 | 73.76 | 93.24 | 100.32 |
| N3 | 34.18 x 2 | 49.68 x 2 | 62.79 x 2 | 67.56 x 2 |
| C | 55.25 x 2 | 80.31 x 2 | 101.52 x 2 | 109.22 x 2 |
Elemental Skill
Rushes forward, dealing Dendro DMG to nearby opponents when the rush ends, causing a Chisel-Light Mirror to form.
Holding this skill will cause it to behave differently.
Hold
Enters Aiming Mode to adjust the direction of Alhaitham’s rush attack.
Chisel-Light Mirror
When this skill is unleashed, Alhaitham will generate 1 Chisel-Light Mirror. If there are no Mirrors at this time, he will generate 1 additional Mirror. Chisel-Light Mirrors will have the following properties:
- When he possesses Chisel-Light Mirrors, Alhaitham’s Normal, Charged, and Plunging Attacks will be converted to Dendro DMG. This cannot be overridden.
- When attacks of the aforementioned kinds hit opponents, the Chisel-Light Mirrors will unleash a Projection Attack that deals AoE Dendro DMG based on the number of Mirrors on the field.
- A total of 3 Chisel-Light Mirrors can exist at once.
- The Chisel-Light Mirrors will disappear one after the other over time, and will all disappear when Alhaitham leaves the field.
With this skill, Al Haitham generates one or two Light-Chisel Mirrors (called “mirrors” from here on out) for himself. While he has mirrors, his normal attacks will be converted to Dendro. Furthermore, these mirrors will periodically release projection attacks. The strength of these projection attacks is dependent on how many mirrors Al Haitham has.
If Al Haitham leaves the field, he will lose all his mirrors. Furthermore, the mirrors will also gradually disappear after 4s. The maximum number of mirrors he can have at any one time is three.
This talent is Al Haitham’s main source of damage.
Multipliers
| Lvl 1 | Lvl 6 | Lvl 9 | Lvl 10 | |
| DMG% | (67.2% ATK + 134.4 EM) * Mirrors | (94.08% ATK + 188.16 EM) * Mirrors | (114.24% ATK + 228.48 EM) * Mirrors | (120.96% ATK + 241.92 EM) * Mirrors |
Elemental Burst
Creates a Particular Binding Field and deals multiple instances of AoE Dendro DMG.
If Chisel-Light Mirrors exist when this ability is unleashed, all such Mirrors will be consumed and increase the number of DMG instances dealt.
2s after this ability is unleashed, if 0/1/2/3 Mirrors were consumed, Alhaitham will generate 3/2/1/0 new Mirrors in turn.

This talent has multiple use cases. The one it is most often used for (and what you should be using it for) is to generate mirrors while he has none. However, it can also be used for a single large hit of damage if you have mirrors. This is generally not recommended as Al Haitham’s main source of damage comes from his elemental skill, which heavily relies on how many mirrors you have.
Ascension 1
When Alhaitham’s Charged or Plunging Attacks hit opponents, they will generate 1 Chisel-Light Mirror. This effect can be triggered once every 12s.
This is an extremely important talent for Al Haitham’s mirror management. It allows him to refresh his mirrors mid-rotation without his elemental skill or burst. Furthermore, it allows some 3-mirror uptime if you don’t have burst, as it allows you to hold his elemental skill before following it up with a plunge attack.
Note that you don’t need to activate his elemental skill or burst beforehand for this talent to activate, so you should be careful about recklessly plunging or charged attacking as it can ruin your mirror uptime and rotations. However, enemies are easy enough to defeat in the overworld to the point where this doesn’t matter.
Ascension 4
Each point of Alhaitham’s Elemental Mastery will increase the DMG dealt by Projection Attacks and Particular Field: Fetters of Phenomena by 0.1%.
The maximum DMG increase this way for both these abilities is 100%.
A nice talent that gives him some straight-up DMG% bonus. You likely won’t max this, as it will require 1000 EM to max out, which would require triple EM main stats (not recommended). However, it does increase the value of building EM on Al Haitham even further, which is something you should be doing anyway.
Talent Priority
E > NA > Q
Constellations
Descriptions are condensed. Good constellations are given a ⭐.
| C1 | When a Projection Attack hits an opponent, E CD is decreased by 1.2s. This effect can be triggered once every 1s. | A pretty useless constellation, assuming you manage your rotations correctly; it does not let you get another skill in during your rotation |
| C2⭐ | 200 free EM | Even though the description is pretty long-winded, you will end up with 200 extra EM most of the time, which is always appreciated |
| C3 | Increase E by 3 levels | Even though his E is his main source of damage, his NAs do a good amount as well, so this constellation is not as importnat. |
| C4⭐ | 30% Dendro DMG Bonus (unless you have C6) | Though this constellation does give effects for consuming mirrors with his Q, you probably should not be doing that. Unfortunately, the value of Dendro DMG% Bonus is diminished since that is also his ascension stat |
| C5 | Increase Q by 3 levels | His Q is not a significant source of damage, so this is a very bad constellation |
| C6⭐ | Infinite mirrors, 10% CRIT Rate, 70% CRIT DMG | This constellation lets Al Haitham’s burst generate 3 mirrors no matter what, allowing you to activate more of the buffs from C4. Furthermore, it also gives 90 CV whenever you generate mirrors and you already have 3. |
Combos
Al Haitham’s combos are hard to remember and execute compared to other characters. As such, you may find yourself messing up if you have just started playing him.
| QE 2(N3D) 3(N3CD) | A relatively easy-to-remember combo that is also easy to execute. It maintains good 3-mirror uptime over a rotation |
| Q(2s)1 2(N3D) E 2(N3D) 2(N3CD) | A combo that is slightly harder to remember and execute; it is used to fill a longer rotation, though it has better 3-mirror uptime. However, accurately timing the two seconds is extremely hard |
| hEP | You can simply hold his E and plunge if his burst is not available or you do not want to use it. However, this leads to extremely low 3-mirror uptime |
Weapons
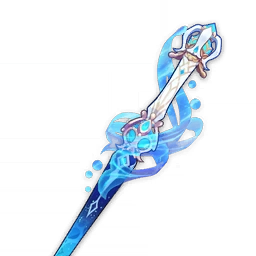
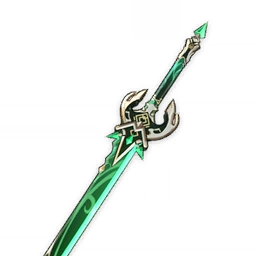
 Light of Foliar Incision | Light of Foliar Incision is Al Haitham’s signature weapon. It gives a huge amount of CRIT DMG, and it boosts his damage by a large amount of his Elemental Mastery, which he should have a lot of. |
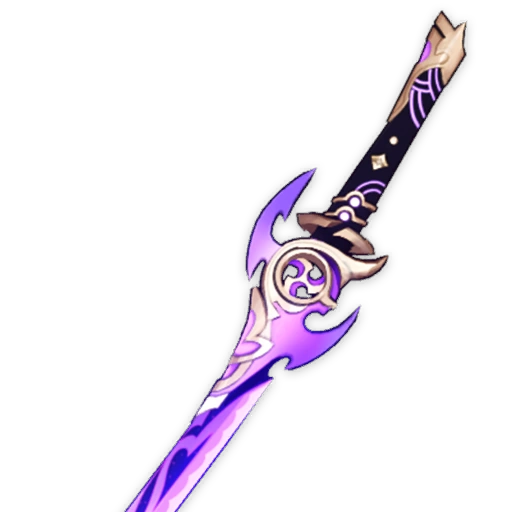
 Uraku Misugiri | Uraku Misugiri provides the same amount of CRIT DMG as Light of Foliar Incision. Additionally, it also boosts his normal attacks and elemental skill damage, which is welcome. |
 Splendor of Tranquil Waters | Splendor of Tranquil Waters also gives a hefty amount of CRIT DMG and a conditional elemental skill DMG% Bonus. However, the damage bonus requires HP fluctuations, which will only happen with Furina |
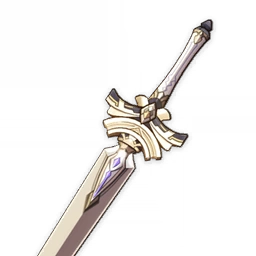
 Primordial Jade Cutter | Primordial Jade Cutter is a good stat-stick since it gives 44% CRIT Rate, which is very good for balancing Al Haitham’s CRIT ratio, especially at C6 |
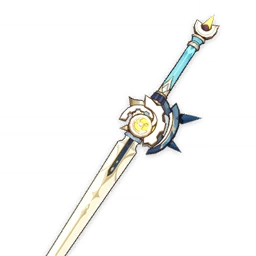
 Mistsplitter Reforged | Mistsplitter Reforged is a good weapon for Al Haitham. However, the fact that it trades CRIT for more base attack makes it weaker since Al Haitham has much weaker attack scalings. Still, the DMG% Bonus from its passive is very good. |
 Wolf Fang | Wolf Fang is Al Haitham’s best 4* weapon, as it provides a lot of CRIT Rate and elemental skill DMG% Bonus. However, it is BP-exclusive. |
 Toukabou Shigure | Toukabou Shigure is one of Al Haitham’s best F2P-friendly weapons. However, it was weapon exclusive from an event from 2.7, meaning it is impossible to obtain now. |
 Iron Sting | Iron Sting is Al Haitham’s other best F2P-friendly weapon. It provides EM as its secondary stat, and its passive provides a nice amount of DMG% Bonus. Additionally, you can craft it for free at the blacksmith. |
 Harbinger of Dawn | Harbinger of Dawn is an acceptable 3* weapon to use, given all the CV it can provide for Al Haitham. However, it provides no EM or any other bonuses, and it places heavy teambuilding restrictions given the 90% HP restriction. |
Energy Recharge Requirements
Al Haitham’s burst is crucial to gaining mirrors and maintaining his 3-mirror uptime. As such, it is important to ensure that he has enough ER to burst every rotation.
Favonius procs greatly reduce his energy recharge requirements.
| Double Dendro, Nahida/Lauma | ~125% |
| Double Dendro, no Nahida/Lauma | ~140% |
| Triple Dendro, Nahida/Lauma | ~105% |
| Triple Dendro, no Nahida/Lauma | ~120% |
Values in this table are approximations. Other factors (such as poor rotations, poor funneling, enemy particle drops, or other gameplay factors) can raise or lower energy recharge requirements
Artifacts
Artifact Sets
 Marechaussee Hunter | Marechaussee Hunter is Al Haitham’s best artifact set if the 36% CRIT Rate buff can be maintained. Notably, this implies that you will have to use Furina in his team. It also gives some normal and charged attack bonus, which is nice. |
 Night of the Sky’s Unveiling | Night of the Sky’s Unveiling can also become Al Haitham’s best artifact set, since it gives him 30% CRIT Rate and 80 EM. However, that would require two Moonsign characters on the team to activate the full buff. |
 Gilded Dreams | Gilded Dreams is Al Haitham’s best general-use artifact set. It provides a large amount of EM and ATK%. Furthermore, there are no restrictions on team composition. |
 Golden Troupe | Golden Troupe is another good artifact set for Al Haitham. While he cannot utilize the full set bonus, he still gains 50% elemental skill DMG bonus. |
 Deepwood Memories | Al Haitham can hold Deepwood if no one else on the team holds it. However, you should usually relegate Deepwood to a more supportive character who does not have as much damage potential. |
2pc/2pc sets (EM, Dendro DMG% Bonus) are also viable on Al Haitham, though they perform significantly worse than dedicated 4pc sets.
Teambuilding
Notable Teammates
Dendro
Al Haitham should be paired with at least one Dendro teammate to battery him with Dendro particles. If he runs as the only Dendro character in his team, his energy requirements will be too high to sustain, or his personal damage will be significantly lowered.
Lauma | Lauma is a very good unit for Al Haitham. She has very good Dendro application uptime, making her a good Deepwood holder. Furthermore, her skill can also shred Dendro RES%. However, a lot of her buffs are locked behind bloom-based reactions, so you should play quickbloom if you use Lauma. |
Nahida | Nahida is a great slot for Al Haitham, providing a lot of buffs like Lauma. However, she trades RES Shred for EM share. Though she is not as strong as Lauma in bloom-based teams, she is stronger in pure Spread and Aggravate teams |
Baizhu | Baizhu is a good teammate for Al Haitham. He provides sustain and healing, meaning he can be used with Furina. Furthermore, he also has an EM buff and some reaction buffs. |
Dendro Traveler | Dendro Traveler is a solid F2P option to use as a Dendro battery for Al Haitham, especially at C6. |
Kirara | Kirara can be a good support for Al Haitham as she provides a shield for sustain, and her skill generates a few particles. However, a lot of her power (e.g., off-field Dendro application, teamwide Dendro DMG% Bonus), is locked behind constellations (C4 and C6). |
Yaoyao | Yaoyao is a solid option as a Dendro teammate for Al Haitham. She is able to provide sustain and healing. However, due to the Yuegui’s single target nature, using Deepwood on her may not be the most ideal. |
Collei | Collei can also be used with Al Haitham. However, she is practically outclassed in every aspect by Dendro Traveler. Still, she is a viable option |
Electro
Electro teammates can enable the Quick and Aggravate reactions when paired with Al Haitham. Since these are free damage boosts, using at least one electro teammate with Al Haitham is a good idea. Furthermore, due to Al Haitham wanting to build EM, the effect of triggering a Spread reaction will increase his damage even further.
Fischl | Fischl is a great option for Al Haitham in pure Spread and Aggravate teams. She has high personal damage and good particle generation. However, she falls behind in quickbloom teams as she is a bad hyperbloom trigger. Furthermore, due to her awkward cooldowns, you might need to find time in your rotation to slot Fischl in to summon Oz again. |
Yae Miko | Yae Miko serves a very similar role as Fischl, providing high off-field sub DPS. While her damage may be higher than Fischl’s, her field time requirements can make rotations clunky and hard to play. |
Kuki Shinobu | Kuki Shinobu is one of the game’s best Hyperbloom triggers and is the recommended Electro slot in a Quickbloom team. Additionally, she also provides very good healing. However, her personal damage is quite low, so she should not be used in pure Spread and Aggravate teams. |
Raiden Shogun | Raiden Shogun is also a good Hyperbloom trigger. However, she is unable to provide healing. To compensate for that, she offers much better personal damage in and application in pure Aggravate teams. Furthermore, she can also help with Al Haitham’s energy requirements by a significant amount if you play a split rotation with her burst, though it is very hard to do that properly. |
 Ineffa | Ineffa is a very good unit overall and a nice teammate for Al Haitham. She provides a shield and good Electro application. However, most of her damage comes from and requires Hydro application. |
Hydro
Hydro teammates can enable bloom-based teams that unlock many more versatile team compositions. Furthermore, they can also provide buffs of their own.
Furina | Furina is one of the best supports in the game for DMG% carries, as she can provide a huge DMG% bonus to all party members. Her hydro application can also result in good Hyperbloom damage. However, using Furina in your team will require you to run a good healer. |
Columbina | Columbina is a decent Hydro applicator for Al Haitham’s teams. Though she doesn’t directly buff Al Haitham, if you have other Moonsign and Lunar Damage units (most notably Ineffa), she can be a decent option on his teams. |
Yelan | Yelan has very good sub DPS and a ramping DMG% bonus for the whole team. |
Xingqiu | Xingqiu is an alternative to Yelan. However, he has extremely limited offensive utility and much worse sub DPS compared to Yelan. Additionally, he has too much Hydro application, which can override Electro auras and cause Al Haitham to miss Spreads and instead trigger Bloom. |
Nilou | Nilou is a situation Hydro slot for Al Haitham. Her value is almost solely tied to the Bloom reaction and is removed whenever any conflicting elements are in the party, so playing her with Al Haitham essentially locks the team to a pure Bloom team, which prevents Al Haitham from triggering Spread. Still, given Al Haitham’s strength as a driver, it is still a viable team. |
Sangonomiya Kokomi | Kokomi is a good Hydro applicator who also has great healing. As she shines in AoE content, her greatest use cases are in Nilou Bloom teams with Al Haitham when they are played together |
Other
Other units can bring good utility to Al Haitham’s teams. However, you must make sure they do not interfere with reactions (most notably Pyro units triggering Burning, which Al Haitham cannot take any advantage of).
Zhongli | Zhongli is a solid option for Al Haitham. He offers a practically unbreakable shield for sustain and to allow Harbinger of Dawn. Furthermore, his shield also gives 20% Dendro RES Shred. |
Example Teams
Al Haitham/Furina/Lauma/Kuki Shinobu Furina E > Lauma hEQ > Kuki Shinobu EQ > Furina Q > Al Haitham combo Al Haitham’s best non-wheelchair team. Furina provides large DMG% buffs, and Kuki’s healing is decent enough to the point that she can generate enough fanfare. Furthermore, Lauma provides decent buffs to Dendro and especially Kuki’s Hyperbloom damage. |
Al Haitham/Nahida/Fischl/Zhongli Zhongli hE > Nahida hEQ > Fischl Q/E > Al Haitham combo A traditional Al Haitham Spread team that excels in single-target scenarios. Fischl provides consistent Electro application and huge Aggravate sub DPS, and Zhongli’s shield is great for sustain. Additionally, Nahida provides great buffs, Deepwood uptime, and energy genreation. |
Al Haitham/Columbina/Lauma/Ineffa Columbina EQ > Ineffa EQ > Lauma hEQ > Al Haitham combo A Lunar Reaction-based team that is designed to wheelchair Al Haitham through hard content, so don’t expect Al Haitham to be carrying a large load of the damage here. However, his strong Dendro application and ability as a driver can make him a good option here, personal damage aside. |
Al Haitham/Nahida/Fischl/Yae Miko Yae Miko 3E > Nahida EQ > Fischl Q/E > Yae Miko Q 3E > Al Haitham combo. A sustainless Spread and Aggravate with two sub DPSes providing high damage contribution. If this team is pulled off correctly, it can prove to be extremely potent and powerful. Note that Yae Miko’s burst can be skipped entirely if she does not have enough energy or if you are finding that is screwing up your rotations too much. |
Al Haitham/Xingqiu/Dendro Traveler/Kuki Shinobu Xingqiu EQ > Dendro Traveler EQ > Kuki Shinobu EQ > Al Haitham combo A good F2P Al Haitham team focused on the Hyperbloom reaction. As noted above, however, Xingqiu’s Hydro application can overpower Electro auras on enemies and cause Al Haitham to lose Spread damage. |
Al Haitham/Fischl/Dendro Traveler/Kuki Shinobu Kuki Shinobu EQ > Fischl Q/E > Dendro Traveler EQ > Al Haitham combo A good F2P Al Haitham team focused purely on Spread and Aggravate, allowing Kuki Shinobu to hold Tenacity of the Millelith instead of an EM-focused set. |
Other Gameplay Notes
Mirrors
Dashing Direction
Al Haitham’s mirrors will always attack forwards, unlike other talents (e.g., Ayaka’s E that attacks in a certain radius around her). Therefore, you should always make sure you are facing the enemy as much as possible to ensure the greatest possible chance of actually hitting your enemy, since meticulously managing your mirrors only to miss their attacks would be quite pitiful. To do that, you should prioritize dashing toward your enemy if you ever need to dodge.
This also means that you should preferably line up your enemies in multi-target scenarios instead of being in between them so your projection attacks can hit them all.
Wait
Remember to be patient when managing his mirrors. If you get pecky and worried about losing mirror uptime and charged attack early, you will only end up losing uptime on your 3-mirror projection attacks.
If you lose track of your rotation, you can wait until he loses a mirror to use your charged attack and get your third mirror back. You can keep track of his mirrors by looking at his head (his mirrors look like small green rhombuses).
Practice
If you feel unsure about what to do, don’t be afraid to practice playing your Al Haitham in Miliastra Wonderland against mobs.
Vertical Investment
Al Haitham himself has relatively poor vertical investment. While his weapon is a sizable improvement to 4* weapon options, it can actually perform worse than Uraku Misugiri in some situations (notably with Geo teammates), so pulling it might not be worth it.
Additionally, his constellations also have terrible amortized value. His C1 is quite useless, and his C2 is relatively mediocre for such a bad C1. Instead, pulling for his teammate’s constellations (Furina C2, Lauma C2), is a much better idea for his team damage and future-proofing.
Quickbloom
Quickbloom is a team composition generally played in single-target scenarios, mainly due to the fact that Hyperbloom is best in single-target. Furthermore, Quickbloom’s best support, Furina, is also much better in single-target. In these scenarios, you should seek to circle the enemy if you are playing Kuki Shinobu, as her Electro (which procs Hyperbloom) triggers in a circle-like fashion. However, with Raiden, you should seek to stay on one side, as her application is not circular.
EM vs ATK%
While, as a general rule, EM is better than ATK%, it’s quite natural to ask how much. Generally, you can find diminishing returns on EM anywhere from 400 to 500 compared to ATK%, depending on how much ATK% you already have on your build. This is a large contrast to other newer dual-scalers (most notably, the difference between DEF% and ATK% on Chiori is practically the difference between ATK% and flat DEF).
My Al Haitham has 447 EM, and he only gains 10% from an EM roll compared to an ATK% roll2. While this is very non-intuitive (as his EM scalings are twice his ATK scalings and his passives further increase the value of EM), Al Haitham’s ICD limits him to triggering Spread on only around half of his mirror projection attacks. Therefore, you shouldn’t be trying to reroll ATK% into EM.
Multi-chamber Content
On multi-chamber content (realistically just the Spiral Abyss), Al Haitham can find himself without energy if the battle ends in the middle of a rotation. Therefore, if you think that you have time to spare and you will end without his burst if you use it, you should opt to use his burstless combo to save your burst for the next chamber.