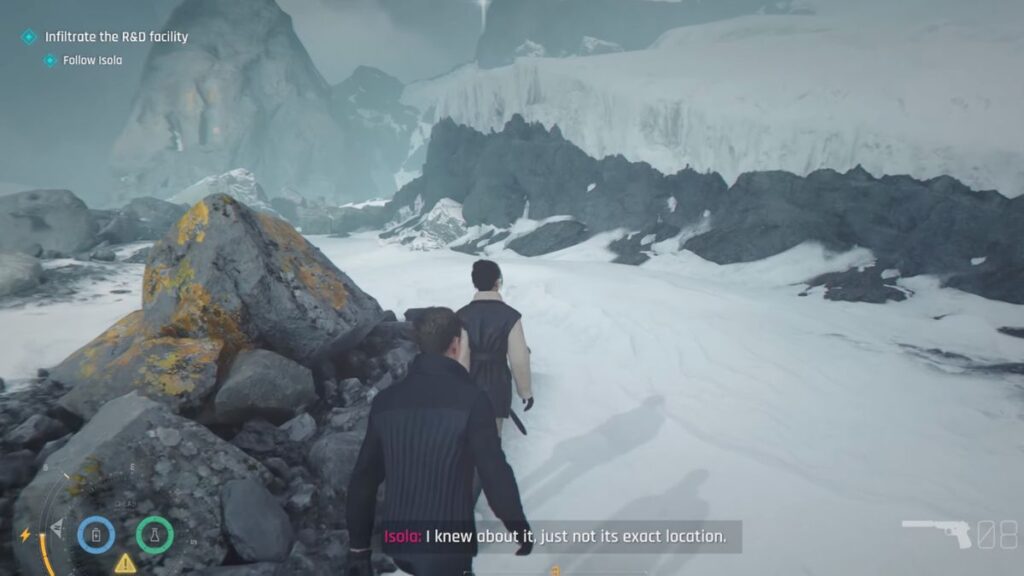
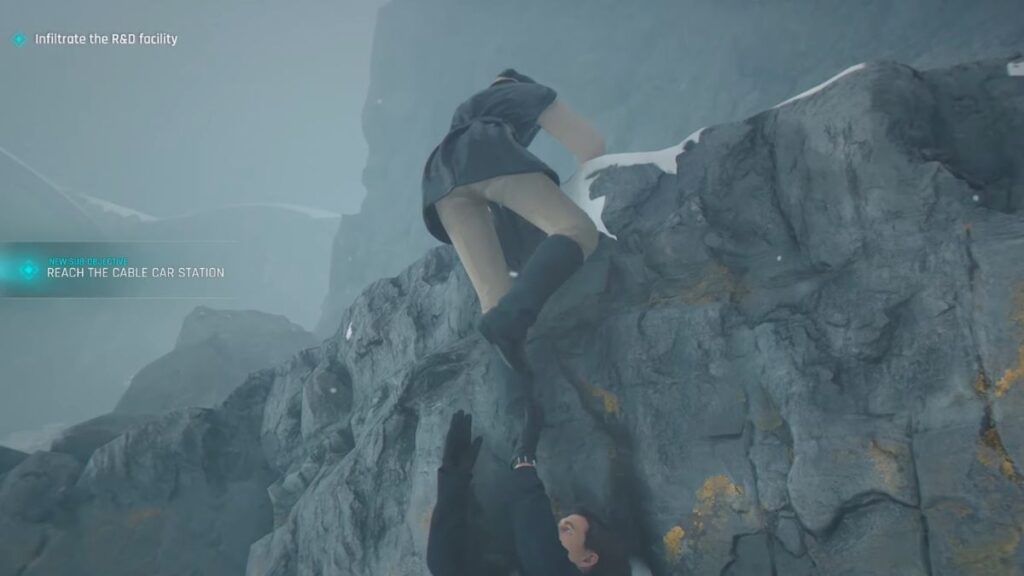
Chapter 9 opens with Bond and Isola in Antarctica. Your first objective is to Infiltrate the R&D Facility with the sub-objective to Follow Isola. The path is linear so just keep up with her. After a short while the sub-objective changes to Boost Isola. A brief cutscene plays where you help her up to the ledge above, after which your next sub-objective is to Reach the Cable Car Station.
Note: This guide is a work in progress.
Getting to the Cable Car Station
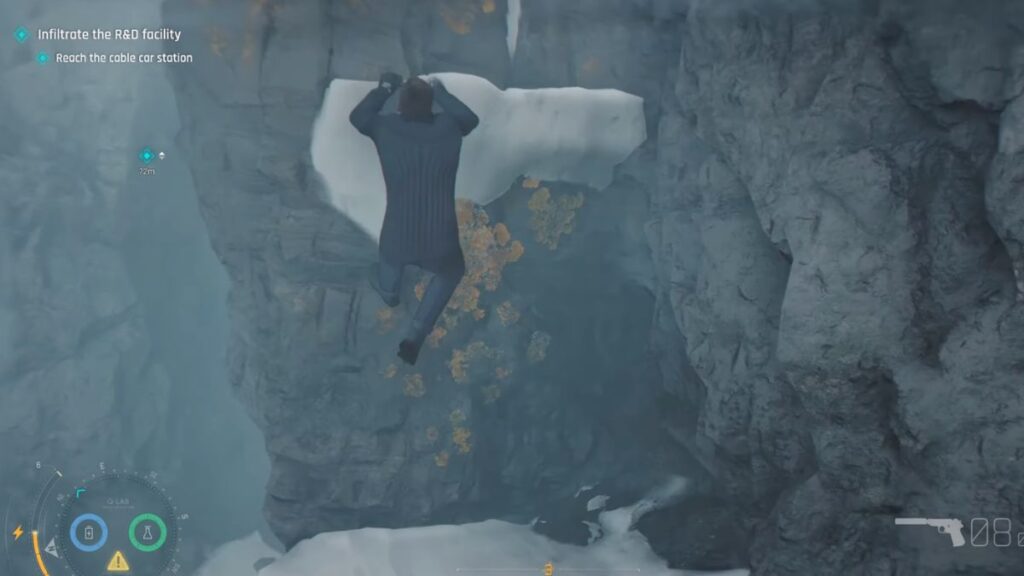
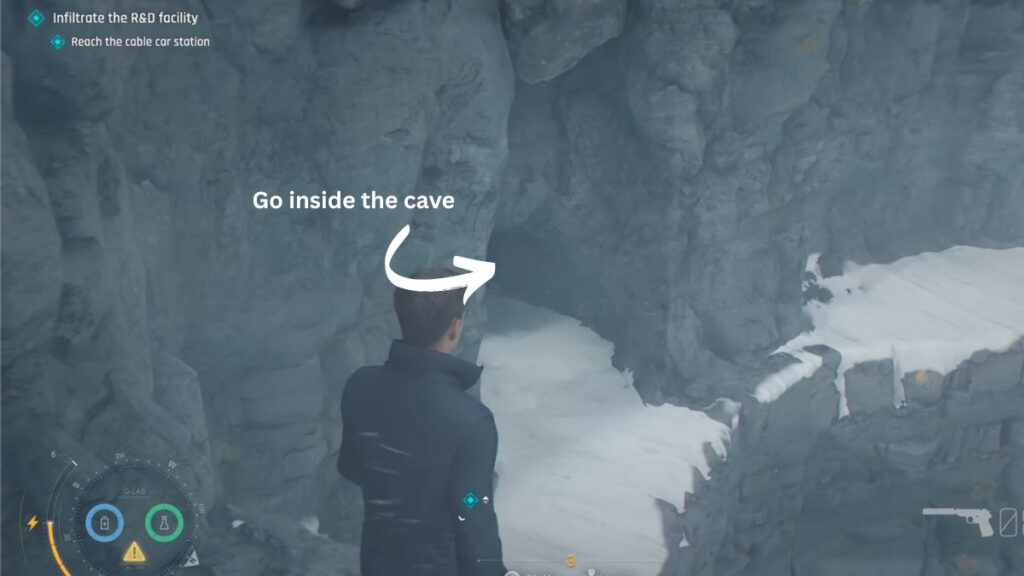
Keep moving toward the blue marker. You will come across a ledge that you try to climb but the ice breaks and you cannot get a grip. Turn around and look at the ledge just before the one you are on. There is a small cave there. Crouch and go through it. The path inside is linear but requires some jumping and climbing. Keep following it until you reach the cable car station.
The Cable Car Station
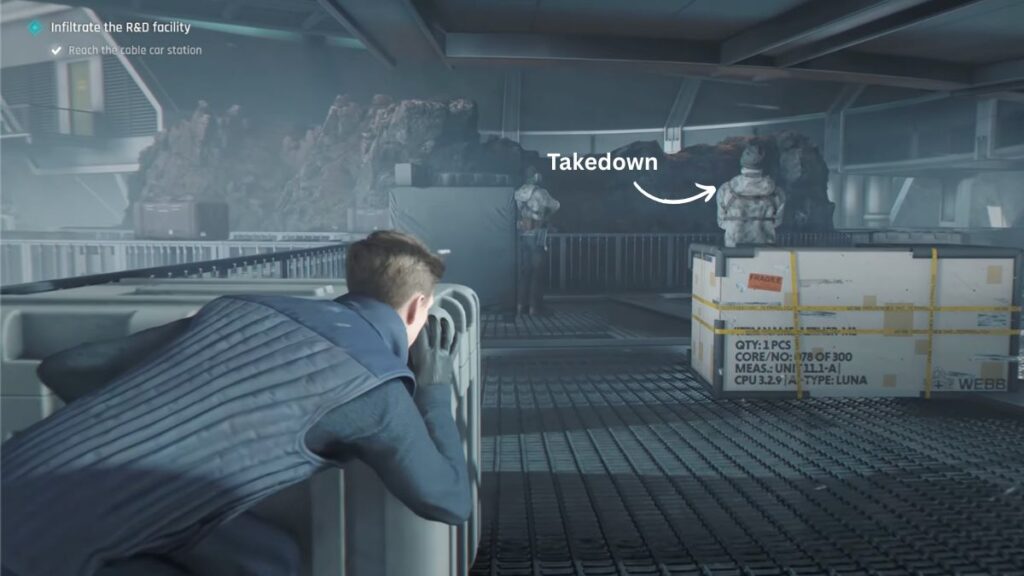
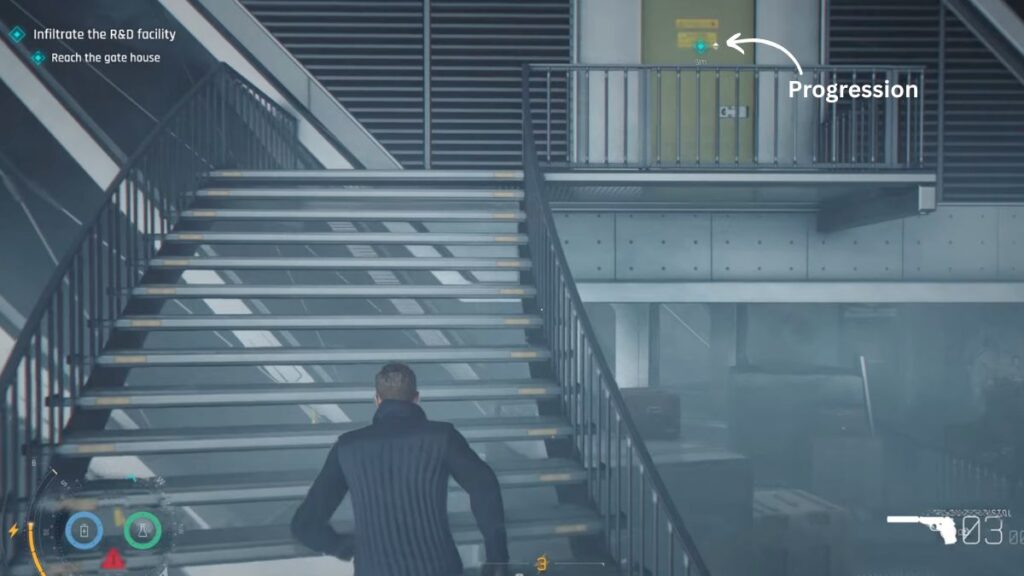
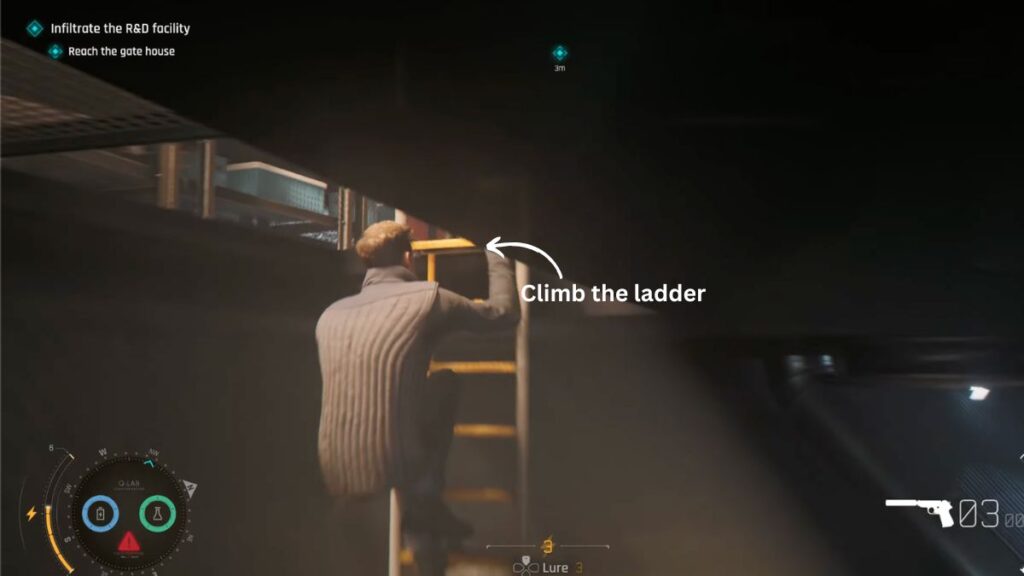
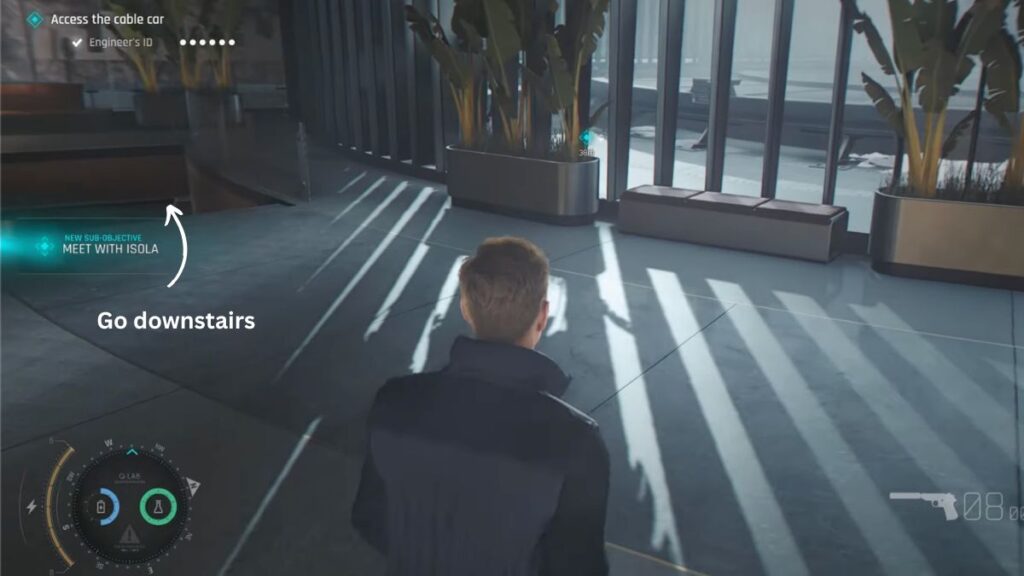
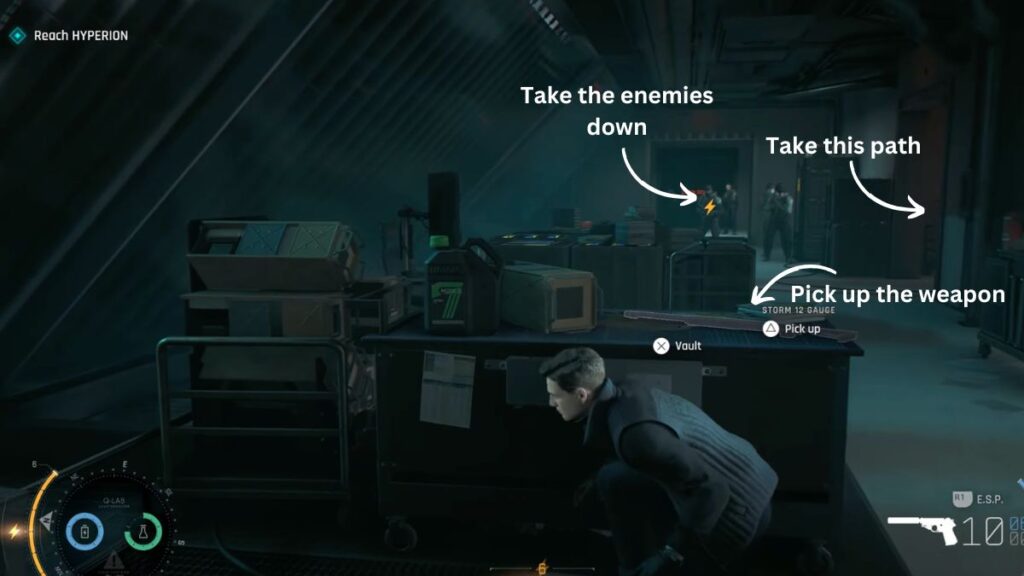
Your new sub-objective is to Reach the Gate House. Two guards are standing ahead. Isola says she will take the one on the left so sneak behind the guard on the right and take him down. Take the right path and shoot the guard you spot in the distance. Keep moving forward until you reach a platform in the center. Walk across it but at the far end there are four more guards. Shoot the one on the right first, then the two in the center, then the one on the left. You need to move quickly here. Go upstairs through the green door, keep moving forward, and climb the yellow ladder inside to reach the upper level.

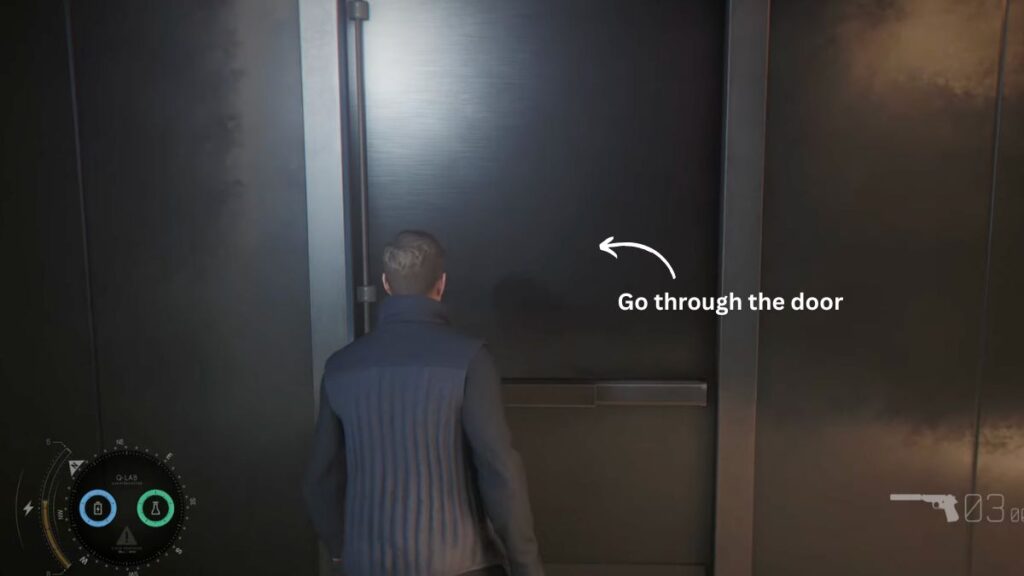
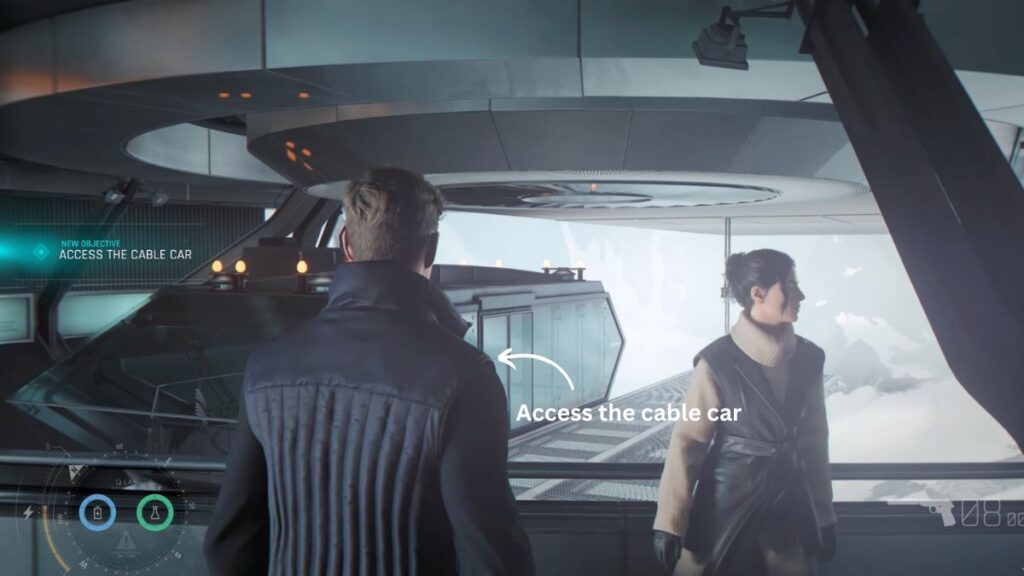
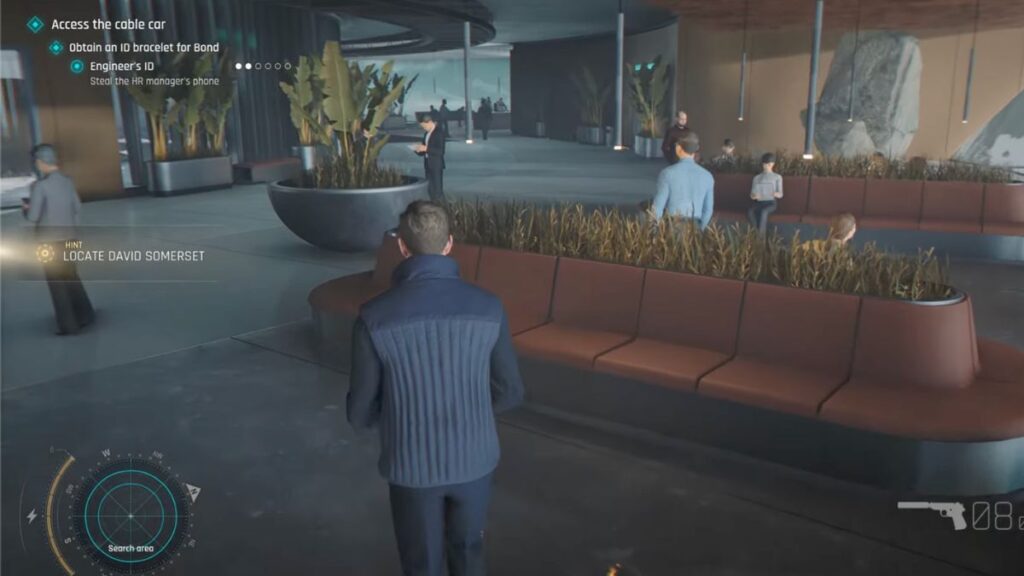
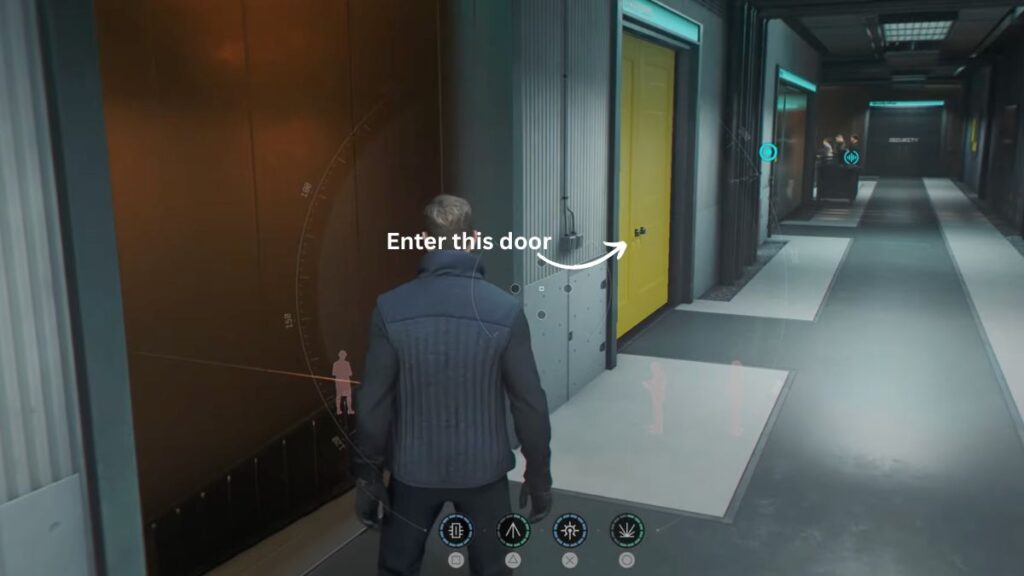
Take a right through the metal door and meet up with Isola again. A short dialogue plays between them and then they split up. Your next objective is to Access the Cable Car, with three sub-objectives: Obtain an ID Bracelet for Bond, Obtain an ID Bracelet for Isola, and Explore to Find Opportunities.
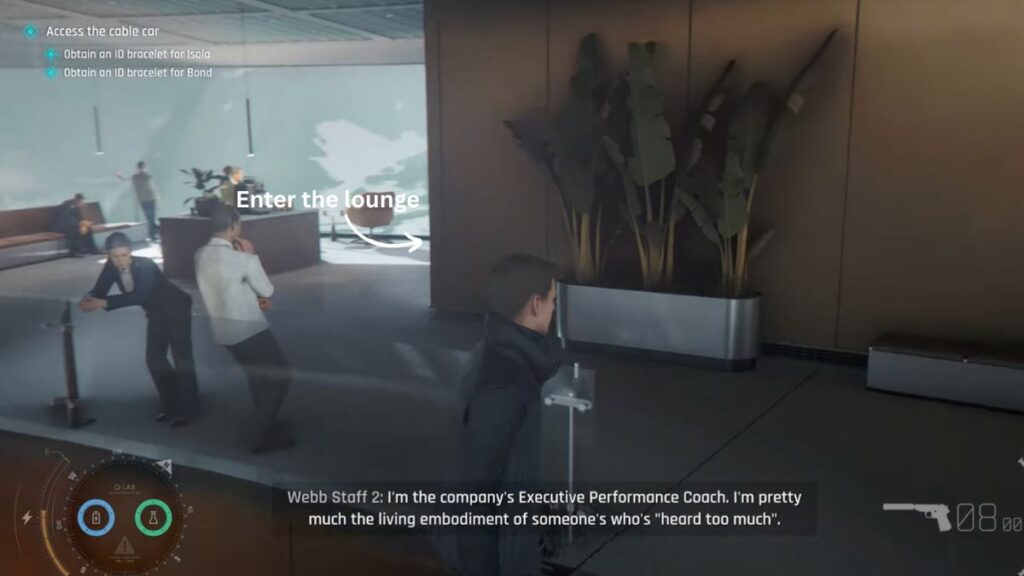
Getting the ID Bracelets
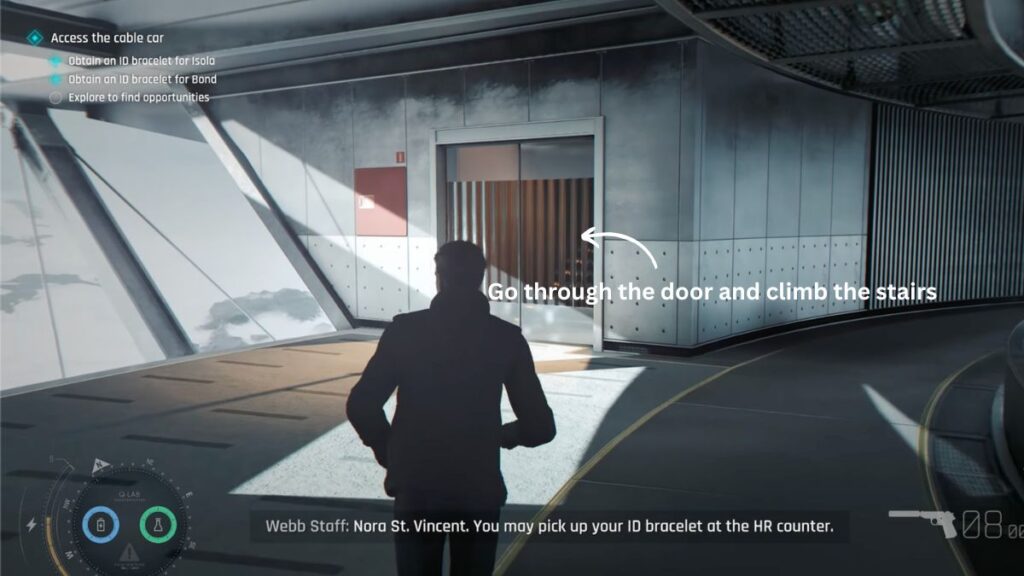
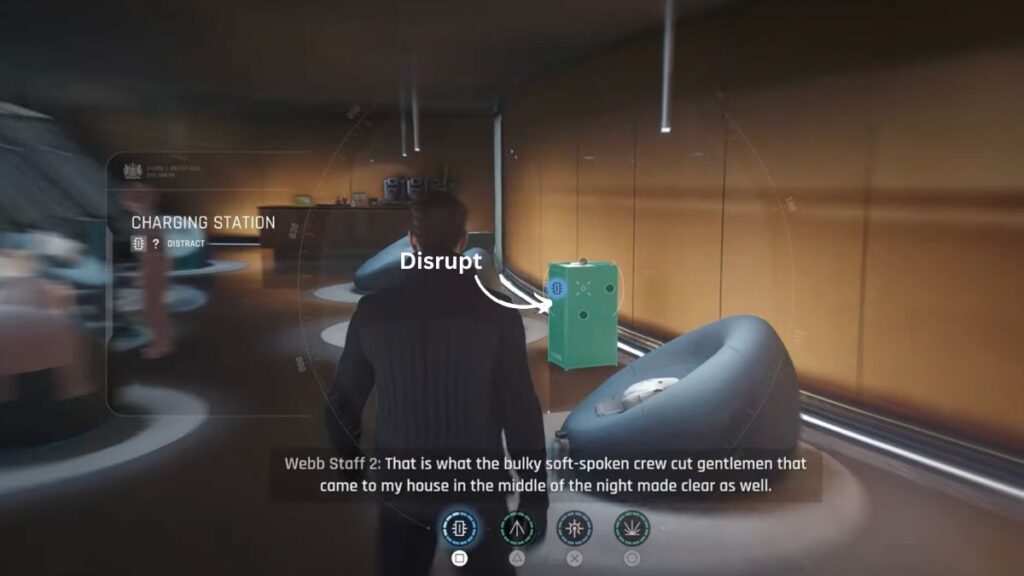
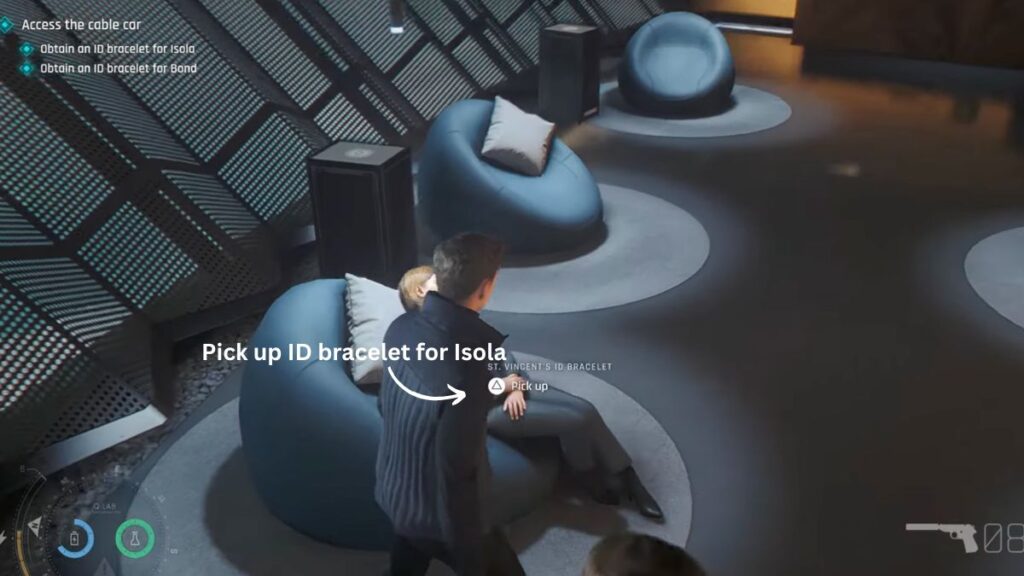
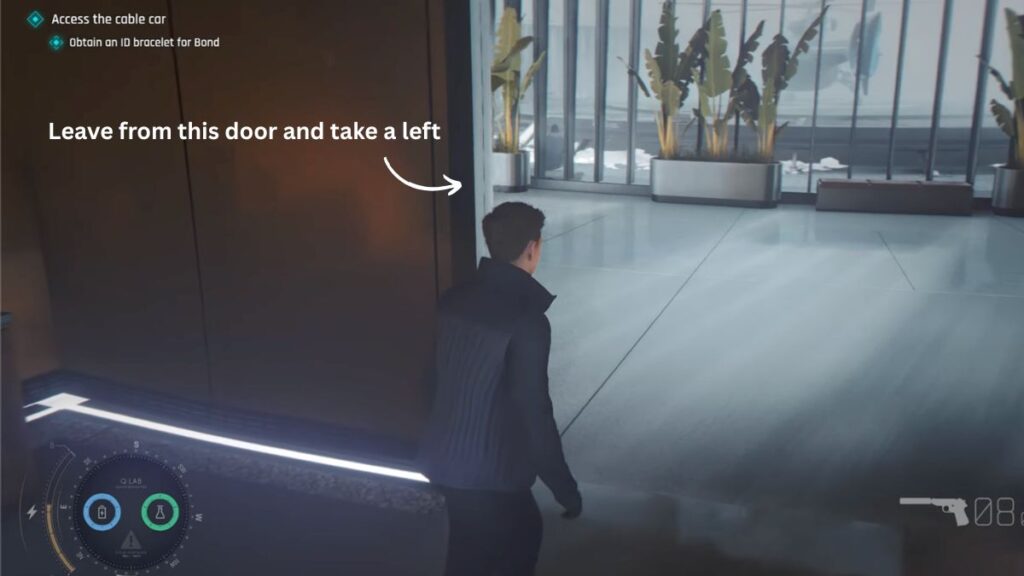
Take a left and look for a glass door on the left side with stairs behind it. Go through the door and head upstairs. At the top, take a left and enter the lounge on the right. Inside the lounge, use your Q-Watch on the charging station to create a distraction. While people are distracted, walk past the girl sleeping on the seat and pick up her bracelet. This completes the Obtain an ID Bracelet for Isola sub-objective. Leave the lounge through the door on the right and take a left.
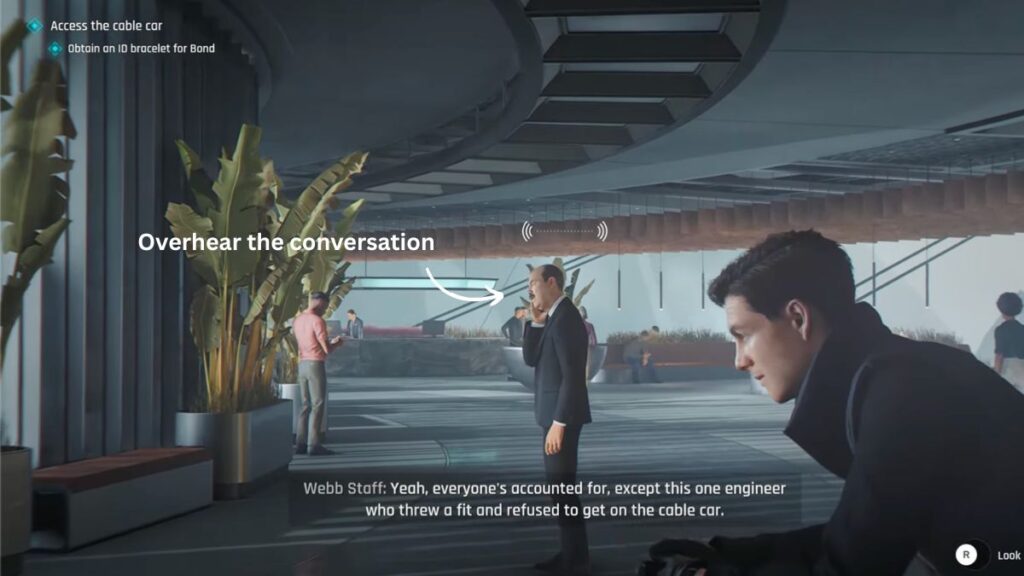
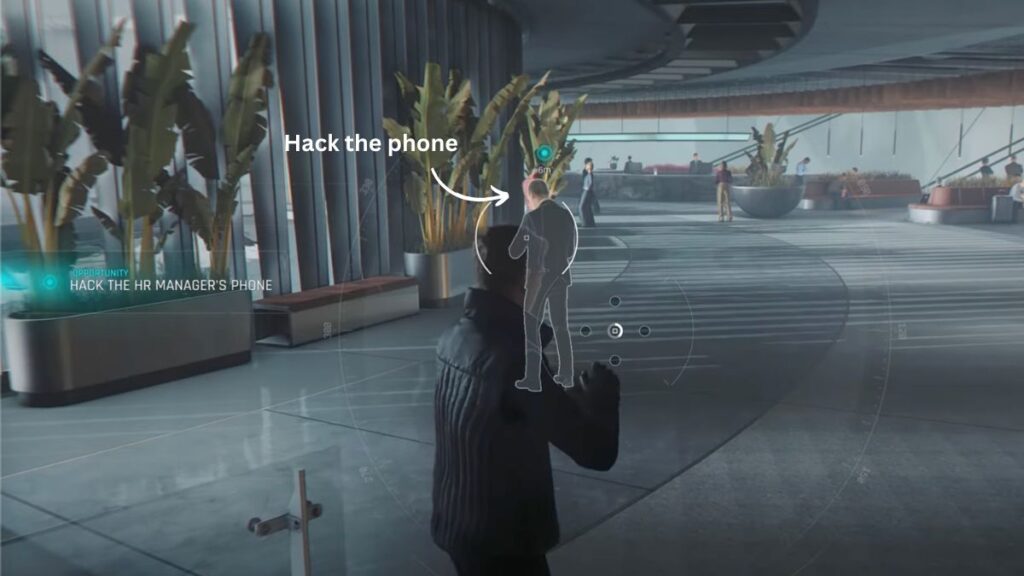
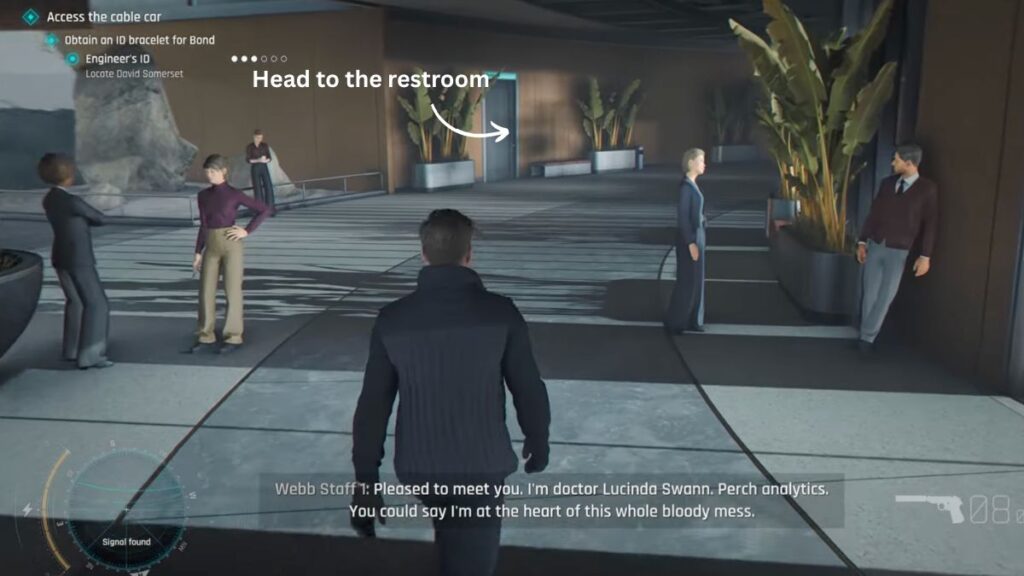
Keep moving through the reception-like area until you spot an HR list on a tabletop. Keep going and you will find a bald man talking on a phone near some stairs. Stand close enough to overhear the conversation. This gives you your next move, which is to Hack the Manager’s Phone. Follow him and attempt the hack but it will fail. You now need to Steal the Manager’s Phone instead.
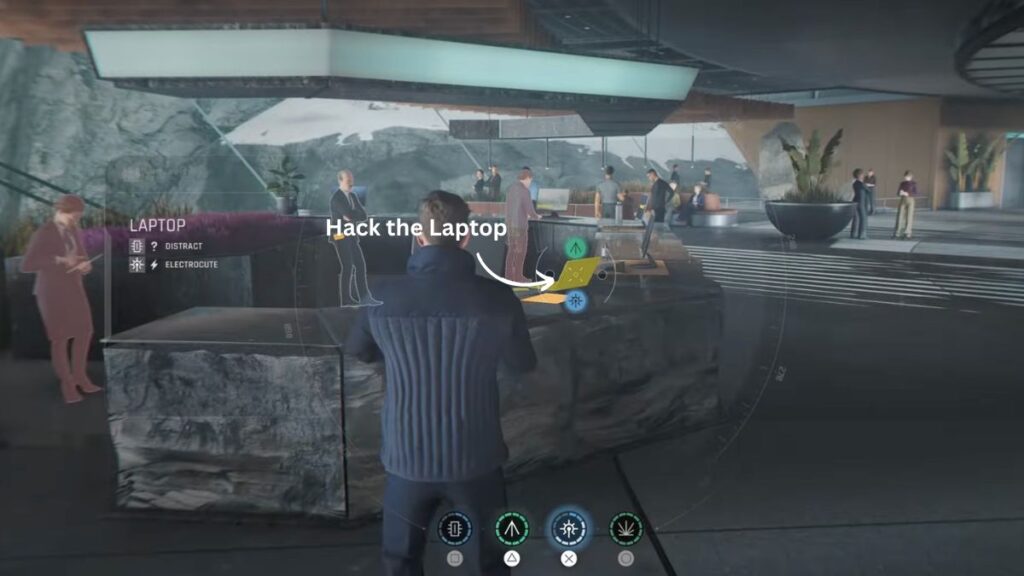
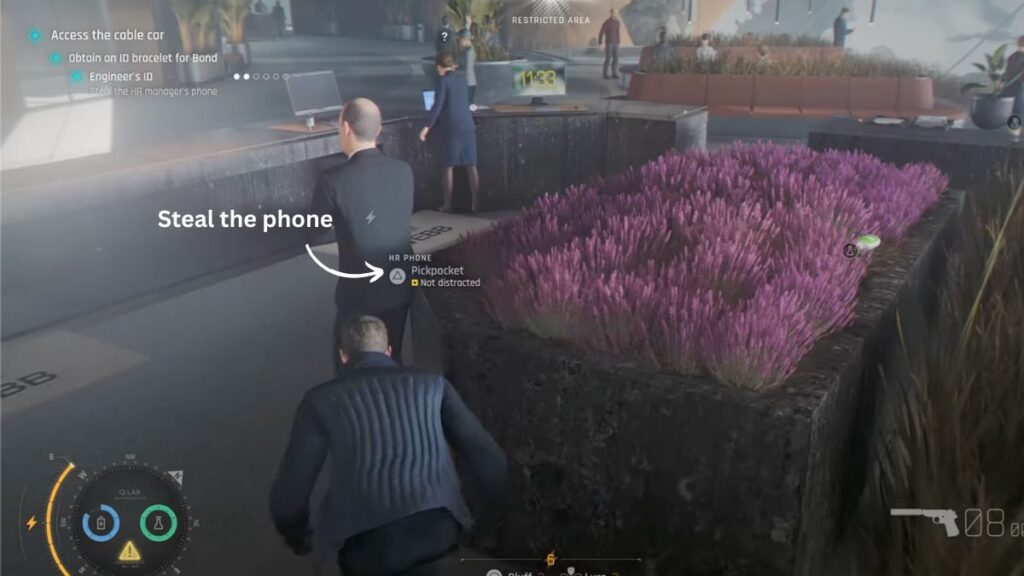
Keep following him and hack the laptop on the tabletop where you earlier saw the HR list. This causes a distraction. Vault to the other side of the tabletop, crouch in the grass, and pickpocket the phone from behind. Once you have it, your next hint is to Locate David Somerset.
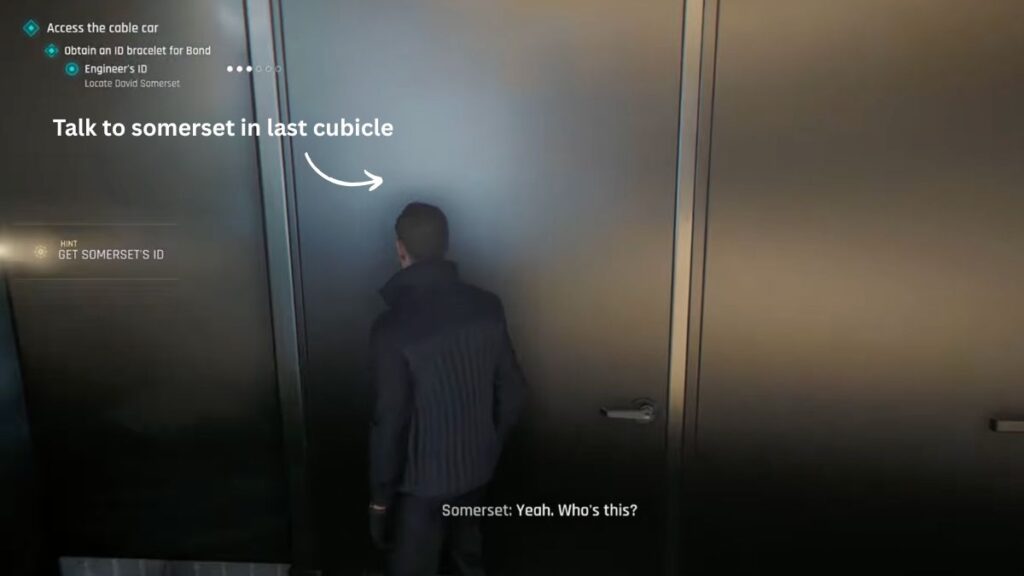
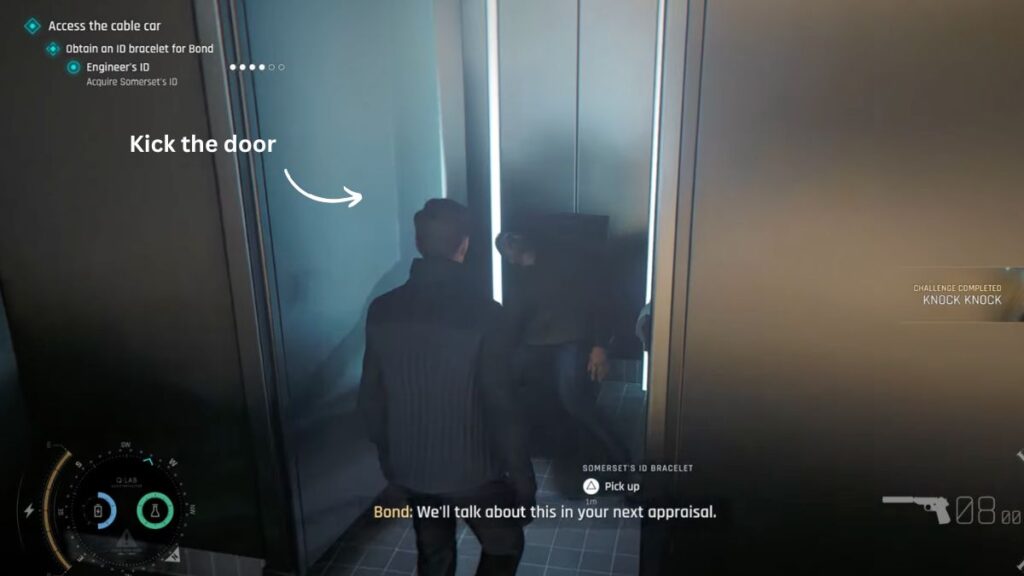
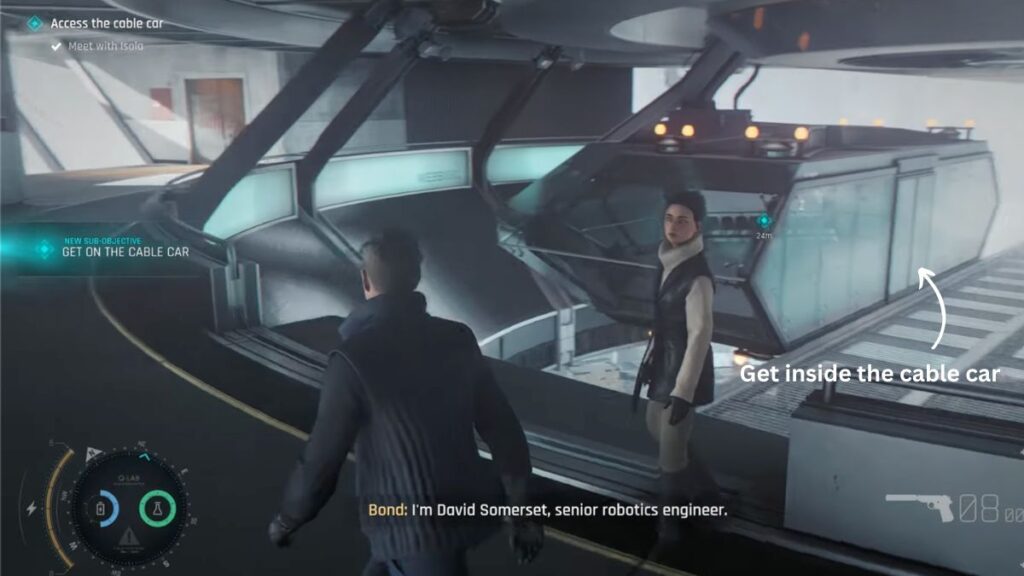
Walk back to the area where you first saw the manager on the phone. The restroom door is on the left side. Go inside. Somerset is in the last cubicle. Interacting with it starts a short dialogue between Bond and Somerset but it does not get you anywhere useful. Kick the door open to knock Somerset out. Pick up his ID bracelet. This completes the Obtain an ID Bracelet for Bond sub-objective. Your next sub-objective is to Meet Back with Isola.
Take a left and go down the stairs in front of the restroom. Keep moving forward until you reach her. Once you are beside her the next sub-objective is to Get on the Cable Car, which is directly in front of you. A cutscene plays.
Upper Facility
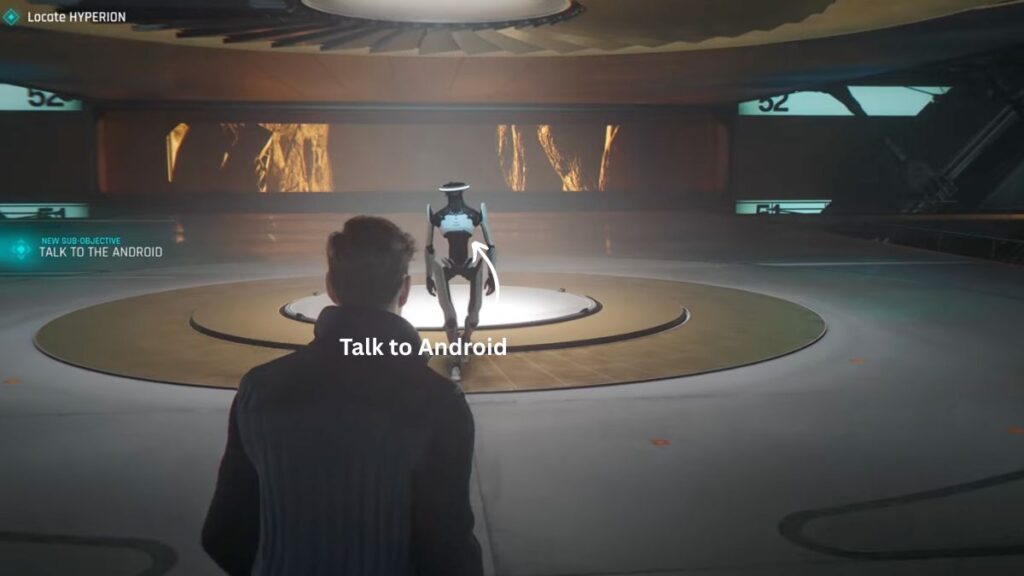
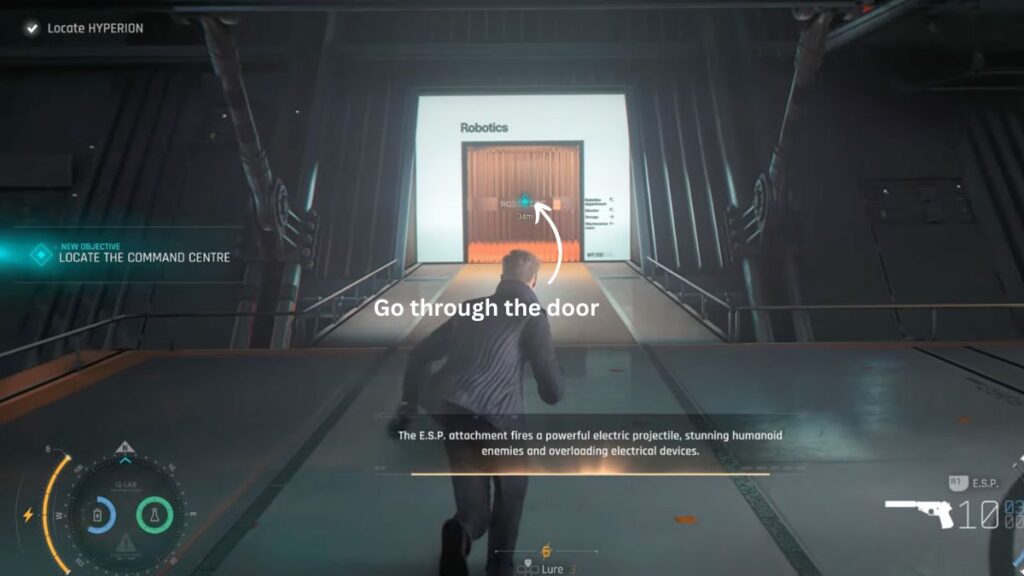
After the cutscene your objective is to Locate Hyperion. Follow Isola for now. On the upper platform you will see a robot. Your next sub-objective is to Talk to the Android. Interact with it and a dialogue plays between Bond and the android. When it ends, take a left toward the Robotics Department. Your objective also updates to Locate the Command Centre.
Inside the Robotics Department you will see an elevator ahead. Shoot it with the attachment Isola gave you to fry it and force the doors open. Interact with the panel inside to go to the Robotics Department floor. Walk inside and a short cutscene plays.
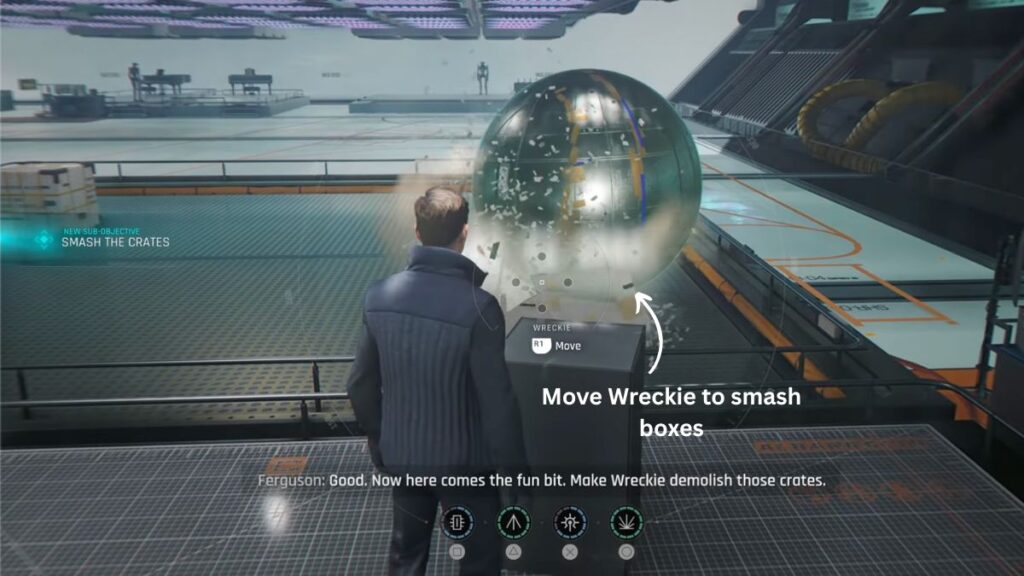
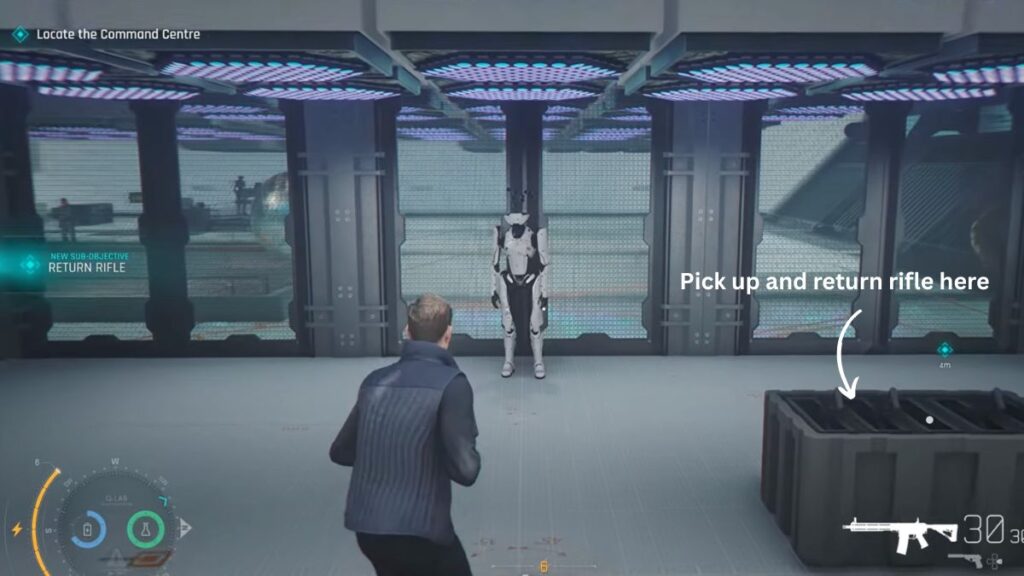
Ferguson asks you to step onto a platform for a demo. Your sub-objective is to Pick Up the Controls, which are directly in front of you. Your next sub-objective is to Move Wreckie. Hold L1 to activate the lens and tap R1 to order Wreckie to move. The following sub-objective is to Smash the Crates. Use Wreckie to break them. After a short dialogue your next sub-objective is to Shoot the Android. Pick up the gun from the crate ahead and fire at it. No matter how many shots you land you cannot damage it. Your next sub-objective is to Return the Rifle. Put it back in the crate.
The Utility Area
Isola tells you the utility area connects every floor. Your next objective is to Get to the Utility Area while also learning more about the research tests.
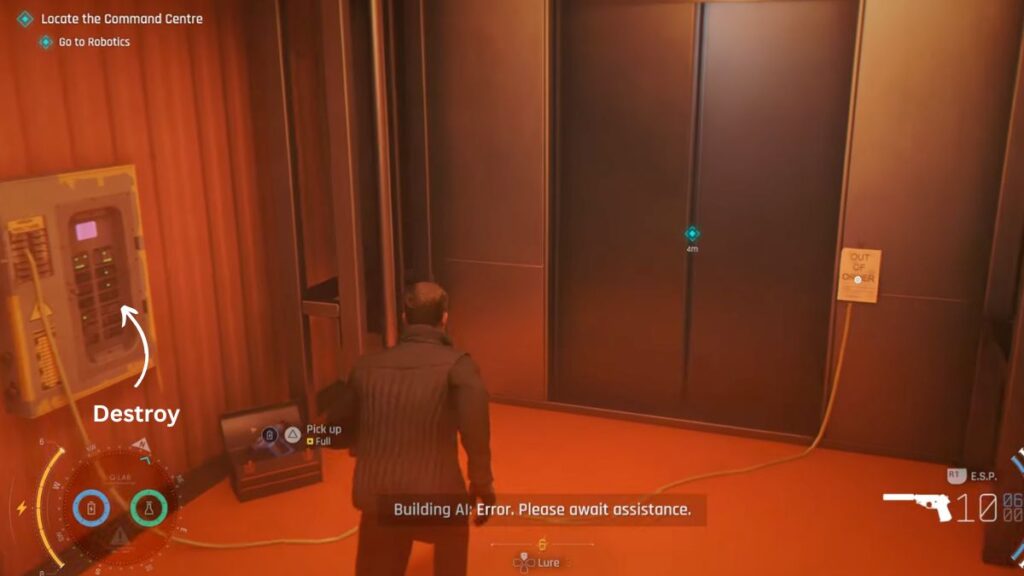
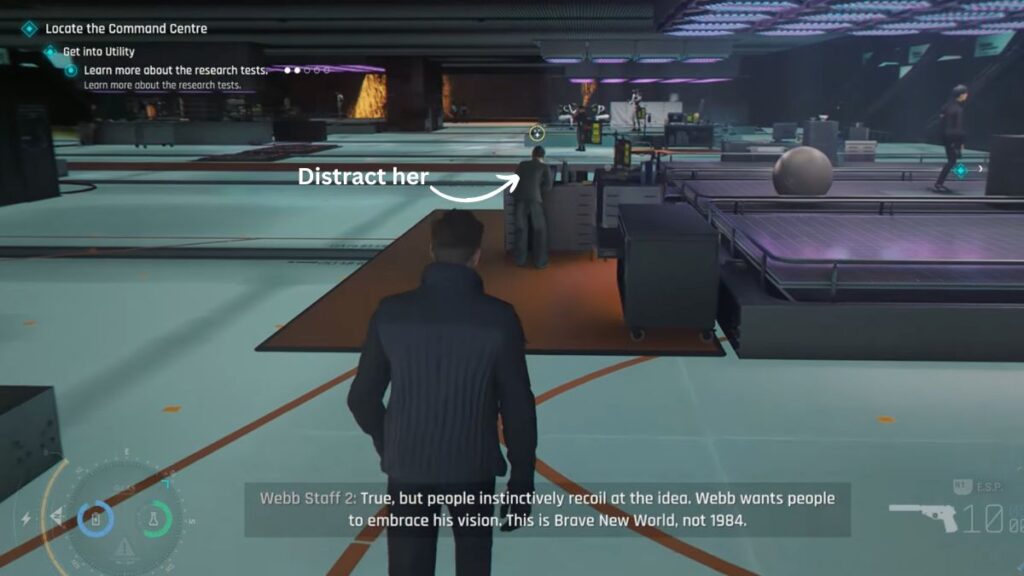
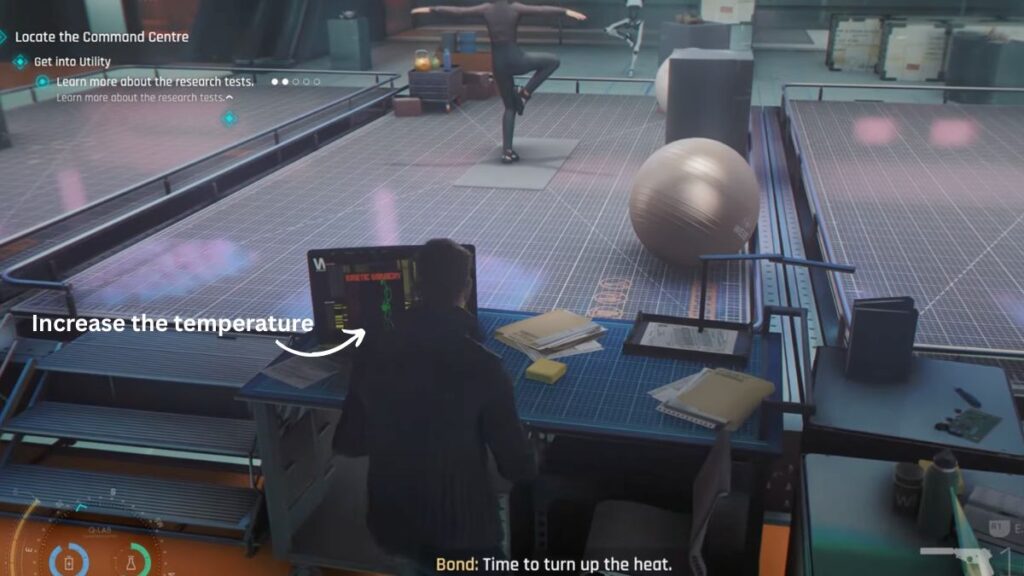
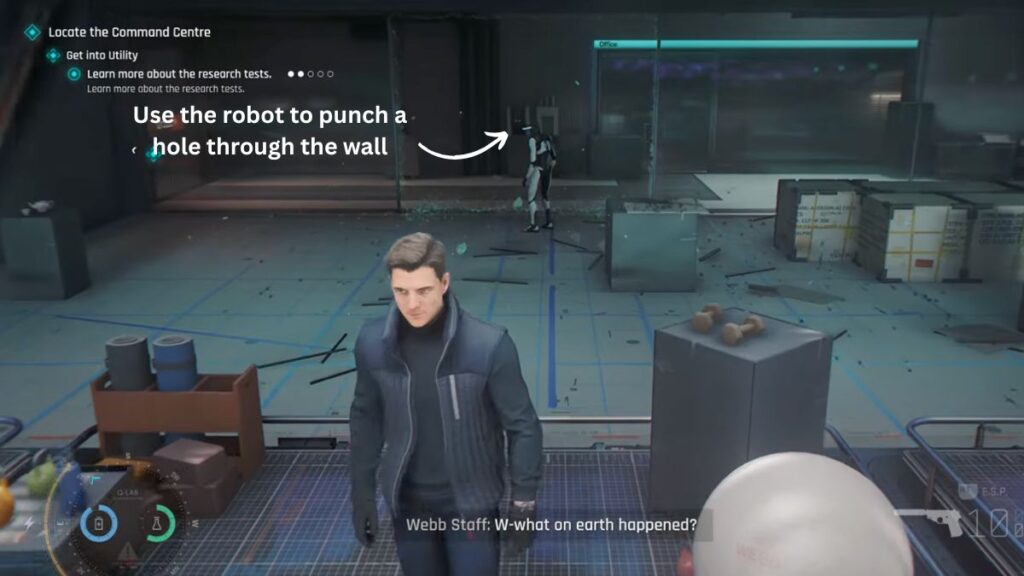
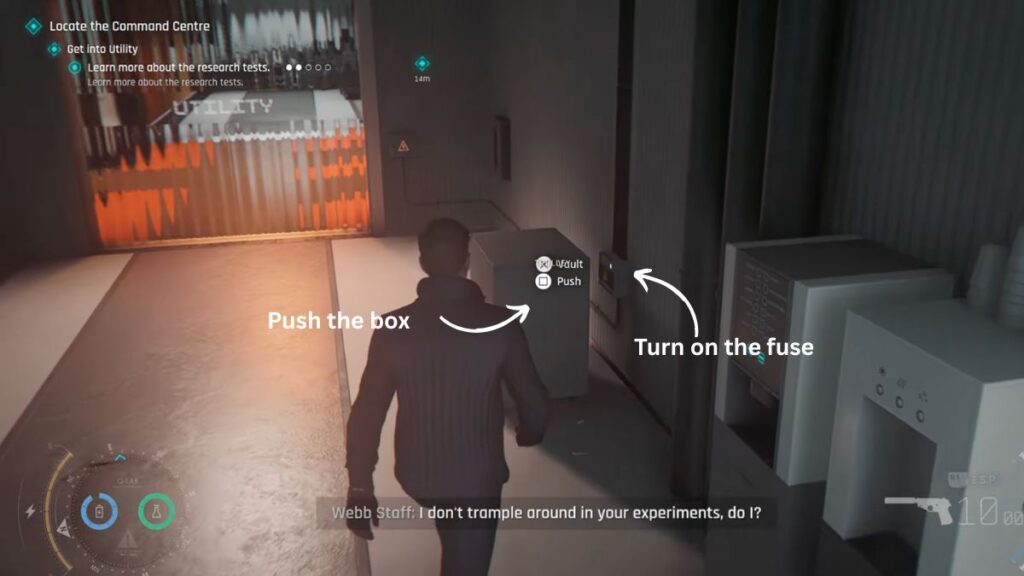
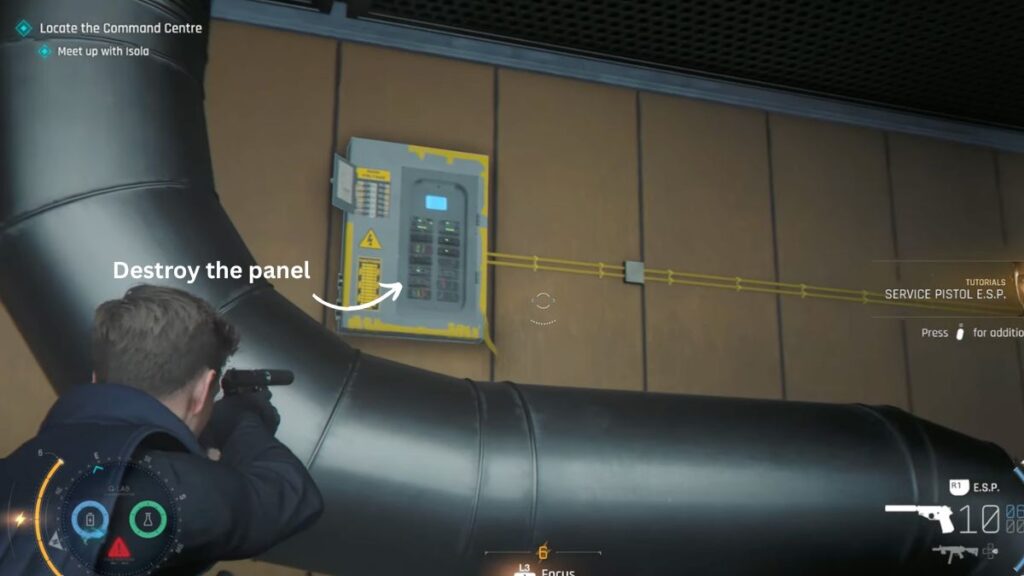
Go to the platform in front of the utility area. An operator is at the panel and another person is on the platform being mimicked by the robot. Use the Dart Phone on the operator. When the lady at the panel leaves, use the laptop next to it to raise the temperature so the lady on the platform leaves too. Once she is gone, step onto the platform yourself. The robot will begin mimicking you. The glass wall behind the robot leads to the utility area. Turn around and punch so the robot mirrors you and breaks the glass. Go through the broken wall and take a left. Push the box ahead into the circuit in front of it, then turn off the fuse box behind it to open the utility area door.
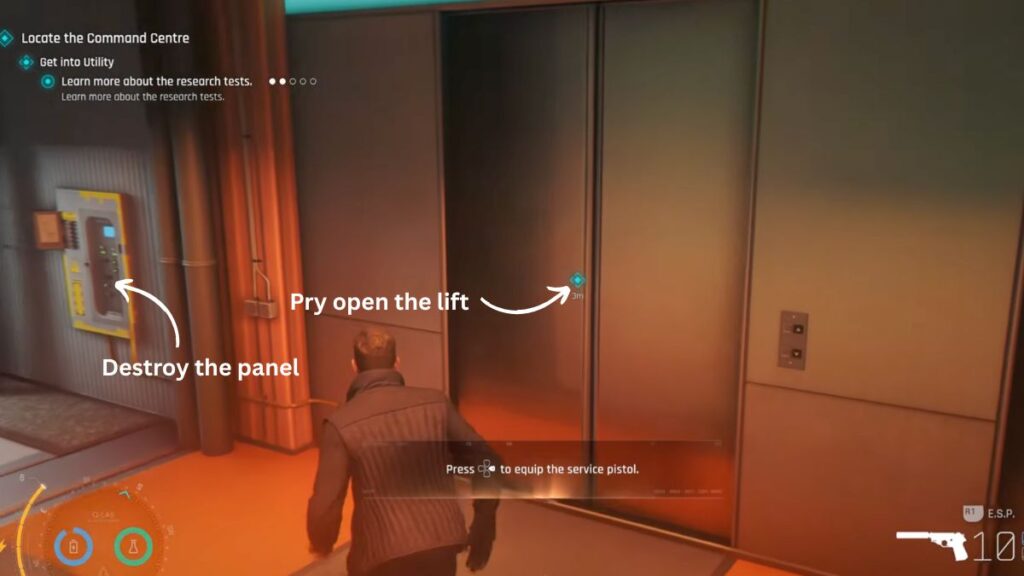
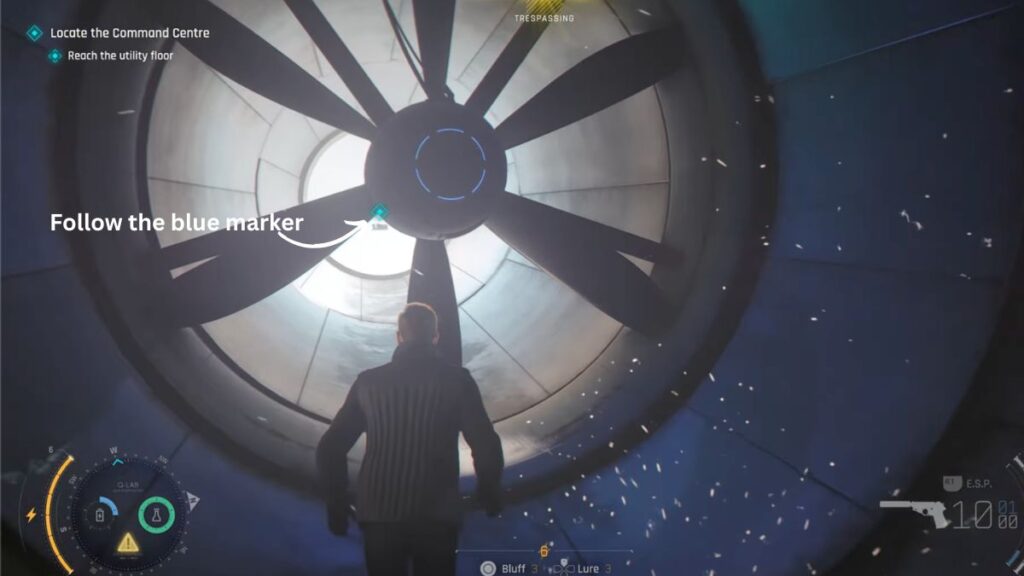
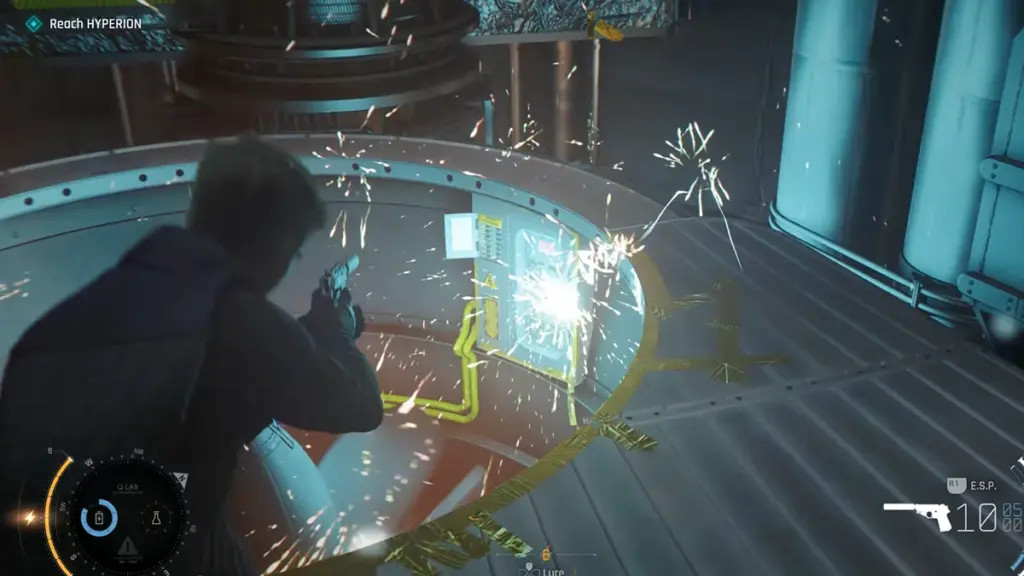
Inside the utility area, use your service pistol on the panel next to the elevator to open its doors. Your next sub-objective is to Reach the Utility Floor but there is no elevator available so you will need to climb. Just follow the blue marker and the path stays mostly linear. Show off your parkour skills to get through. Once on the other side you will find a panel. Turn it off to open the doors. Squeeze through and you will see two large fans ahead. Hack them and pass through the left one to follow the blue marker.
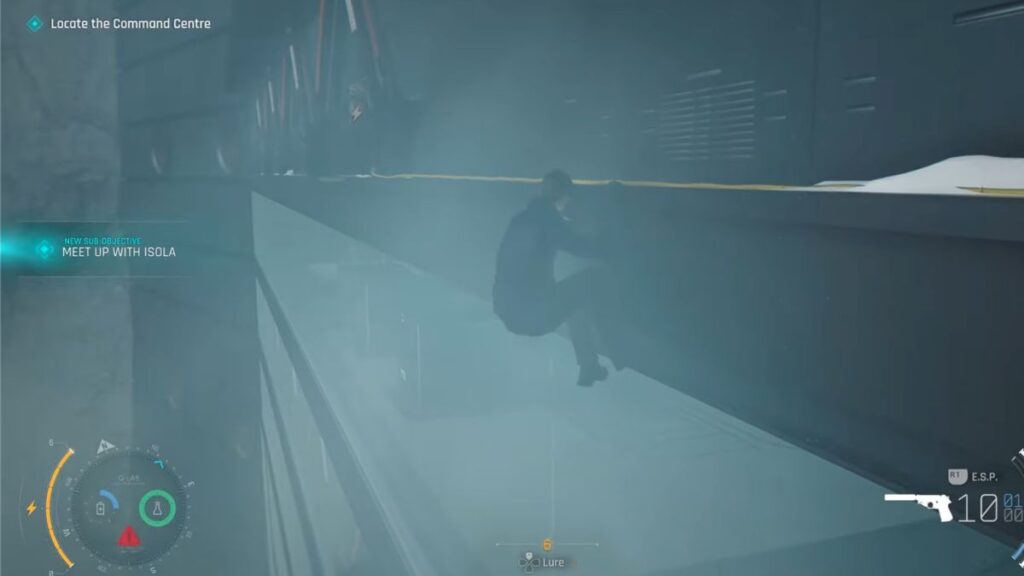
The fan opens out to the cliffside. As you pass through it will activate and you will be hanging on the edge. Move right and keep going along the ledges. Do not try to go through the second fan. Climb along the ledges until you reach the utility floor and your sub-objective updates to Meet Up with Isola.
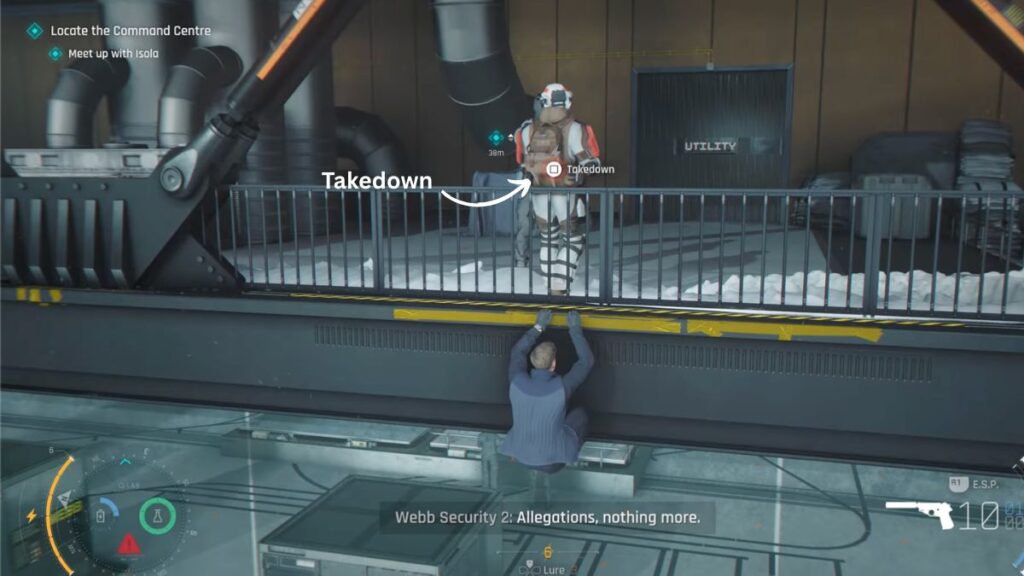
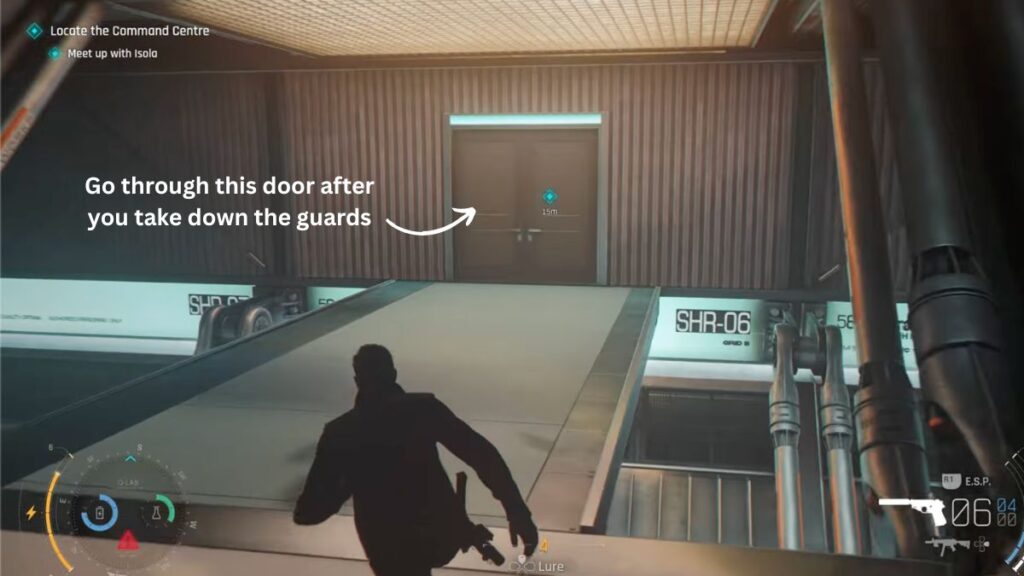
As you continue hanging along the outside of the building you will reach an area with a railing where two people are standing. Wait for their dialogue to finish and for one of them to walk away. Take down the guard near the railing, then sneak up on the second man and take him down too. Shoot the third guard further into the area. Sabotage the panel and get inside.
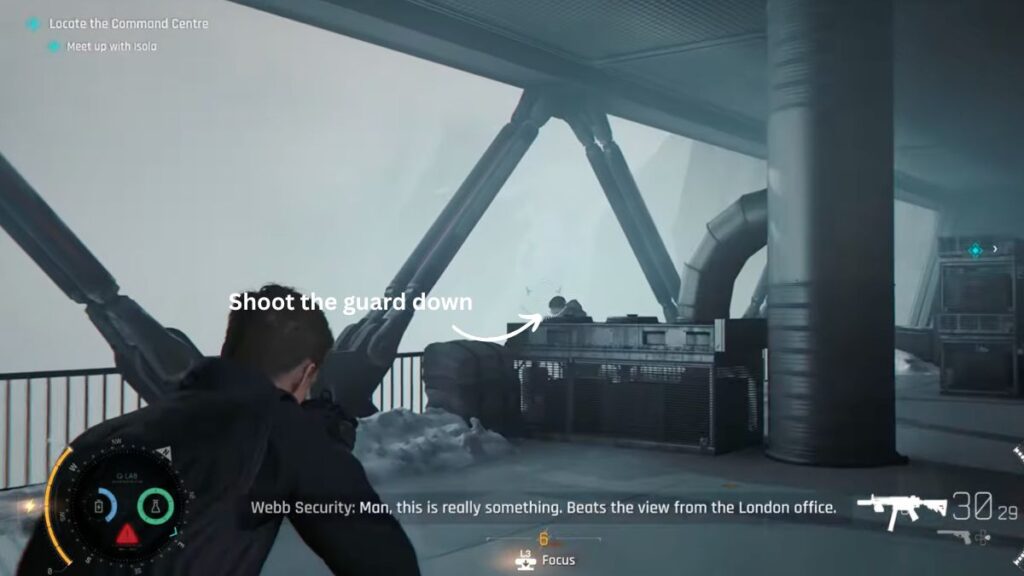
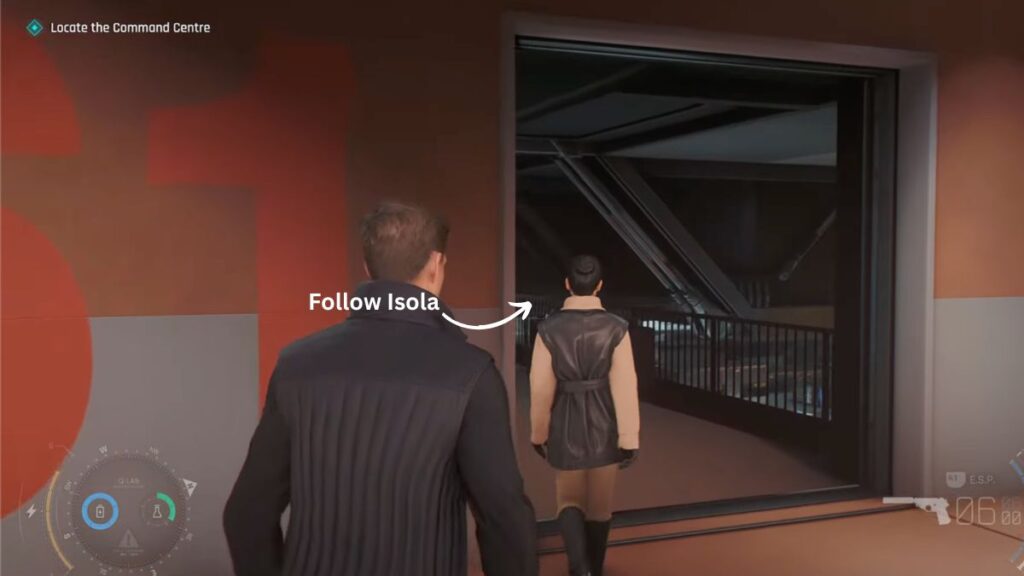
Crouch and move carefully through the inside. There are multiple guards to deal with. Create distractions and use takedowns to clear them one by one. Once the area is clear go through the door at the end. On the other side you will reunite with Isola. Follow her through the operations door ahead and go upstairs. Take another flight of stairs and go through the next operations door.
Accessing the Command Centre
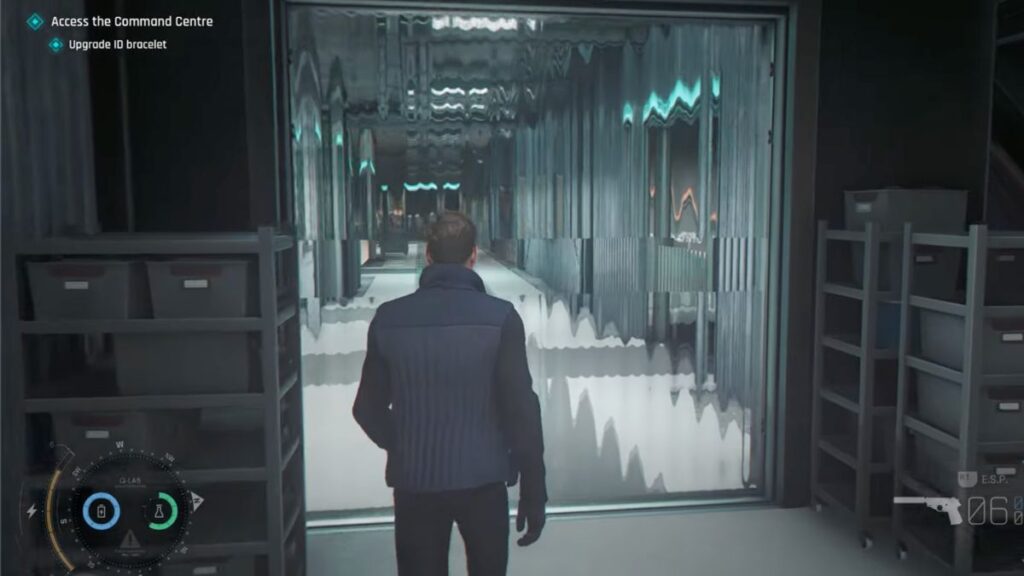
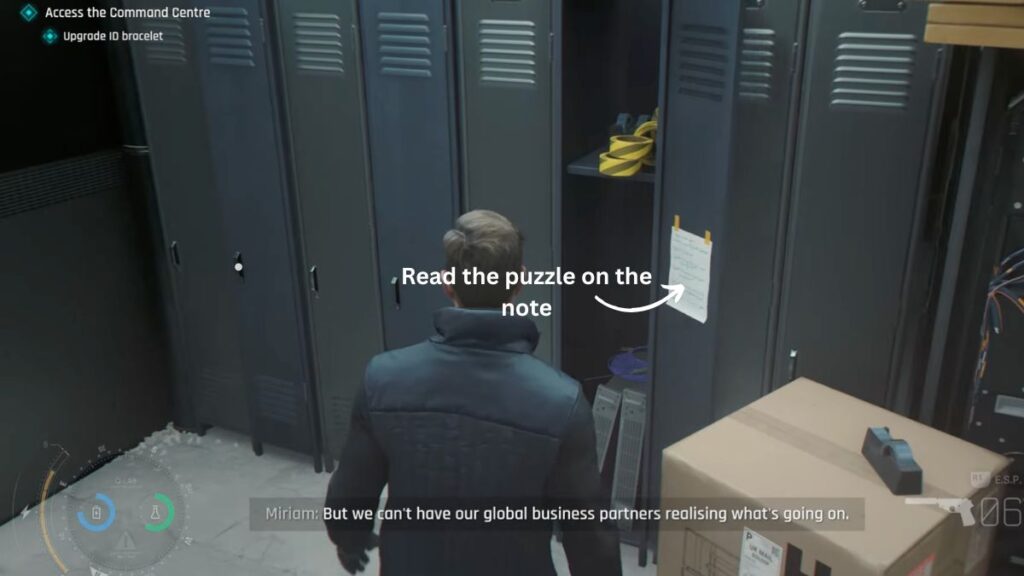
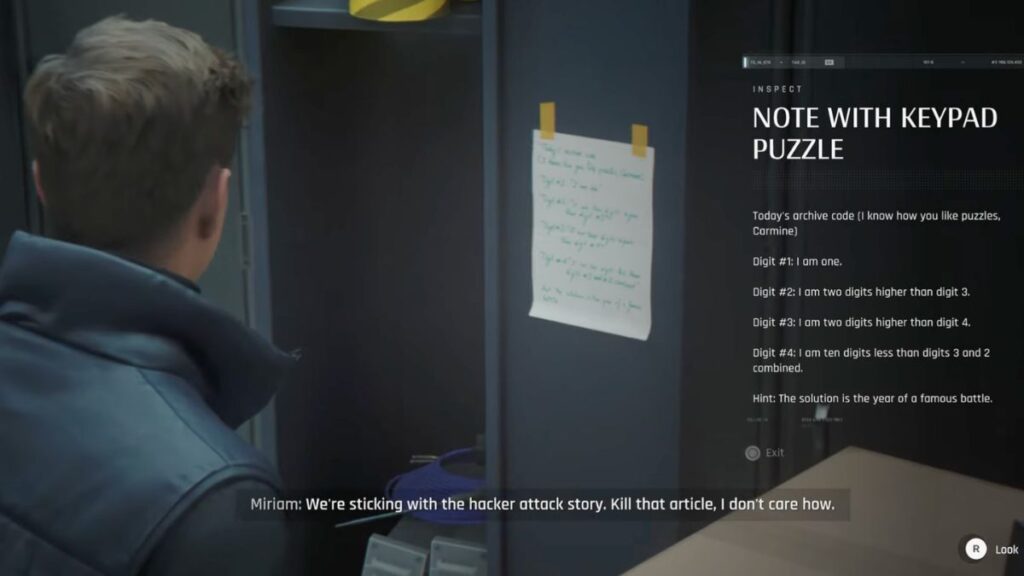
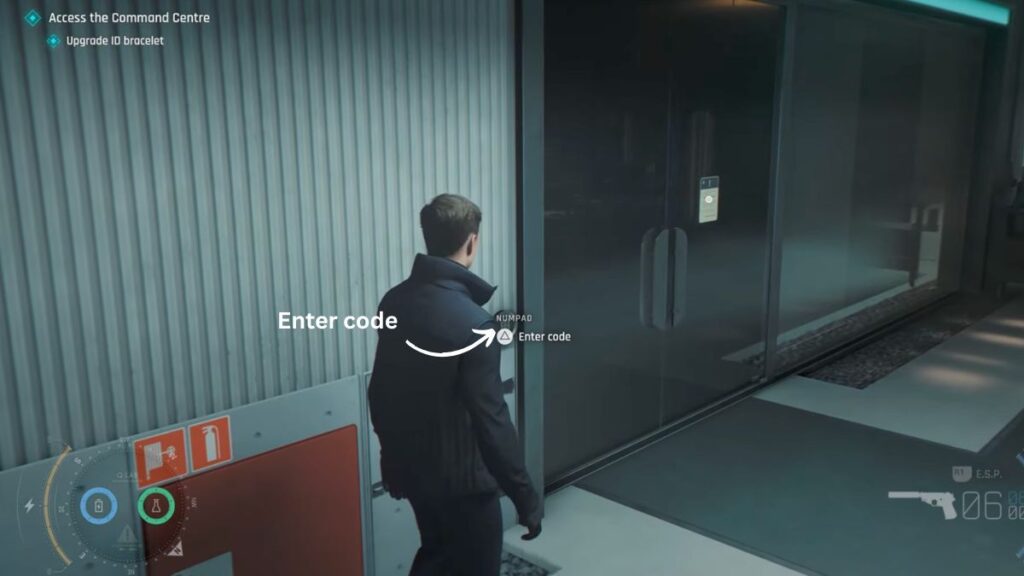
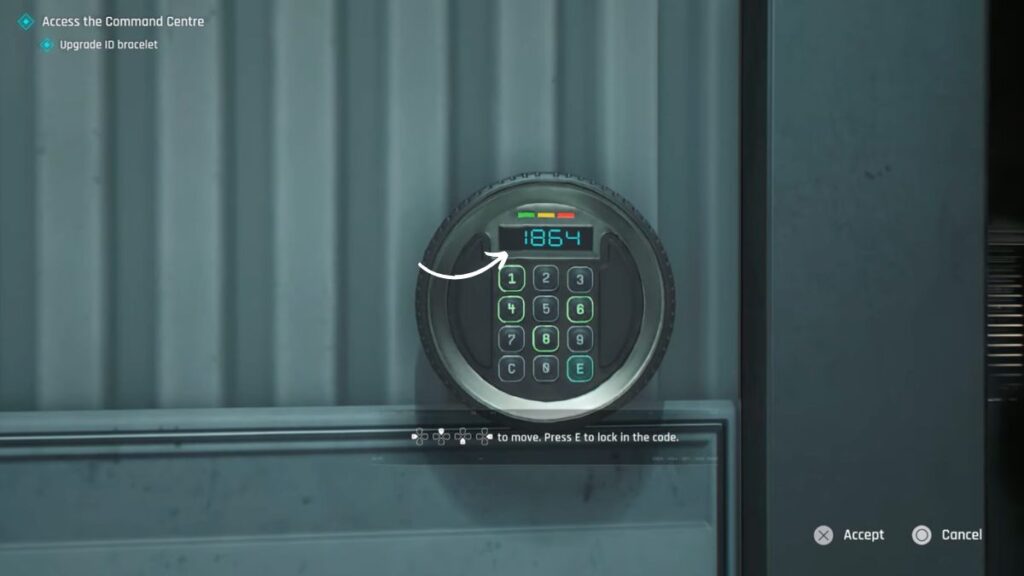
After a short dialogue with Isola your next objective is to Access the Command Centre. Your first sub-objective is to Upgrade Your ID Bracelet. Go through the door ahead. On the left you will see a room with a yellow door. Break the lock and go inside. Open the lockers and inside one of them you will find a keypad puzzle for an archive code. Head back to the hallway and look for the locked door with a number pad on the left. Interact with it and enter the code.
The code is 1864. Here is how to work it out:
Setting up the equations:
- Digit 1 = 1
- Digit 2 = Digit 3 + 2
- Digit 3 = Digit 4 + 2
- Digit 4 = (Digit 3 + Digit 2) − 10
Solving:
From the clues, let assume Digit 4 = x.
- Digit 3 = x + 2
- Digit 2 = (x + 2) + 2 = x + 4
Now plug into the Digit 4 equation:
x = (Digit 3 + Digit 2) − 10 x = (x + 2) + (x + 4) − 10
x = 2x − 4
−x = −4
x = 4
So:
- Digit 4 = 4
- Digit 3 = 6
- Digit 2 = 8
- Digit 1 = 1
The answer is 1864.
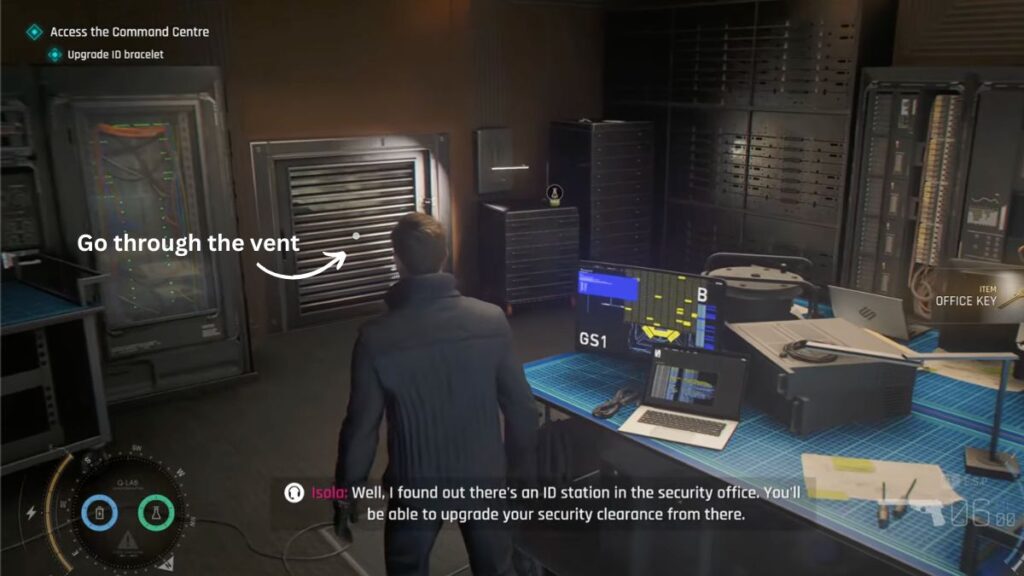
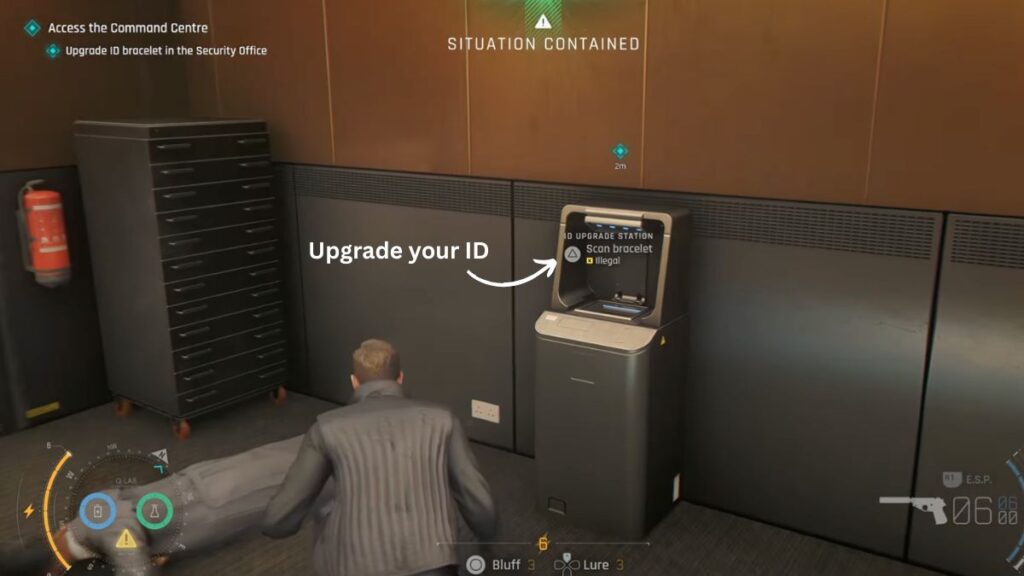
Once inside, pick up the Office Key on the table. Find the vent in the office and go through it. Your sub-objective updates to Upgrade ID Bracelet in the Security Office. Keep moving through the vent system until you reach the end and drop out. Take down the man directly in front of you. Right next to him on the left is the ID Upgrade Station. Scan your bracelet. When done, exit through the door and follow the blue marker to the command centre on the left side of the hallway.
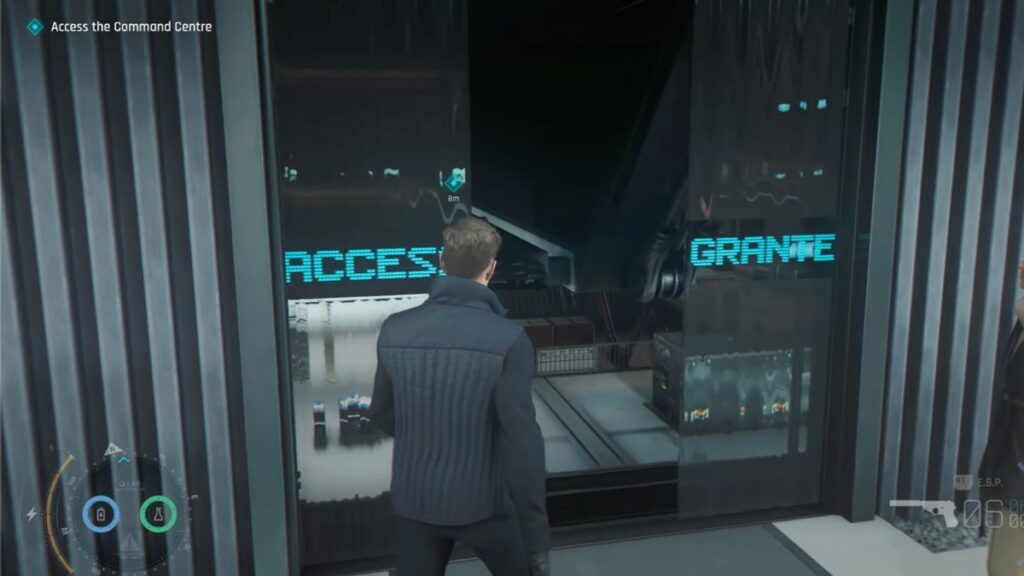
The Command Centre
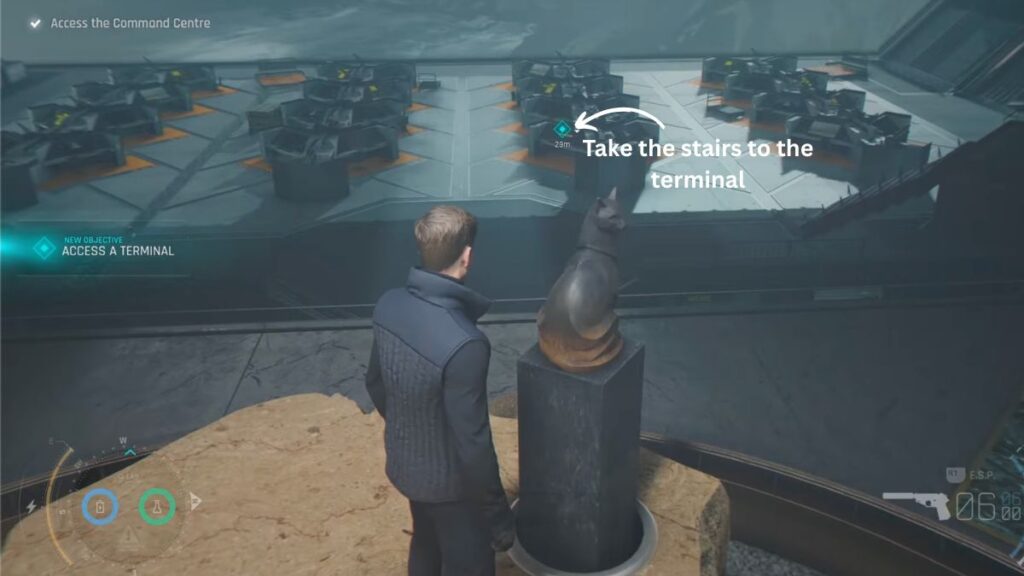
Enter the command centre and keep moving until you take a left. You will see a chair on a raised platform with a file called Webb’s Manuscript on it. Pick it up and read it. After this your sub-objective is to Find a Way Down. Turn the black cat statue directly in front of the chair around and your next sub-objective becomes Access a Terminal. Go down the stairs and follow the blue marker. A cutscene plays as you get close to the terminal.

Reaching Hyperion
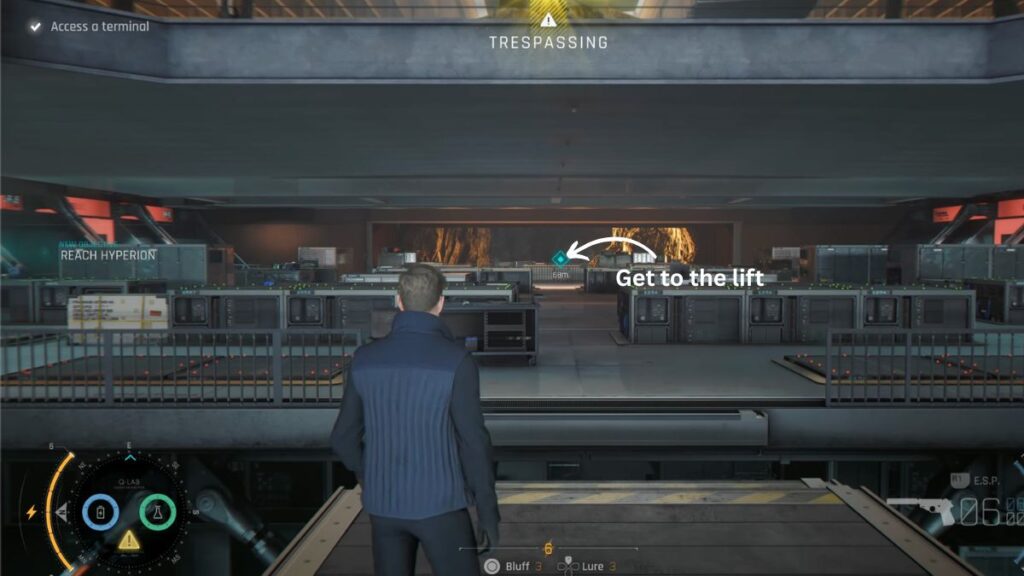
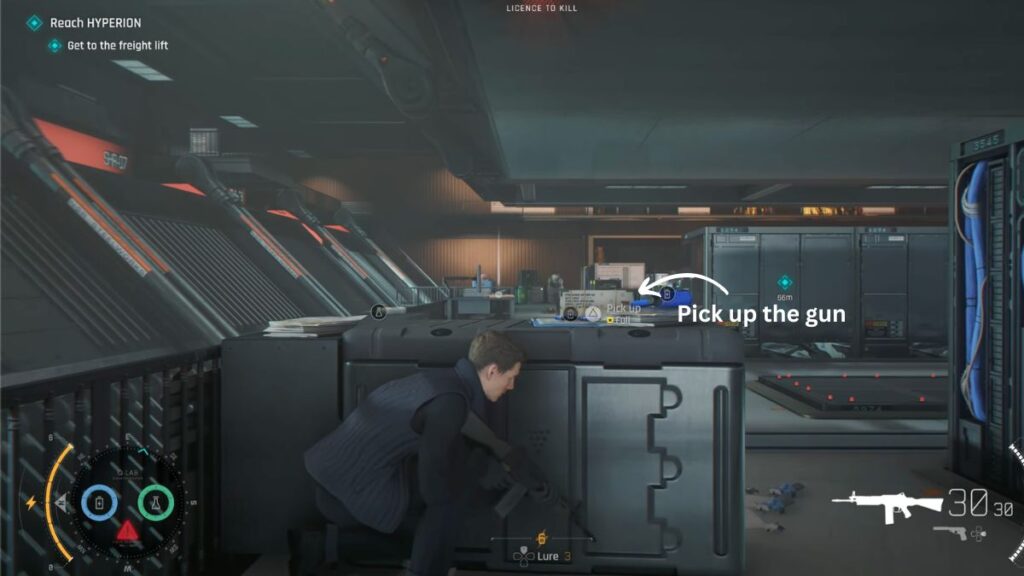
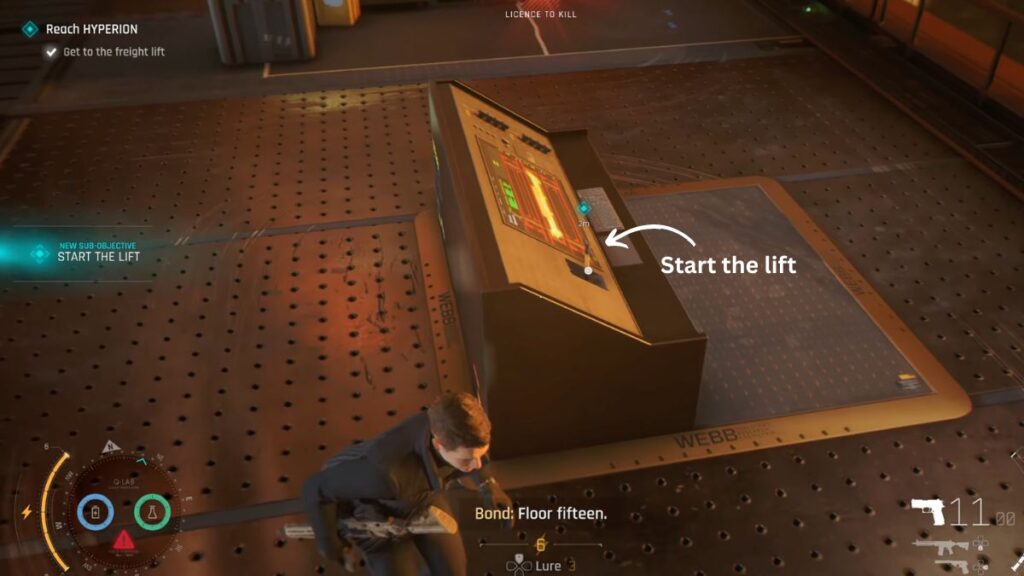
After the cutscene your objective is to Reach Hyperion. Move toward the blue marker but as you get close a large number of guards flood the area and your sub-objective updates to Get to the Freight Lift. Head to the far left and pick up the gun there. A heavy gunfight follows so be ready. Clear all the guards and soldiers and continue toward the blue marker. When you reach the panel your sub-objective becomes Start the Lift. Pull the lever on the panel. As the lift moves down a brief fistfight with soldiers begins. Take them down.
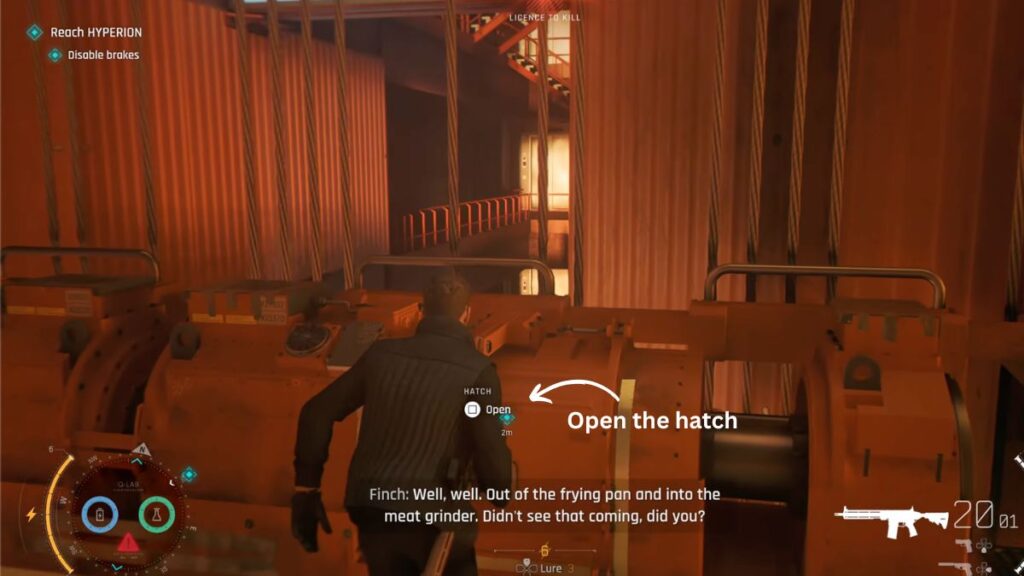
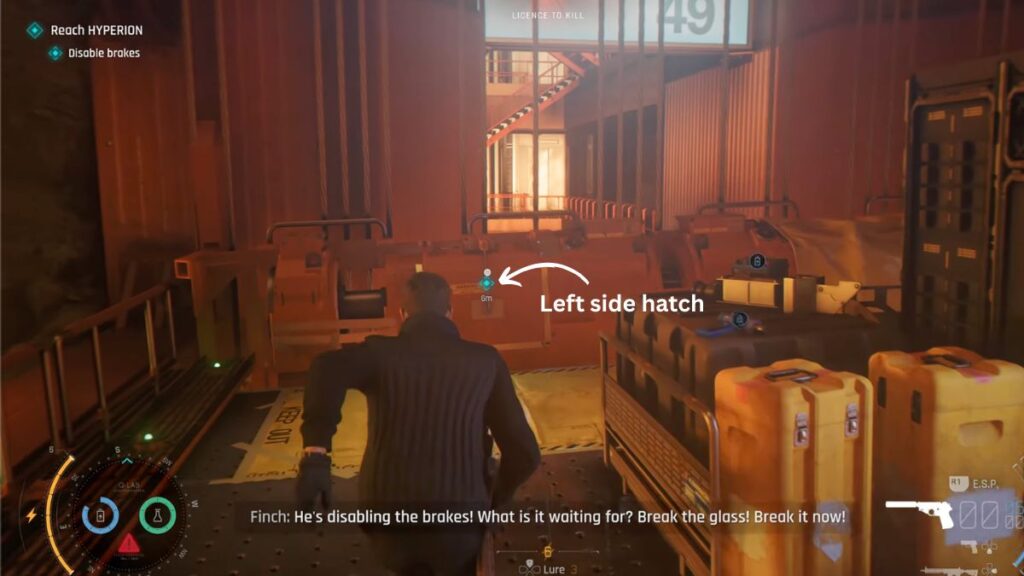
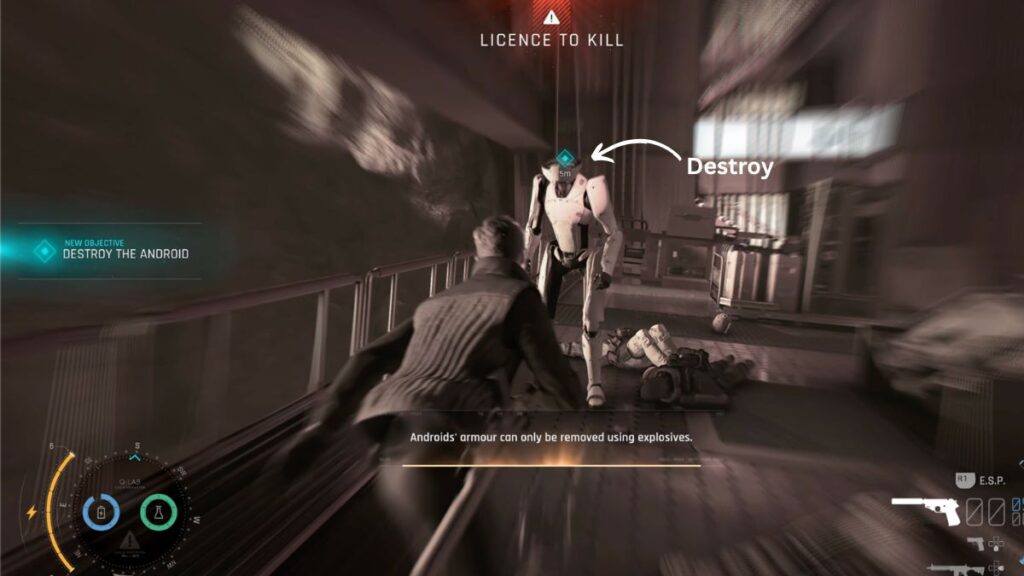
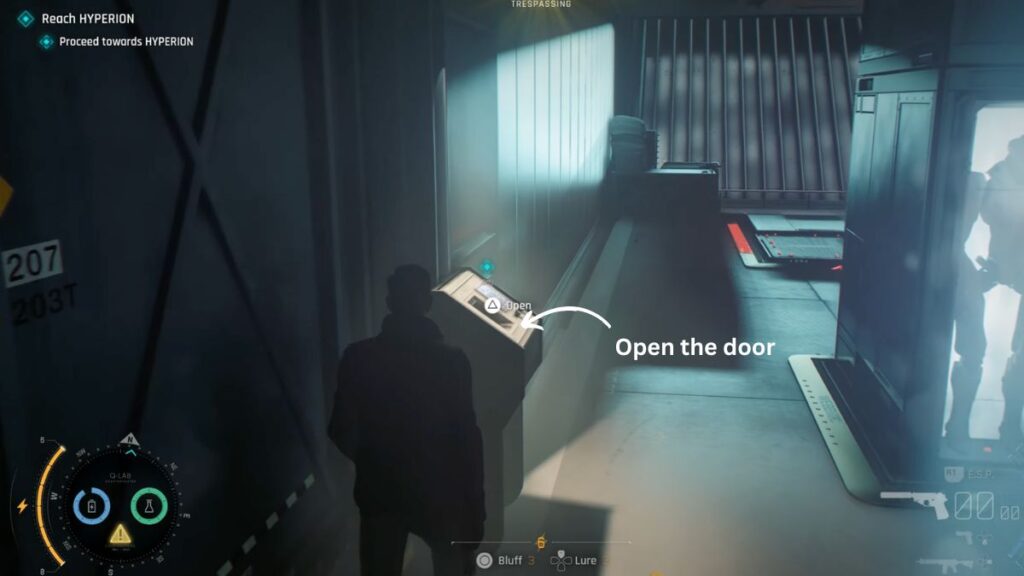
Once the lift reaches the floor your next sub-objective is to Disable the Brakes. There is a hatch on each side of the lift. Open them and destroy what is inside. Once the lift drops your sub-objective becomes Proceed Towards Hyperion. Follow the blue marker to the panel at the end of the area and open it. Your next sub-objective is to Retrieve the Override Key, which is on the lift so head back there. As you approach, an android drops down from above. Your new objective is to Destroy the Android.
The android’s armour can only be removed using explosives. Your service pistol will briefly stun it but not damage it significantly. Use explosives to strip the armour and then take it down. Once it is destroyed your sub-objective is to Open the Blast Doors. Go back to the panel at the end of the room and open them.
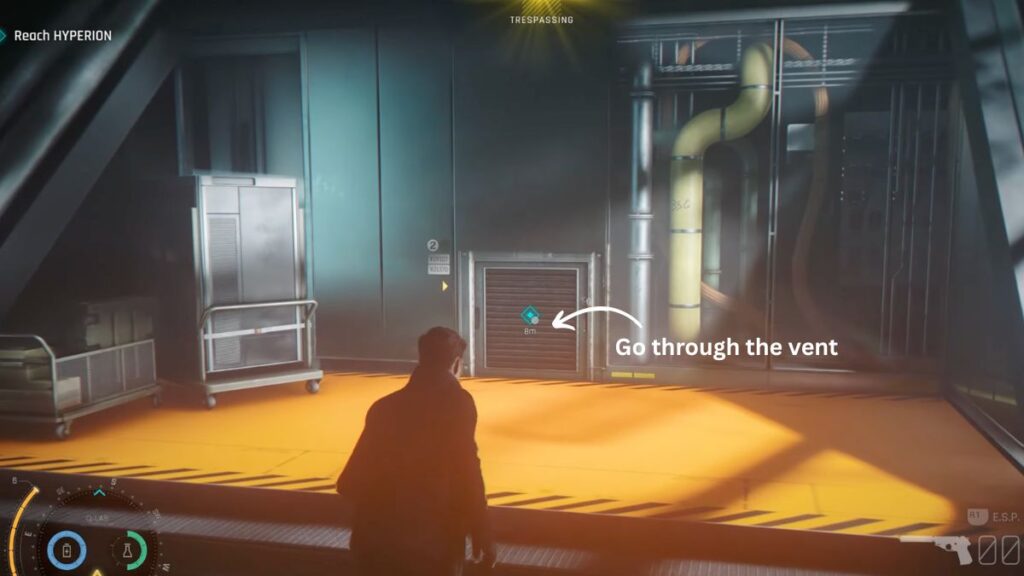
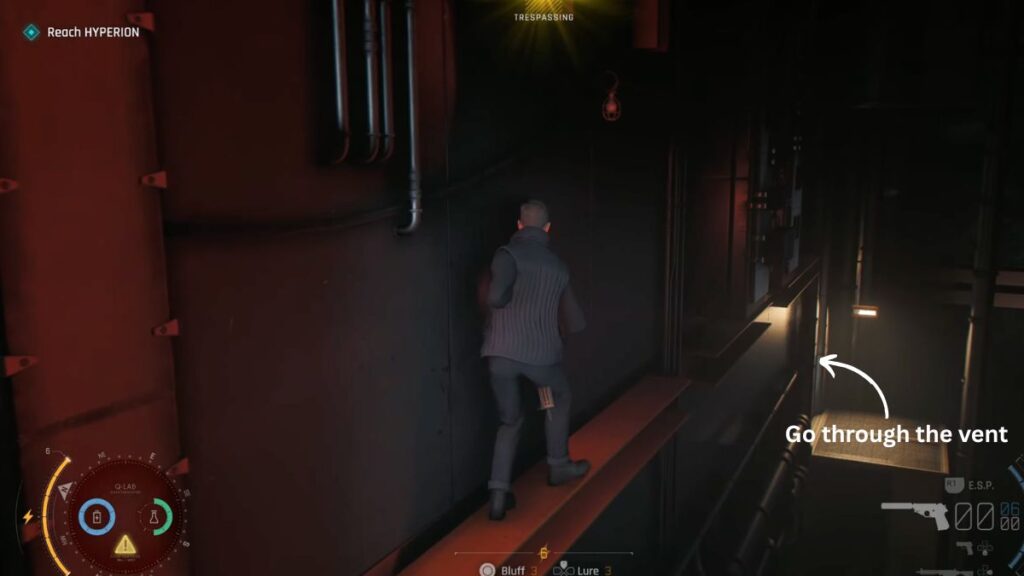
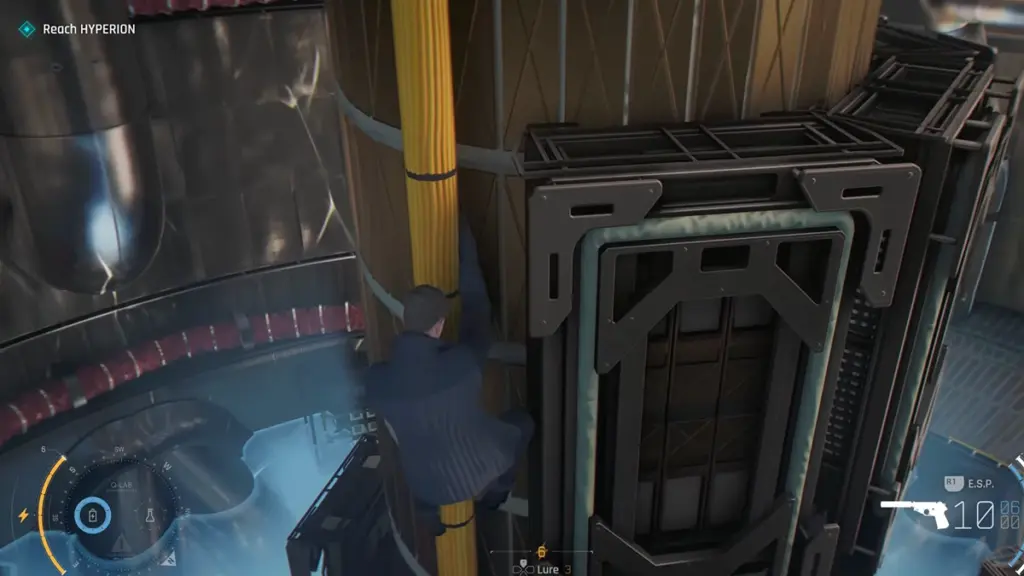
Keep moving forward into a larger area. Take a left and go through the vent ahead. Inside the vent take the first left and keep moving forward by hanging. Drop to a lower level and enter another vent. Keep going until you reach the end. Drop down and your next sub-objective is to Enter Through the Fan.
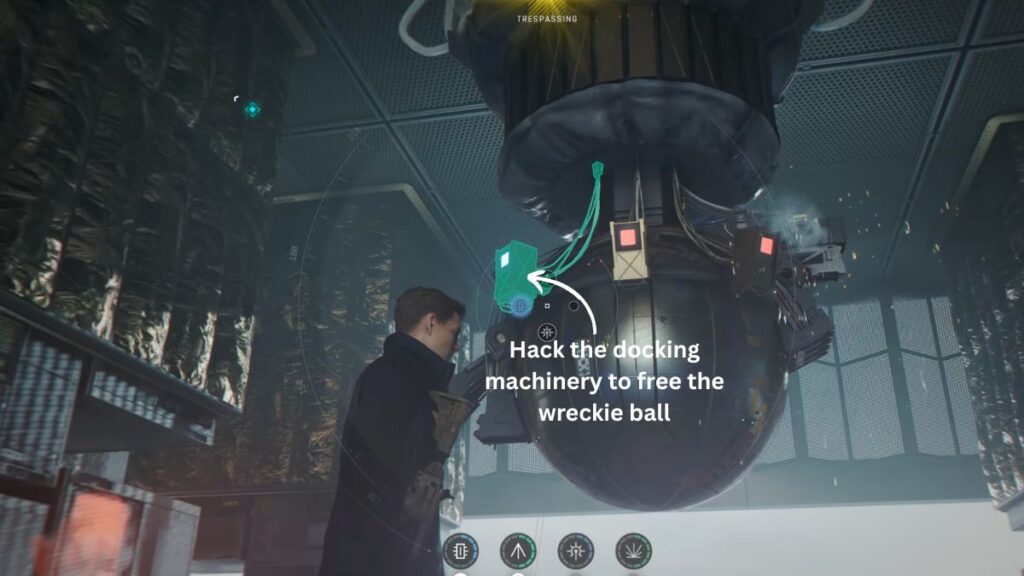
The Fan Section
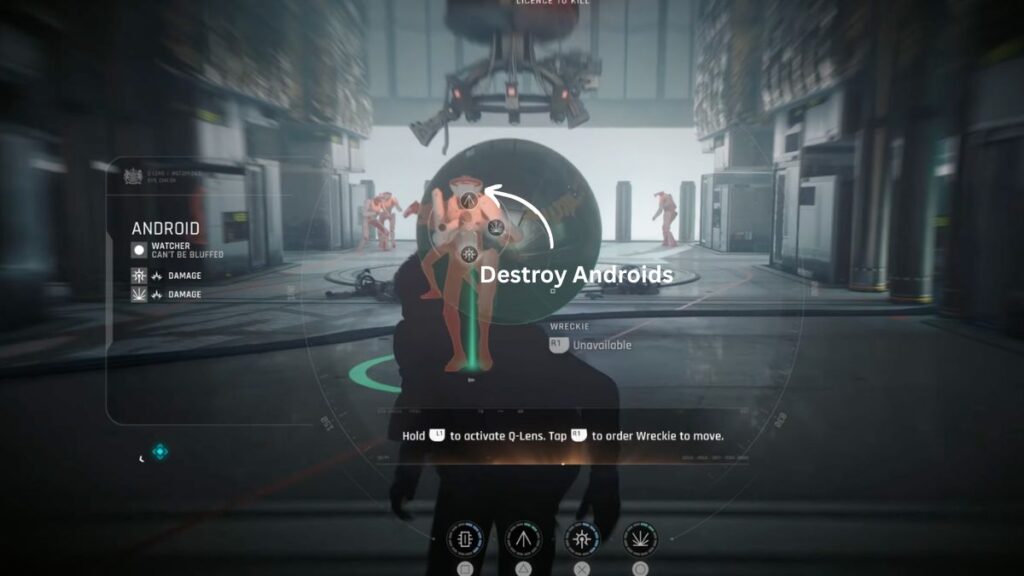
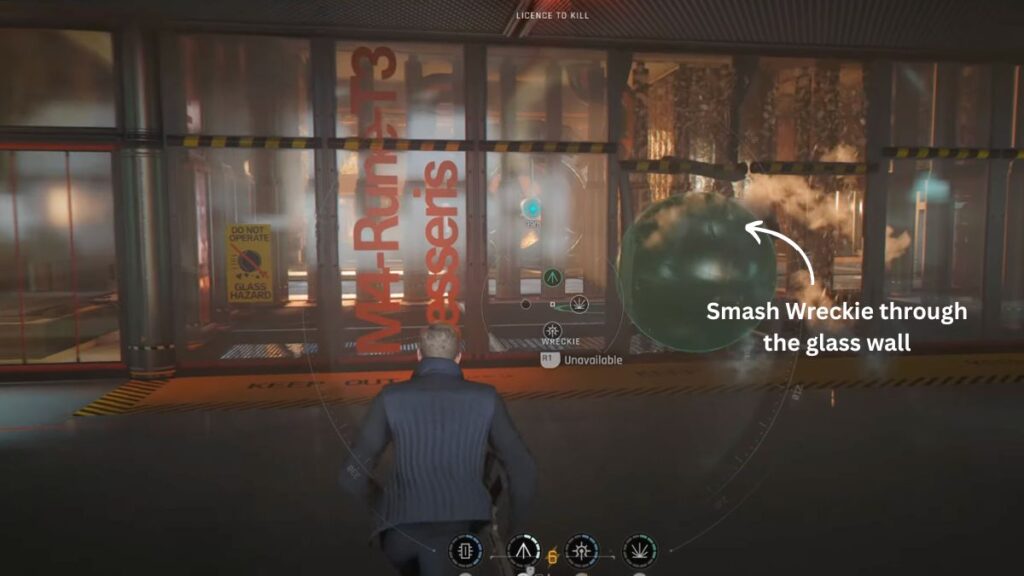
In the center of this area there is a wreckie ball hanging from machinery. Hack the docking machinery to drop it. Use the wreckie to destroy the androids in the area. Once they are all down use the wreckie to smash the glass wall ahead. Squeeze through the metal bars to reach the fan area. Your sub-objective becomes Lower the Bollards.
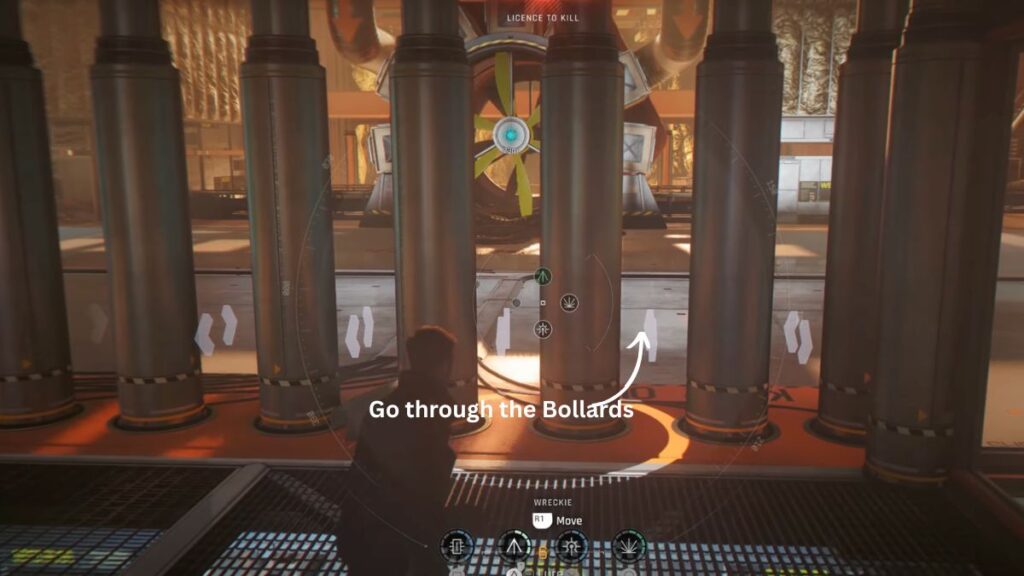
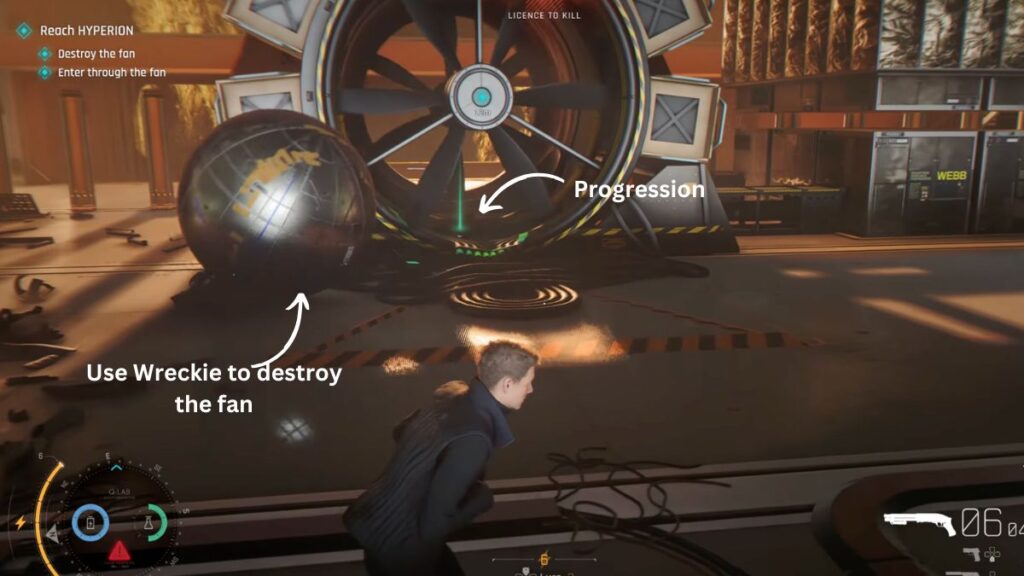
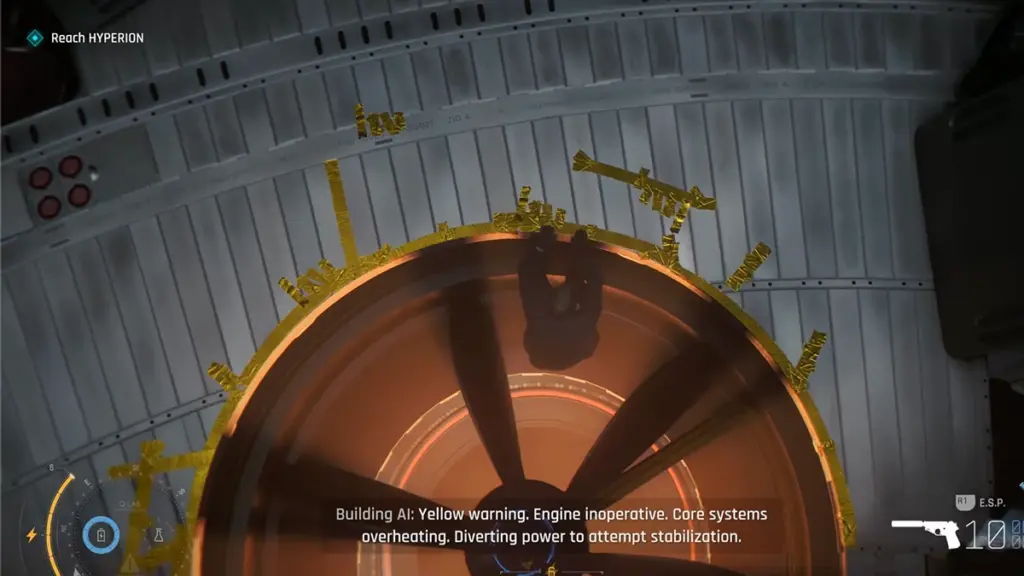
There are stairs on both the left and right sides of this room. Climb them to reach the panels on the upper levels and use those panels to lower the bollards. Once done your sub-objective becomes Destroy the Fan but deal with the androids in this area first. Then use the wreckie to destroy the fan. After that your sub-objective is to Enter Through the Fan. Climb down.
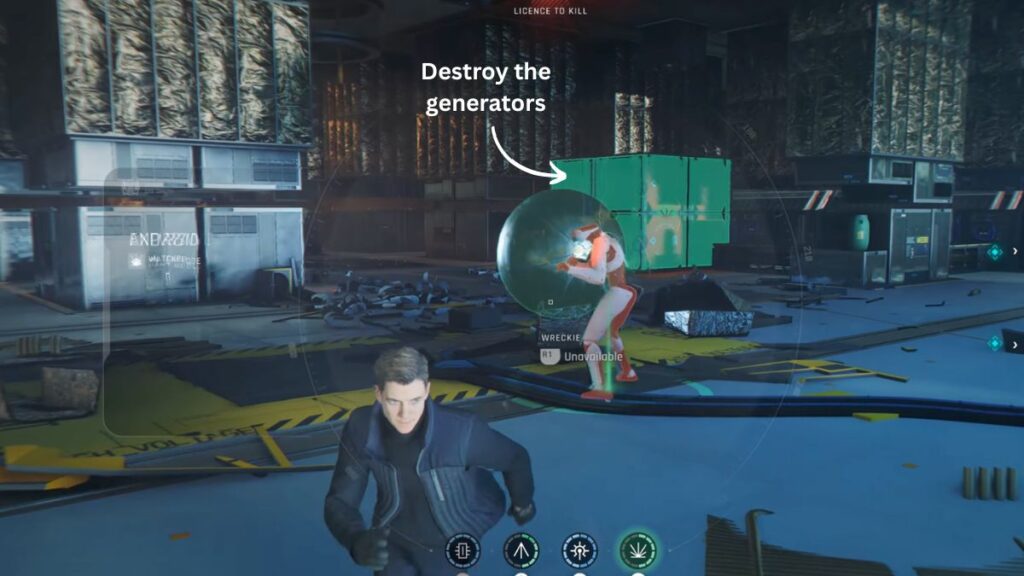
Once down your next sub-objective is to Destroy the Generators. Use the wreckie in the center to take out the android first and then destroy the generators. Your next sub-objective is to Enter the Chamber. Jump down and follow the marker as the path is straightforward from here.
The Chamber
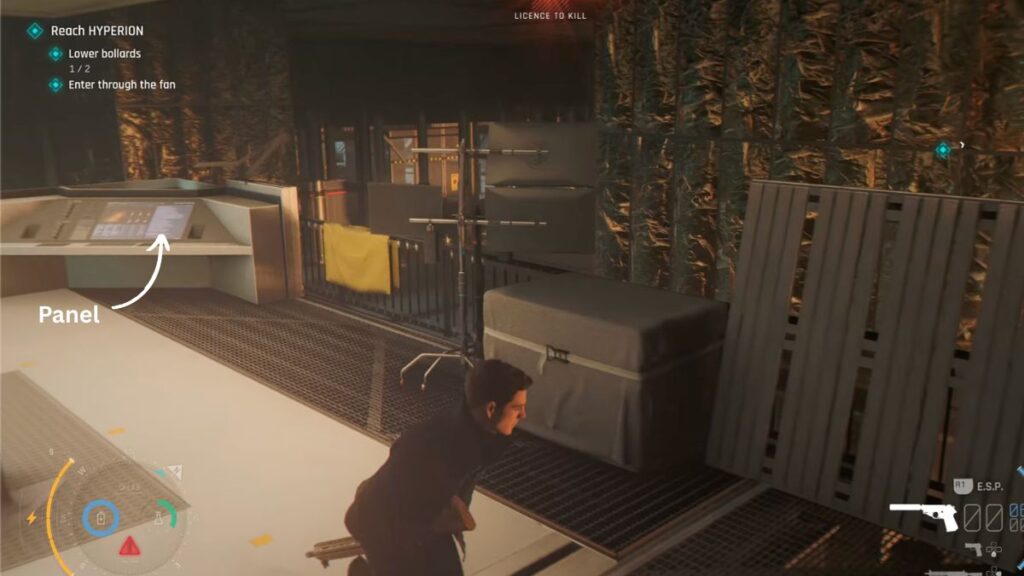
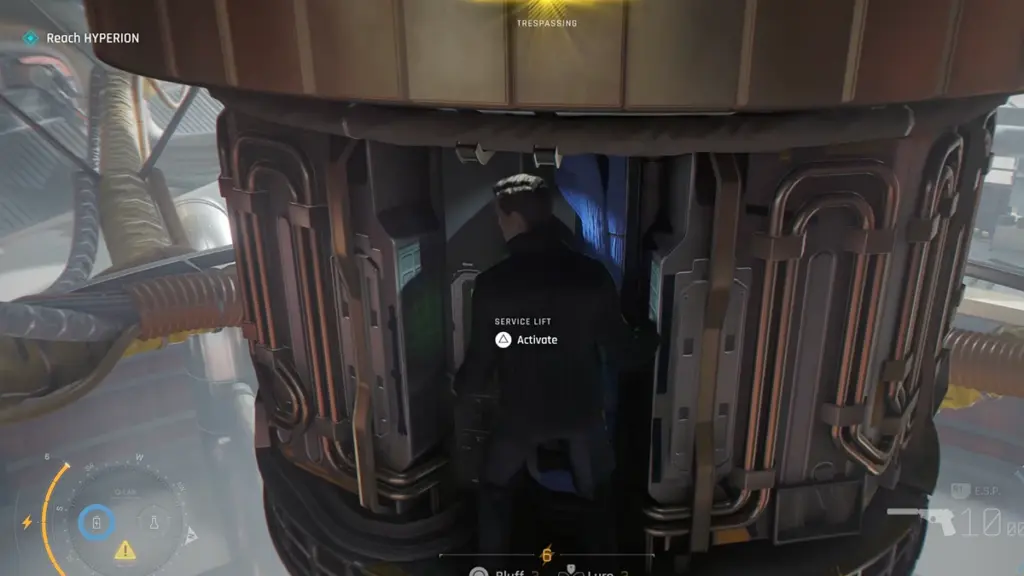
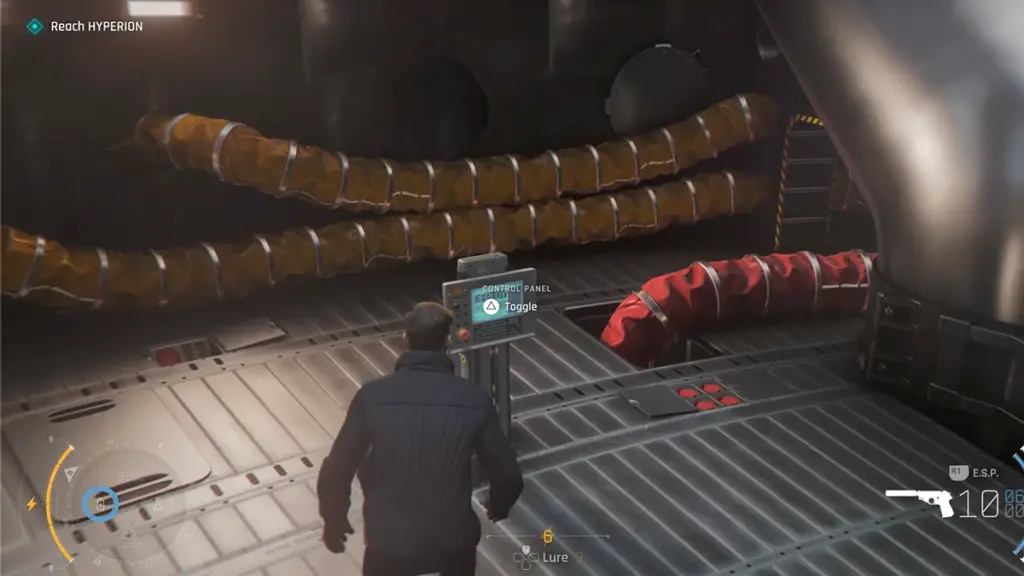
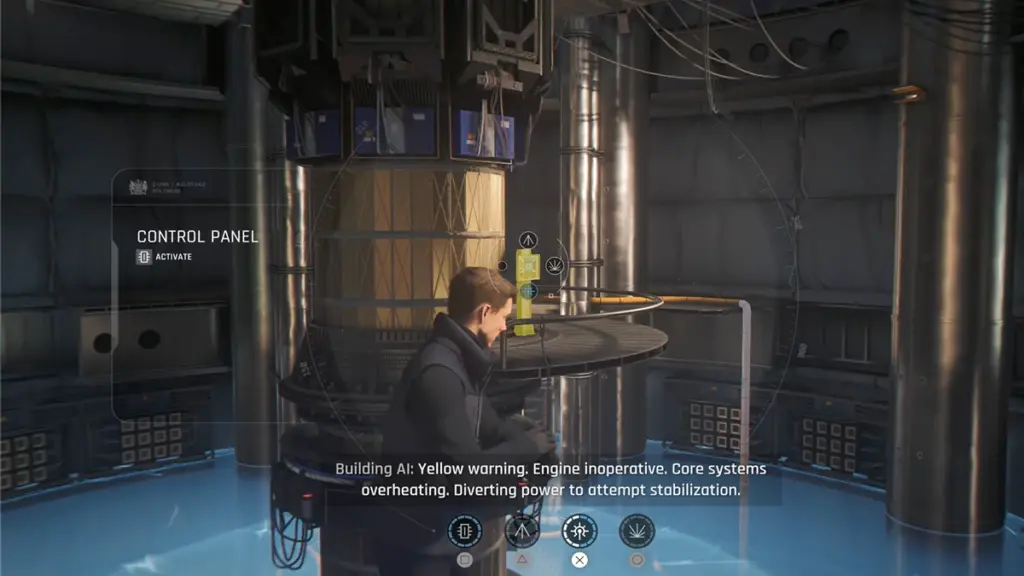
Keep moving forward and use the cable to reach the structure in the center. On the structure use the panel to activate the service lift. Once on the lower floor go to the control panel on the lower platform and toggle it. There is a fan on the right side of the floor. Destroy the panel next to it to stop the fan. Hang down from it and get to the area below.
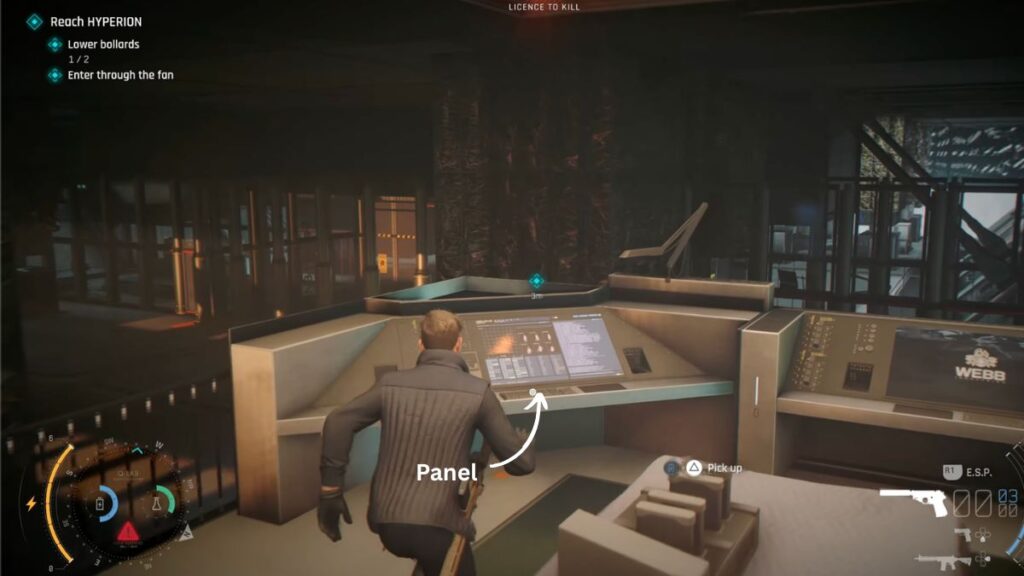
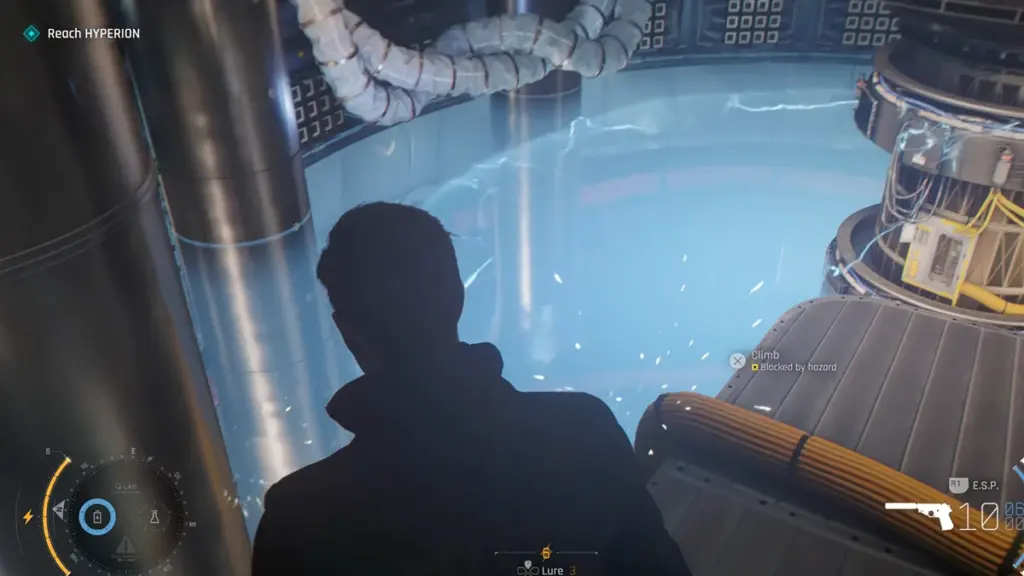
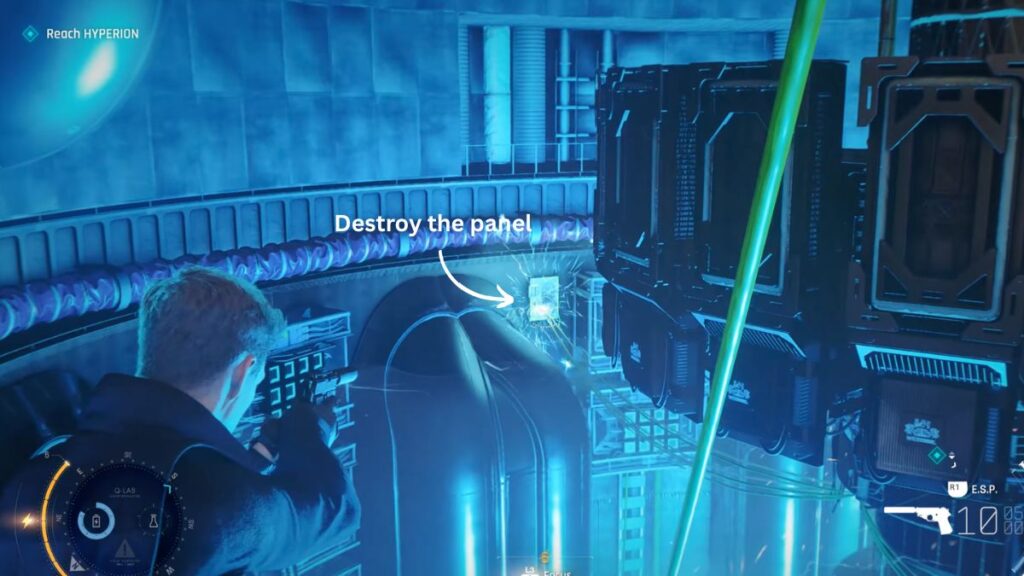
Hack the control panel of the service lift from a distance to activate it. This opens the platforms and lets you walk across to the other side. Once there follow the yellow pipe upward but you will find the climb is blocked. Look slightly down and to the right where the service lift is and you will see a panel. Destroy it. This clears the hazard on the lower floor and lets you climb down the yellow pipe. Once on the bottom platform make your way to the center structure. A short cutscene plays and a dialogue follows. Once it is over climb down the yellow cable to reach the platform below and jump to the other side.
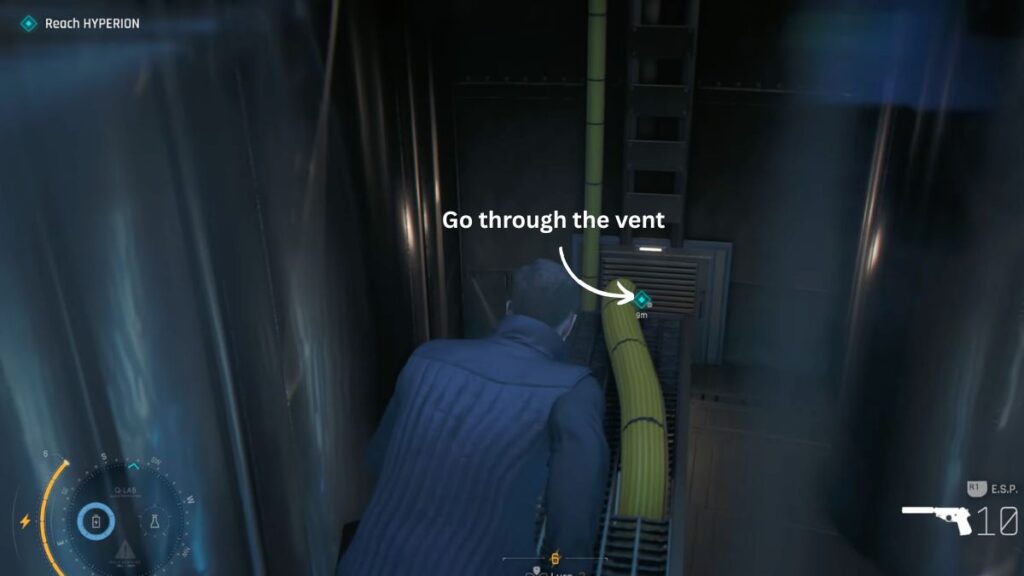
You will see another yellow cable leading down but a hazard is blocking it. Look directly across from where you are standing and you will see a panel. Destroy it to clear the hazard and then use the cable to reach the floor below. Follow the blue marker into the vent. The vent path is linear so keep going until you reach another vent at the far end.
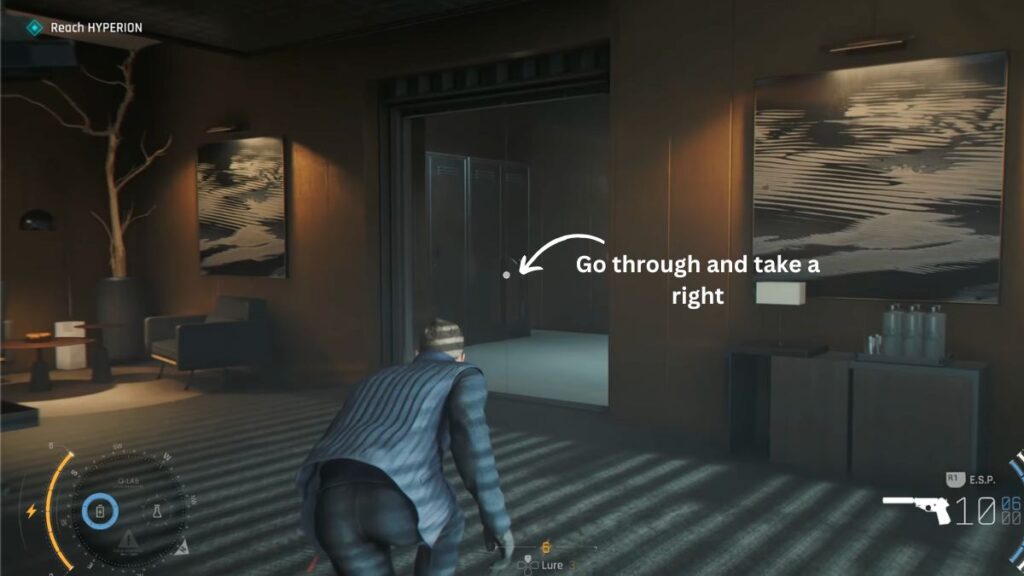
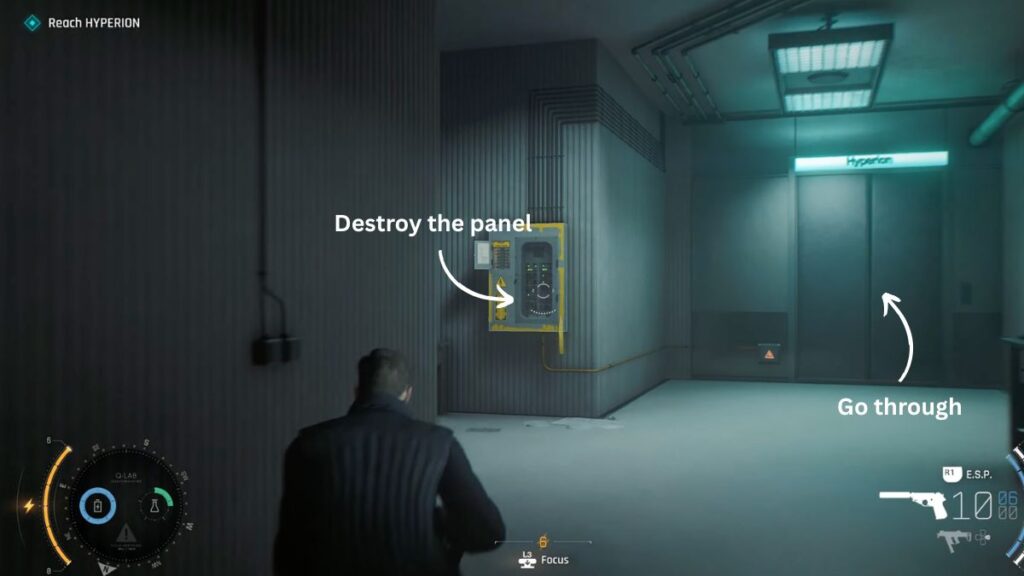
Drop down into a meeting room. Go out through the door, take a right, then another right. Keep going until a couple of armed guards ambush you. Pick up the weapon on the desk nearby and clear them. Take a right and you will see a panel on the left and the lift to Hyperion directly ahead. Destroy the panel to open the door. The lift is on the lower floor so jump on top of it and climb your way down. Pry open the elevator door on the lower floor.
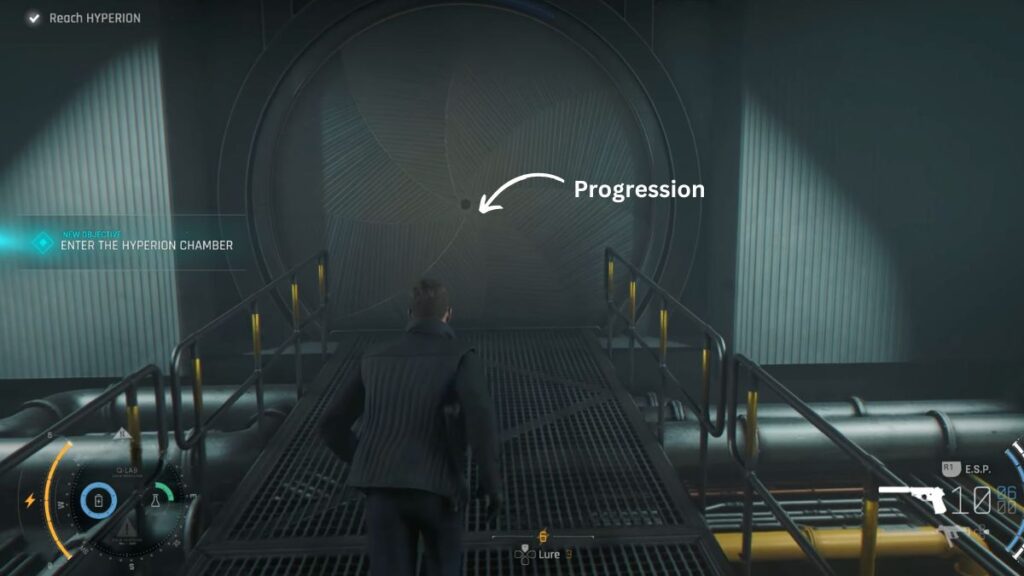
The Hyperion Chamber
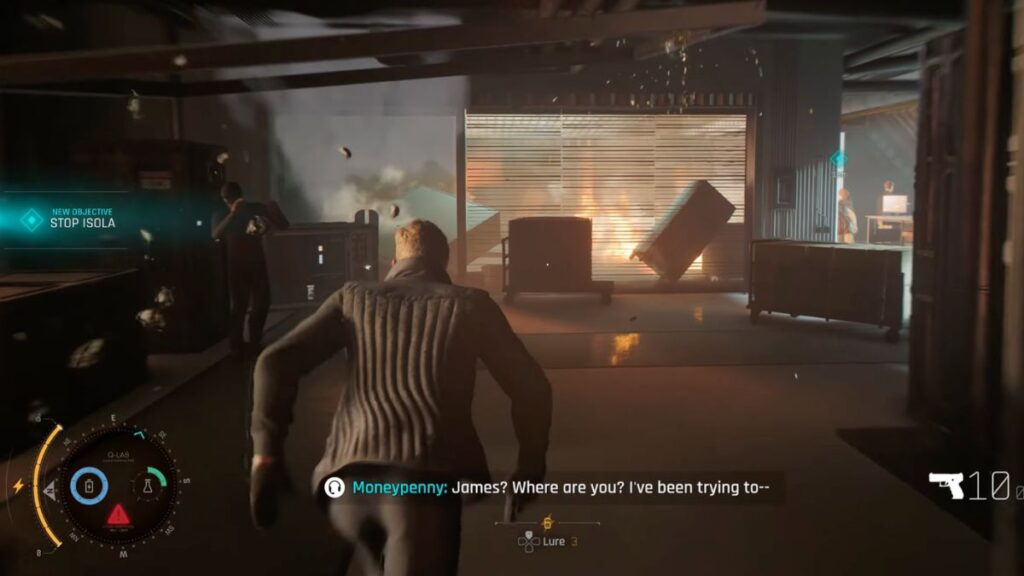
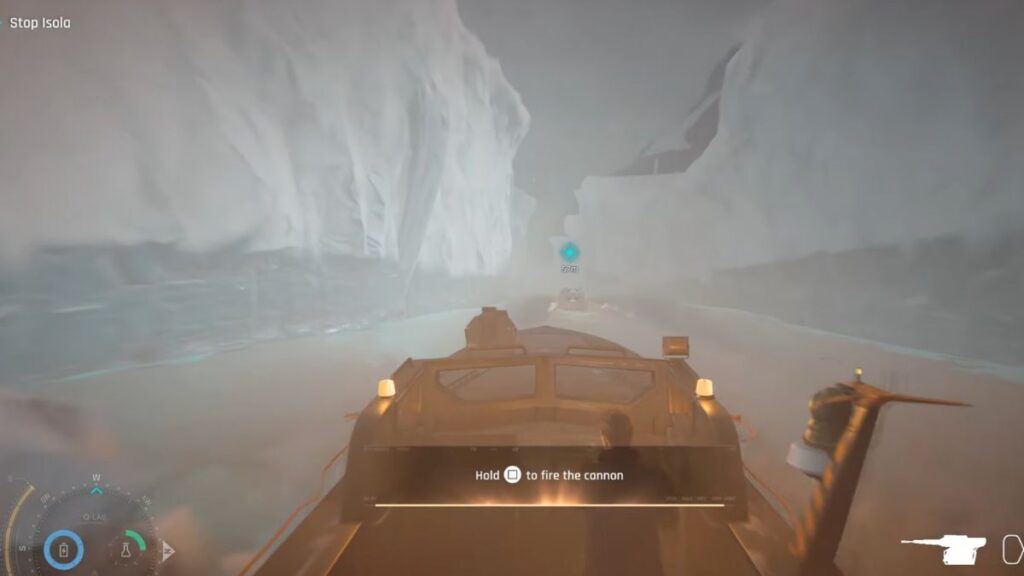
Opening the door gives you the objective to Enter the Hyperion Chamber. A cutscene plays. After it ends your objective is to Stop Isola. Chase her through the sequence, taking down multiple guards along the way. During the chase you will jump down to a platform and your next sub-objective is to Get in the Boat. Board the boat in front of you and the objective goes back to Stop Isola. You can fire the cannon from the boat but watch out for the explosive mines in the water. A cutscene plays during the chase and when it ends the Chapter 10 title screen appears.
007 First Light Chapter 9 Wave of the Future All Challenges
| Challenge | Description |
|---|---|
| Pacifist: Wave of the Future | Complete “Pacifist protocols” and “Surrender”. |
| Ghost: Wave of the Future | Complete “Hide and seek” and “Stay stealthy”. |
| Assault: Wave of the Future | Complete “No time to reload” and “Server breakdown”. |
| Hide and Seek | Complete Gatehouse trespassing without being detected. |
| Knock Knock | Knock out David Somerset in the toilet. |
| First Day at Work | Complete all opportunities in Robotics. |
| Special Intelligence Task Force | Bail out Isola when she is recognized by Lindsey. |
| Pacifist Protocols | Complete Gantries and Utility Floor without shooting anyone. |
| Death From Above | Takedown 3 Webb guards from above in the Utility space. |
| Deadly Delivery | Kill an enemy with a proximity mine placed on a robot vacuum cleaner. |
| Server Breakdown | Kill a Webb guard with an exploding server module. |
| Attention to Detail | Open the safe. |
| Snoop Around | Find a math puzzle. |
| Surrender | Talk to a guard and turn yourself in. |
| Expert Marksman | Kill 10 enemies with headshots in the Command Center. |
| Proxy Agent | Hack 5 servers in “Red alert”. |
| Stay Stealthy | Eliminate 4 enemies without alerting anyone in “Red alert”. |
| No Time to Reload | Kill enemies with 5 different firearms during a single combat encounter. |
| Going Down? | Throw all the guards off the freight lift as it descends. |
| Terminated | Crush the rogue android. |
| Wrecking Baller | Use Wreckie to destroy 15 androids without taking any damage during “Wreaking havoc” or “A daring escape”. |
| Perfect Strike | Use Wreckie to destroy 10 androids in one roll during “Wreaking havoc” or “A daring escape”. |
| Icecap-Tain | Use an iceberg as a jump during the boat chase. |
| Running Man | Complete the chase after Isola without failing. |